How to Fix Bathtub Paint Chip and Restore Surface Smoothness
You can fix a small bathtub paint chip by cleaning and degreasing the spot, sanding it lightly with fine (400–600) grit, then applying a compatible filler or touch-up paint in thin coats, feathering edges for a smooth blend. Let each coat dry, cure fully (24–72 hours for light use), then polish gently. Match the product to your tub material—paint, enamel, or acrylic—for lasting adhesion, and keep up gentle cleaning; more tips and step-by-step options follow.
Quick Fix: Repair Small Bathtub Paint Chips in 10–30 Minutes
If you’ve spotted a small chip in your bathtub’s paint, you can fix it yourself in 10–30 minutes with a few simple supplies.
You’ll clean, sand lightly, apply matching touch-up paint, and smooth the finish.
Follow bathtub maintenance tips to keep repairs minimal, and adopt chip prevention strategies like avoiding abrasive cleaners and using mats.
Quick, careful fixes restore appearance and prevent widening damage.
Diagnose: Painted, Enameled, or Acrylic-How to Tell
After you’ve patched a small chip, take a moment to identify what kind of surface you’re working with—painted, enameled, or acrylic—because each needs different repair steps and products.
Check adhesion, scratch resistance, and paint durability by rubbing a hidden spot.
Inspect surface texture: painted feels softer, enamel is glassy and hard, acrylic is slightly springy.
Record findings before choosing materials.
Why Finish Type (Porcelain, Enamel, Acrylic) Decides Repair Steps
Because each finish—porcelain, enamel, or acrylic—has different hardness, adhesion, and chemical makeup, it determines which cleaners, fillers, and coatings will bond properly and last.
You’ll choose different prep methods, primers, and touch-up products based on whether the surface is glassy and hard (porcelain), baked-on and brittle (enameled), or flexible and polymer-based (acrylic).
- Assess finish characteristics.
- Match repair techniques.
- Check surface compatibility.
- Plan restoration methods, durability factors, maintenance strategies.
When to DIY and When to Call a Pro
When evaluating whether to tackle a bathtub paint chip yourself or hire a pro, weigh the repair’s size, the material involved, and your comfort with tools and chemical touch-ups; small chips on acrylic you can often fix, but know your DIY Limitations.
Consider Professional Expertise for complex finishes, compare Repair Costs, and choose the option that delivers reliable Long term Solutions.
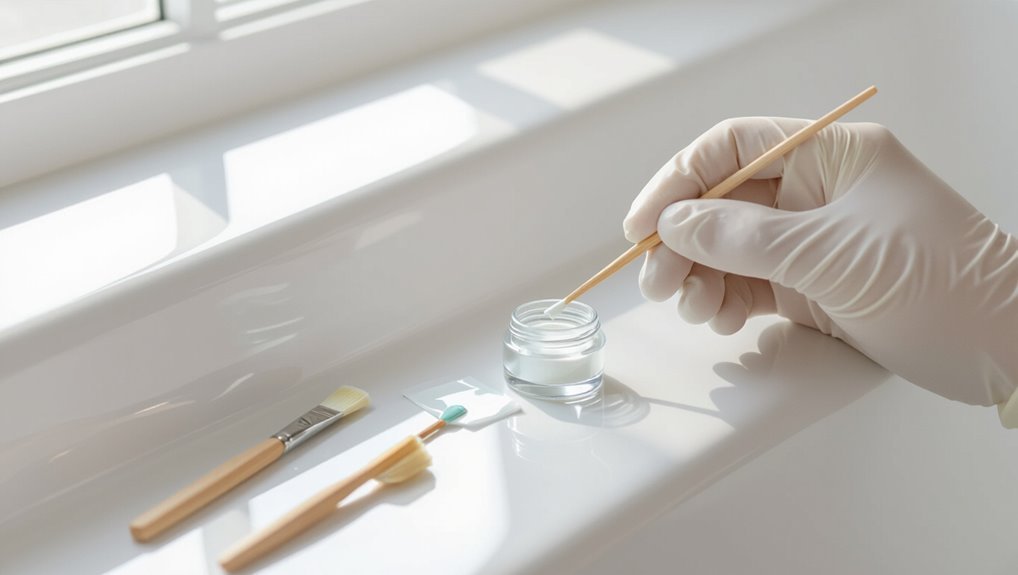
Tools You Need for Bathtub Chip Repair
You’ll need a few basic tools to get a neat, durable repair: fine-grit sandpaper or sanding pads, a putty knife or applicator, a suitable filler or epoxy for your tub material, touch-up paint or refinishing kit, clean rags and solvent, and painter’s tape for masking.
- Sanding block for feathering
- Applicator for precise fills
- Clean-up solvents and rags
- Masking tape and small brushes
Use these for bathtub repair techniques and surface restoration tips.
Materials to Buy: Fillers, Paints, Primers, and Coatings
Before you buy anything, identify your tub’s material—porcelain, enamel-coated steel, cast iron, or acrylic—so you can match fillers, primers, and topcoats that bond properly.
Identify your tub material first—porcelain, enamel steel, cast iron, or acrylic—to choose compatible fillers, primers, and topcoats.
Choose compatible filler types (epoxy putty for cast iron, acrylic filler for acrylic tubs).
Pick primers and coatings rated for tubs, and compare paint brands for durability, chemical resistance, and color match.
Buy quality brushes and mixing tools.
Prep Your Bathroom Workspace Safely and Quickly
Clear the work area by removing toiletries and rugs so you have room to move.
Protect surrounding surfaces with drop cloths and painter’s tape to keep caulk, paint, and dust off walls and fixtures.
Gather safety gear—gloves, eye protection, and a mask—before you start.
Clear The Work Area
Start by removing toiletries, rugs, and loose items from the bathroom so you have an uncluttered, dry zone around the tub.
Then focus on workspace organization and tool accessibility so you work efficiently.
- Gather tools near the tub.
- Stash cleaners and disposables.
- Sweep and dry the floor.
- Keep a trash bag handy.
Protect Surrounding Surfaces
Covering nearby surfaces prevents accidental drips, dust, and stray paint from turning your bathroom into a bigger cleanup job.
Lay down drop cloths and secure edges with painter’s tape, shield fixtures and hardware with plastic, and remove or cover toiletries.
This surface protection step speeds repair preparation, keeps grout and tile clean, and confines mess so you can focus on patching and repainting efficiently.
Gather Safety Gear
Because you’ll be working with chemicals, dust, and sharp tools, gather basic safety gear before you do anything else: chemical-resistant gloves, a respirator or mask rated for paint fumes, safety goggles, and knee pads or a cushioned mat.
- Gloves for solvent contact
- Respirator for fumes
- Goggles for debris
- Knee support and non-slip shoes
Follow safety precautions, don protective gear, ventilate, and keep a first-aid kit nearby.
Protect Caulk, Grout, and Fixtures During Repair
Protect the caulk and grout first by running painter’s tape along the tub edges so you don’t smear paint or primer.
Cover faucets, drains, and any fixtures with plastic and secure it with tape or rubber bands so they stay clean and usable.
Take care with grout lines—work slowly and use small tools to avoid getting material into the joints.
Masking Delicate Edges
If you want a neat, durable repair, mask the caulk, grout, and nearby fixtures before you touch up chipped paint.
Use masking tape techniques and edge protection tips to prevent bleed and damage.
Follow steps:
- Clean and dry edges.
- Apply low-tack tape along grout lines.
- Press tape firmly for a crisp line.
- Remove tape after paint skins, not fully cured.
Shielding Fixtures Securely
1 simple prep step will save you from later scrubbing and re-caulking: cover caulk lines, grout, faucets, and drain fittings with the right materials so paint can’t seep or stick. You’ll use secure masking tape and film for fixture protection, press edges firmly, and remove tape before full cure to avoid lifting caulk.
| Item | Material | Tip |
|---|---|---|
| Caulk | Tape | Press |
| Faucet | Film | Seal |
| Drain | Cap | Remove |
Preventing Grout Contamination
While you’re repairing paint chips, keep grout and caulk clean by masking and isolating nearby joints and fixtures; it’ll stop stray paint and cleaner from bonding to porous grout lines.
- Tape edges to protect caulk and fixtures.
- Cover drains and hardware tightly.
- Use temporary barriers for tiles and grout before sealing.
- After repair, perform grout sealing for long-term moisture prevention and durability.
Remove Loose Paint and Flaking Around Chips
Start by scraping away any loose paint and flaking around the chip so you’re working with a solid edge; use a plastic scraper or putty knife and a stiff brush to remove debris, then vacuum or wipe the area clean before proceeding. Use Paint removal techniques and Chip assessment methods to gauge depth and stability.
| Tool | Purpose |
|---|---|
| Scraper | Remove loose paint |
| Brush | Clear flakes |
| Vacuum | Remove dust |
| Inspection | Assess chip depth |
Clean and Degrease the Damaged Area Properly
Start by removing loose debris and any flaking paint so you’ve got a solid surface to work on.
Use a degreasing solution to strip away soap scum, oils, and residues that would prevent new paint from adhering.
Rinse thoroughly and let the area dry completely before moving on.
Remove Loose Debris
Scrape away any loose paint and grime around the chipped area using a plastic putty knife or a firm nylon brush so you’re working on solid edges.
You’ll focus on debris removal and surface preparation before refinishing.
- Brush loose flakes into a dustpan.
- Vacuum edges to remove particles.
- Wipe with a damp cloth to lift dust.
- Let the area dry fully.
Use Degreasing Solution
1. You’ll clean the chipped area using appropriate degreasing methods: apply a commercial degreaser or a mild trisodium phosphate mix, scrub gently with a nonabrasive pad, and target greasy residue and soap scum.
These effective solutions remove contaminants that prevent paint adhesion. Work methodically, avoid over-scrubbing, and repeat only if residue remains so the surface’s bond is optimized before repair.
Rinse And Dry Thoroughly
After you’ve removed grease and soap scum, rinse the area thoroughly with clean water to wash away chemical residue and loosened debris; use a sponge or low-pressure spray to guarantee all degreaser is gone.
- Blot excess water with a lint-free cloth.
- Use gentle cleaning techniques for corners.
- Air-dry briefly to evaporate trapped moisture.
- Finish with microfiber and recommended drying methods.
Sand Chips and Feather the Surrounding Finish
Start by sanding the chipped areas and the surrounding glossy finish until you create a smooth blend between the bare substrate and the remaining paint.
Use progressive sanding techniques—start with 220 grit, finish with 400–600 grit—to remove gloss without overcutting.
Feathering edges guarantees paint adhesion and invisible repairs.
Clean dust, inspect for rough spots, and repeat light sanding as needed before priming.
When to Use a Rust Inhibitor on Metal Tubs
Once you’ve smoothed and feathered the damaged area, check the exposed metal for any signs of rust or bare steel—if you see orange flakes, pitting, or dark staining, apply a rust inhibitor before priming.
If exposed metal shows orange flakes, pitting, or staining, treat with a rust inhibitor before priming.
You’ll protect the substrate and improve metal tub maintenance. Follow these rust prevention strategies:
- Clean thoroughly.
- Neutralize rust.
- Apply inhibitor.
- Prime promptly.
Choose Filler: Epoxy, Acrylic, or Porcelain Touch-Up Kits
When you’re ready to rebuild the chip’s surface, pick a filler that matches the tub material and damage size: epoxy putty offers the strongest, most durable repair for deep gouges and metal tubs; acrylic fillers work well for minor chips and are easy to sand and paint; and porcelain touch-up kits provide pre-matched color and a glossy finish for small surface nicks on enameled tubs.
| Filler | Best for |
|---|---|
| Epoxy | Deep gouges — Epoxy durability |
| Acrylic | Small chips — Acrylic flexibility |
| Porcelain | Surface nicks — Porcelain compatibility |
| All | Compare cost and Repair efficiency |
Apply Epoxy Filler to Fill Deep Chips (Step-by-Step)
After you’ve picked epoxy as the best match for deep gouges, prepare the area and mix the two-part compound according to the manufacturer’s instructions.
Perform a chip assessment, then follow epoxy application steps:
- Clean and sand the chip.
- Mask surrounding surface.
- Apply epoxy, slightly overfill.
- Cure, sand flush, and finish for a smooth repair.
Use UV-Curing Touch-Up Resin for Quick Surface Fixes
Grab a UV-curing touch-up resin for quick, shallow chips and surface scratches—you’ll get fast, durable results without the long wait of two-part epoxies.
Clean and dry the area, apply a thin resin application with the included nozzle, then level with a plastic card.
Expose to a UV lamp per instructions; the rapid curing process leaves a smooth, hard finish ready for light sanding and polish.
Build up Thin Chips With Multiple Thin Layers
Start by cleaning and drying the chip, then apply several very thin coats of touch-up paint or resin—letting each layer fully cure before adding the next—to build depth without drips or uneven edges.
- Prep area and mask.
- Use small brush or toothpick.
- Practice layer building patience.
- Inspect for chip smoothing and consistency.
Sand and Smooth Filler for a Seamless Transition
Once the filler’s cured, sand the edges so they feather smoothly into the surrounding enamel.
Use fine-grit sandpaper and gentle, circular strokes to match the surface texture without removing too much material.
Check by running your hand over the repair and adjust until the shift is invisible.
Feather Edges Smoothly
Before repainting, you’ll want to sand and smooth the filler so the repair blends into the surrounding surface; doing this carefully prevents visible ridges and guarantees the new paint lays down evenly.
- Use feather sanding with fine grit.
- Check edge blending frequently.
- Smooth with a flexible sanding block.
- Wipe dust, inspect under good light, and repeat if needed.
Match Surface Texture
After you’ve feathered the edges, focus on matching the surrounding texture so the repair disappears under the new finish. You’ll sand progressively, apply thin filler, and blend grain to mimic the original surface. Use texture matching techniques and proven surface restoration methods to avoid visible seams.
| Step | Tool | Goal |
|---|---|---|
| Sand | 320–600 grit | Smooth |
| Fill | Lightweight filler | Match grain |
| Finish | Fine sand/polish | Invisible change |
Match Bathtub Paint Color Without a Pro
If the paint on your tub chips, you don’t need a pro to match the color—start by gathering a small, clean sample of the existing finish and comparing it under natural light to paint swatches or spray cans labeled for enamel or tub refinishing.
Use simple color matching techniques and paint blending methods:
Use basic color-matching and blending techniques to seamlessly touch up chips on your tub finish.
- Photograph sample in daylight.
- Test swatches on cardboard.
- Mix small batches.
- Apply feathered touch-ups.
Choose the Right Paint for Your Tub Finish
Now that you’ve matched the color, pick a paint formulated for tubs and the finish already on yours — acrylic enamel, epoxy, or two-part epoxy each behave differently and bond best to specific surfaces.
Choose based on material (porcelain, fiberglass, acrylic) and required paint durability. Consider warranty, cure time, and compatibility.
Proper surface preparation remains critical to adhesion and a long-lasting, smooth repair.
Thin and Mix Touch-Up Paint for Smooth Application
Work the paint until it flows easily—thin it only as the manufacturer’s directions recommend so you don’t weaken adhesion or color.
You’ll focus on color matching and proper application techniques.
- Stir thoroughly to avoid streaks.
- Test consistency on scrap.
- Add thinner dropwise; retest.
- Keep a wet edge and small batches for smooth, even coverage.
Brush, Roller, or Spray: Pick the Best Method
Choose the application method that matches the size of the chip, the tub’s finish, and your comfort level—brush for small spots and tight edges, roller for slightly larger areas with low texture, and spray for the smoothest, most uniform results on bigger repairs.
You’ll weigh brush vs. roller by texture and control; use spray paint for flawless coverage but mask thoroughly and practice to avoid runs.
Use a Touch-Up Brush for Tiny Chips
For tiny chips, pick a fine-tipped touch-up brush that holds paint without leaving streaks.
You’ll want to load it lightly and paint thin, even coats so the repair blends and dries smoothly.
Repeat with additional thin layers only if needed to match the surface.
Choose The Right Brush
One small chip calls for a fine-tipped touch-up brush so you can control the paint and avoid smudging adjacent enamel.
You’ll pick based on chip size, paint, and finish. Consider these quick points:
- Compare brush types for precision.
- Match bristle materials to enamel paint.
- Choose a comfortable handle.
- Keep a spare for future dings.
Apply Thin, Even Coats
With your fine-tipped brush in hand, work in thin, even strokes so the repair blends with the surrounding enamel.
You’ll use paint application techniques focused on control: dab minimal paint, pull outward, and avoid buildup.
Let each thin coat dry fully, then repeat using even layer methods until opacity matches.
Finish with a light feather to blend and cure per product instructions.
Spray-Paint a Tub Chip for a Factory-Like Finish
Several simple steps will get your tub chip looking factory-new again: clean and sand the area, mask surrounding surfaces, and spray a thin, even coat of touch-up paint designed for porcelain or enamel.
Follow these concise tips using proper spray techniques to maximize finish durability:
- Test spray pattern.
- Keep 8–12″ distance.
- Overlap passes.
- Let dry fully before light use.
Layer Thin Coats to Avoid Runs and Orange Peel
Start by applying very light, even passes so each coat dries smooth before the next goes on.
You’ll use layering techniques and strict drying intervals to prevent runs and orange peel.
Focus on paint consistency, thorough surface preparation, and precise application methods.
Emphasize consistent paint mix, meticulous surface prep, and exacting application for flawless, uniform finishes.
Follow repair strategies for thin builds, check finish matching and texture replication between coats, and let each layer cure before proceeding.
Finish With a Clear Topcoat for Durability
Before sealing the repair, make sure the patched area is completely dry and smooth so the clear topcoat can bond properly and give lasting protection.
Apply a clear topcoat to lock color and add clear coat benefits.
Follow these steps for topcoat application:
- Clean surface.
- Thin coats.
- Light sanding between coats.
- Inspect finish for even gloss and coverage.
Curing and Drying Times: What to Wait For
Once you’ve applied the clear topcoat, give the repair proper curing time so the finish hardens and bonds—don’t rush using the tub. You should follow recommended curing methods and respect drying duration; temperature and humidity affect results. Check tack-free time, then full cure before heavy use. Plan 24–72 hours for light use, up to 7 days for full strength.
| Factor | Time |
|---|---|
| Tack-free | 4–8 hrs |
| Light use | 24–72 hrs |
| Full cure | 7 days |
| High humidity | Add 24–48 hrs |
Blend Repaired Spots Into High-Gloss Surfaces
When you’re matching a repaired chip to a glossy tub, feather the paint outward and polish gently so the repair disappears into the surrounding shine.
Use precise color blending techniques and match high gloss finishes.
Steps:
- Thin edges with fine sandpaper.
- Apply thin glaze layers.
- Wet-sand between coats.
- Buff to mirror shine.
Repair Chips Around the Drain and Hardware
If you’re working near the drain or around faucet hardware, take extra care to protect fittings and sealants while you repair chips—those tight areas need precision and the right tools to avoid causing leaks or cosmetic damage.
Mask hardware, remove loose debris, and use fine brushes to apply chip materials in thin layers. Cure fully, reinstall drain hardware, and test for tight seals.
Fix Hairline Cracks That Accompany Paint Chips
Before you touch up paint, check how deep the hairline crack goes so you know whether it’s cosmetic or needs structural filling.
If it’s shallow, you’ll scrape and clean the area; deeper cracks require a flexible filler and light sanding for a smooth bond.
After filling, prime and feather the repair so your touch-up paint adheres and blends.
Assess Crack Depth
Start by inspecting the chip and the surrounding glaze to determine how deep the crack runs—are you seeing a hairline surface crack or a seam that reaches the underlying porcelain or fiberglass?
Use crack severity and chip evaluation to decide repair scope.
- Light surface craze
- Shallow glaze break
- Substrate-exposed seam
- Structural fissure requiring pro assessment
Prep And Fill Technique
Gather your tools and clear the area so you can work cleanly: you’ll need fine-grit sandpaper, a soft brush or vacuum, rubbing alcohol, a quality two-part epoxy or bathtub filler designed for hairline cracks, a putty knife or small applicator, and fine-grit finishing pads.
Use prep techniques: sand, clean, and degrease.
Apply thin layers with filling methods, cure, then sand smooth and blend for a seamless finish.
Repair Chips on Acrylic vs. Cast-Iron Tubs
Because acrylic and cast-iron tubs handle chips differently, you’ll need to choose repair methods and materials that match the surface. Use these tips:
- Acrylic repairs: use flexible filler and lightweight touch for glossy finish.
- Cast iron considerations: bond epoxy and sand thoroughly for hardness.
- Chip prevention: avoid heavy impacts and use bath mats.
- Surface durability: finish with compatible topcoat for long-lasting protection.
Detect Chips That Indicate Rust or Structural Damage
When you inspect chips, look beyond missing paint—exposed metal, brown-orange staining, flaking enamel, or a gritty feel under the chip usually mean rust or deeper damage that needs immediate attention.
You should perform rust detection by probing gently, checking for soft spots, and tapping for hollow sounds. If corrosion compromises structural integrity, stop refinishing and consult a professional for repair or replacement.
Prevent Future Chipping and Peeling
To keep chips from coming back, you should set up a simple regular maintenance routine that checks for small cracks, loose paint, and surface dirt.
Make sure your bathroom has proper ventilation—use an exhaust fan or open a window during and after showers to cut humidity that weakens paint. Those two habits together will greatly reduce future chipping and peeling.
Regular Maintenance Routine
If you keep a simple maintenance routine, you’ll stop small issues from turning into big chips or peeling.
Use a preventative measures maintenance checklist and follow these quick tasks:
- Wipe tub weekly to remove grime.
- Check for tiny chips monthly.
- Touch up paint promptly.
- Use nonabrasive cleaners and soft tools.
Proper Ventilation Practices
Good ventilation helps keep paint adhesion strong by removing excess moisture and airborne cleaners that can weaken finishes.
You should use ventilation techniques like exhaust fans, open windows, and portable vents during application and drying.
Monitor humidity, avoid tiled room steam, and follow safety measures such as proper masks and eye protection.
Consistent airflow prevents trapped moisture and reduces future chipping and peeling.
Maintain a Repaired Tub for Long-Lasting Results
Because you want the repair to last, establish a simple routine of gentle cleaning, timely inspections, and small touch-ups so small chips don’t become bigger problems.
Keep repairs lasting: gentle cleaning, monthly checks, and quick touch-ups to stop small chips from growing.
- Use mild cleaners and soft cloths for long term care.
- Perform regular inspections monthly.
- Address tiny chips immediately with touch-up kits.
- Avoid abrasive tools and heavy impact to preserve finish.
DIY Cost Estimate vs. Professional Refinishing Cost
You can save money by doing the repair yourself, and a DIY cost breakdown usually includes epoxy or touch-up kits, sandpaper, primer, and your time.
Professional refinishing rates vary widely depending on tub size, materials, and finish, often costing several hundred dollars to refinish a standard tub.
We’ll compare those line items so you can decide which option fits your budget and skill level.
DIY Cost Breakdown
Tallying costs upfront helps you decide whether to tackle the chip yourself or hire a pro: expect to spend roughly $30–$150 on DIY materials (epoxy kits, sandpaper, primer, paint, and basic tools) versus $300–$800 for professional reglazing or refinishing depending on tub size, finish, and local labor rates.
- Epoxy kit: $15–$60
- Sandpaper/blocks: $5–$20
- Primer/paint: $10–$50
- Tools/misc: $0–$20 (reuse helps with budget constraints and material choices)
Professional Refinishing Rates
While a DIY repair can save you money upfront, hiring a pro for tub refinishing gives you a longer-lasting, more durable finish—and it comes at a considerably higher price.
You’ll weigh professional pricing against materials and time. Expect $300–$1,000+ depending on prep, coatings, and tub condition.
Ask about refinishing options, warranties, and surface prep to compare true long-term value before deciding.
When a Chip Deserves Professional Refinishing
If a chip goes deep enough to expose the underlying metal, or if the surrounding finish peels or cracks beyond a fingertip-sized area, it’s a sign you should call a professional refinishers.
You’ll want a professional assessment to judge chip severity and risks. Consider:
- Rust forming
- Multiple chips nearby
- Large peeled area
- Water penetration into substrate
Common Mistakes That Make Chips Worse
Don’t use too-coarse sandpaper or you’ll gouge the surrounding finish and make the chip larger.
Also don’t skip proper cleaning—dirt and soap residue prevent primers and paint from adhering.
Follow the right prep steps and you’ll avoid turning a small repair into a bigger job.
Using Too-Coarse Sandpaper
Pick sandpaper grit carefully, because using one that’s too coarse will gouge the surrounding finish and make chips worse.
You should protect the bathtub surface and use gentle sanding techniques. Avoid aggressive grit.
Follow this quick checklist:
- Start with fine grit (400–600).
- Test in an inconspicuous area.
- Use light pressure.
- Finish with a finer pad for smoothness.
Skipping Proper Cleaning
Surface dirt and soap scum will stop new paint from bonding, so you need to clean the chip and surrounding area thoroughly before you sand or prime. You should use proper cleaning techniques and follow surface preparation steps: degrease, rinse, dry. Skip shortcuts and chips will reappear.
| Step | Action |
|---|---|
| 1 | Degrease |
| 2 | Rinse |
| 3 | Dry |
Troubleshoot Bubbling, Flaking, or Poor Adhesion
When your bathtub coating starts bubbling, flaking, or peeling away, it’s a sign the underlying bond has failed and you need to diagnose the cause before patching or repainting.
Check:
- Inspect for moisture exposure causing bubbling issues.
- Sand and test surface compatibility.
- Scrape flaking concerns to bare substrate.
- Address adhesion problems for repair longevity before refinishing.
Touch Up Repaired Areas Later: Quick Tips
After repairs cure, you’ll want to touch up the area promptly to blend the patch and protect the finish; do small test strokes to match texture and color before committing to a full coat.
Use precise touch up techniques: thin layers, light brush or sponge, and allow drying between passes.
Keep repair strategies simple—clean edges, feather strokes, and avoid overworking the spot for a seamless repair.
Match Finish Sheen and Avoid Visible Blotches
Because sheen catches the eye, you’ll want to match the finish of the repaired area to the surrounding tub to avoid blotches and shiny spots.
- Test small patches for finish blending.
- Sand lightly to feather edges.
- Use thin coats and let each cure for sheen matching.
- Buff gently to unify texture and hide changes.
Eco-Friendly and Low‑VOC Repair Product Options
When you want a greener repair, look for low‑VOC epoxy options that give durable coverage without strong fumes.
You can also choose water‑based repair kits that cure cleanly and are easier to work with indoors.
For a final seal, consider natural sealant alternatives like plant‑based or silicone‑free formulas to keep chemicals to a minimum.
Low‑VOC Epoxy Options
One practical choice for repairing chipped bathtub enamel is a low‑VOC epoxy, which gives you strong adhesion and a durable finish without the harsh fumes of traditional products.
You’ll appreciate eco friendly options and low voc benefits when choosing a kit.
Consider these points:
- Surface prep required
- Cure time
- Finish sheen
- Waterproof durability
Water‑Based Repair Kits
If you want an eco-friendlier, low‑odor fix for a chipped bathtub, water‑based repair kits give strong adhesion and a near‑invisible finish without the solvent smell of traditional options.
You’ll find easy application, quick curing, and water based durability for small to medium chips.
Choose eco friendly options with low‑VOC labels, follow surface prep, and sand lightly for seamless blending and lasting results.
Natural Sealant Alternatives
Water‑based kits are a great low‑odor option, but you may prefer repairs made from naturally derived sealants that cut VOCs even further and use renewable ingredients.
Choose eco friendly sealants and natural alternatives that match finish and durability. Consider:
- Plant‑oil epoxy
- Soy‑based filler
- Beeswax blend
- Low‑VOC acrylic sealer
Test first on a scrap area.
Ventilate Safely and Control Strong Fumes
Because paint strippers and epoxy primers give off strong fumes, you’ll need to ventilate the bathroom before you start and keep airflow steady while you work.
Open windows and run an exhaust fan, position a fume extraction unit near the tub, and use HEPA-rated air purifiers outside the room.
Wear an organic-vapor respirator, seal door gaps, and limit exposure time with regular breaks.
Repairing Tub Chips in Rentals: Documentation & Landlord Tips
If you find a chip in a rental tub, photograph it right away and note the date to document damage promptly.
Let your landlord know your repair plan before you start so you’re both clear on whether you should fix it or they will.
Taking these steps protects your security deposit and helps avoid disputes later.
Document Damage Promptly
When you spot a chip in a rental tub, document it right away with time-stamped photos and a brief written note describing size, location, and any suspected cause; doing so protects both you and the landlord and speeds resolution.
Use documenting repairs and visual evidence to support requests.
- Photo angles
- Scale reference
- Date/time stamp
- Short description
Communicate Repair Plans
Although you don’t have to handle every repair yourself, you should tell your landlord promptly how you plan to address the chip and ask whether they prefer to manage it instead.
Outline a clear repair timeline, materials, cost estimate and who’ll perform work.
Use concise communication strategies: email for records, follow-up calls for confirmation, and get written approval before starting any repair.
Protect Security Deposit
Document every step so you protect your security deposit and show you handled the tub chip responsibly.
Follow clear security deposit tips and reference rental agreements when communicating with your landlord.
Do this:
- Photograph damage before and after repair.
- Keep receipts for materials.
- Send dated repair plan via email.
- Request written acknowledgement of completion and any deductions.
Photograph and Document Damage Before Repair
Before you touch the chip, take clear photos that show its size, location, and surrounding area from several angles.
Before you touch the chip, photograph its size, location, and surroundings from multiple angles for records.
You’ll use photographic documentation for damage assessment and to show landlords or insurers the original condition.
Label photos with date, time, and brief notes about cause or nearby fixtures.
Store images securely and keep backups before you start repairs.
Quick-Reference Repair Checklist
1 quick checklist will keep your repair organized and efficient: gather safety gear (gloves, mask, eye protection), cleaning supplies (non-abrasive cleaner, soft cloths), sanding tools (fine-grit sandpaper), primer and touch-up paint matched to your tub, applicators (small brush or toothpick), and a clear drying space.
- Prep surface and clean thoroughly.
- Sand and remove loose paint.
- Apply primer then touch-up.
- Note bathtub maintenance tips and chip prevention strategies.
Estimate Time Needed for Small, Medium, and Large Repairs
You’ll want to budget your time based on the repair size: small chips often take under an hour, medium jobs can need a few hours including drying, and large restorations may span a day or two.
Plan for prep, application, and curing for each category so you’re not caught short. I’ll walk you through typical timelines and tips to speed each stage.
Small Repair Time
Plan on spending about 1–2 hours for a small bathtub paint chip repair; this covers cleaning, sanding, applying primer and touch-up paint, and letting the finish set enough to use the tub gently.
- Gather supplies: touch-up kit, sandpaper, cleaner.
- Clean and sand carefully.
- Apply primer and paint using precise repair techniques.
- Allow cure time; follow chip prevention tips to avoid recurrence.
Medium Repair Duration
If a small repair takes an hour or two, expect a medium bathtub paint chip job to require more time and attention—typically 3–5 hours from start to finish.
You’ll clean, sand, apply primer and paint, and allow partial cures.
Follow basic bathtub maintenance tips and recommended surface treatment techniques to guarantee adhesion and smoothness.
Plan breaks for drying and inspection between steps.
Large Repair Timeline
For large bathtub paint chip repairs, expect a full-day project—or sometimes two—because you’ll be tackling extensive surface prep, multiple coats, and longer cure times to guarantee durability.
- Small: 1–3 hours — quick clean, prime, single coat.
- Medium: half to full day — more prep, two coats.
- Large: full day–2 days — deep sanding, filler, several coats, long cure (large chip considerations).
- Repair timeline overview: plan downtime and ventilation.
Product Recommendations and Where to Buy Supplies
When repairing a chipped bathtub, you’ll want durable, water-resistant products that bond well to porcelain or enamel.
Choose epoxy repair kits, touch-up paints, sandpaper, and clear sealants — these product types cover most needs.
Buy from hardware stores, home centers, or online retailers; check local store locations for same-day pickup.
Compare brands for warranty and color match before purchasing.
Real-Life Examples: Small Chip, Large Chip, and Edge Damage
Now that you’ve picked the right repair products, you’ll want to see how they perform on common chip types so you can pick the correct technique.
Try these real-life examples and match repair material options to the damage:
- Small chip solutions: clean, fill, sand, paint.
- Large chip techniques: build layers, cure longer, sand smooth.
- Edge damage fixes: reinforce edge, feather, recoat.
- Choose materials by durability and color match.
Next Steps: Inspection Schedule and Ongoing Maintenance
Although a thorough repair makes your tub look new, you should set a simple inspection schedule and follow routine maintenance to keep chips from returning. You’ll track inspection frequency and use a maintenance checklist to stay proactive.
| Task | Interval | Notes |
|---|---|---|
| Visual check | Monthly | Look for new chips |
| Clean | Weekly | Gentle, nonabrasive |
| Touch-up | As needed | Match paint precisely |
Frequently Asked Questions
Can I Repair Bathtub Chips While Water Still Has Minerals in the Tub?
Yes—you can, but you shouldn’t. You’ll want to remove mineral deposits first for proper bathtub maintenance; otherwise repair techniques won’t adhere well. Clean, dry, and demineralize the area before proceeding for lasting results.
Will Kids or Pets Be Unsafe Around the Tub During Curing?
Keep kids and pets away: they shouldn’t contact wet finishes during curing. Create clear safety precautions, cordon off the bathroom, ventilate well, and expect the curing duration to last from hours to several days depending on product.
Can I Reuse Filler From an Opened Kit for Later Repairs?
You can, but don’t expect long filler longevity once opened; store it airtight and cool. If it thickens or skin forms, your repair effectiveness drops, so test a small patch before trusting it for major fixes.
How Do Tubs With Heated Surfaces Affect Paint Adhesion?
Heated tub surfaces can weaken paint adhesion: you’ll need superior adhesive properties and thorough surface preparation, because heat expands materials and off-gases; clean, degloss, and use heat-tolerant primers so coatings bond reliably.
Are Repaired Areas Safe for Food Contact (E.G., Baby Bath Toys)?
Like a cautious gardener pruning, you shouldn’t assume repaired areas are safe for food contact; you’ll need to verify safety standards and material composition, guarantee proper curing, and avoid direct contact until certifications confirm non-toxicity.
Conclusion
Now that you’ve learned how to spot the finish and patch chips, keep a regular inspection schedule so small problems don’t become big ones. Tidy up any loose paint, sand smooth, and use the right repair kit for your porcelain, enamel, or acrylic tub. For large or structural damage, call a pro. Keep supplies on hand like a pirate keeps rum — you’ll save time and money and keep your bathtub looking smooth and fresh.