How to Fix Blistering Paint – Causes, Repair Steps & Prevention Tips
You can stop paint blisters by first diagnosing moisture or compatibility issues, then stripping loose film and exposing sound substrate. Dry and clean the area, sand glossy spots, apply a high‑bonding, moisture‑blocking primer, and use a compatible topcoat in thin, even layers. Improve ventilation, fix leaks or rising damp, and avoid painting in high heat or humidity to prevent recurrence. Keep inspecting for early signs, and continue for detailed repair steps, product picks, and prevention tips.
What This Guide Covers and How to Use It
Before you start, know what this guide covers and how to use it: we’ll explain why paint blisters form, show how to assess severity, and give step-by-step fixes for walls, trim, and exterior surfaces, plus prevention tips and safety notes.
You’ll learn to identify blister types, test paint adhesion, prioritize repairs, gather tools, and follow safety steps so you tackle blisters confidently and efficiently.
Quick Fixes for Blistering Paint You Can Salvage
If you’ve got small, intact blisters, you can often salvage the finish without a full repaint:
Sand lightly, clean debris, and apply a suitable primer to sealed areas.
Use matching touch-up paint in thin coats, feathering edges to blend.
For minor spots, consider clear protective coats.
These quick fixes and salvage techniques restore appearance and extend life until a larger repair’s needed.
How to Tell True Paint Blisters From Surface Defects
Those quick touch-ups can hide many issues, but you’ll want to distinguish true blisters from surface defects before committing to a repair.
For accurate blister identification, press gently: real blisters feel raised, may pop, and reveal underlying adhesion failure.
Surface evaluation includes checking texture, pattern, and paint thickness—scattered specks often mean contamination or finish flaws, not blistering.
Moisture as the Main Cause of Paint Blisters
When moisture gets trapped beneath paint, it expands as vapor and forces the coating to lift, creating the rounded blisters you see.
When moisture becomes trapped under paint, it vaporizes and pushes the coating up, forming rounded blisters.
You’ll often find the problem where walls face damp spaces, poor ventilation, or rising groundwater.
You should identify moisture sources quickly to protect paint integrity and stop recurring blisters.
- Leaky pipes
- Condensation
- Rising damp
- Roof leaks
- Poor ventilation
How Heat and Sunlight Make Paint Bubble
When paint is exposed to intense heat, it expands and can lift away from the surface, forming bubbles you can see or feel.
Prolonged sunlight also breaks down the paint’s binder with UV, making the film brittle and more likely to crack or blister.
You’ll need to address both thermal expansion and UV degradation to prevent recurring bubbles.
Heat-Induced Paint Expansion
Because sunlight heats the surface unevenly, paint can expand faster than the layer beneath it, and that differential causes bubbles to form.
You’ll notice heat effects increase pressure under the film as paint elasticity varies with temperature, so edges lift and blister.
Prevent by choosing compatible coatings, improving ventilation, and avoiding hot-day painting.
- Pick heat-resistant primers
- Paint in cooler hours
- Thin coats
- Allow full curing
- Shade surfaces
UV-Driven Film Breakdown
If sunlight keeps hammering at a painted surface, UV rays gradually break down the binder that holds pigments together and makes the film flexible.
As a result, the coating turns brittle, cracks, and lets moisture penetrate—this hidden damage is what ultimately fuels bubbling and blistering.
You’ll see reduced paint longevity as UV exposure erodes film stability; use quality protective coatings and regular maintenance to prevent failure.
Surface-Prep Failures That Lead to Blisters
Though you might paint quickly, neglecting surface prep invites blisters by leaving contaminants, loose old paint, or dampness beneath the new coat.
Skipping surface prep risks paint blisters—contaminants, loose old paint, or trapped moisture will ruin your finish.
You must guarantee good surface adhesion and use proper paint quality to avoid trapped moisture and poor bonding.
Do these steps before coating:
- Clean grease and dirt
- Remove loose or peeling paint
- Sand glossy surfaces
- Dry and check for moisture
- Prime porous areas
Incompatible Coatings and Common Product Mistakes
When you slap a new paint over an incompatible product, the layers can fail to bond and you’ll end up with bubbling, cracking, or flaking.
Check labels and match solvent types, sheen, and adhesion primers to avoid incompatible coatings.
Common product mistakes include skipping a primer, using latex over oil without conversion primer, or applying paint too thick—each invites blisters and shortens finish life.
Risks and Fixes by Substrate: Wood, Metal, Masonry, Drywall
Different substrates need different fixes, so you’ll want to treat wood, metal, masonry, and drywall according to their specific risks.
For wood, address moisture and rot before sanding and repainting; for metal, remove rust and prime with a corrosion-resistant product; for masonry and drywall, repair cracks and guarantee a proper breathable or flexible coating.
Follow substrate-specific prep to stop future blistering and make your repairs last.
Wood: Causes And Repairs
Because wood absorbs and releases moisture, paint blisters on it for different reasons than on metal or masonry—often from trapped moisture, inadequate surface prep, or using the wrong primer or paint for exterior wood.
You should assess wood types, fix rot, sand to solid edges, guarantee paint adhesion with compatible primers, and use breathable topcoats.
- Remove loose paint
- Dry and ventilate
- Replace rotten boards
- Sand and prime
- Repaint with breathable finish
Metal: Rust And Remediation
Where wood blisters from trapped moisture and poor adhesion, metal paint failures usually trace back to rust and surface contamination—issues that act faster and can undermine coatings from beneath.
You should remove rust, degrease, and sand to bright metal, apply a quality rust treatment and primer, then topcoat with corrosion-resistant paint.
Regular metal maintenance prevents recurrence and extends coating life.
Masonry & Drywall Care
While wood and metal failures often show as peeling or rust, masonry and drywall bring their own blistering risks tied to moisture, salts, and surface preparation.
You should address masonry techniques and drywall maintenance to prevent and repair blisters:
- Identify moisture sources and fix leaks
- Remove salts and efflorescence
- Use breathable primers on masonry
- Patch and skim damaged drywall
- Allow proper curing and ventilation
How to Spot Rot or Rust Beneath Blistered Paint
Curious whether that bubbling paint hides something worse? Use careful blister detection: press edges, lift a flap, note staining or soft spots.
Tap suspect areas; a dull thud or crumbling means rot identification is likely. For metal, look for orange flakes, pitting, or raised seams under paint.
Document locations, extent, and any moisture sources before proceeding with repairs.
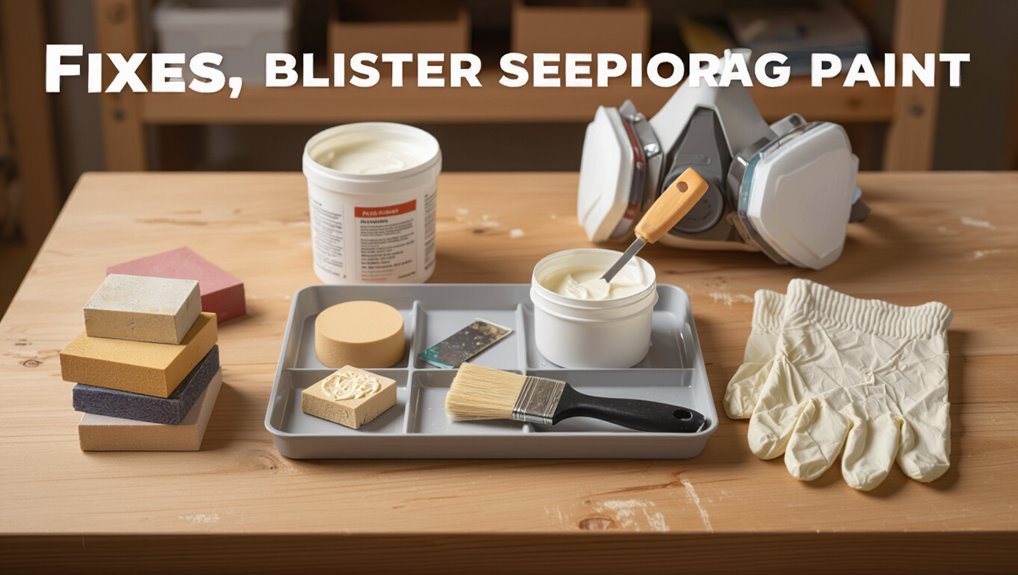
Tools and Materials for Proper Blister Repairs
Before you start repairs, make certain you’ve got essential safety gear—gloves, eye protection, and a respirator if you’re sanding or stripping.
Gather surface preparation supplies like scrapers, sandpaper, rust remover, and cleaners so the substrate is sound.
Finally, pick the right paint and repair materials—primer, compatible topcoat, and any fillers or rust inhibitors—to guarantee a lasting fix.
Essential Safety Gear
Because you’ll be working with chemicals, dust, and heat, wearing the right safety gear is as important as using the right tools.
You should protect eyes, lungs, skin, and hearing whenever you repair blisters.
- safety goggles or safety glasses
- respirator masks or dust masks
- protective gloves and coveralls
- sturdy work boots
- hearing protection
Surface Preparation Supplies
When you’re ready to tackle blistered paint, gather the right surface-prep supplies so each repair bonds properly and lasts: wire brush, scraper, sanding block, assorted grit sandpaper, putty knife, vacuum or tack cloth, rust inhibitor, and masking tape.
Choose surface preparation tools for proper abrasion and follow surface cleaning techniques—soap, degreaser, and solvent wipes—to remove contaminants before repair.
Paint And Repair Materials
You’ll need a focused set of paints and repair materials to restore blistered areas correctly:
- High-quality primer compatible with your substrate for proper paint selection
- Exterior or interior paint matched for finish and durability
- Sandpaper and sanding block for surface prep
- Flexible filler or epoxy for repair techniques on damaged spots
- Brushes, rollers, masking tape and respirator for neat, safe application
Safety and Environmental Precautions Before You Start
Before you scrape or sand, take a moment to protect yourself and the surroundings: wear a respirator rated for lead and organic vapors, gloves, eye protection, and cover nearby plants, vents, and floors with drop cloths or plastic sheeting.
Follow safety precautions: isolate the area, use proper waste containers, avoid runoff, and dispose of contaminated materials per local regulations to minimize environmental impacts.
Drying Surfaces and Controlling Moisture Before Repairs
Before you start repairs, make sure the surface is completely dry so new paint will adhere properly.
Lower ambient humidity with dehumidifiers or good ventilation, and don’t work right after rain or heavy condensation.
If the substrate itself is damp, locate and fix the source of moisture before repainting.
Ensure Adequate Surface Drying
If moisture’s trapped in the substrate, any repairs you make will fail, so dry the surface thoroughly before you touch up blistered paint.
Check surface temperature, use proper drying techniques, and confirm dryness with a moisture meter.
Follow these steps:
- Wipe and blot wet areas
- Use heat gun cautiously
- Apply fans for airflow
- Allow natural drying time
- Recheck moisture readings
Reduce Ambient Humidity
When you’re preparing to repair blistered paint, lower the room’s humidity so surfaces can dry faster and new coatings will adhere properly; use fans, open windows, and consider humidity control measures to speed drying.
Choose dehumidifier options sized for the space, monitor relative humidity with a hygrometer, and wait until readings stay below 50% before sanding or repainting to guarantee adhesion and prevent recurring blisters.
Address Substrate Moisture
Because trapped moisture under paint will cause new coatings to fail, you need to dry the substrate completely and control any ongoing sources of dampness before you start repairs.
Use dehumidifiers, fans, and heat; fix leaks; test with a moisture meter; apply substrate sealing products; install moisture barriers where needed.
- Use a moisture meter
- Ventilate and dehumidify
- Repair leaks promptly
- Apply substrate sealing
- Install moisture barriers
Remove Loose Paint and Expose Sound Substrate
Start by scraping and sanding away all loose, bubbling paint until you reach a firmly adhered layer or bare substrate; you want no flakes or feathered edges left behind.
Perform a careful substrate inspection to confirm sound material and address any underlying causes that affect paint adhesion.
Remove dust, grease, and contaminants, then wipe clean so primers and new coatings bond properly to the prepared surface.
How to Strip Stubborn Blistered Paint Safely
Before you start stripping, assess the surface for sound substrate, underlying moisture, and any signs of lead or mold.
Pick removers that match the material and health risks—low-VOC chemical strippers, heat tools with controls, or mechanical methods—and read labels carefully.
Prepare the area and protect yourself with drop cloths, ventilation, and appropriate PPE to contain dust and fumes.
Assess Surface Condition
A quick, careful inspection tells you whether the blisters are surface-level or indicate deeper damage.
Use surface evaluation and damage assessment to decide next steps. Check adhesion, substrate softness, moisture, multiple layers, and surrounding peeling.
- Tap and listen for hollow sounds
- Press to test adhesion
- Look for substrate discoloration
- Probe edges for lifting
- Note blister size and spread
Choose Safe Removers
When blistered paint won’t come off with a scraper, choose removers that dissolve or loosen coatings without damaging the substrate or exposing you to toxic fumes.
Pick products labeled for your surface, prioritize eco friendly options and low-VOC formulas, and read labels for chemical safety.
Test a small area, follow manufacturer instructions, and dispose of residues per local regulations to avoid contamination.
Prepare And Protect
Now that you’ve picked the right remover, get your work area and yourself ready so stripping blistered paint goes safely and cleanly.
Protect surroundings and skin, test a small spot, and note Paint selection for refinishing. Use proper ventilation, and plan Surface protection before you scrape.
- wear respirator and gloves
- lay drop cloths and tape edges
- open windows/vent fan
- score and soften blisters
- dispose waste per label
Patching and Sanding for a Smooth Base
Before you repaint, remove all loose blistered paint and open the edges so patches will bond properly; then fill gouges and shallow hollows with a compatible filler, feathering the edges to match the surrounding surface.
Once cured, sand progressively with medium then fine grit, using proper smoothing techniques for even base preparation.
Clean dust, inspect for low spots, and touch up until the surface’s uniform and ready.
Choosing Primers for Moisture-Prone Areas
When you’re dealing with areas that stay damp, picking the right primer makes a big difference.
Use a high-bonding primer to guarantee new paint grabs onto patched or chalky surfaces.
For basements, bathrooms, or exterior trim, a moisture-blocking primer will help stop water vapor from causing blisters again.
High-Bonding Primers
Because moisture can undermine adhesion, choosing a high-bonding primer is one of the smartest moves you can make for blister-prone surfaces.
You’ll get high bonding benefits that improve paint longevity; follow proper primer application to guarantee grip and drying.
Consider these quick tips:
- Choose adhesion-focused formulas
- Clean and sand first
- Apply thin, even coats
- Allow full cure time
- Match primer to topcoat
Moisture-Blocking Primers
High-bonding primers do a lot to keep paint stuck down, but they won’t stop moisture that comes through from behind the surface — that’s where moisture-blocking primers come in.
You’ll choose primers with vapor-retardant formulas for basements, bathrooms, and exterior walls.
Proper primer application and surface prep guarantee effective moisture management.
Apply per manufacturer’s cure times and address leaks before painting.
Best Topcoats and Paint Types to Resist Blisters
Choosing the right topcoat and paint type makes the biggest difference in preventing blisters, so pick products designed for your surface and exposure.
You should favor durable finishes and modern paint formulations that resist moisture and UV.
Consider these options:
- 100% acrylic exterior enamel
- Elastomeric coatings for masonry
- High-quality alkyd for trim
- UV-stable latex blends
- Breathable masonry paint
Correct Application Methods to Prevent Bubbling
Start by preparing the surface thoroughly — clean, dry, and smooth substrates give paint the best chance to adhere and cure without trapping moisture or air.
Use recommended application techniques: thin, even coats, proper drying times, and correct tools.
Avoid overbrushing or spraying in high humidity.
Consider compatible paint additives to improve flow and adhesion, but follow manufacturer guidelines to prevent unintended reactions.
Repainting Exterior Siding: Timing and Weather Windows
Pick a clear stretch of dry weather—ideally several days with daytime temps between 50–85°F and low humidity—so paint can bond and cure without trapping moisture.
Pick several dry days with mild temps (50–85°F) and low humidity so paint can properly bond and cure
You’ll schedule around favorable weather conditions and consider siding materials’ temperature and moisture tolerances.
- Check forecast for consecutive dry days
- Avoid painting in direct midday sun
- Test substrate for dampness
- Use appropriate primer
- Start early morning to maximize cure time
Repainting Interior Walls and Ceilings Without Re-Blistering
Prevent blisters by addressing the root causes before you paint: remove loose film, dry any damp spots, sand glossy finishes, and spot-prime with a product compatible with both substrate and topcoat so the new paint can adhere without trapping moisture or reacting with old layers. Do interior preparation carefully, choose proper paint selection, maintain ventilation, and monitor humidity.
| Step | Why | Tip |
|---|---|---|
| Prep | Remove loose paint | Vacuum dust |
| Prime | Seal substrate | Use compatible primer |
| Paint | Apply topcoat | Control humidity |
Repairing Trim, Doors, and Windows With Blisters
When you find blisters on trim, doors, or window casings, address them promptly to keep rot and further paint failure from spreading.
Sand blistered spots, remove loose paint, prime bare wood, match paint types, and repaint.
Check trim materials and door finishes for moisture. Consider window treatments that reduce weather exposure.
- Sand and clean
- Use suitable primer
- Match paint types
- Repair wood
- Refinish surfaces
When to Replace Boards or Panels Instead of Repair
If the boards or panels show significant structural damage—rot, deep cracks, or sagging—you’ll usually need to replace them rather than patch and paint.
Also replace any pieces with persistent moisture issues that keep causing new blisters, since fixes won’t stick if the substrate stays wet.
Finally, weigh the cost versus replacement: sometimes a new board is cheaper and longer-lasting than repeated repairs.
Significant Structural Damage
Although minor peeling and bubbling you can fix with sanding and repainting, severe blistering that exposes rot, delamination, or warping means you need to replace the affected boards or panels.
You should perform a damage assessment to evaluate structural integrity and decide replacement versus repair.
- Inspect for rot depth
- Tap for hollow sounds
- Check for delamination
- Measure warping degree
- Document compromised spans
Persistent Moisture Issues
After you’ve assessed structural damage, check for ongoing moisture sources that will keep causing blistering no matter how well you repair the surface.
If boards or panels show rot, persistent damp, or mold from hidden leaks, replace them.
Patching won’t stop recurring problems without fixing moisture sources and improving humidity control.
Replace compromised materials when drying and humidity control can’t reliably prevent future blisters.
Cost Versus Replacement
Deciding whether to repair or replace blistered boards comes down to comparing the true cost of ongoing fixes against the one-time expense of new materials and labor.
You should do a cost analysis, weigh replacement options, and consider longevity, structural damage, and resale value.
- Repair labor vs. replacement cost
- Extent of rot or delamination
- Expected lifespan after repair
- Warranty and guarantees
- Impact on property value
How to Fix Recurring Blisters After Repair
When blisters keep coming back after you’ve repaired them, it usually means the underlying cause wasn’t fully addressed — moisture, poor adhesion, or trapped contaminants are common culprits. Identify blister types, revisit repair techniques, and isolate moisture sources. Use the table below to plan steps.
| Cause | Action | Result |
|---|---|---|
| Moisture | Dry, seal | Stable paint |
| Contaminants | Clean, prime | Better adhesion |
Long-Term Prevention: Ventilation and Moisture Control
If recurring blisters followed repair because of trapped moisture or poor airflow, you’ll need to tackle ventilation and humidity control to keep paint stable long-term.
You should assess ventilation methods and install moisture barriers, improve air circulation, and set humidity control routines to prevent future problems.
- Inspect existing vents
- Add exhaust fans
- Seal foundation gaps
- Install vapor barriers
- Monitor humidity levels
Product Checklist for Humid and Hot Climates
Because humid, hot climates speed up paint failure, you’ll want a focused product checklist that targets moisture, mold, and sun damage. Choose products for humidity control, mold inhibitors, high-UV exterior primers, and breathable topcoats. Balance paint selection for durability and breathability to prevent trapped moisture.
| Item | Purpose |
|---|---|
| Dehumidifier | Reduce indoor humidity |
| Mildew cleaner | Remove mold |
| High-UV primer | Protect from sun |
| Breathable paint | Allow moisture escape |
Maintenance Schedule to Catch Bubbling Early
Regularly inspecting painted surfaces lets you spot bubbling while it’s still small and fix it before it spreads.
Set a simple maintenance schedule with calendar maintenance reminders and quick checks for early detection.
Do these regularly to prevent bigger repairs:
- Inspect exterior walls monthly
- Check trim after heavy rain
- Note paint texture changes
- Snap photos for comparison
- Log findings and actions
When to Call a Pro for Persistent Blister Problems
When bubbling keeps returning despite your repairs, it’s time to call a pro who can diagnose underlying causes like trapped moisture, poor priming, or structural issues and recommend lasting solutions.
You should contact a specialist when multiple blister types reappear, DIY repair techniques fail, or moisture tests show problems.
A pro won’t just patch—you’ll get root-cause fixes, proper prep, and warranties.
Frequently Asked Questions
Can Blistered Paint Indicate a Termite or Pest Infestation?
Yes — blistered paint can signal pests, but it’s not definitive; you’ll need pest identification to confirm whether insects or moisture caused the issue, since compromised paint adhesion often results from dampness rather than solely from termites.
Will Blistering Paint Affect Indoor Air Quality or Cause Odors?
Coincidentally, if blistering causes trapped moisture or old solvents, you’ll notice odors and reduced air quality; you shouldn’t ignore it, because lingering VOCs and mold from blisters can make your indoor air smell musty and unhealthy.
Can Wallpaper Cause Paint to Blister if Applied Beneath It?
Yes — if wallpaper traps moisture or has poor wallpaper adhesion, you’ll get paint blisters beneath it. You’ll want to guarantee strong adhesion and prevent moisture retention before applying wallpaper to avoid bubbling and paint failure.
Do Paint Blisters Impact Home Resale Value or Inspection Reports?
Absolutely — blisters can scream issues: you’ll lower curb appeal and buyers’ trust. Blister causes must be disclosed; inspectors note defects, so resale implications include reduced offers, repair requests, or price reductions unless you fix underlying problems first.
Are There Insurance Policies That Cover Paint Damage From Blisters?
Yes, you can get insurance coverage for paint damage sometimes, but policies vary; you’ll need to check homeowners or condo policies, and they may consider causes and paint types when deciding claims, so document damage carefully.
Conclusion
So you’ve battled paint blisters like a DIY gladiator and maybe won a round or two. Keep sanding, scraping, and drying like a fanatical spa attendant; prime with the solemnity of a ritual; ventilate like you actually want to breathe. If bubbles keep reappearing, call a pro and admit defeat with dignity. In short: laugh at the bubbles, fix the root causes, and stop pretending paint enjoys humidity or sunburns.