How to Fix Chipped Paint on Baseboards Without Repainting the Whole Room
You can fix chipped baseboard paint without repainting the whole room by cleaning the area, lightly sanding edges, filling gouges with wood filler or spackle, then sanding smooth. Prime the spot, match the original paint (or get a color match at a store), and touch up with a small brush or paint marker for a seamless repair. For multiple chips repeat the steps; keep tools and quick tricks on hand if you want more tips and alternatives.
Quick Answer Fix Chipped Paint on Baseboards Without Repainting the Whole Room
You can usually fix a small chip by lightly sanding, filling with wood filler or spackle, priming the spot, and touching up with matching paint.
Use this quick fix for isolated chips or small areas where the finish and color still match the surrounding trim.
If chips are widespread, the paint is peeling, or the color/finish doesn’t match, you’ll need to repaint the whole room or at least the entire trim for a uniform look.
One-sentence solution
Patch the chip, sand lightly, and touch up with matching paint or a paint marker so the baseboard blends in without repainting the whole room.
You’ll prep the area, apply a small filler, sand smooth, then use a matching paint or marker to conceal the damage.
This quick how to fix chipped paint on baseboards lets you restore appearance fast with minimal tools and time.
When this approach is appropriate vs when full repainting is needed
That quick spot-repair works great for small nicks and isolated chips, but knowing when to touch up versus repaint matters.
If damage is limited to a few areas with matching paint, touch-ups save time and blend fine.
Repaint the whole room when chips are widespread, color has faded, finish differs, or repairs keep showing—full repainting guarantees uniform color and long-term durability.
Basic Understanding Why Baseboard Paint Chips Happen
You’ll usually find chips come from moisture, bumps, poor adhesion, or simply age, so start by noting what likely caused the damage.
Check the paint type and finish—glossier paints resist scuffs better while flat paints chip easier.
Then assess whether you’re dealing with surface flakes you can sand and touch up or deeper gouges that need filler.
Common causes (moisture, impact, poor adhesion, age)
Because baseboards sit where floors meet walls, they take a lot of abuse, and that’s why paint chips there more than elsewhere: moisture from mopping or leaks, knocks from shoes and furniture, poor adhesion from inadequate prep or low-quality paint, and simply age all weaken the finish until flakes come off.
- Moisture: swelling and lifting
- Impact: dings and scrapes
- Poor prep/age: failing bond and brittleness
Types of paint and finishes and how they affect chipping
Having covered how moisture, impact, poor prep, and age wear baseboard paint down, look next at the paints and finishes themselves—because the type you choose directly affects how prone the surface is to chipping.
Use durable paints: semi-gloss and gloss resist scuffs and shed moisture better than flat.
Acrylic latex bonds well and flexes; oil-based can harden and crack over time.
How to assess the extent of damage (surface vs deep chips)
When evaluating chipped baseboard paint, start by distinguishing surface flakes from deeper gouges so you know what repairs are required.
Run your fingernail over chips: if paint lifts but wood underneath is intact, you’re dealing with surface peeling.
If you feel a depression, exposed raw wood, or previous filler, it’s a deep chip needing sanding, filler, and priming before repainting that spot.
Tools and Materials You’ll Need
Before you start, gather the essential tools: a scraper, sandpaper, a putty knife, and a small brush.
You’ll also need materials like wood filler, caulk, primer, touch-up paint, and the appropriate finish.
For cleaner, longer-lasting results consider optional supplies such as painter’s tape, a tack cloth, and a respirator.
Essential tools (scraper, sandpaper, putty knife, brush)
You’ll need just a handful of basic tools to get the job done: a metal scraper to lift loose paint, medium- and fine-grit sandpaper to feather edges, a flexible putty knife for filling chips, and a small angled brush for precise paintwork.
- Metal scraper
- Sandpaper (med & fine)
- Flexible putty knife
Use the angled brush for touchups and the scraper/sandpaper to prep edges before filling.
Materials (wood filler, caulk, primer, touch-up paint, finish)
Gather a few key materials and you’ll have everything needed to repair chipped baseboard paint: wood filler for gouges, paintable caulk to seal gaps, a primer to promote adhesion and hide repairs, matching touch-up paint, and a finish (satin or semi-gloss) to blend with the rest of the trim.
- Wood filler
- Paintable caulk
- Primer, touch-up paint, finish
Optional supplies for best results (painter’s tape, tack cloth, respirator)
While the basic repair supplies will get the job done, a few optional items make the work neater and safer: painter’s tape protects adjacent walls and flooring, a tack cloth removes dust for a smooth finish, and a respirator keeps you from inhaling dust or paint fumes.
- Painter’s tape: clean edges, protects surfaces
- Tack cloth: captures fine dust
- Respirator: protects lungs during sanding and painting
Step-by-Step Repair Process (One Baseboard or Multiple Spots)
You’ll start by prepping the area—clean off dirt and loose paint so the surface is ready.
Then you’ll sand and feather the edges, fill any deep chips with wood filler or caulk, and sand the repairs smooth before wiping clean.
Finish by spot-priming the repaired spots with the appropriate primer so paint adheres and blends.
Step 1 Prepare the area (cleaning, removing loose paint)
Start by clearing the work area and removing any loose or flaking paint so the patch will bond properly.
Next, clean the baseboard to remove dirt and grease; use a mild detergent and a damp cloth, then dry thoroughly.
Protect nearby flooring and walls.
- Wipe with soapy water
- Scrape loose paint gently
- Tape adjacent surfaces
Step 2 Sanding and feathering edges for a smooth transition
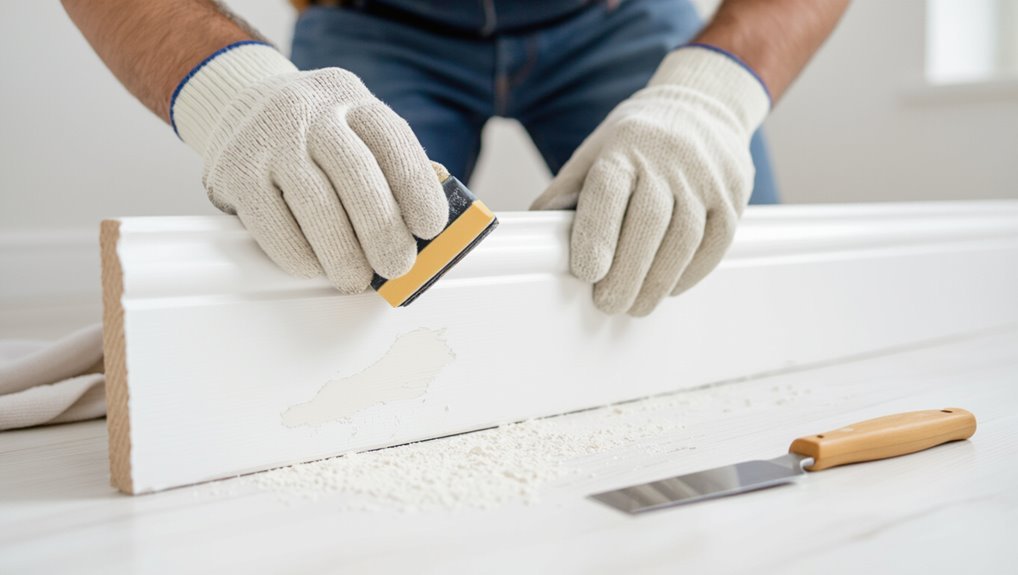
Grab a medium-grit sandpaper (120–150) and gently sand the chipped area and the surrounding paint until the edges feel smooth and blended with the undamaged surface.
Work in light, even strokes, tapering the paint edge so it feathered into bare wood.
Wipe away dust with a tack cloth, check for smoothness by touch, and repeat lightly if any ridges remain.
Step 3 Fill deeper chips and gouges with wood filler or caulk
Fill the deeper chips and gouges with a suitable filler so the surface sits flush with the surrounding baseboard.
Choose wood filler for large voids or paintable acrylic caulk for narrow gaps. Pack material firmly, overfill slightly to allow shrinkage, and remove excess with a putty knife.
Let it cure per product instructions before proceeding to the next step.
Step 4 Sand filler smooth and wipe clean
Smooth the repair by sanding the filler until it blends seamlessly with the baseboard profile.
Use fine-grit sandpaper (120–220) and sand with the grain or along the molding contours.
Check edges for feathered junctions.
Remove dust with a tack cloth or damp microfiber, ensuring a clean, dry surface.
Inspect for low spots and repeat light sanding if needed before priming or painting.
Step 5 Spot-prime repaired areas (when and what type of primer to use)
Before you paint, spot-prime the repaired areas so the filler and surrounding wood accept paint evenly and the patch won’t show through.
Use a stain-blocking, water-based primer for small wood repairs; it dries fast and bonds well.
For knots, tannin bleed, or heavy staining choose an oil- or shellac-based primer.
Apply thin coats, feather edges, and let it fully dry before touching up paint.
Step 6 Color-matching touch-up paint techniques (brush vs small roller)
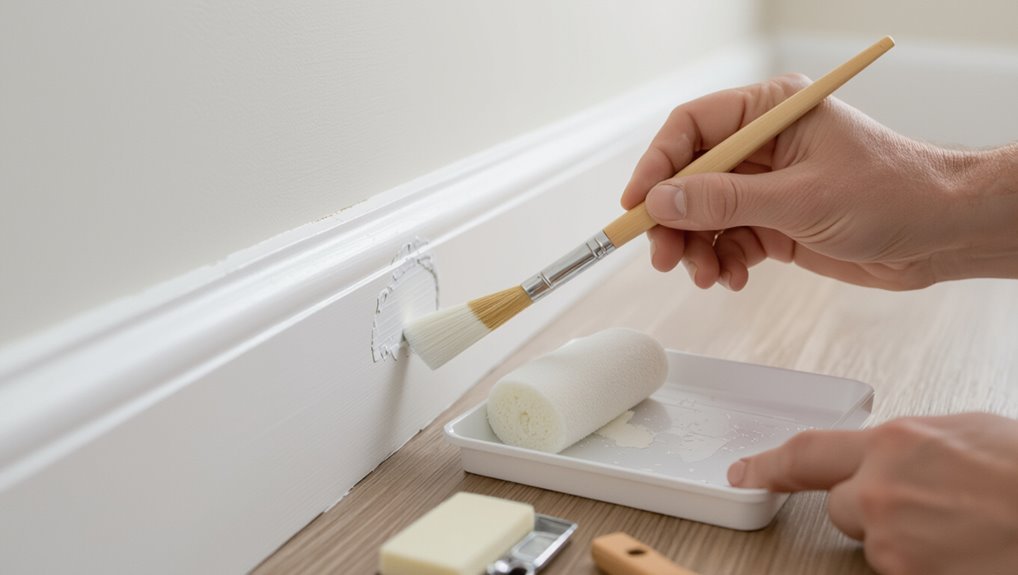
Now that your repairs are primed and dry, pick a touch-up method that matches the paint and the damage: a fine brush for tiny chips and trim details, or a small foam or microfiber roller for larger, flat areas where a seamless texture matters.
Test color on scrap, thin paint slightly for the brush, load roller evenly, and apply light even coats until color matches.
Step 7 Blend and feather paint into surrounding finish for an invisible repair
With your touch-up paint matched and applied, focus on blending the repair into the surrounding finish so the patch disappears.
Lightly feather edges with a damp brush or mini dry brush, working outward in thin strokes.
Blend sheen by softly stippling nearby areas, matching texture.
Step back, check under different light, and repeat delicate strokes until the repair visually integrates with the baseboard.
Step 8 Apply topcoat or protective finish for durability
Seal the repair by applying a compatible topcoat to protect the patched area and confirm an even sheen across the baseboard.
Choose satin or semi-gloss to match existing finish.
Lightly sand between coats if needed, wipe dust, then apply thin, even coats with a brush or small roller.
Let each coat fully dry before adding another to guarantee durability and a seamless look.
Quick Fix Alternatives (When You Need a Faster or Temporary Repair)
If you need a fast or temporary fix, you can use paint pens or markers to neatly cover tiny chips without sanding.
Touch-up kits and pre-matched products give a better color match for slightly larger areas.
For a non-permanent option, snap-on decorative covers or trim protectors hide damage while protecting the baseboard.
Using paint pens and markers for tiny chips
When you need a fast, temporary fix for a tiny chip, paint pens and touch-up markers let you correct the spot without sanding or pulling out brushes.
You’ll dab or draw a thin layer, let it dry, and add a second coat if needed. Match sheen, test on scrap, and wipe excess quickly—these tools work best for small, quick touch-ups.
Touch-up kits and pre-matched products
For chips that need a bit more than a marker but still call for a quick fix, touch-up kits and pre-matched products give you ready-made solutions that cut prep time.
You’ll get matched paint, small brushes, and instructions so you can blend repairs fast. Consider these options:
- Single-color touch-up pens for quick daubs
- Small pot kits with applicator brushes
- Spray-on matched touch-up aerosols
Decorative covers and trim protectors as temporary solutions
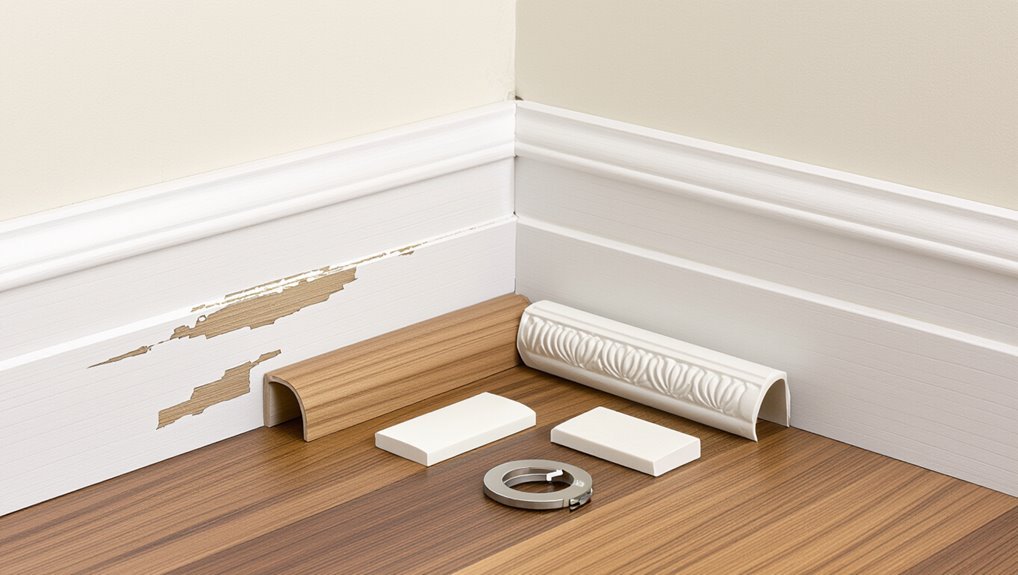
Although they won’t fix the paint, decorative covers and trim protectors give you a fast, tidy way to hide chips while you plan a proper repair.
You can snap on vinyl or magnetic covers, apply adhesive trim, or use corner guards to mask damage. They’re inexpensive, removable, and protect edges from further wear, letting you delay full touch-ups until you’re ready.
Color Matching and Finish Matching Tips and Techniques
Start by checking paint can labels or testing tiny samples to pin down the original color.
Use small swatches and feathered blending to see how the repair looks in different light and at the actual baseboard edge.
Match the sheen—eggshell, satin, or semi-gloss—so the repaired area reflects light the same way as the surrounding trim.
How to find the original paint color (labels, sample testing)
Wondering how to match that exact baseboard shade? Check paint cans or room labels if you’ve kept them.
If not, take a small scrap or remove a discreet chip and use a store color reader or sample card.
Ask pros for spectrophotometer matching.
Test tiny swatches on scrap wood, let them dry, and compare under room lighting before buying.
Using small samples and blending strategies
When you’ve narrowed the color, try small test patches and feathering to make the repair disappear; apply tiny swatches of the matched paint on scrap wood or behind the baseboard.
Let them fully cure, and compare under the room’s usual lighting. Once satisfied, blend the edges by thinning the paint slightly and brushing outward in light strokes.
Build thin layers until the chip visually vanishes.
Matching sheen/finish for seamless results
Although getting the color right matters, nailing the sheen is what makes a repair disappear; you’ll want the repaired spot to reflect light the same way as the surrounding baseboard.
Test the finish (flat, eggshell, satin, semi-gloss) on a scrap, let it fully cure, then compare at different angles.
Use the matching sheen and thin coats to blend edges for an invisible repair.
Common Mistakes to Avoid
Don’t skip surface prep, because loose paint and dust will make any repair fail.
Use the right filler and primer, and avoid slopping on thick paint or the wrong brush strokes that show brush marks.
Also be sure your color and sheen match the surrounding baseboard so the patch blends in.
Skipping surface prep
Skipping surface prep is the quickest way to turn a simple touch-up into a recurring chore: if you don’t clean, sand, and prime properly, new paint won’t adhere, will show bumps or peeling, and chips will reappear sooner.
You should remove dust, grease, and loose paint, sand edges smooth, and use a tack cloth before applying paint so repairs last and blend seamlessly.
Using wrong filler or primer
After you’ve cleaned, sanded, and primed the damaged area, picking the right filler and primer matters just as much as your prep work.
Don’t use flexible fillers for rigid trim or oil-based primer over water-based paint. Match filler type to material and choose primer compatible with your topcoat.
Incorrect choices cause poor adhesion, visible seams, and peeling—so check labels before you buy and apply.
Applying thick paint layers or wrong brush strokes
While it’s tempting to load your brush for a “one-and-done” finish, laying on thick coats or using the wrong stroke will leave drips, brush marks, and an uneven surface.
Work in thin, even layers, feathering each stroke away from edges. Use a high-quality angled brush, maintain a wet edge, and sand lightly between coats so the repair blends smoothly with the surrounding trim.
Not matching sheen or color properly
1 common mistake isn’t matching the paint’s sheen or color exactly, and it’ll make even a perfectly patched spot stick out.
You should compare sheen (flat, eggshell, semi-gloss) and test small swatches under room lighting. Use leftover original paint or bring a trim chip to the store for color-matching.
Blend edges feathering technique to hide shifts and inspect in different light.
Prevention and Maintenance to Avoid Future Chipping
Keep baseboards clean with gentle cleaners and soft cloths, and avoid kicks or furniture bumps by using corner guards and felt pads.
Caulk gaps where joints flex to stop moisture and movement from cracking the paint.
Check your trim every few months and do small touch-ups as soon as you spot wear to prevent larger repairs.
Best practices for cleaning and impact prevention
Good maintenance cuts future repairs down considerably, so you’ll want to adopt a few simple cleaning habits and impact-prevention steps to keep baseboard paint intact.
Wipe dust weekly with a microfiber cloth and mild cleaner, spot-clean scuffs promptly, and protect from knocks.
Use:
- felt pads on furniture
- door stoppers to prevent hits
- area rugs in high-traffic zones
When to caulk joints and why it helps
Along with regular cleaning and knock protection, you should caulk baseboard joints whenever you notice gaps, paint cracking along seams, or seasonal shrinkage that opens tiny splits.
Caulking seals moisture and air pathways, prevents paint edges from lifting, and creates a smooth surface for touch-ups.
Use a flexible acrylic caulk, tool it flush, let it cure fully, then repaint only damaged spots.
Periodic touch-up schedule and inspection tips
Set a simple routine: inspect your baseboards every three months and touch up small chips immediately to prevent larger repairs later.
Keep a small kit (matching paint, brush, sandpaper, caulk) handy.
Note trouble spots like high-traffic areas or doorways, record repairs, and address moisture or furniture causes.
Regular, quick fixes stop chips from spreading and save time and money.
Cost, Time, and When to Call a Professional
For small chips you can expect a DIY touch-up to take 30–60 minutes and cost under $20 for primer, paint, and a few supplies.
If paint damage is widespread, you suspect lead, or there are underlying structural issues, you’ll want a professional to assess and quote the job.
I’ll outline typical DIY costs and clear signs that mean it’s time to call a pro.
Estimated time and material cost for DIY spot repairs
A small spot repair on baseboards usually takes 30–90 minutes and costs $10–$50 in materials, depending on whether you already have spare paint and basic tools. You’ll sand, fill, prime, and touch up paint; expect minimal drying time between steps. If you lack materials, add budget for primer and fine sandpaper.
| Task | Time | Cost |
|---|---|---|
| Sand & clean | 10–20 min | $0–$5 |
| Fill & dry | 15–30 min | $2–$8 |
| Prime & paint | 10–40 min | $5–$35 |
Signs you should hire a pro (widespread damage, lead paint, structural issues)
If your spot repairs start to look bigger than a few chips—multiple rooms affected, long stretches of peeling paint, or visible damage that goes past the paint into the wood or drywall—you should consider hiring a pro.
Call a contractor if you suspect lead paint, notice rot or structural issues, or lack tools/time.
Pros handle testing, safe removal, repairs, permits, and guarantee durable, code-compliant results.
FAQs
You’ll find quick answers here to common questions like whether you can skip sanding, how to match paint without the original can, and whether glossy finishes hide spot repairs.
I’ll also cover when caulk is appropriate for filling chips and the safety concerns around sanding older baseboards that might contain lead.
Read on for clear, practical guidance so you can decide the best approach.
Can I fix chipped paint on baseboards without sanding?
Wondering whether you can fix chipped paint on baseboards without sanding? Yes—you can for small chips.
Clean the area, remove loose flakes, apply a thin coat of bonding primer or liquid sand alternative, then fill with lightweight spackling.
Smooth, let dry, lightly feather the edges with a damp sponge, and touch up with matching paint.
Larger damage may still need sanding.
How do I match paint if I don’t have the original can?
Small touch-ups often work without sanding, but matching the paint color when you don’t have the original can be the trickier part.
Take a chip or trim sample to a paint store for color-matching, or use a portable spectrophotometer if available.
Test a small swatch, let it dry, and view it in different light. Adjust tint or sheen until it blends.
Will spot repairs be visible on glossy baseboards?
Because glossy finishes reflect light, spot repairs tend to stand out more than on flat or eggshell surfaces. You’ll often notice differences in sheen or texture even when the color matches.
To minimize visibility, blend edges carefully, sand lightly, use the same gloss level paint, apply thin multiple coats, and let each coat cure fully before evaluating in various lighting angles.
Can I use caulk to fill all types of chips?
Can you use caulk to fill every chip on your baseboards? No.
Caulk works well for tiny surface nicks and gaps where paint’s missing but substrate is intact. For deep gouges, loose wood, or missing molding, use wood filler or epoxy first.
Caulk also won’t bond well to oily or dirty surfaces, so clean and prime repairs before repainting.
Is it safe to sand older baseboards that may have lead paint?
Worried about sanding older baseboards that might’ve lead paint? Don’t sand or scrape if you suspect lead—disturbing it creates toxic dust.
Instead, test with a home lead kit or hire a pro. If lead’s present, use wet-sanding methods, HEPA-filter tools, or contractor abatement.
Wear PPE, seal the area, and follow local regulations to protect yourself and occupants.