How to Fix Chipped Paint on Wooden Door Quickly and Easily
You can fix a small chipped spot on a wooden door in about 20–30 minutes: scrape loose paint, clean the area, fill gouges with fast‑dry wood filler, sand smooth, prime the patch, then dab on matching paint in thin coats until it blends with the surrounding finish. Use a small brush, cotton swab, or toothpick for precision, feather the edges, and let each coat dry fully. Keep going below for simple tips to get a perfect match.
Why a Chipped Paint Spot Makes Your Door Look Neglected
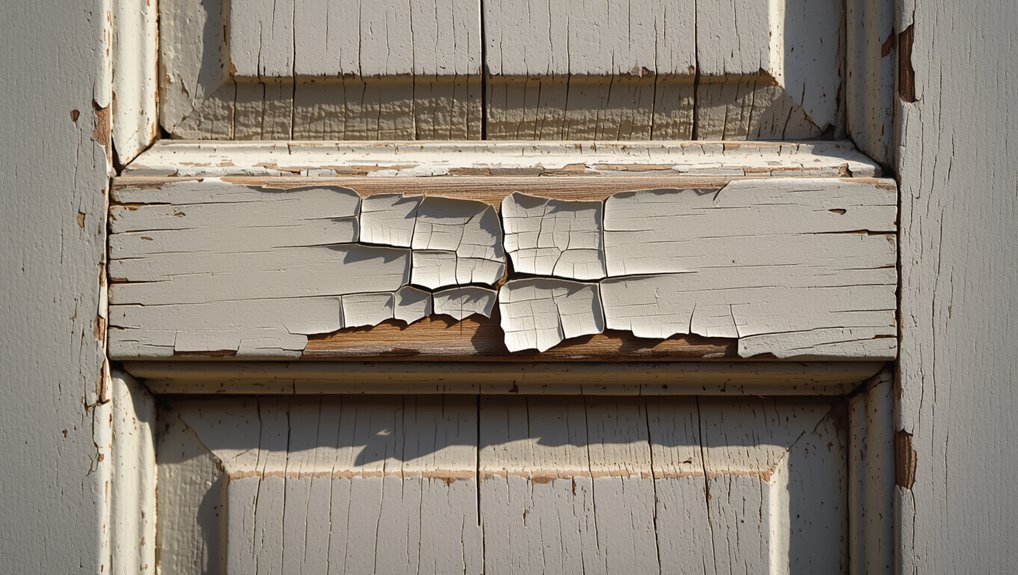
When paint chips away, it draws the eye to a small, glaring flaw that makes the whole door seem uncared for; you notice the damage first and assume the rest of the home gets the same neglect.
That chipped aesthetics creates negative door impressions, lowering aesthetic appeal and first impressions.
You feel maintenance neglect, sense repair urgency, and your homeowner pride prompts quick action to restore visual impact.
Repair or Repaint? A Quick Checklist
First, check how deep and widespread the damage is so you can tell if a spot repair will hold.
Then factor in how much time you’re willing to spend versus the convenience of a full repaint.
Finally, weigh long-term costs—materials and potential future touch-ups—before you decide.
Assess Damage Extent
1 clear glance is all you need to decide whether to repair a chip or repaint the whole door: check the number, size, and depth of chips; whether bare wood, primer, or just paint is exposed; and if surrounding finish shows cracking, peeling, or widespread wear.
Use damage identification and chip assessment to prioritize repairs, note moisture or rot, and mark areas for touch-up or full refinish.
Consider Time Investment
Now that you’ve identified the size and severity of the chips, weigh how much time you can realistically spend: small, shallow chips often take 30–90 minutes for cleaning, filling, sanding, and touch-up, while multiple deep chips or widespread peeling can mean several hours or a full-day refinish.
Use time management and priority setting to choose repair vs. repaint:
- Quick touch-up (30–90 min)
- Multiple repairs (2–4 hrs)
- Partial repaint (half day)
- Full refinish (full day)
Compare Long-Term Costs
Because a one-time touch-up can look fine today but cost you more over time, weigh immediate savings against future expenses: estimate materials, labor (or your time), and how long each fix will hold up.
You should compare repainting vs. spot repairs by calculating long term savings, frequency of touch-ups, and expected maintenance costs so you pick the most cost-effective option.
Tools for Fixing Chipped Paint on Doors
You’ll need a few essential painting tools—brushes, rollers, primer, and paint—to get a professional finish.
For prep, grab sanding blocks or sandpaper, a putty knife, and tack cloths to smooth and clean the surface.
Having these on hand will make the repair faster and more durable.
Essential Painting Tools
Any homeowner tackling chipped paint on a wooden door will find the right tools make the job faster and neater.
You’ll want essential tools and painting supplies that fit the task.
Consider these basics:
- Quality brush set for trim and touch-ups
- Small roller for smooth coverage
- Painter’s tape for clean edges
- Drop cloth to protect floors
Sanding And Prep Tools
Start by gathering the right sanding and prep tools so you can remove loose paint, smooth edges, and get the surface ready for primer and paint.
You’ll need sandpaper (80–220 grit), a sanding block, foam pads, a vacuum or brush, tack cloth, putty knife, and wood filler.
Learn sanding techniques for feathering edges and follow prep essentials to guarantee good adhesion.
Pick the Right Touch‑Up Paint for Your Door
Color matters, but so do sheen and formulation—so match the original paint’s finish (gloss, semi-gloss, satin, or flat) and choose a water‑ or oil‑based touch‑up that’s compatible with the existing coating.
For color matching and paint finish, do this:
- Test small swatch.
- Use sample pots.
- Match sheen, not just hue.
- Choose brush or pen for size.
Quick Workspace Setup for a Fast Repair
Gather your tools and materials—sandpaper, putty, primer, paint, brushes, and a rag—so you won’t be hunting for supplies mid-repair.
Set up in a clean, well-lit area to spot flaws and keep dust off the patched surface.
Lay down a drop cloth and arrange everything within arm’s reach to work quickly and neatly.
Tools And Materials
Before you begin, set up a small, well-lit workspace near the door so you can work quickly and keep everything within reach.
Gather essential tools and materials, knowing which paint types suit the door and which repair techniques you’ll use.
- Sandpaper (various grits)
- Wood filler and putty knife
- Matching paint and primer
- Small brushes, tack cloth, painter’s tape
Clean, Well-Lit Area
Choose a bright, well-ventilated spot near the door and clear a 3- to 4-foot work zone so you can move freely and keep tools within reach; good lighting and fresh air make the repair faster and safer.
Lay drop cloths, gather brushes, sandpaper, and cleaner, and follow simple cleaning techniques before painting.
Prioritize lighting importance—use task lights to spot imperfections and avoid missed chips.
How to Clean Loose Paint, Dirt, and Grease
Start by scraping away any loose or flaking paint with a stiff putty knife or paint scraper.
Then wipe the area with a tack cloth to pick up dust.
Use appropriate cleaning solutions or eco-friendly options to remove grease.
Gather cleaning tools, consider paint removers for stubborn spots, and follow maintenance tips for surface preparation and protective coatings.
- Soap and water
- Degreaser
- Rinse
- Dry
Safely Remove Flaking Paint From the Chip
Once the loose edges are cleaned, carefully lift and remove flaking paint with a stiff putty knife or a flexible scraper held at a low angle so you don’t gouge the wood; work from the undamaged paint toward the chip, taking off any brittle bits until you reach a solid, feathered edge. Use gentle removal techniques and wear a mask.
| Tool | Angle | Tip |
|---|---|---|
| Putty knife | Low | Push gently |
| Scraper | Low | Flexible blade |
| Brush | N/A | Clean debris |
Sanding Tips to Smooth a Chip Without Overdoing It
Before you sand, aim to blend the chip into the surrounding finish without removing more good paint than necessary; use a light touch and the right grit to avoid gouging the wood or creating a lip.
Use proper sanding techniques and sanding materials, then:
- Start with fine 220-grit.
- Feather edges gently.
- Check progress frequently.
- Wipe dust before priming.
Fill Deep Chips and Gouges in Wood Quickly
If sanding has smoothed the edges but left a noticeable cavity, you’ll want to fill deep chips and gouges so paint can adhere evenly and the repair won’t show.
Choose wood filler suited to the grain, prioritize tool selection for neat application, and follow surface preparation.
Use quick solutions and DIY techniques for chip repair, then sand, paint matching, and add finishing touches for a seamless door.
Fast‑Drying Wood Fillers and Putties to Use
Pick a fast‑drying filler that matches the size and location of the damage so you can move from filling to sanding and painting in one day.
Choose fast drying options based on chip depth and exposure. Consider:
- Vinyl wood filler — small chips, easy sanding.
- Epoxy putty — deep gouges, durable.
- Water‑based filler — indoor doors, low odor.
- Automotive spot putty — tiny imperfections, quick cure.
Use proper application techniques.
When Primer Matters for Repaired Spots
When you’ve filled and sanded a chip, priming the repaired spot matters whenever the filler, bare wood, or surrounding paint will affect adhesion, color, or durability—think raw wood, dark stains, or porous fillers.
You’ll choose primer types by repair techniques and paint compatibility, consider primer colors, and use proper application techniques.
That delivers surface adhesion, long term benefits, and quick fixes that last.
How to Feather Primer and Hide Edges
Now that you’ve primed repaired spots that needed it, blend that primer into the surrounding paint so the patch stops reading like a patch.
Use the feather technique and careful edge blending to disguise seams.
Steps:
- Lightly sand edges.
- Wipe dust clean.
- Thin primer at periphery.
- Softly brush outward.
Check under different light to confirm seamlessness.
Fast Paint Application Methods for Small Chips
If you want to speed up touching up small chips without sacrificing a neat finish, choose tools and techniques that deposit paint precisely and dry quickly. For quick touch ups and emergency fixes, dab with a small applicator, thin coats, and blot excess. Let layers dry between passes for smooth blending.
| Tool | Best use |
|---|---|
| Toothpick | Pinpoint chips |
| Cotton swab | Gentle blending |
| Syringe | Precise dots |
| Tape edge | Clean borders |
Brush vs. Mini Roller: Which to Use for Touch‑Ups?
For tiny chips you’ll want a small brush because it gives precise control and lets you feather the edges.
A mini roller covers slightly larger patches faster and leaves a smoother, more uniform finish.
Think about whether you need speed or control, and pick the tool that matches the size and look you’re after.
Brush For Small Areas
One small brush often beats a mini roller when you’re working on tight chips, trim, and detailed profiles because it gives you precise control and lets you feather edges into the surrounding paint.
Use brush techniques and simple touch up tips to blend repairs.
- Choose angled sash brush
- Thin paint slightly
- Dab, don’t flood
- Feather outward gently
Mini Roller For Smoothness
A mini roller gives you a faster, more uniform finish than a brush when you’re covering small chips and surrounding areas. It’s especially useful on flat door panels where brush strokes would show.
You’ll appreciate mini roller benefits for blending repaired spots into the door. Choose a short-nap roller for texture matching, light pressure, and overlapping passes to avoid ridges and achieve a seamless look.
Speed Versus Control
While a brush gives you pinpoint control for narrow chips and detailed edges, a mini roller speeds up coverage on flat panels—so pick the tool that matches the task and your tolerance for visible texture.
You’ll balance speed techniques with control methods. Choose based on surface:
- Trim and corners — brush
- Small chips — brush
- Panels — mini roller
- Blending — light brush strokes
Blend Touch‑Up Paint So the Chip Disappears
Start by feathering the edges of the chip so the surrounding paint blends with the repair; you’ll lightly sand the perimeter and wipe away dust before applying any paint.
Match paint sheen and mix small amounts to achieve precise color blending. Apply thin layers, let each dry, and lightly sand between coats for texture matching.
Finish with a final feathered stroke so the chip disappears.
Speed Hacks: Blending With a Damp Brush or Sponge
When you’re in a hurry, blending with a lightly damp brush or sponge speeds things up without sacrificing finish.
Make sure your touch‑up paint matches the original consistency so it spreads evenly.
Use gentle, feathering strokes from the chip outward to blend the edges seamlessly.
Match Paint Consistency
Getting the paint’s consistency right makes blending quick and invisible, and you’ll save time by using a damp brush or sponge to feather edges.
Match paint thickness to the original and check for subtle color variations.
Then follow steps:
- Thin small batch to match flow.
- Test on scrap.
- Adjust with medium, not water.
- Keep damp tool for soft blending.
Feather Edges Seamlessly
Although the trick seems small, feathering with a damp brush or sponge lets you blend fresh paint into old without visible ridges.
You’ll work faster by softening edges as you go. Use the feather technique: load minimal paint, drag outward lightly, then tap with a damp sponge for subtle edge blending.
Let layers dry briefly and repeat until seamless.
Drying Times and Safe Ways to Speed Curing
Because paint cures through both evaporation and chemical cross-linking, drying times vary with paint type, temperature, humidity, and film thickness.
So plan for at least 24 hours for light handling and up to several days for full cure.
Use proper drying techniques and, sparingly, compatible curing agents.
Tips:
- Increase ventilation.
- Raise temperature moderately.
- Lower humidity with a dehumidifier.
- Thin coats for faster cure.
Quick Ways to Refinish Hardware and Edges
Before you rehang the door, tackle hardware and edges quickly so the finish looks seamless; you can strip, sand, and touch up most metal and wood details in under an hour with the right tools.
Use simple hardware refinishing techniques: remove knobs, degrease, sand fine, and apply metal-specific finish.
For wood, employ edge repair methods: fill, sand, and touch up paint or stain for crisp, durable edges.
Spray Touch‑Up vs. Brush Touch‑Up: When to Pick Which
When should you grab a spray can and when is a brush your best bet? You’ll choose based on chip size, texture, and control.
Use spray technique for even coverage on large flat panels; use brush technique for small nicks and edges.
Consider:
- Size of damage
- Surface texture
- Drying time
- Accessibility and control
Color‑Correction Tricks for Stubborn Mismatches
Spray and brush techniques get paint back on the door, but they won’t always hide a color mismatch — especially on older finishes or sun-faded panels.
You can use subtle color matching by testing small swatches, tinting primer, and feathering edges with a fine brush.
Blending techniques like stippling and glazing help your repair disappear without stripping or repainting the whole door.
Repairing Painted Panels and Raised Moldings Fast
Start by evaluating the damage area so you know whether the panel or molding needs light touch‑ups or patching.
Prepare the surface properly—clean, sand, and prime any bare wood or rough edges to guarantee adhesion.
Finally, match both the paint color and the texture so the repair blends seamlessly with the surrounding finish.
Assess Damage Area
Before you touch a single tool, give the damaged area a close inspection so you know exactly what you’re up against.
Note how much chipped paint affects door aesthetics and which paint types were used. Decide repair techniques and needed surface preparation.
Evaluate edges, depth, adhesion, and underlying damage:
- Size
- Location
- Depth
- Adhesion
Prepare Surface Properly
Now that you’ve assessed the damage, get the surface ready so repairs bond and look seamless.
Remove loose paint and dust with a nylon brush, then sand edges smooth for ideal paint adhesion.
Wipe panels and moldings with a damp cloth or mild detergent for thorough surface cleaning, let dry completely, and tack with a lint-free cloth before priming or filling chips.
Match Paint And Texture
Color match matters—get it right and the repair will disappear.
You’ll need precise color matching and careful texture blending to hide chips on panels and raised moldings.
Follow steps:
- Clean and prime area.
- Test paint swatches in natural light.
- Apply thin coats, feather edges.
- Replicate grain or stipple texture with brush or sponge.
Inspect and adjust until seamless.
Fixing Chips on Stained or Varnished Doors
If your wooden door has stain or varnish instead of paint, you’ll repair chips a bit differently—matching grain and sheen matters more than matching color.
Start with careful wood preparation: sand smooth and clean.
Begin with meticulous wood prep: sand until smooth, then clean thoroughly before staining or varnishing.
Use precise stain application to blend color into the grain, then apply compatible varnish techniques for sheen.
Follow targeted touch up methods with small brushes and thin coats for an invisible repair.
Check for Moisture or Rot Before You Paint
Before you repaint, check the door for soft spots by pressing along edges and panels—soft areas can mean rot.
Use a moisture meter to measure the wood; readings above 15–18% need drying before painting.
Fix any damp or rotted sections first so your repair and new paint will last.
Inspect For Soft Spots
When you’re fixing chipped paint, check the door for soft spots that signal moisture or rot—press firmly with your thumb or a screwdriver edge to feel for spongy wood, crumbling fibers, or hollow areas around the damaged paint.
- Note soft spot identification locations.
- Probe edges and panels gently.
- Watch for discoloration from moisture detection.
- Mark areas for repair or replacement.
Measure Door Moisture
1. Before painting, measure door moisture to avoid trapping rot.
Use a moisture testing meter on bare wood—check several spots, edges, and joints.
Compare readings to recommended levels for exterior or interior doors and note current humidity levels in the room.
If readings are high, dry the door thoroughly or delay painting until moisture drops to safe, stable percentages.
Prevent Future Chips: Protective Finishes and Bumpers
If you want the repairs to last, add protective finishes and bumpers to absorb knocks and shield the wood; a durable topcoat like polyurethane or marine varnish seals edges and resists abrasion, while soft bumpers or doorstops take the brunt of impacts before paint ever chips.
Use protective coatings and door bumpers to prevent recurrence:
- Sand, clean surface
- Apply primer
- Seal with varnish
- Mount soft bumpers
Temporary Fixes Until You Can Do a Full Repair
Even with protective finishes and bumpers in place, you mightn’t be able to do a full repair right away; here are quick fixes you can apply now to stop damage from worsening and keep the door looking acceptable until you have time for a proper job.
Use clear tack cloth, apply wood filler or spackle sparingly, sand smooth, and cover with matching touch-up marker or temporary adhesive-backed paint patch as temporary solutions.
Estimate Time and Materials for One‑Chip Fixes
For a single chipped spot you can usually finish the job in 20–45 minutes and with just a few basic supplies: fine-grit sandpaper, a small amount of wood filler or spackle, a putty knife, touch-up paint or marker that matches the door, and a tack cloth — plus optional clear sealer for durability.
- Sand
- Fill
- Paint
- Seal
Include a brief cost breakdown and clear material selection to plan time and budget.
Cost‑Saving Tips for Small Door Repairs
You can save money by sticking to basic tools like sandpaper, a putty knife, and a small brush instead of buying specialty gear.
Take a sample of the paint or a chip to the store so you can match the color exactly and avoid costly rework.
With the right match and simple tools, one small repair can look seamless without breaking the bank.
Use Basic Tools
One or two basic tools will get you most of the way toward fixing chipped paint on a wooden door; with a small investment in a putty knife, sanding block, and quality brush you’ll save time and money compared with hiring a pro.
Use basic toolkits and proven repair techniques, then follow steps:
- Clean
- Sand
- Fill
- Paint
Match Paint Exactly
While small chips might seem insignificant, matching the existing paint exactly saves time and keeps your repair nearly invisible.
Bring a paint swatch to the hardware store or use a small sample for color matching under natural light. Test on a hidden spot, adjust with tints if needed, and blend edges with thin coats. This prevents repainting the whole door.
Common Mistakes That Make Touch‑Ups Obvious
Because touch-ups are meant to blend in, small mistakes stand out quickly and ruin the repair’s purpose. You’ll avoid obvious fixes by using proper touch up techniques and focusing on paint blending.
Watch for these errors:
- Overloading brush – drips and ridges.
- Uneven edges – visible borders.
- Wrong sheen – mismatched gloss.
- Rushed drying – texture differences.
Troubleshooting: Why Touch‑Ups Change Color Later
If your touch‑up looks fine at first but shifts color days or weeks later, don’t panic — several common factors can cause that change and you can usually fix them.
Uneven sheen, incompatible paint layers, and UV exposure cause color fading.
Test small areas, match sheens, allow full curing, and use proper touch up techniques.
Replace poorly bonded paint if color still shifts.
Maintain Your Door Finish to Avoid Repeat Chips
To prevent chips from coming back, keep your door’s finish clean, dry, and well-protected so small dings don’t become bigger problems.
Keep your door’s finish clean, dry, and protected so small dings don’t turn into bigger problems.
Use these door maintenance tips and simple paint protection steps:
- Wipe with mild detergent, then dry.
- Apply paste wax or clear sealer.
- Check hinges and hardware for rubbing.
- Touch up nicks promptly with matching paint.
When It’s Smarter to Hire a Pro
When damage goes beyond a few surface chips—deep gouges, rot, large areas of failing paint, or doors that need precise color-matching and finishing—you’ll save time and get better results by hiring a pro.
You should seek a professional assessment to determine scope, timelines, and techniques.
Compare bids, ask about guarantees, and run a cost evaluation so you know value versus DIY effort.
Step‑by‑Step Fast Repair Workflow You Can Follow Now
Now that you’ve decided a pro isn’t necessary, here’s a fast, reliable repair workflow you can follow to fix chips and small damaged areas yourself.
Start by cleaning, sanding, and priming the chipped paint. Then follow these quick steps:
- Clean and sand
- Apply wood filler
- Prime the patch
- Paint and feather edges
These quick solutions restore appearance fast.
Frequently Asked Questions
Can I Fix a Painted Door Chip in Cold or Humid Weather?
You can, but temperature effects and paint adhesion suffer in cold or humid weather, so you’ll get weaker bonding. Wait for milder, drier conditions or use low-temperature, quick-dry primers and paints to improve adhesion and curing.
Will Touch‑Ups Affect My Door’s Warranty or Condo Rules?
You might void warranty implications if touch‑ups alter factory finishes; check your warranty and condo regulations first. If rules allow DIY repairs and finish matches, proceed carefully; otherwise get written approval or use approved contractors to avoid violations.
How Long Before I Can Hang Towels or Use the Door After Repair?
You can usually hang towels or resume door usage after about 24–48 hours; drying time depends on paint type and humidity, so wait 24 for touch‑dry and 48 for full cure before heavy use to avoid damage.
Can I Match Paint From an Old, Faded Can Already Opened?
Like finding an old photo, you can match paint from a faded can but you’ll need paint color matching and old paint evaluation; I once brought a swatch to a store, and they custom-blended a near-perfect match.
Are There Safe, Non‑Toxic Products for Homes With Kids or Pets?
Yes — you can choose eco friendly options like low‑VOC or water‑based paints and child safe materials such as plant‑based primers, non‑toxic sealers, and natural brushes; they reduce fumes and keep kids and pets safer indoors.
Conclusion
You’ve now got the quick fix steps to make that chipped spot disappear, and you can tackle it yourself without fuss. In minutes you’ll sand, prime, and blend paint so the repair sits smooth and seamless like a small patch of new snow on an old path. Keep the right supplies handy, follow the checklist, and do minor upkeep to prevent repeats—call a pro only for extensive damage or time you don’t have.