How to Fix Cracked Paint on Walls Step by Step
You can fix cracked paint in an afternoon: scrape loose flakes, sand the area smooth, widen hairline cracks slightly, then fill with spackle or joint compound in thin layers. Sand cured filler flush, wipe dust, prime the patch with a bonding or stain-blocking primer, and paint with matched color and finish, feathering edges for texture. Control moisture sources and use quality paint to prevent recurrence—keep going for full step-by-step guidance and pro tips.
Quick Fix Overview: Repair Cracked Paint in One Afternoon
You can fix most small areas of cracked paint in a single afternoon with just a few tools: sandpaper, patching compound, primer, and matching paint.
Start by sanding loose flakes, apply compound, sand smooth, prime, then paint. These quick fixes save time and look professional when you follow simple steps.
Plan materials and schedule afternoon repairs to finish neatly and efficiently.
Diagnose: Cosmetic Crack or Structural Problem?
Before grabbing sandpaper and paint, figure out whether the crack is just cosmetic or signals a structural issue.
You’ll perform a quick cosmetic assessment: check surface depth, width, paint flaking, and nearby moisture.
Then do a basic structural evaluation: look for wall shifts, large gaps, recurring cracks, or doors that stick.
Then check for structural warning signs: shifted walls, wide gaps, repeating cracks, or doors that stick.
If structural signs appear, call a professional for further inspection.
Top 6 Causes of Interior Paint Cracking and How to Spot Them
Before you start repairs, you’ll want to spot the common causes so you don’t repeat them.
Check for poor surface prep like peeling or dusty walls, signs of moisture or high humidity such as staining or bubbling, and the telltale cracking from low‑quality paint that flakes easily.
Identifying these issues first will guide the right fix.
Improper Surface Preparation
When paint fails to bond because dust, grease, or loose plaster was left behind, cracking often follows quickly. You’ll spot this issue where paint peels in flakes or forms small, isolated cracks that reveal a powdery or powder-coated substrate beneath.
You should focus on thorough surface cleaning and proper priming to restore paint adhesion. Sanding loose material and using compatible primers before repainting is essential.
Moisture And Humidity
Loose or contaminated surfaces aren’t the only causes of cracking — moisture and high humidity can make paint expand, blister, and split as it repeatedly swells and dries.
You should check for leaks, poor ventilation, or damp walls and monitor humidity levels with a hygrometer.
Improve moisture control by fixing sources, using dehumidifiers, and increasing airflow before repainting to prevent recurring damage.
Low-Quality Paint
If paint wasn’t made to last, you’ll see it fail fast — chalking, cracking, and peeling can all point to low-quality paint or cheap off-brand formulas.
You’ll spot low quality ingredients by uneven sheen, poor coverage, and rapid wear.
Replace with reputable brands that advertise tested paint durability, follow proper prep, and apply recommended coats to prevent recurring failure and save time.
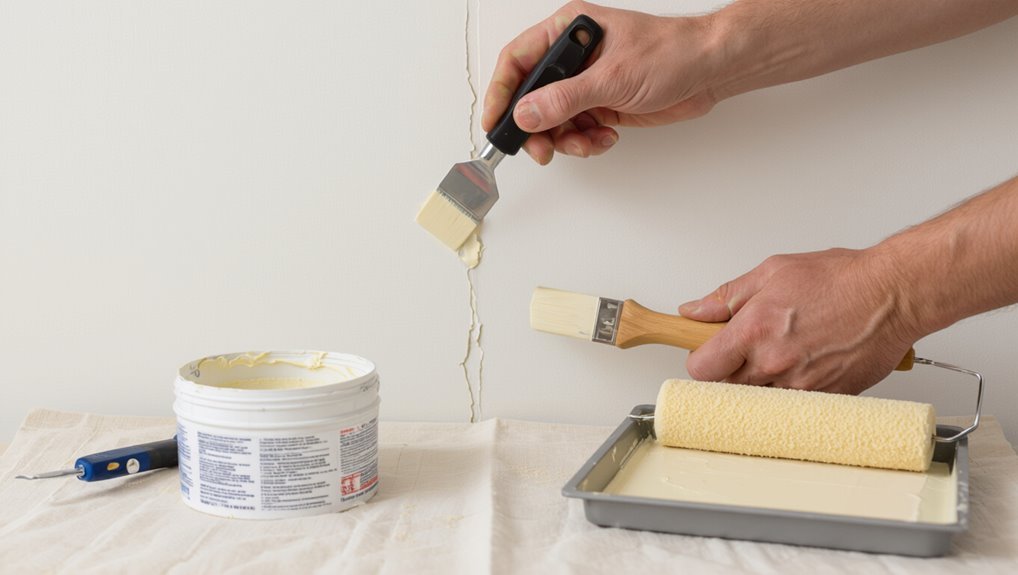
Tools and Materials You’ll Need
You’ll need a few basic repair tools—scrapers, sandpaper, a putty knife, and a sanding block—to remove loose paint and prep the surface.
For materials, grab spackle or filler, primer, matching interior paint, and a small selection of brushes and rollers.
With the right tools and paints on hand, the repair goes faster and looks professional.
Essential Repair Tools
Before you begin, gather the right tools so the repair goes quickly and looks professional:
- Putty knife and flexible scraper for removing loose paint and applying filler.
- Sandpaper (medium/fine) for surface preparation and smoothing repaired areas.
- Cleaning supplies (detergent, sponge) to remove dust and grease.
- Caulking gun and patching compound to fill cracks and reinforce repair techniques.
Required Paint Materials
Gather a few specific paint materials to make the repair durable and seamless: select appropriate paint types and paint brands for wall textures, plus primers.
Include paint tools—brushes, rollers, scrapers—and supplies for surface preparation and repair techniques like filler and sandpaper.
Consider paint finishes, color matching, drying times, and estimate repair costs before starting to guarantee a smooth, lasting result.
Inspect Damage and Map Crack Patterns
Start by walking the room and closely examining every crack; you want to note length, width, direction, and whether the paint is flaking, the substrate is exposed, or the crack follows a joint.
- Mark cracks for crack assessment.
- Photograph patterns for damage evaluation.
- Note movement or structural sources.
- Prioritize repairs by size and location, so you’ll plan materials and technique.
When to Remove Loose or Peeling Paint First
If paint is lifting, flaking, or easily scraped away, remove the loose material before you patch or repaint so the new finish bonds to sound substrate.
You should strip away all loose paint and any surrounding cracked edges until only firmly adhered coating remains. That prevents future lifting, guarantees proper adhesion, and gives you a stable surface for priming and repainting without trapping peeling paint beneath.
Safely Remove Flaking Paint Without Harming Drywall
When paint is flaking from drywall, work gently to remove loose material so you don’t gouge the paper surface beneath.
Use careful paint removal and prioritize drywall safety as you proceed.
Prioritize drywall safety by removing paint carefully, protecting the paper surface as you work.
- Wear a dust mask and goggles.
- Lightly scrape with a flexible putty knife.
- Sand feathered edges with fine-grit paper.
- Vacuum dust and wipe with a damp cloth before priming.
Widen and Clean Hairline Cracks for Lasting Repairs
Open up hairline cracks slightly with a utility knife or a 1/8″ V-gouge so filler can bond, then blow or brush out dust and loose particles before wiping the groove with a damp cloth.
Inspect crack types to detect substrate issues, remove any loose paint, and guarantee edges are solid.
You’ll prepare a clean, stable surface that lets repair techniques adhere and last.
Apply Joint Compound to Small Cracks
Grab a putty knife and a small tub of joint compound, then press a thin layer into the cleaned crack so the compound fully fills the groove and bonds to the sides.
You’ll follow simple joint compound application and basic crack repair techniques:
- Smooth excess with the knife.
- Let dry fully.
- Sand lightly.
- Recoat if needed before priming and painting.
Patch Large or Deep Cracks With Plaster
For large or deep cracks, use a plaster repair rather than joint compound so the patch has the strength and thickness it needs to hold up over time.
First perform a crack assessment to remove loose material and undercut edges.
Begin by assessing the crack: remove loose material and undercut edges for a secure repair.
Mix plaster per instructions and apply in thin layers, letting each cure.
Sand smooth, prime, and repaint for a durable, flush finish that resists settling.
When to Use Fiberglass or Paper Mesh Tape
When deciding between fiberglass and paper mesh tape, think about the crack size and the substrate you’re repairing.
Use fiberglass for hairline or moving cracks and on surfaces where moisture or flexibility are concerns.
Choose paper tape for wider seams or when you need a smoother finish under thin plaster.
Also match tape thickness to the wall profile—thicker tape for deep joints, thinner tape for flat, even surfaces.
When To Use Fiberglass
Although both fiberglass and paper mesh tape do the same job—reinforcing joints and preventing cracks—you’ll choose fiberglass when you need greater strength, moisture resistance, and durability, such as in high-humidity areas, over metal studs, or where movement is likely.
- Use Fiberglass tape for bathrooms.
- Use it over metal studs.
- Use it where movement occurs.
- Pair with strong repair techniques and setting compound.
When To Use Paper
If you’re repairing interior drywall in low-moisture areas and want an almost invisible finish, choose paper mesh tape—it bonds tightly, creates a smoother seam, and sands cleaner than fiberglass, making it ideal for living rooms, bedrooms, and other stable environments.
Use the right paper types for seams and corner joints, apply thin coats of joint compound, and follow precise repair techniques to minimize shrinkage and visible ridges.
Thickness And Surface Considerations
Paper mesh tape works great on smooth, stable seams, but thicker joints, textured surfaces, or areas prone to movement call for a different approach—fiberglass mesh.
You’ll decide based on paint thickness and surface texture. Choose fiberglass when flexibility and strength matter.
- Use paper for thin paint thickness.
- Choose fiberglass for deep joints.
- Prefer fiberglass on rough texture.
- Match tape to movement.
Choose the Right Filler and Primer for Your Wall
Pick a filler and primer that match your wall’s material and the size of the damage so your repairs bond well and stay hidden.
Choose filler types like spackle for small chips or epoxy for deep gouges, and primer options (stain-blocking or bonding) to guarantee adhesion and color match.
Feel confident restoring walls.
Sand Cracked-Paint Repairs for a Smooth Finish
After the filler has fully cured, sand the repair flush with the surrounding wall so paint won’t reveal bumps or ridges.
Use gentle sanding techniques to shape and feather edges for smooth finishes. Follow these steps:
- Start with medium-grit to remove excess.
- Switch to fine-grit to refine.
- Feather outward to blend.
- Wipe dust before priming.
Clean and Prime Repaired Areas : When to Paint
Once the patched area’s surface is smooth and dust-free, clean it with a damp cloth or mild detergent solution and let it dry completely before priming.
You’ll use targeted cleaning techniques to remove residue, then choose priming methods suited to the patch material.
Wait recommended dry times on the primer label, ensuring adhesion and preventing bleed-through.
Then proceed to paint only when fully cured.
Match Paint Sheen and Color for Seamless Blending
Matching both sheen and color is essential to make your repair disappear, so check the original finish first and buy paint that matches that level of gloss—flat, eggshell, satin, semi-gloss, or gloss—because sheen affects how light reflects and will highlight any mismatch even if the color is perfect.
- Inspect original sheen selection.
- Use a color matching tool.
- Test small patch under real light.
- Match batch numbers and sheen.
Best Painting Techniques to Hide Repaired Sections
Start by feathering the new paint into the surrounding wall so the edges blend instead of standing out; then use correct blending techniques and controlled paint application to match texture and sheen. Roll light, brush sparingly, and layer thin coats until uniform.
| Tool | Action | Result |
|---|---|---|
| Roller | Light passes | Even texture |
| Brush | Thin strokes | Edge control |
| Sponge | Dab | Soft gradient |
| Spray | Mist coats | Invisible repair |
Feather and Blend Paint Edges for an Invisible Finish
To make your repair disappear, start with basic feathering strokes that thin the paint toward the surrounding wall.
Practice blending those softened edges with light, overlapping passes so the patched area matches texture and sheen.
Pick the right tool—angled brush, soft-bristle brush, or a small roller—based on the paint type and how wide you need to feather.
Feathering Technique Basics
Feathering lets you blend new paint into old so the repair disappears; you’ll work from the center of the patched area outward, thinning the paint at the edges with gentle brush or roller strokes until it fades into the surrounding wall.
- Use thin paint for the feathering technique.
- Lightly drag strokes outward.
- Overlap slightly for smooth blending edges.
- Check under different light and adjust.
Blending Paint Edges
Now that you’ve thinned and dragged the paint outward, focus on feathering and blending the edges so the repair vanishes against the surrounding wall. Use gentle strokes, work wet into wet, and check color matching under natural light for seamless tone. Prioritize edge smoothing for invisible changes; step back, refine, and let dry.
| Hope | Calm | Pride |
|---|---|---|
| Soft | Smooth | Done |
| Blend | Match | Breathe |
Feathering Tool Selection
Pick the right tool for the job—you’ll get a smoother, less noticeable repair when your implement matches the paint type, surface texture, and scale of the damaged area.
Choose based on feathering techniques and tool variations:
- Small brush for tight spots.
- Foam brush for smooth blends.
- Roller for large, textured walls.
- Sanding pad to soften edges before repainting.
When a Full Repaint Is Better Than Spot Repair
When cracks and peeling cover large sections or the wall shows multiple layers of mismatched touch-ups, a full repaint is usually the smarter choice; it’ll save you time and give a consistent, long-lasting finish instead of patchy results. You’ll choose a full repaint when aesthetic considerations, texture inconsistencies, or extensive damage make spot repair impractical.
| Factor | Decision |
|---|---|
| Coverage | Repaint |
| Match | Repaint |
| Time | Repaint |
Prevent Paint Cracking From Moisture
If you’re choosing between a full repaint and spot repairs, also think about what’s causing the damage — moisture is a common culprit that will keep cracking paint coming back unless you address it.
Use these steps:
- Install moisture barriers and waterproof coatings.
- Improve ventilation systems and humidity control.
- Try paint additives for flexibility.
- Consider dehumidifier use to stabilize air.
Fix Underlying Issues: Humidity, Leaks, and Movement
Before you repair cracked paint, you’ll want to find the moisture sources that may be causing it, like high humidity, roof or window leaks, or condensation.
Fix any plumbing leaks promptly and dry the affected areas to prevent recurring damage.
If the cracks are from structural movement, have settling or framing issues assessed and repaired so new paint will hold.
Identify Moisture Sources
A quick walk-through will help you spot the moisture sources that caused the paint to crack: check for high indoor humidity, hidden plumbing leaks, roof or flashing failures, and structural movement like settling or warped framing.
- Use moisture detection tools to scan walls and ceilings.
- Inspect attics, eaves, and rooflines for water entry.
- Monitor humidity control and ventilation patterns.
- Note cracks or bulges tied to movement or damp.
Repair Plumbing Leaks
Now that you’ve identified where moisture’s coming from, address plumbing leaks promptly to stop ongoing water damage and recurring paint failure. Use leak detection and plumbing tools for faucet repair, pipe replacement, and fixture upgrades. Control water pressure, improve water quality, add pipe insulation, schedule plumbing maintenance and drain cleaning to prevent recurrence.
| Leak | Tool | Fix |
|---|---|---|
| pinhole | wrench | patch |
| drip | camera | replace |
| clog | snake | clear |
| surge | gauge | adjust |
| odor | filter | test |
Address Structural Movement
Because walls shift and moisture levels change over time, you should tackle structural movement as the root cause of recurring cracks rather than just patching paint.
Address structural integrity and foundation issues promptly.
- Inspect for uneven floors or gaps.
- Check for leaks, damp, and humidity sources.
- Consult a structural pro if movement persists.
- Stabilize, repair, then repaint.
Choose Paint Formulations That Resist Cracking (DIY Picks)
When you’re picking paint to prevent future cracks, focus on flexible, high-quality formulations designed for interior walls; they’ll move with temperature and humidity changes instead of splitting.
Choose acrylic latex blends for elasticity and paint durability.
Choose acrylic-latex blends for flexible, long-lasting finish—elasticity that resists cracking and maintains durable wall protection.
Look for eco-friendly options with low VOCs that still bond well.
Test samples on a repaired patch and follow manufacturer curing times for best long-term results.
Quick Cosmetic Touch-Ups That Hold Up
Once you’ve chosen a flexible, high-quality paint and finished repairs, you can focus on quick cosmetic touch-ups that actually last.
You’ll match paint, blend texture, and seal edges. Follow these steps:
- Test color matching on scrap.
- Feather paint for subtle changes.
- Replicate texture blending with stipple or brush.
- Apply thin topcoat to protect and cure.
Common Mistakes That Make Cracks Reappear
If you skip proper substrate prep or rush curing, cracks will often come back.
Don’t ignore moisture, loose old paint, or improper filler—those choices undo crack prevention.
Using low-quality paint, skipping primer, or painting in adverse conditions shortens paint longevity.
Follow manufacturer drying times, clean and bond surfaces, and use compatible products so repairs stay put and you avoid repeated touch-ups.
Repair Textured Finishes After Patching
After you’ve filled and sanded the crack, match the original texture before repainting so the repair blends seamlessly with the surrounding wall.
Use these steps for textured surfaces:
- Assess texture and plan patching methods.
- Choose repair techniques (spray, stomp, or trowel).
- Practice texture matching on scrap board.
- Confirm thorough surface preparation, then finish with careful paint blending for an invisible repair.
Signs Your Repair Needs a Pro
Matching texture and blending paint will handle most small repairs, but sometimes a job calls for professional help.
If cracks run deep, cover structural issues, or keep reappearing, get a professional assessment.
You’ll also seek pros when mold, extensive moisture damage, or safety hazards exist.
If repair urgency is high because damage worsens, don’t delay—hire expertise to prevent bigger problems.
Estimate Time and Cost for a DIY Repair Job
Start by measuring the damaged area and listing needed materials so you can create a realistic timeline and budget.
Measure the damaged area first and list needed materials to build a realistic timeline and budget.
Use cost estimation and time management to plan efficiently.
- Assess size and severity.
- Price materials and tools.
- Break tasks into hours (prep, repair, dry, paint).
- Add contingency for delays or extra supplies.
Maintenance Tips to Keep Repaired Walls Looking Fresh
Keep a simple cleaning routine—dust and gently wash walls every few months—to prevent grime from highlighting old repairs.
Control humidity and guarantee good ventilation to stop paint from peeling or blistering again.
Keep a small touch-up paint kit handy so you can quickly fix nicks and keep the finish uniform.
Regular Cleaning Routine
A simple weekly wipe-down will help your repaired walls stay fresh and prevent dirt from highlighting any tiny cracks or touch-ups.
You should set a regular maintenance plan that matches room use and cleaning frequency.
Follow these steps:
- Dust gently with a microfiber cloth.
- Spot-clean stains with mild detergent.
- Rinse and dry completely.
- Inspect for new damage and touch up promptly.
Humidity And Ventilation
When humidity stays high or ventilation’s poor, repaired paint can bubble, peel, or develop mold, so you should control moisture and air flow to protect fresh work. Use dehumidifiers, exhaust fans, and open windows for humidity control and ventilation solutions.
| Tool | Purpose | Frequency |
|---|---|---|
| Dehumidifier | Reduce moisture | Continuous |
| Exhaust fan | Remove damp air | As needed |
| Monitor | Track humidity | Daily |
Touch-Up Paint Kit
One simple touch-up paint kit can save you time and keep repaired walls looking seamless between full repaints.
You’ll want compact tools and clear instructions so you can use precise touch up techniques and proper paint selection.
Follow this mini checklist:
- Sample pots matched to original color
- Small brush and foam applicator
- Sanding pad and cleaner
- Label and date mixes for future use
Frequently Asked Questions
Can I Use Household Glue to Fill Small Paint Cracks?
You can, but you shouldn’t rely on household glue for small paint cracks; it might bond temporarily yet won’t promote proper paint adhesion. Use a suitable filler or spackle, then sand, prime, and repaint for lasting results.
Will Caulk Work Instead of Joint Compound for Drywall Hairline Cracks?
You can use caulk for drywall hairline cracks, but choose the right caulk types (paintable acrylic latex or silicone blend) and apply properly; it’ll hide cracks and aid crack prevention, though joint compound gives a smoother finish.
Can Temperature Changes Cause Immediate New Cracking After Repair?
Yes — temperature swings can cause immediate new cracking after repair. You’ll prevent that by controlling moisture and temperature during curing, using proper materials, and priming correctly to improve crack prevention and boost long-term paint durability.
Is It Safe to Repair Cracks in Older Homes With Lead Paint?
You can repair cracks in older homes with lead paint, but you shouldn’t do it casually; use lead paint safety precautions, contain dust, and consider professional abatement or specialized crack repair techniques to avoid exposure and contamination.
How Do I Repair Cracks Around Electrical Outlet Boxes Safely?
Worried about shocks? You’ll turn power off, remove covers, follow outlet safety and electrical precautions, clean gaps, apply non-conductive backer, patch with joint compound, sand, prime, and reinstall covers—testing power carefully afterward.
Conclusion
You’ve got the steps to fix cracked paint—now get started and enjoy the difference. With the right tools, you can diagnose, patch, sand, texture, prime, and repaint in an afternoon or over a weekend. Don’t skip inspection so you’ll know if it’s cosmetic or needs pros. Want your walls to stay looking great longer? Keep humidity and maintenance in check, touch up small cracks early, and you’ll avoid bigger headaches down the road.