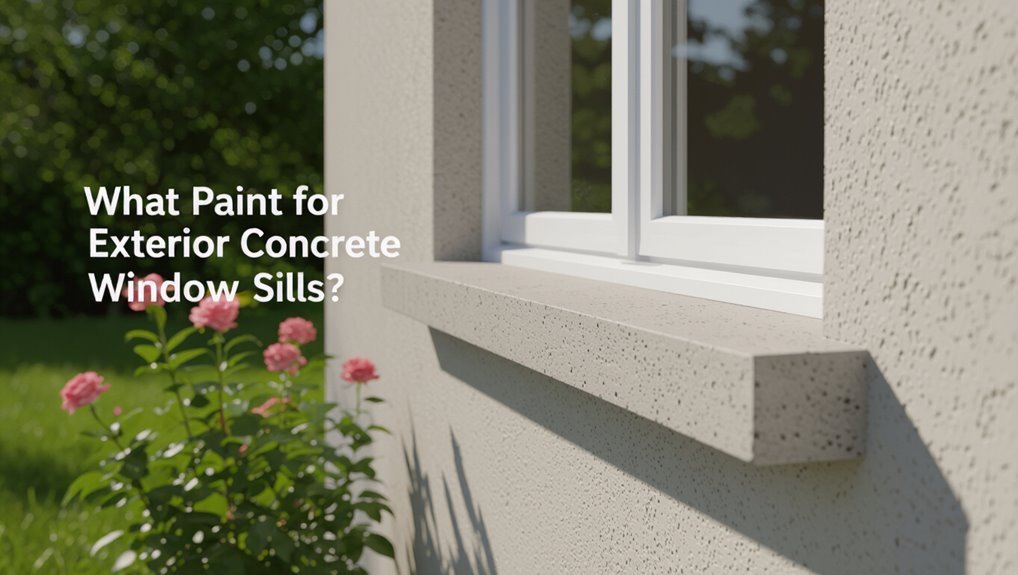
What Paint for Exterior Concrete Window Sills?
Use a high-quality 100% acrylic latex or masonry paint for exterior concrete window sills, and consider epoxy or elastomeric systems where extra durability or crack-bridging is needed. You’ll want a concrete-formulated primer, low-VOC and UV-stable pigments, and a breathable finish that resists moisture and freeze-thaw cycles. Prep, clean, and repair cracks first, then apply multiple thin coats for best adhesion and longevity. Keep going to get tips on prep, products, and troubleshooting.
Quick Answer: Best Paint Types for Exterior Concrete Window Sills
For exterior concrete window sills, you’ll want a paint that resists moisture, UV, and temperature swings—usually a high-quality acrylic latex or a 100% acrylic masonry paint.
Epoxy or elastomeric coatings work well if you need extra durability or crack-bridging. You’ll choose acrylic for ease and breathability, epoxy for heavy wear, and elastomeric to bridge hairline cracks.
Consider sustainability considerations like low-VOC formulas and longevity to reduce repainting.
Think about color psychology: lighter tones reflect heat and feel airy, while darker shades hide stains and add contrast.
Pick a finish with mild texture for grip and weathering resilience.
How to Use This Guide
Use this guide to quickly find the best paint types and the right prep steps for your exterior concrete window sills.
You’ll find clear sections to help you navigate from product choices to application tips.
Follow the practical tips and checklists to get durable, weatherproof results.
How To Use
Start by scanning the quick checklist below to match your sill type, climate, and desired finish—this will help you pick the right paint and prep steps for your job.
Use the guide step-by-step: identify surface condition, choose compatible primers and paints, and follow recommended paint techniques for durability.
Note drying times and temperature windows so coats dry properly. Lean on the color selection tips to harmonize sills with trim and avoid high-gloss traps that show flaws.
Keep tools, safety gear, and cleanup items ready. Refer back to checklist before you start each stage to avoid rework.
Navigating This Guide
Anyone can follow this guide step-by-step to match your sill type, climate, and finish goals—we’ll walk you through evaluating surface condition, choosing compatible primers and paints, and applying techniques for long-lasting results. You’ll find clear sections that help you identify concrete porosity, select paint types suited to exposure, and pick application techniques that reduce peeling. Use the quick-reference table below to jump to relevant sections.
| Topic | What to Look For |
|---|---|
| Surface | Cracks, efflorescence, porosity |
| Paint types | Breathable vs. impermeable choices |
| Primer | Bonding, moisture tolerance |
| Technique | Brush, roller, or sprayer guidance |
Getting Practical Tips
1 clear plan will make following this guide easier: read the quick-reference table to identify your sill’s condition, then follow the matching sections for surface prep, primer choice, and paint technique so you can work efficiently and avoid common mistakes.
Use this section to map steps to your time and skill level. Start with recommended preparation techniques, note safety and weather windows, and gather tools and materials before you begin.
Follow the step-by-step sequences for cleaning, patching, priming, and topcoat application to maximize paint longevity.
Check troubleshooting tips if you hit adhesion or finish issues, then proceed confidently.
How to Choose Paint: Adhesion, Flexibility, UV, and Moisture Criteria
Because exterior sills face temperature swings, sun, and wetness, you’ll want a paint system that sticks strongly, stretches without cracking, resists UV breakdown, and blocks moisture.
Focus on adhesion importance: choose primers and paints formulated for concrete to bond chemically and mechanically.
Look for flexible acrylic or elastomeric topcoats so thermal movement won’t cause flaking.
Pick UV-stable pigments and binders to slow chalking and color loss.
Ascertain the finish creates effective moisture barriers yet allows vapor to escape from the substrate.
Test small areas, follow manufacturer surface prep and cure times, and prefer products rated for exterior masonry use.
Weather Threats: Freeze-Thaw, UV, Salt, and Ponding Water
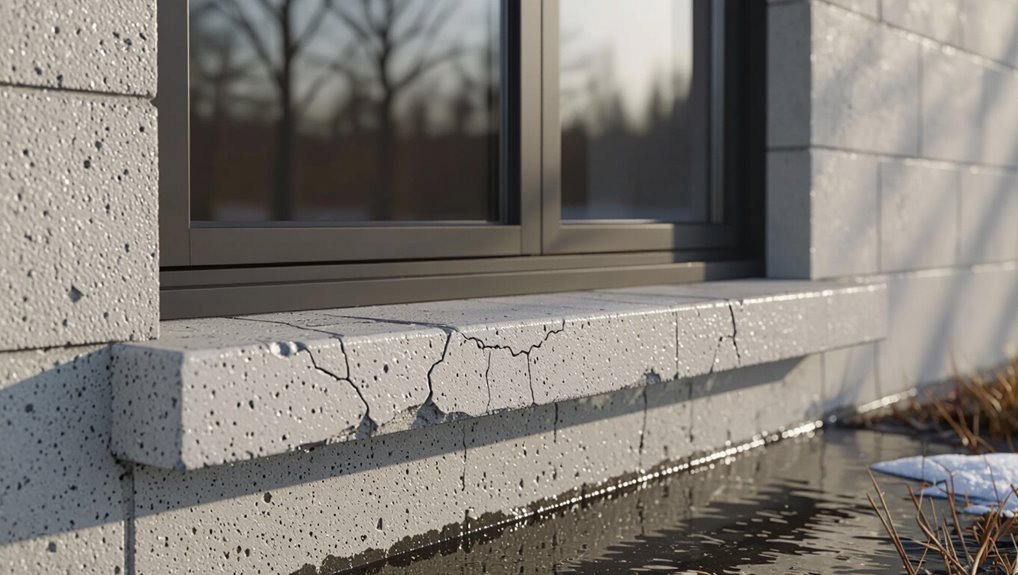
When concrete sills endure repeated freeze-thaw cycles, intense UV, road salt, and standing water, they face different but often compounding forms of damage that shorten coatings and substrate life.
You need coatings and prep that resist moisture ingress, thermal movement, chemical attack, and prolonged UV exposure.
Consider these specific threats and responses:
- Freeze-thaw cycles: water freezes in pores, expands, and causes flaking—use flexible, breathable coatings.
- UV exposure: degrades binders and color—choose UV-stable topcoats.
- Salt: accelerates deterioration—use impermeable, chemical-resistant finishes.
- Ponding water: promotes blistering—ensure proper slope and waterproofing.
Assess Damage: Repair vs. Repaint
If your concrete sill shows only surface chalking, hairline cracks, or peeling limited to the topcoat, you can often repaint after proper cleaning and priming.
But if you see spalling, deep cracks, exposed aggregate, or active water stains, you’ll need repairs first to restore structural integrity before any coating goes on.
You should perform a quick damage assessment: tap for hollow sound, probe cracks, look for rusting reinforcement, and trace moisture sources.
Choose repair strategies based on findings — epoxy injection for structural cracks, patch mortar for spalls, and corrosion treatment for rebar — then allow full cure before painting.
Waterproofing First: Why Sealers Matter for Exterior Concrete Sills
Before you paint, seal the sill: a breathable masonry sealer lets trapped moisture escape while blocking new water from entering.
You’ll want a water-repellent coating that sheds rain without trapping vapor, or you’ll shorten both paint and concrete life.
Apply and cure the sealer fully before moving on to primer and paint.
Choose Breathable Masonry Sealers
Because concrete needs to shed water without trapping moisture inside, you should pick a breathable masonry sealer for exterior window sills. These products repel liquid water while allowing vapor to escape, preventing freeze-thaw damage and efflorescence.
You’ll improve moisture management and extend sill life by choosing breathable sealers that match substrate porosity and UV exposure. Consider these factors:
- Penetrating vs surface sealers — choose penetrators for vapor permeability.
- Coverage rate — calculate based on porosity.
- Drying time — faster cures reduce dust pickup.
- Compatibility — guarantee paint or topcoat adhesion after sealing.
Apply per manufacturer instructions for best results.
Prioritize Water-Repellent Coatings
When you’re prepping exterior concrete sills, sealers that repel liquid water should come first—you’ll stop most damage mechanisms at the source by keeping water out.
You should apply a penetrating silane/siloxane or acrylic clear sealer designed for masonry to block capillary absorption and reduce freeze-thaw stress. That waterproofing improves adhesion and lets you use water resistant paints over a dry substrate, extending service life.
Pick products labeled for exterior concrete, follow drying times, and test compatibility with your topcoat.
Prioritizing sealer selection gives you long lasting finishes, lowers maintenance, and prevents costly deterioration.
Best Primers for Exterior Concrete Window Sills
If you want your exterior concrete window sills to hold paint and resist moisture, start with the right primer; it’s the foundation for adhesion, durability, and long-term protection.
Choose primers that boost epoxy adhesion where heavy bonding matters and products known for primer longevity to minimize rework. Consider these options:
- High-build acrylic masonry primer — breathable, fast-drying.
- Epoxy-based concrete primer — excellent adhesion and moisture resistance.
- Silane/siloxane water-repellent primer — combines penetration with protection.
- Bonding primer with polymer modifiers — works on old, chalky concrete.
Pick one matched to your topcoat and local climate for best results.
Proper Priming Technique for Maximum Adhesion
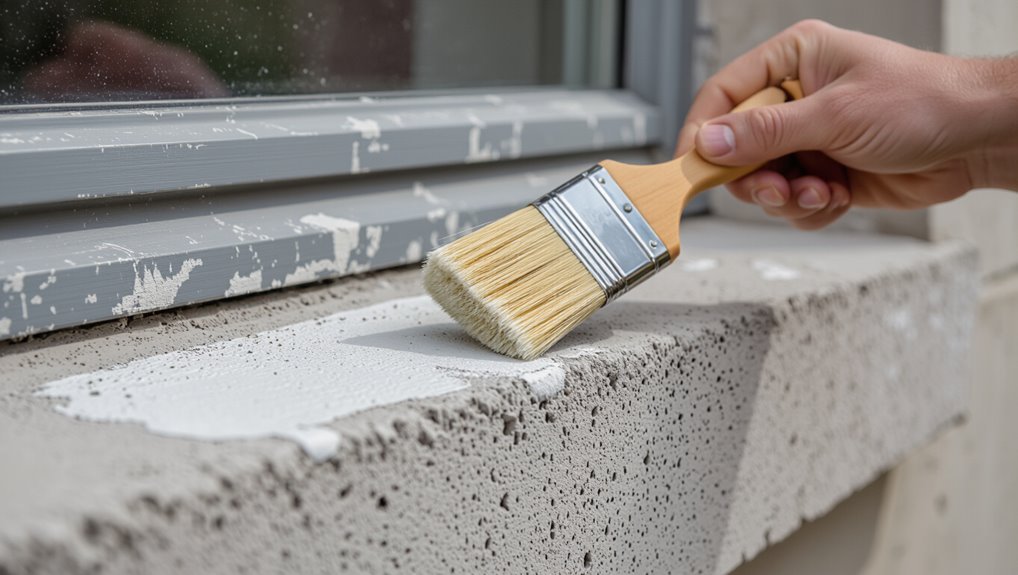
Before you prime, clean and etch the concrete to remove dirt, efflorescence, and any loose particles so the primer can grab the surface.
Choose a concrete-specific primer and apply it evenly with a brush or roller, following the manufacturer’s recommended wet film thickness and recoat times.
Doing both steps correctly gives your paint the best chance to bond and last.
Surface Cleaning And Etching
Start by removing loose dirt, efflorescence, and peeling paint with a stiff brush or pressure washer, then etch the concrete to open the pores so primer can bond properly.
You’ll use surface preparation techniques that combine mechanical cleaning and chemical treatment. Choose appropriate cleaning solutions for oil, mold, or salt stains, rinse thoroughly, and let the surface dry.
Follow these steps:
- Sweep and pressure-wash to remove loose debris.
- Apply a masonry cleaner or diluted muriatic solution for stains.
- Etch with a concrete etcher or phosphoric acid following instructions.
- Rinse and cure fully before priming.
Primer Type And Application
When you choose a primer for exterior concrete window sills, pick a masonry or concrete-specific primer—preferably a high-adhesion acrylic or epoxy-based product—because these formulas bond to porous surfaces, resist moisture, and block efflorescence.
Apply them to clean, etched, and fully dry concrete following the manufacturer’s wet-film thickness and recoat windows so the primer forms a continuous, well-adhered base for your topcoat.
You’ll notice primer benefits like improved adhesion, reduced peeling, and moisture blocking.
Use application techniques such as rolling with a short-nap roller, back-brushing into pores, and avoiding puddles.
Respect cure times before topcoating for lasting performance.
Surface Prep for Exterior Concrete Window Sills
Because exterior concrete sees weather and debris, you need to prep the sill thoroughly so paint will stick and last. Focus on surface preparation and concrete cleaning before priming.
Sweep loose dirt, degrease stains, and remove efflorescence with a mild acid rinse. Let the sill dry fully.
- Sweep and blow away loose debris.
- Wash with a concrete cleaner or trisodium phosphate solution.
- Rinse thoroughly and let dry 24–48 hours.
- Sand glossy or laitance areas to roughen the surface.
Proper prep prevents peeling and guarantees primer bonds to clean, stable concrete.
How to Repair Hairline Cracks and Spalled Edges
Repair hairline cracks and spalled edges promptly to keep water out and paint adhered.
First, clean the area with a stiff brush and a hose; remove loose concrete and dust.
For hairline crack repair, widen cracks slightly with a V-tool, blow out debris, then inject or trowel in a polymer-modified cementitious filler or masonry caulk.
For spalled edge solutions, chip away unstable material to sound concrete, dampen, and apply a bonding agent before patching with a repair mortar.
Smooth and cure per product instructions.
Sand lightly when cured, then prime before painting to guarantee long-term adhesion and protection.
Flashing, Slope, and Drainage to Protect Painted Sills
If you want painted window sills to last, control water at the source with proper flashing, a slight slope, and clear drainage so moisture can’t sit against the paint. You’ll reduce peeling and freeze-thaw damage by directing water away from the sill.
Inspect and maintain flashing, keep slope at about 5–10 degrees, and guarantee outlets aren’t blocked.
Inspect and maintain flashing, ensure a 5–10° forward slope, and keep drainage outlets clear to prevent moisture damage.
- Install metal or membrane flashing correctly.
- Verify a 5–10° forward slope from the window.
- Create unobstructed drainage paths and drip edges.
- Schedule regular sill maintenance to clear debris.
These drainage solutions preserve paint and concrete integrity.
Acrylic Latex Paint: Pros and Ideal Use Cases
When you want a durable, flexible finish that breathes with concrete, acrylic-latex paint is a top choice for exterior window sills. You’ll get acrylic latex advantages like UV resistance, mildew inhibition, quick drying, and easy cleanup.
It adheres well to properly prepared concrete and tolerates slight substrate movement without cracking. For ideal application, clean, etch, and prime where needed, apply in moderate temperatures, and use two thin coats for uniform coverage.
Choose a masonry or exterior latex formula with good solids and pigment. Acrylic-latex balances protection and breathability for most residential sill situations.
Elastomeric Coatings: When to Choose Them
Acrylic-latex covers most sill needs, but you’ll want elastomeric coatings if your concrete has hairline cracks, significant movement, or chronic moisture issues.
You’ll choose them for elastomeric benefits like flexible crack-bridging and long-term water resistance. Prepare surfaces by cleaning, repairing deep voids, and priming; follow specific application techniques to avoid trapped moisture.
Consider these triggers:
- Visible hairline or expanding cracks
- Sills that flex or settle seasonally
- Recurrent efflorescence or dampness
- Need for a thicker, protective membrane
You’ll find elastomeric layers tolerant of movement, but apply per manufacturer instructions for best longevity.
Epoxy & Polyurethane for Exterior Sills: Pros, Cons, Limits
Because epoxy and polyurethane systems form much tougher, more chemical- and abrasion-resistant films than standard paints, they’re worth considering for exterior concrete sills that face heavy wear, frequent water exposure, or contact with de-icers and cleaners.
Epoxy and polyurethane coatings create tougher, more chemical- and abrasion-resistant finishes ideal for high-wear exterior concrete sills.
You get epoxy benefits like exceptional adhesion, fast cure, and long-term resistance to salts and solvents, so surfaces stay sealed and easier to clean.
Polyurethane drawbacks include UV sensitivity (yellowing or chalking) and higher material cost; topcoats or UV-stable formulations often fix that.
Both need meticulous prep, correct mixing, and adequate drainage—otherwise moisture entrapment can cause delamination or blisters.
Masonry Paint vs. Standard Exterior Paint: Key Differences
When you’re choosing between masonry paint and standard exterior paint for concrete sills, think about breathability and how each handles moisture to prevent trapped water.
Also compare flexibility and crack resistance—masonry formulas bend and bridge hairline cracks better.
Finally, check adhesion and long-term durability so the coating actually sticks and holds up to weather.
Breathability And Moisture Management
Breathability matters because exterior concrete sills need to let moisture escape without letting more in, and masonry paints are formulated for that task while standard exterior paints usually aren’t.
You want breathable paints that prevent trapped water and avoid creating impermeable moisture barriers. Choose coatings that wick vapor out but shed liquid.
- Allows vapor transmission
- Prevents blisters and peeling
- Reduces freeze–thaw damage risk
- Works with lime or cement substrates
Inspect product labels for vapor permeance ratings and compatibility with concrete.
Properly applied breathable masonry paint controls moisture movement and extends sill life without sealing water inside.
Flexibility And Crack Resistance
Although exterior concrete sills expand, contract, and settle with temperature and moisture changes, you’ll want a paint that flexes rather than cracks. You’ll choose masonry paint because it’s formulated for movement, offering superior crack prevention and improving paint longevity. It bends with substrates, tolerates freeze/thaw cycles, and resists hairline splits that standard exterior paints often develop.
| Feature | Benefit |
|---|---|
| Elastic binder | Accommodates expansion |
| Microflex additives | Reduces stress cracking |
| UV-stable pigments | Maintains finish longer |
| Masonry formulation | Enhances crack prevention and paint longevity |
Surface Adhesion And Durability
Because concrete sills see rough weather and hold onto moisture, you’ll want a paint that actually bonds to porous masonry rather than sitting on the surface like standard exterior paints.
You’ll focus on adhesion and long-term durability: masonry paint soaks in, forming a mechanical bond; standard exterior paint usually relies on cohesion and can peel.
Prioritize proper surface preparation and assess paint compatibility with sealers or primers.
Consider these practical differences:
- Porosity: masonry paint penetrates; standard coats may flake.
- Flexibility: masonry accommodates movement better.
- Breathability: masonry allows moisture escape.
- Maintenance: masonry coatings last longer on concrete.
Choosing Paint by Climate: Cold, Wet, Hot, and Freeze-Thaw
When you pick paint for exterior concrete window sills, match the formulation to your climate: cold regions need flexible, frost-resistant coatings; wet climates demand highly water-shedding, mildew-resistant finishes; hot, sun-drenched areas require UV-stable, heat-tolerant paints; and locations with frequent freeze–thaw cycles call for products that bond well and resist cracking and spalling.
Assess climate considerations and environmental factors: choose elastomeric or acrylic-latex for freeze-prone zones, breathable silicate or mineral paints where moisture must escape, and high-quality acrylics with mildew additives for persistently damp sites.
Always check manufacturer specs for temperature and moisture performance limits.
UV Resistance: Pick Paints That Won’t Fade or Chalk
If your sills sit in strong sun, pick a UV-resistant paint so colors stay true and surfaces don’t chalk over time.
You’ll want coatings formulated for UV protection and proven color retention to avoid frequent repainting.
Consider these quick checks before buying:
- Look for exterior latex or acrylics labeled UV-resistant.
- Choose pigments rated for lightfastness and fade tests.
- Verify the product’s warranty covers outdoor sun exposure.
- Prefer coatings with stabilizers that resist chalking and breakdown.
Apply per manufacturer instructions, including primer and proper curing, so UV protection performs and color retention lasts.
Color and Finish Choices That Hide Dirt and Wear
Think practical: pick colors and finishes that mask grime and stand up to traffic so your sills look good longer. You’ll favor mid-tones and warm neutrals—they follow current color trends while aiding dirt concealment. Satin or low-sheen finishes hide scuffs better than high gloss and repel staining without shouting imperfections. Contrast trim slightly for definition, but avoid very light or very dark hues that show dust or fading. Consider textured paints if you want extra disguise and grip. Use the table below to compare quick choices and how they help maintenance.
| Finish | Benefit |
|---|---|
| Satin | Hides scuffs |
| Neutral mid-tone | Conceals dirt |
| Textured | Masks wear |
Application Methods: Brush, Roller, and Sprayer Tips
When you paint exterior concrete sills, the right brush technique keeps edges crisp and helps you work paint into small pores.
Use a roller for flat areas to get even coverage and a sprayer for fast, thin coats—just mask surrounding surfaces.
Follow tool-specific tips like keeping a wet edge with the roller and back-brushing sprayed coats for proper adhesion.
Brush Technique Tips
Although each tool has its strengths, choosing the right application method and refining your brush technique will determine how durable and professional your exterior concrete window sills look.
You’ll pick brush types for edges and flat surfaces; synthetic bristles suit water-based paints, natural ones suit oil.
Prep by cleaning, sanding, and priming. Load the brush properly—don’t overload—and cut in with steady, even strokes. Work wet edge to wet edge to avoid lap marks and choose paint finishes that resist moisture and UV. Finish with light cross-brushing for uniformity.
- Use angled sash brushes for corners.
- Maintain consistent pressure.
- Remove drips immediately.
- Clean brushes thoroughly.
Sprayer And Roller Guidance
Efficiency matters when you’ve got multiple concrete sills to coat, so choosing between a roller and a sprayer will shape your prep, timing, and finish.
If you use a sprayer, test sprayer settings on cardboard to get even atomization and overlap; keep nozzle distance consistent and mask nearby surfaces.
For rollers, pick a short-nap roller to press paint into pores, work in wet edges, and use roller techniques like “W” patterns to avoid lap marks.
Wear eye and respiratory protection for spraying, and back-roll after spraying if texture or coverage needs evening.
Clean tools promptly.
Coats and Dry Times for Durability
Because a proper layer system beats a single thick coat, plan for multiple thin coats to get lasting protection and a uniform finish.
You’ll use coating techniques that prioritize adhesion and even coverage; thin coats dry faster and resist runs.
Mind drying factors: temperature, humidity, and ventilation determine recoat windows. Wait the manufacturer’s recommended touch and full cure times before exposing sills to weather.
Follow this quick checklist:
- Clean and prime, then apply first thin coat.
- Wait specified dry time; inspect for coverage.
- Apply second thin coat; feather edges.
- Allow full cure before heavy exposure.
Preventing Peeling: Common Causes and Fixes
To stop paint from peeling on your exterior concrete sills, start by checking for poor surface prep like dirt, efflorescence, or old flaking paint that prevents adhesion.
Look for moisture entry points—cracked caulk, gaps at the jamb, or rising damp—that’ll keep paint from curing properly.
And don’t use a paint that’s incompatible with concrete or the primer you chose, because mismatched systems fail fast.
Surface Preparation Failures
When paint peels from exterior concrete window sills, it’s usually because the surface wasn’t prepped properly—dirt, efflorescence, old paint, or moisture can stop new coatings from bonding.
You can avoid surface preparation mistakes and other common pitfalls by doing a few precise steps before painting. Clean, remove salts, and profile the surface; don’t skip priming.
Typical failures include:
- Painting over loose or chalky material.
- Skipping etching or sanding for adhesion.
- Using the wrong primer for masonry.
- Applying paint to damp concrete.
Address each item, and you’ll drastically reduce peeling and extend the finish’s life.
Moisture Entry Points
Surface prep will only get you so far if water’s finding its way into the sill from cracks, gaps, or loose glazing; moisture trapped behind paint will lift even the best primer.
You should inspect joints, mortar, and the glazing bead for entry points and pry out failing sealant. Install proper moisture barriers behind trim and reseal with a compatible exterior-grade sealant.
Slope the sill away from the window and add simple drainage solutions like weep channels or routed grooves so water runs off.
After repairs, allow full drying time before priming and painting to prevent trapped moisture and future peeling.
Incompatible Paint Choices
If you apply a paint that’s chemically incompatible with the primer, or coat oil-based paint over a water-based finish (or vice versa), you’re asking for adhesion failure and peeling down the line.
You should check labels and test small areas before committing. Using incompatible materials shortens paint longevity and invites blisters, flaking, and early rework.
Prevent problems by:
- Removing old finish when types differ.
- Using a bonding primer rated for both systems.
- Allowing full cure times between coats.
- Performing a cross-hatch adhesion test.
Follow manufacturer guidance to guarantee durable exterior concrete window sills and avoid costly repainting.
Maintenance Schedule: Cleaning, Touch-Ups, and Resealing
Plan a simple, regular maintenance schedule to keep your exterior concrete window sills looking and performing their best. Use gentle cleaning techniques (soft brush, mild detergent) monthly, inspect paint and sealant quarterly, and touch up chips as you find them. Reseal every 2–4 years depending on exposure and maintenance frequency.
| Task | Interval | Tools |
|---|---|---|
| Cleaning | Monthly | Soft brush, detergent |
| Touch-ups | As needed | Small brush, matching paint |
| Resealing | 2–4 years | Exterior sealer, roller |
Keep records of dates and products so you can track wear and plan replacements.
Cost Comparison: Budget Paints vs. Premium Systems
You’ll notice budget paints cost a lot less up front, so they’re tempting for quick fixes.
However, premium systems often last longer and resist weathering, reducing repainting and repair frequency.
We’ll compare upfront material costs against long-term value so you can pick the most cost-effective option.
Upfront Material Costs
When weighing upfront material costs, you’ll find budget paints tempt with low sticker prices but often require more coats and frequent touch-ups.
In contrast, premium systems cost more initially yet typically save labor and repainting down the line. You should weigh budget considerations against desired durability and material quality.
Consider these upfront factors numerically:
- Cost per gallon and coverage estimates.
- Primer and sealant needs for adhesion.
- Specialized additives or flexible topcoats for exterior concrete.
- Tools: brushes, rollers, and masking supplies.
Tally those costs before buying; a higher upfront spend can reduce immediate maintenance and application time.
Long-Term Value
Although cheaper paints save you money up front, they usually cost more over the long run because they need more frequent recoats and repairs; premium systems cost more initially but often cut repainting frequency, labor hours, and lifecycle expenses. You’ll weigh upfront savings against long-term value: premium coatings deliver long lasting protection and lower overall cost through fewer interventions. Consider maintenance benefits like reduced sealing, crack repair, and weather damage. Use the table to compare typical scenarios and decide based on expected lifespan and labor rates.
| Budget Paints | Premium Systems |
|---|---|
| Lower initial cost | Higher initial cost |
| Shorter lifespan, more maintenance | Longer lifespan, fewer repairs |
Safety and VOCs: Low‑VOC Options and Ventilation Tips
Because many paints release volatile organic compounds (VOCs) that can harm your health and the environment, choosing low‑VOC or zero‑VOC exterior paint for concrete sills is important.
Pairing it with proper ventilation during application will reduce exposure. You should check VOC regulations and follow paint safety labels, wear a respirator if recommended, and avoid painting in still air or extreme heat.
Consider these practical tips:
- Pick certified low/zero‑VOC exterior acrylic or elastomeric paint.
- Work during mild breezy conditions.
- Use fans to push fumes away from windows.
- Store and dispose of leftover paint per local rules.
Tools and Supplies Checklist for a Professional Finish
One clear checklist will make the job faster and give your concrete sills a clean, durable finish: gather a concise tools overview and essential supplies before you start.
One clear checklist speeds the job and ensures concrete sills get a clean, durable finish—gather essentials first.
You’ll need a wire brush, scraper, sanding block or orbital sander, and respirator for prep.
For priming and painting, get a masonry primer, exterior acrylic or elastomeric paint, quality angled brushes, a roller with a nap suited to concrete, painter’s tape, and drop cloths.
Include a bucket, mixing paddle, caulk gun with exterior-grade sealant, and nitrile gloves.
Having these on hand prevents delays and guarantees a professional, long-lasting result.
Troubleshooting Common Problems After Painting
With your tools and supplies at hand and the job finished, you’ll still want to keep an eye out for common issues that can show up after the paint dries.
Inspect regularly for peeling paint, paint bubbling, surface cracking, or signs of color fading from UV degradation. Address adhesion issues quickly and look for moisture damage at joints.
- Scrape loose paint, sand, prime, and repaint.
- Fix leaks and improve drainage to prevent moisture damage.
- Use UV-resistant topcoats to slow color fading.
- Follow simple maintenance tips: clean, touch up, and monitor seals.
Product Recommendations and How to Pick the Right One
When choosing paint for exterior concrete window sills, focus on durability, adhesion, and weather resistance so your finish lasts through freeze-thaw cycles and sun exposure.
Pick a masonry or elastomeric acrylic paint rated for exterior concrete; primers matter, so use a concrete primer to improve adhesion.
Consider epoxy or polyurethane coatings for high-traffic ledges.
For color selection, test small swatches in different light and choose UV-resistant pigments.
Assess finish options—flat hides imperfections, satin balances sheen and maintenance, gloss sheds water but shows flaws.
Read product datasheets, match warranty to climate, and buy reputable brands with proven exterior performance.
Quick Recap: Durable Finishes for Exterior Concrete Sills
A quick recap: choose coatings that prioritize adhesion, flexibility, and UV/freeze‑thaw resistance so your exterior concrete sills stay intact through weather cycles.
You’ll want products that offer finish durability and thoughtful color selection while sealing pores and shedding water.
Consider these essentials:
- Primer: use a concrete/masonry primer for adhesion.
- Flexible acrylic or elastomeric topcoat: for movement and crack resistance.
- UV‑stable pigments: maintain color selection longevity.
- Protective clear sealer: adds abrasion resistance without altering sheen.
Follow proper prep, apply per instructions, and inspect yearly so your sills stay protected and looking sharp.
Frequently Asked Questions
Can I Paint Concrete Sills Over Existing Lead-Based Paint?
You can, but you shouldn’t paint over lead paint without precautions. You’ll follow safety precautions: test for lead paint, encapsulate with approved primer/encapsulant, wear respirator and gloves, and consider professional abatement for extensive or deteriorated surfaces.
How Long Before Rain Can Painted Sills Be Exposed Outdoors?
Think of paint as a coat drying on a traveler; you shouldn’t send it into rain too soon. Wait at least 24–48 hours depending on drying time and weather conditions, longer in cool or humid air.
Will Painted Sills Cause Condensation or Indoor Moisture Issues?
No, painted sills won’t cause condensation or indoor moisture issues if you choose breathable, moisture-control coatings and guarantee proper sealing and ventilation; you’ll maintain condensation prevention by allowing vapor diffusion while preventing liquid water ingress and trapping.
Can I Use Tinted Sealers to Match Surrounding Masonry?
Want a color match? You can use tinted sealers to tint and protect sills, but check masonry compatibility, test adhesion and breathability first, and expect subtle color shifts over time — don’t skip a small trial patch.
Are There Eco-Friendly Paint Disposal Options for Leftover Coatings?
Yes — you can use eco friendly alternatives and paint recycling programs to dispose leftover coatings responsibly; donate usable paint, return to hazardous waste or manufacturer take-back, and follow local guidelines to avoid landfill contamination.
Conclusion
You’ve got the right tools to armor your concrete sills — imagine a tough, satin shield that sheds rain, shrugs off frost, and warms under sun without cracking. Pick a flexible, UV‑resistant masonry or elastomeric paint, prep and patch carefully, and apply with steady strokes so the finish lays down like glass over stone. With proper choice and care, your sills will stand strong and look crisp year after year.