How to Fix Paint Peeling Off Cabinets and Restore Finish
If paint’s peeling from your cabinets, scrape loose flakes, clean grease with a degreaser, then sand or scuff glossy areas for bite. Spot-prime with a bonding primer or shellac where stains or tannins show, feather edges, then apply thin even coats of durable alkyd or acrylic enamel, sanding lightly between coats. Control moisture and use quality brushes or HVLP spray for a factory look. Keep going for a clear step‑by‑step plan, troubleshooting tips and cost estimates.
Quick Fix: Stop Cabinet Paint Peeling Today (5‑Minute Emergency Repair)
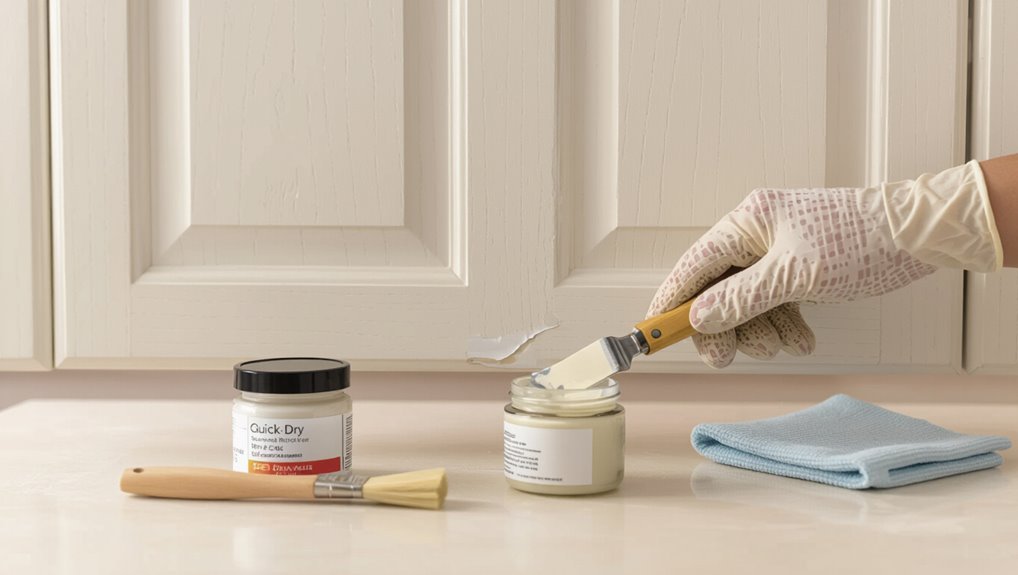
If you spot paint peeling on a cabinet right before guests arrive, don’t panic—here’s a 5‑minute emergency fix you can do now:
Scrape loose flakes gently, wipe dust with a damp cloth, apply a thin coat of bonding primer or fast‑drying filler, smooth with a fingertip, then spot‑paint or use a touch‑up marker.
These emergency repairs offer quick solutions to stabilize the finish.
At‑A‑Glance Repair Plan: Step‑By‑Step Checklist
1 clear checklist will keep your cabinet repair organized and fast: gather tools, assess damage, prepare surfaces, prime, paint, and finish with hardware and cleanup.
You’ll follow concise cabinet maintenance tips: document damaged areas, sand to sound substrate, degrease, use recommended primer, and apply paint adhesion techniques.
Schedule tasks, allow cure times, and inspect before reinstalling doors and hardware.
Quick Answer: How to Fix Peeling Paint on Cabinets Now
Start by stopping further damage: remove loose paint, wipe away grease, and dry the surface so you can see the real problem.
Sand edges smooth, spot-prime bare wood, and use a high‑adhesion primer to restore paint adhesion.
Recoat with thin, even layers of quality paint, letting each dry fully.
Address peeling causes later if issues recur.
How to Diagnose Why Paint Is Peeling From Cabinets
When paint peels from cabinets, you’ll want to treat the issue like a short investigation: inspect the finish, feel for soft or damp spots, and note where flakes originate and how large they are.
Check substrate cleanliness, previous coatings, and incompatible paint types. Look for environmental triggers and hardware stress.
List potential peeling causes, document patterns, and decide if stripping, patching, or recoating fits the diagnosis.
How to Tell Poor Adhesion From Moisture Damage
After you’ve mapped where flakes come from and noted previous coatings, focus on distinguishing poor adhesion from moisture damage so you can pick the right fix.
Check edges: adhesion issues peel in tight flakes or sheets from old finishes.
Check edges carefully — adhesion failures peel away in tight flakes or sheets from older finishes.
Moisture indicators include swelling, blistering, or soft wood beneath paint.
Tap and press suspect areas; soft, discolored wood signals moisture, dry powdery loss signals adhesion.
How to Spot Solvent, Grease, or Contamination on Cabinet Surfaces
How can you tell if solvents, grease, or other contaminants are causing paint to fail on your cabinets?
Inspect gloss loss, smudges, or lifting during light rubbing. Use solvent identification tests (acetone spot) and grease assessment with a degreasing cloth.
Contamination detection includes tackiness or residue.
Perform a careful surface evaluation, then apply targeted cleaning techniques before refinishing to guarantee adhesion.
Decide: Repair Versus Replace a Peeling Cabinet
First, assess how much of the surface and underlying material is damaged so you know if repairs are practical.
Then weigh the cabinet’s value—sentimental, functional, and replacement cost—to see if fixing makes sense.
Finally, consider how much time you’re willing to spend versus hiring or replacing it outright.
Assess Damage Extent
Wondering whether you should repair or replace a peeling cabinet? You’ll start with a damage assessment: inspect paint loss, substrate rot, warping, hinge integrity, and hardware.
Note peeling causes—moisture, poor prep, or heat—and mark isolated chips versus structural decay. If damage’s surface-only and joints are sound, plan repair; extensive substrate failure means replacement will save time and money.
Evaluate Cabinet Value
Start by tallying costs and benefits so you can decide whether to repair or replace a peeling cabinet: estimate repair expenses (materials, labor, and time) and compare them to replacement cost plus the value of improved function or appearance.
Do a quick cabinet appraisal and value assessment to guide your choice.
- Compare quotes and lifespan
- Factor structural damage
- Weigh resale impact
Consider Time Investment
Because time is often the scarcest resource, weigh how much of your schedule a repair will eat up compared with the quicker route of replacement.
You’ll assess labor hours, drying times, and sourcing materials. Good time management and clear project planning let you compare total downtime, costs, and disruption.
Choose repair if savings justify the schedule; replace if speed and reliability matter more.
How to Choose Tools and Materials for Cabinet Repainting
Before you start repainting, gather the essential tools—sandpaper or a sander, a scraper, high-quality brushes or a foam roller, tack cloths, and proper safety gear—so you won’t stop mid-job.
Choose a primer that bonds to your cabinet material and a durable paint formulated for trim or cabinets, like a semi-gloss or satin acrylic enamel.
I’ll walk you through tool choices and the best primer/paint pairings for wood, laminate, and painted surfaces.
Essential Tools Needed
Tool-selection matters: the right brushes, rollers, sandpaper, and cleaners make cabinet repainting faster and give a smoother, longer-lasting finish.
You’ll pick tool types based on surface and finish, and gather essential supplies for prep, protection, and application. Choose quality over cheap options to avoid extra work and poor results.
- angled brush, foam roller
- 120–220 grit sandpaper
- degreaser, tack cloth, drop cloth
Best Paints & Primers
Now that you’ve gathered the right brushes, sandpaper, and cleaners, pick paints and primers that’ll bond well and stand up to frequent use.
Choose best paint types like water-based acrylic enamel or oil-based alkyd for durability and smooth finish.
For adhesion and stain blocking, select ideal primer choices: high-quality bonding primer or shellac-based primer on tricky surfaces before topcoating for lasting results.
Safety Gear and Ventilation Requirements for Cabinet Refinishing
One essential step is equipping yourself with proper protective gear and ensuring good ventilation so you can work safely while stripping, sanding, or painting cabinets.
Equip proper protective gear and ensure good ventilation before stripping, sanding, or painting cabinets.
You’ll follow safety precautions and ventilation strategies: wear an N95 respirator, chemical-resistant gloves, and eye protection.
Keep windows open, run a box fan exhaust, and use low-VOC products to minimize fumes and dust exposure.
- N95 respirator
- Gloves
- Eye protection
How to Remove Cabinet Doors and Hardware Safely
Start by labeling each door and its matching cabinet box so you can work systematically and reinstall everything correctly; mark hinges and hardware with a number or a piece of painter’s tape and a matching diagram on paper. Wear gloves, use proper tools, and support doors during hardware removal to guarantee cabinet safety.
| Step | Tool | Tip |
|---|---|---|
| 1 | Screwdriver | Keep screws grouped |
| 2 | Drill | Use low torque |
| 3 | Gloves | Prevent cuts |
| 4 | Block | Support door |
| 5 | Tray | Collect parts |
How to Label and Store Doors So Reassembly Is Easy
Label every door with a clear code (like “U1” for upper left) so you know exactly where it goes.
Put each door’s screws and hinges in a labeled bag or small container taped to the matching door’s back.
Lay doors flat on a protected surface to prevent warping or damage while you work.
Label Every Door Clearly
Because each cabinet door is unique, you’ll want to mark and bag them as you remove them so reassembly is painless.
Use simple Labeling Techniques and clear Storage Solutions: tag each door with a number and position, note hinge orientation, and pack matching screws with the door.
- Numbered paper tags
- Masking-tape location notes
- Zip-top bagged parts
Organize Hardware Kits
When you remove each door, tuck its screws, hinges, and any special fasteners into a clearly marked bag so you won’t hunt for parts during reassembly.
Next, group bags by cabinet section and attach a note with door ID and hinge orientation.
Use consistent kit labeling and a small box or tray for hardware organization so every piece is tracked and reinstalled without guesswork.
Store Doors Flat Safely
Place each removed door on a flat, padded surface and mark its position with a clear ID that notes cabinet location and hinge side so you can grab the right piece during reassembly.
You’ll use safe storage and flat surfaces to prevent warping or scratching. Label bags for screws and stack doors separated by padding.
- Numbered ID stickers
- Zip bags for hardware
- Foam or cardboard separators
How to Test the Existing Cabinet Finish Before Stripping
Before you strip a cabinet, test the existing finish so you know whether chemical strippers, sanding, or a simple repaint will work best.
Check finish type visually and with mineral spirits; water bead test shows latex, solvent softening indicates lacquer.
Perform adhesion tests by scoring a small area and using tape.
Note varnish grain raise and compatibility with your chosen finishing techniques.
How to Strip Failing Paint With a Chemical Stripper
Start by choosing the right stripper for the job — gel or paste for vertical surfaces and thick, slow-evaporating formulas for multiple paint layers — and put on proper PPE: chemical-resistant gloves, eye protection, and a respirator rated for organic vapors.
Apply per instructions, test paint compatibility, work in ventilated space, scrape gently, neutralize residue, and follow chemical safety.
- Test a small area first
- Use plastic scrapers
- Dispose per label instructions
How to Remove Paint With Heat Tools Without Scorching
Pick a heat tool that’s right for the job—a low-temp heat gun or a razor-edged heat knife will give you control without blasting the wood.
Keep the nozzle moving and hold it a few inches away to soften paint without scorching the surface.
Test a hidden spot first so you can adjust temperature and technique before committing to the whole cabinet.
Choose The Right Heat Tool
When you’re removing paint with heat, choose a tool that gives you steady, controllable heat so you can strip layers without scorching the wood or warping thin cabinet panels.
Pick based on finish, size, and power; know heat gun safety and compare heat tool types before starting.
- Small nozzle pistol for detail
- Adjustable temp heat guns for control
- Infrared panels for even heating
Prevent Surface Scorching
After choosing a heat tool with the right power and nozzle, focus on preventing scorch marks by controlling distance, temperature, and movement.
Keep the tool moving in even strokes, hold it farther from vulnerable grain when cabinet humidity is high, and lower temperature settings preserve finish and paint adhesion.
Test a hidden area first, pause to cool, and scrape gently to avoid burns.
How to Sand Cabinets for Reliable Adhesion
Start by stripping off hardware and giving the surfaces a quick once-over to remove grease or crumbs; clean cabinets adhere better and sanding will be more even.
Use gentle sanding techniques to scuff glossy finishes and reveal a key tooth for primer. Remember adhesion importance: prep beats rework.
Scuff glossy surfaces gently to create a tooth for primer—proper prep ensures lasting adhesion and avoids rework.
- Scuff all painted areas
- Wipe dust with tack cloth
- Vacuum crevices before priming
Which Sandpaper Grits to Use for Different Cabinet Finishes
If you’re removing old paint or varnish, start with a coarse grit like 80–120 to strip down to bare wood quickly.
Switch to a medium grit (150–180) to blend scratches and then finish with a fine grit (220–320) to create a smooth surface for new paint.
Using the right progression prevents visible scratches and helps your new finish stick.
Coarse Grits For Stripping
1 or 2 coarse grits will usually do the heavy lifting when you need to strip old paint or varnish from cabinets: think 40–60 grit for thick, stubborn coatings and 80 grit for lighter buildup or more delicate veneers.
You’ll use these stripping techniques and sanding methods to remove finish quickly without gouging.
- Use 40–60 grit for heavy coats
- Choose 80 grit for delicate areas
- Keep pressure steady
Fine Grits For Smoothing
Move to finer grits to smooth scratches from the coarse sanding and prepare the surface for primer or paint.
Use 120–150 grit for sanding techniques on painted or sealed cabinets, then 220–320 grit for raw wood or between coats.
Match grit selection to finish: higher grits for glossy surfaces, moderate grits for veneer.
Light, even passes prevent dip-through and guarantee a uniform, paint-ready surface.
How to Clean and Decontaminate Cabinet Surfaces for Repainting
Start by stripping away grease, dirt, and mildew so the new paint can bond properly to the cabinets.
Start by removing grease, dirt, and mildew so new paint can bond to cabinets.
You’ll use proven cleaning techniques for thorough surface preparation: degrease with TSP substitute, rinse, and dry.
Sand lightly to scuff the finish. Mask hardware and adjacent areas, then wipe with a tack cloth before priming.
- Degrease
- Rinse and dry
- Tack cloth wipe
How to Repair Wood Damage and Fill Gouges in Cabinets
Inspect the cabinet surfaces for scratches, gouges, and soft or rotted wood. Then remove any loose fibers or old filler so repairs will bond solidly.
Sand edges smooth, apply wood filler in thin layers, let cure, then sand flush.
Prime repaired spots and blend with surrounding grain. Proper patching improves adhesion and appearance during cabinet refinishing, preventing future paint failure.
How to Repair MDF, Laminate, and Thermofoil Cabinet Surfaces
MDF, laminate, and thermofoil each need different fixes, so first identify the surface and the type of damage—peeling, bubbling, chipping, or edge swelling—before you pick materials and methods.
For MDF repair, use filler and primer; for Laminate restoration, sand and bond edges; for Thermofoil refinishing, reheat or replace panels.
Prioritize Cabinet maintenance and Surface preparation.
- Assess and clean
- Choose compatible products
- Seal and finish
How to Handle Water‑Damaged or Swollen Cabinet Faces
When water has seeped into cabinet faces, you’ll often see swelling, delamination, or soft, spongy edges that signal structural compromise; act quickly to assess how much of the panel is affected and whether repair or replacement is safer.
Remove swollen trim, dry thoroughly with fans, and sand off delaminated surfaces. For minor water damage, use epoxy or wood filler; replace panels if cabinet swelling is widespread.
When to Use Wood Conditioner or Grain Filler on Cabinets
Decide whether to use a wood conditioner or grain filler based on the wood species, the finish you want, and the surface condition.
You’ll use wood conditioner benefits on soft, blotch-prone woods to guarantee even stain or paint absorption.
Choose grain filler application for open-grain hardwoods when you want a smooth, sealed surface before finishing.
- Soft woods: conditioner
- Open-grain: filler
- Repair: sand then fill
How to Choose the Right Primer for Cabinets
Because the primer is the foundation of your cabinet finish, pick one that matches the substrate and topcoat to guarantee adhesion and durability.
Assess primer types—latex for ease, oil for stain blocking, shellac for stubborn tannins—and compare adhesion levels for bare wood, MDF, or previously painted surfaces.
Test a small area, follow manufacturer cure times, and proceed when bond is secure.
Why Bonding Primers Matter on Slick Cabinet Surfaces
You’ll need to prepare slick cabinet surfaces thoroughly so the coating has something to grab onto.
Bonding primers contain chemical additives that create a stronger link between nonporous substrates and paint, preventing early failure.
Understanding both the prep steps and the primer’s adhesion chemistry will save you time and money down the line.
Surface Preparation Importance
Surface prep matters: slick cabinet finishes like laminate or factory-cured lacquer repel paint, so you need a bonding primer to give new paint something to grab onto.
You’ll clean, scuff, and prime to guarantee surface preparation increases paint adhesion and longevity.
Follow these quick steps:
- Clean thoroughly (degrease)
- Scuff lightly (abrasion)
- Apply bonding primer evenly
Primer Adhesion Chemistry
After you’ve cleaned, scuffed, and primed, it helps to know why bonding primers actually stick to slick finishes.
You’ll learn that chemistry pairs polar resins and solvents to wet hard, nonporous surfaces. Choose primer types formulated for plastics or lacquered wood; they promote mechanical and chemical bonds.
Perform adhesion testing before full coating to confirm compatibility and prevent future peeling.
How to Pick Paint Type for Cabinets: Lacquer, Alkyd, or Acrylic Enamel
Picking the right paint for your cabinets comes down to balancing durability, finish, and how much time you’re willing to spend.
Lacquer dries fast and gives a super-smooth, professional look; alkyd offers tough, long-lasting coverage but needs longer cure times and stronger solvents.
Acrylic enamel is a water-based middle ground that’s durable, easier to clean up, and kinder to indoor air.
- Lacquer advantages: quick recoats, smooth finish
- Alkyd durability: great for high-traffic doors
- Acrylic versatility: easier cleanup, less odor; heed surface preparation and finish maintenance
Which Sheen Is Best for Cabinets and Why
When choosing a sheen for your cabinets, focus on durable options like satin or semi-gloss that stand up to cleaning and wear.
You’ll also want to contemplate how the finish highlights color and hides imperfections, since higher sheens show flaws but clean easier.
We’ll compare appearance and maintenance so you can pick the best balance for your kitchen.
Durable Sheen Options
There are three common sheens you’ll consider for cabinets—satin, semi-gloss, and gloss—and each balances durability, hide, and appearance differently.
You’ll pick based on durable finishes, sheen options, cabinet maintenance needs, and paint durability goals.
- Satin: softer look, hides imperfections, easy to clean.
- Semi-gloss: durable, common for cabinets.
- Gloss: toughest, shows flaws but resists wear.
Appearance And Maintenance
Choosing the right sheen for your cabinets balances how they look with how they’ll stand up to daily use, so think about the room, your cleaning habits, and the imperfections you want hidden.
For modern cabinet styles, choose satin or semi-gloss for durability and easy wipe-downs; for traditional looks, eggshell hides flaws.
Follow simple maintenance tips: gentle cleaner, soft cloth, and timely touch-ups to prevent peeling.
How to Calculate Paint and Primer Quantities for Cabinets
Start by measuring the surfaces you’ll paint—doors, drawer fronts, cabinet boxes and trim—so you can convert square footage into gallons; accurate measurements keep you from buying too much or running short.
Calculate paint coverage per gallon, account for two coats, and choose primer selection appropriate for substrate and adhesion. Estimate extra for mistakes.
Calculate paint coverage per gallon, plan for two coats, pick the right primer, and allow extra for errors.
- Measure total square feet
- Divide by coverage
- Add 10% waste
How to Prep Hinges, Pulls, and Inside Cabinet Boxes for Painting
Prep your hardware and inside surfaces carefully so the finish looks professional and lasts—remove or mask hinges and pulls, clean and degrease the interiors, and decide whether to paint inside boxes or protect them with masking.
For hinge preparation, label and store screws, sand lightly if rusty, and lubricate moving parts.
For pull cleaning, soak, scrub, and dry before reattaching or masking.
How to Apply Primer to Cabinets for Even Coverage
Before you prime, make sure the surfaces are clean, dry, and sanded smooth so the primer will grip evenly; apply thin, even coats with a high-quality brush or spray, working from recessed areas to flat faces and allowing proper dry time between coats.
You’ll follow primer application techniques and cabinet surface preparation to prevent streaks and runs.
- Use a quality brush or HVLP spray
- Maintain wet edges
- Check for missed spots
How to Sand Between Coats Without Damaging Edges
Once the primer’s dry, lightly sand between coats with a fine-grit pad (320–400) to knock down dust nibs and raised grain without rounding the cabinet edges; hold the sanding pad flat, use gentle, even pressure, and follow the profile of mouldings with long, consistent strokes so you remove imperfections while preserving sharp corners.
| Tool | Grit | Purpose |
|---|---|---|
| Pad | 320–400 | Smooth |
| Block | 320 | Edge protection |
| Cloth | 400 | Final dusting |
How to Apply Cabinet Paint With a Brush and Roller
Now that your primer’s been sanded smooth, you’re ready to apply paint with a brush and roller.
You’ll use precise brush techniques for corners and roller methods for flats, keeping thin, even coats and light overlap.
Work wet edges, sand between coats lightly, and remove dust before recoating.
- Feather strokes for edges
- Short naps for smooth coverage
- Light pressure, consistent direction
How to Spray Cabinets for a Factory‑Quality Finish
Spray your cabinets if you want a factory-quality, ultra-smooth finish that’s hard to achieve with brushes or rollers; spraying lays down thin, even coats quickly and eliminates brush marks when your setup and technique are right.
You’ll prep by cleaning, sanding, and masking, choose HVLP or airless systems, thin primer and topcoat appropriately, and practice spraying techniques to maximize finish durability and consistent coverage.
How to Avoid Common Brush Marks and Orange Peel on Cabinet Paint
To avoid brush marks and orange peel, choose the right brush for your paint and surface so bristles lay down smooth.
Keep paint viscosity correct—thin or thicken as needed so it levels without sagging.
Apply long, even strokes and maintain a wet edge to blend each pass.
Choose The Right Brush
Although a good primer and paint are essential, choosing the right brush is what prevents visible brush marks and orange peel on cabinet surfaces.
Pick synthetic brush types for water-based paints, match bristle selection to finish, and practice neat strokes.
Maintain brush care to avoid splayed bristles. Use steady application techniques for even laydown.
- brush types
- bristle selection
- brush care
Control Paint Viscosity
When your paint’s viscosity is right, it flows smoothly from brush to cabinet without leaving ridges, drips, or that dreaded orange peel texture. Test small areas and adjust with recommended solvent for paint thinning to reach the manufacturer’s target consistency.
You’ll gain viscosity control, improve leveling, and reduce visible brush marks. Keep mixing steady, avoid over-thinning, and retest until smooth.
Apply Smooth, Even Strokes
Start each stroke with purpose and glide the brush or roller in steady, overlapping passes so you lay down an even film without backtracking.
You’ll get a smooth application by maintaining even pressure, working wet edges, and avoiding overworking. Keep a consistent pace and thin coats to prevent orange peel; sand lightly between coats for the best finish.
- Use long, continuous strokes
- Apply thin coats
- Sand between coats
How Many Coats of Paint Do Cabinets Actually Need?
Deciding how many coats of paint your cabinets need depends on the paint type, color change, and the cabinet surface, but most projects require two to three coats for durable, even coverage. You’ll match paint types to preparation techniques, primer, and finish. Apply thin coats, sanding lightly between coats for adhesion and smoothness.
| Scenario | Coats | Notes |
|---|---|---|
| Minimal change | 1–2 | Light primer |
| Color shift | 2–3 | Use primer |
| High-wear | 3 | Durable topcoat |
How to Dry and Cure Cabinet Paint to Prevent Future Peeling
After you finish painting, give the cabinets the proper drying time listed on the paint can before you handle them.
Then let the paint cure in stable conditions—moderate temperature, low humidity, and good ventilation—to reach full hardness.
Skipping these steps raises the risk of future peeling, so be patient and control the environment.
Proper Drying Time
One key step to preventing future peeling is giving your cabinet paint enough time to dry and fully cure—usually several days to weeks depending on paint type and conditions.
You should use proper drying techniques and humidity control so paint hardens correctly before use.
- Wait recommended tack-free time
- Avoid handling until firm
- Delay reassembly and heavy use
Optimal Curing Conditions
While paint may feel dry to the touch within hours, ideal curing needs controlled temperature, low humidity, and time so your cabinets harden properly and resist future peeling. Maintain recommended curing temperature, monitor humidity levels, and guarantee airflow control. Respect drying duration between coats for paint layering to promote finish hardness. Watch environmental factors and paint interaction to prevent future failures.
| Parameter | Target |
|---|---|
| Temperature | 65–75°F |
| Humidity | 40–50% |
| Airflow | Gentle |
| Duration | 7–30 days |
How to Reinstall Doors and Hardware Without Chipping the Finish
Reinstalling doors and hardware carefully will protect your fresh finish and keep all the work you did from getting nicked or scratched.
You’ll use Door measurement and Hardware compatibility checks, apply Reinstallation techniques with Careful handling, focus on Door alignment and Hardware positioning, and practice Avoiding chipping for Finish protection.
- Pre-fit hinges and knobs gently
- Torque screws incrementally
- Check gaps and operation before final tightening
How to Protect High‑Wear Areas With Topcoat Options
After you’ve reinstalled doors and hardware without nicking the finish, focus on protecting the surfaces that take the most abuse: edges, drawer fronts, and around pulls.
Choose a durable clear topcoat—polyurethane, water‑based polyurethane, or conversion varnish—balancing topcoat benefits like abrasion resistance and easy cleaning.
Use thin, even application techniques, light sanding between coats, and mask hardware to prevent drips and buildup.
Quick Fixes: Touching Up Tiny Chips and Nicks on Cabinets
A few small chips and nicks won’t ruin your cabinets if you address them quickly and precisely: match the paint or stain, clean the area, and use the right filler or touch‑up tool to blend repairs into the surrounding finish.
For chipping paint and general cabinet maintenance, act fast, feather edges, and seal.
- Use colored wood filler
- Apply matching touch‑up pen
- Lightly sand and topcoat
How to Prevent Moisture‑Related Peeling Long Term
If you want paint to stay put, control the moisture that causes swelling, cupping, and peeling by keeping humidity and water exposure low and consistent; seal gaps, improve ventilation, and choose moisture‑resistant products so small problems never become large ones.
Install moisture barriers behind sinks and dishwashers, use proper ventilation solutions near wet zones, maintain seals and finishes, and inspect regularly to catch leaks early.
How to Control Kitchen Humidity and Ventilation to Protect Cabinet Finish
When you cook, run the range hood on high to capture steam and grease before they hit your cabinets.
Keep indoor humidity between 30–50% with a dehumidifier or HVAC settings to prevent swelling and finish failure.
Improve airflow by using exhaust fans, opening windows when weather allows, and keeping vents clear.
Use Range Hood Effectively
Because steam and grease are the main culprits wearing down cabinet paint, you should use your range hood every time you cook to keep humidity and airborne oils from settling on finishes.
Position the appliance placement for ideal air circulation, run at high fan until odors clear, and inspect for grease buildup as part of cabinet maintenance.
- Use full power during frying
- Clean filters monthly
- Guarantee proper kitchen ventilation and airflow optimization
Control Indoor Humidity
Although cooking produces short bursts of steam, persistent high humidity will soften paint and lift glued joints.
So keep your kitchen’s moisture in check by ventilating, dehumidifying, and drying wet surfaces promptly. You should monitor humidity control with a hygrometer, run a dehumidifier during damp months, wipe spills immediately, and keep cabinet interiors dry.
Good moisture management prevents peeling and prolongs finish life.
Improve Kitchen Airflow
If you want cabinets to keep their finish, improve kitchen airflow by directing steam and cooking vapors out of the room and replacing stale, humid air with dry, moving air.
Use effective kitchen ventilation and maintain steady air circulation so finishes stay dry and bonded. You should install or use a range hood, open windows, and run fans during and after cooking.
- Use a vented range hood
- Open windows strategically
- Run exhaust or box fans
How to Clean Painted Cabinets Without Damaging the Finish
When you clean painted cabinets, choose gentle methods that remove grime without stripping or dulling the finish; use mild cleaning techniques and safe products like diluted dish soap or pH-neutral cleaners. Wring a soft cloth, work small areas, rinse, and dry. Avoid abrasive pads and harsh solvents.
| Task | Example |
|---|---|
| Cleaner | Diluted dish soap |
| Cloth | Microfiber |
| Motion | Gentle wipe |
| Drying | Soft towel |
How to Refresh Cabinets Without a Full Repaint
You don’t always need a full repaint to make cabinets look fresh again — start by thoroughly cleaning and deglossing the surface so new products will adhere.
For small chips or worn spots, use matching touch-up paint or marker and feather the edges before sealing.
Finish with a clear protective sealer to blend repairs and protect against future peeling.
Clean And Degloss
Start by giving your cabinets a thorough cleaning and light deglossing to remove grease, dirt, and that shiny finish that keeps new paint from sticking; this step refreshes their look and lets you skip a full repaint in many cases.
Use simple cleaning techniques and gentle deglossing methods to prep surfaces.
- Degrease with TSP substitute
- Scuff-sand lightly
- Wipe with tack cloth
Touch-Up And Seal
Patch small chips and sand feathered edges before sealing to keep the repair low-profile and durable. Use precise touch up techniques: match color, thin coats, and blend edges. Choose sealant options like water-based polyurethane or a clear lacquer for protection. Apply thin layers, sand light between coats, and buff for uniform sheen.
| Step | Tool | Result |
|---|---|---|
| Fill | Putty knife | Smooth |
| Paint | Brush/pen | Blended |
| Seal | Foam brush | Protected |
How to Troubleshoot Adhesion Problems After Repainting Cabinets
If paint is peeling again after a fresh coat, don’t assume the problem’s just cosmetic—adhesion issues usually have identifiable causes you can fix.
Inspect, then address root causes: improper surface preparation, incompatible products, or contamination. Perform adhesion testing before repainting.
Follow steps to clean, sand, and prime. Useful checks:
- Clean and degrease surfaces
- Sand and re-prime
- Test small patch for adhesion
How to Handle Stubborn Recurring Peeling Problems
When peeling keeps coming back despite careful prep, don’t assume a simple repaint will fix it; you’ll need to methodically identify persistent causes—like trapped moisture, incompatible primers, or hidden contamination—and address each one before reapplying paint.
Test for moisture, strip to bare wood where needed, choose compatible primer/paint, and follow peeling prevention techniques.
Keep up cabinet maintenance tips to prevent recurrence.
Cost and Time Estimates for DIY Cabinet Refinishing
Estimating the cost and time for a DIY cabinet refinishing project depends on the scope—full door removal and repainting takes more time and materials than a simple touch-up or spray job—so you should map out tasks, supplies, and realistic work hours before you start.
Do a cost analysis and time breakdown to set budget and schedule.
- Materials and tools estimated
- Labor hours per phase
- Contingency and cleanup costs
When to Hire a Professional Cabinet Refinisher
If the peeling is widespread or the wood beneath is damaged, you’ll want a pro who can assess and repair structural issues.
If you’re short on time or on a tight budget, hiring someone might cost more upfront but save you headaches and mistakes.
And if you want a complex finish—glazing, distressing, or a flawless factory look—leave it to a refinisher with the right tools and experience.
Extent Of Surface Damage
Look closely at the damage before deciding to tackle refinishing yourself — small chips, light peeling, or worn spots you can sand to bare wood are usually DIY fixes, but widespread bubbling, deep gouges, or multiple layers of failing finish mean you should call a professional cabinet refinisher.
Do a surface assessment to spot key damage indicators and decide on pro help.
- Bubbling or delamination
- Structural gouges
- Multiple failed layers
Time And Budget Constraints
When you’re weighing repairs against hiring a pro, consider how much time you can realistically dedicate and whether your budget covers both materials and unexpected costs; DIY refinishing can save money on labor but often takes longer and may need pricey tools or corrections if mistakes happen. Use budget friendly solutions and time saving tips—know when a pro’s efficiency and warranty justify the cost.
| Option | Time | Cost |
|---|---|---|
| DIY | High | Low–Medium |
| Pro | Low | Medium–High |
| Hybrid | Medium | Medium |
Complexity Of Desired Finish
Budget and time help decide who does the work, but the finish you want often determines whether you should call a professional refinisher.
If you want complex finish types—glazes, distressing, or high-gloss lacquer—or precise surface preparation, hire pros. You’ll save time and avoid mistakes.
- Complex glazing or layering
- Flawless surface preparation needs
- Durable, showroom-quality topcoats
Common Mistakes to Avoid When Fixing Peeling Paint on Cabinets
Although tackling peeling paint on cabinets can feel straightforward, skipping key steps often causes the problem to return.
Tackling peeling cabinet paint seems simple, but skipping vital prep steps invites the problem right back.
You should focus on avoiding oversanding that weakens veneer and on identifying primer issues that cause poor adhesion.
Don’t neglect proper cleaning, scuffing, or curing times.
Avoid cheap paint, rushed layering, and skipping test patches so your repair lasts instead of peeling again.
Frequently Asked Questions
Can Peeling Paint Indicate Lead Presence in Older Cabinets?
Yes — peeling paint can indicate lead, especially in older cabinets; you should get lead testing if the cabinet age suggests pre-1978 finishes, and don’t sand or disturb flakes until it’s tested and handled safely.
Will Repainting Cabinets Affect Appliance Warranties?
You can repaint cabinets without voiding appliance warranties, but check terms first; poor paint adhesion or modifications near appliances might have warranty implications. If you avoid altering appliance finishes or components, you’ll stay covered.
Can Cabinet Paint Peeling Cause Mold Growth Inside Cabinets?
Yes — peeling paint can trap moisture, promoting mold growth inside cabinets; you should address mold prevention through thorough cleaning, drying, and cabinet maintenance, repairing finishes and sealing surfaces to stop moisture and spores from taking hold.
How Long Before Painted Cabinets Can Be Used for Food Storage?
You can store food after about 7–14 days, but wait 30 days for full paint curing; cabinet drying may feel faster, yet complete curing guarantees odors and solvents dissipate, so don’t rush food contact until fully cured.
Are Touch‑Up Kits Color‑Matched to Factory Cabinet Finishes?
Perfectly matched? No — touch‑up kits often approximate factory color matching, so you’ll notice slight shifts; choose quality kits for better touch up durability, test swatches, and blend carefully to minimize mismatched, noticeable marks.
Conclusion
Quick, confident care can curtail cabinet calamities: clean, sand, seal, and select sturdy sheen to stop peeling and secure a smooth, strong surface. If stubborn spots persist, strip, prime, and paint with patience — or pass the project to a pro. Cost-conscious cooks can complete a refresh in a weekend; careful contractors can restore lasting resilience. Consistent cleaning and correct prep prevent pesky problems, preserving pretty, practical painted cupboards for years.