How to Fix Uneven Paint Lines on Ceiling Like a Pro
You can fix uneven ceiling paint lines fast by inspecting under a bright angled light to find drips, ridges, and missed primer, then tape or freehand cut in with a quality angled sash brush held at 30–45° and loaded sparingly to avoid drips. Feather touch-ups with thin paint, a damp rag, or a sponge and shave raised spots with a razor; check sheen and color match before wider work. Keep going and you’ll pick up pro tips for tougher fixes.
Quick Fix: Smooth a Jagged Ceiling Line Now
If you need a fast, visible improvement to a jagged ceiling line, grab a small angled brush, a steady hand, and a damp rag—then work in short, controlled strokes to feather the paint back to a clean edge.
You’ll focus on the jagged edge, using quick solutions like thin paint, light pressure, and immediate cleanup to restore a crisp line without sanding or repainting the whole ceiling.
Assess Why Your Ceiling Line Looks Uneven
Once you’ve smoothed the most obvious jagged spots with a small brush, take a step back and figure out why the line looks uneven in the first place.
Inspect lighting, drywall seams, and paint edge adhesion.
Do a quick ceiling assessment for texture variations, shadowing, or missed primer.
Note mistakes—overlapping, too-thick paint, or drips—so you can plan targeted corrections.
Tools and Prep: Brushes, Rollers, Tape, and Ladders
Gather the right tools before you tackle the ceiling—quality angled sash brushes, a mini-roller, painter’s tape, a sturdy ladder, and a small bucket for touch-up paint will make the job cleaner and faster. Use precise brush selection and roller technique, master tape application for crisp lines, practice ladder safety, and focus on edge finishing.
| Calm | Confident | Clean |
|---|---|---|
| Steady | Accurate | Smooth |
| Ready | Controlled | Perfect |
When to Mask the Ceiling Edge (And When Not To)
Because masking can save you clean-up time but sometimes creates its own problems, decide based on the surface and paint type before you tape the ceiling edge.
Use masking techniques smartly during ceiling preparation. Consider:
Use masking wisely during ceiling prep—evaluate surfaces, test tape, and protect edges without causing damage.
- Tape on clean, dry trim
- Skip tape on smooth, sealed edges
- Test with small strip first
- Remove tape at proper time
- Use low-tack for delicate surfaces
Use Painter’s Tape Without Bleed
If you decide to tape the ceiling edge, set up your painter’s tape so paint won’t seep under it and ruin your line.
Press tape firmly along the seam, burnish edges with a plastic card, and remove within an hour of tack-free paint.
For tape application, use low-tack products on clean, dry surfaces.
These steps guarantee reliable bleed prevention without extra sanding.
Cut the Ceiling Line With an Angled Brush
When you’re ready to cut the ceiling line, pick an angled brush that matches the trim width so you can control the edge.
Load the brush sparingly—tap off excess paint so it doesn’t drip or blob.
Steady your hand by bracing your wrist or arm against a ladder or the wall for a smooth, consistent stroke.
Choose The Right Angle
Although it takes a little practice, choosing the right brush angle makes the ceiling cut-in cleaner and faster; you’ll control paint angles and refine brush techniques by adjusting tilt and pressure.
Practice these points:
- Hold the brush at 30–45°
- Aim bristles toward the ceiling edge
- Use steady, short strokes
- Keep wrist relaxed
- Adjust angle for crown molding curves
Load The Brush Properly
Now that you’ve picked the right angle, it’s time to load the brush so your cut-in stays sharp.
Dip an angled brush a third in, tap off excess, and spread paint along bristles for even paint consistency.
Use a controlled brush technique: short, smooth strokes along the ceiling edge, reload frequently to avoid blobs, and keep pressure light to maintain a clean, precise line.
Steady Your Hand Position
Steady your elbow against the ladder or ceiling joist and hold the brush like a pencil so you get precise control along the edge.
You’ll improve hand stability and brush control by setting a steady stance and using an angled brush.
Practice these steps:
- Anchor elbow for support
- Grip near ferrule for control
- Angle bristles toward ceiling
- Take short, smooth strokes
- Pause to reload brush
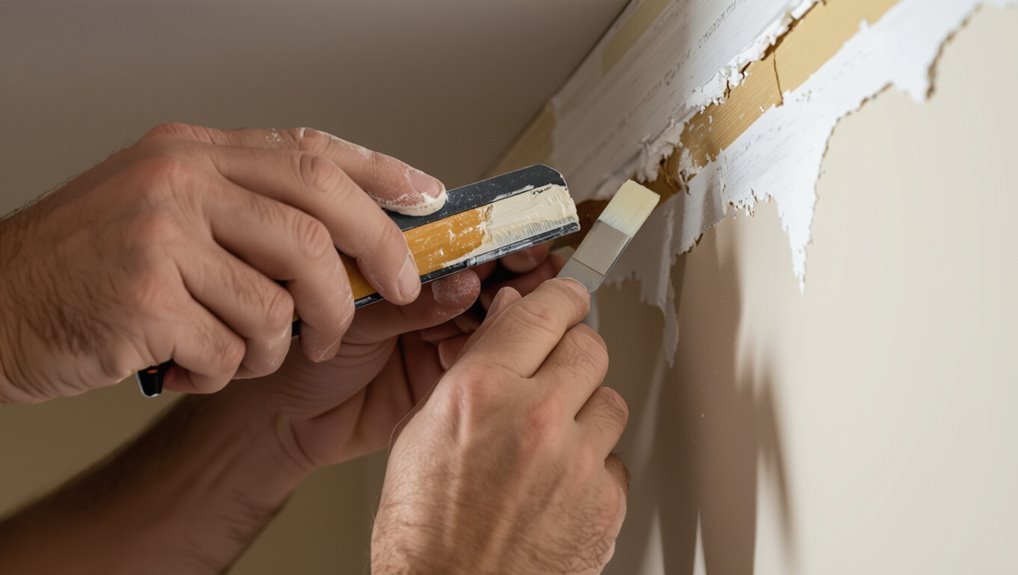
Touch Up Jagged Ceiling Edges With a Steady Brush
Before you touch up jagged ceiling edges, clean and tape the edge so paint won’t spread and you have a clear guideline.
Pick a small, angled or sash brush with firm bristles that holds paint and gives control.
Keep your wrist steady, work in short, continuous strokes, and reload the brush sparingly for crisp results.
Prep The Ceiling Edge
Grab a small angled brush and steady your hand to touch up any jagged spots along the ceiling edge; you’ll work in short, controlled strokes to blend the line and avoid buildup.
- Do ceiling preparation: wipe dust and cobwebs.
- Tape adjacent walls if needed.
- Sand rough nubs lightly.
- Perform edge cleaning with a damp cloth.
- Feather paint outward for a seamless finish.
Use The Right Brush
Choose a small, angled sash brush with firm, tapered bristles so you can control strokes along the ceiling line without dragging or splaying paint.
Pick the right brush types for tight edges—angled sash or miniature trim brushes.
Match bristle materials to your paint: synthetic for latex, natural for oil.
Keep brush tips clean, load sparingly, and touch up with short, deliberate strokes.
Steady Hand Techniques
Steady your wrist and work in short, controlled strokes to blend jagged ceiling edges with the trim—keep the brush tip lightly loaded so paint flows only where you want it.
You’ll use brush control and hand stability to tidy lines. Practice these moves:
- Anchor elbow to body
- Use light, even pressure
- Rest pinky on trim
- Move shoulder, not wrist
- Pause to reload brush
Correct Drips and Runs Without Stripping Paint
If you spot a drip or run after the paint’s dried, don’t strip the ceiling—smooth it out instead.
Use a sharp razor to shave raised paint, then press gently with a damp sponge to blend edges.
For drip control, remove excess before it cures; for run correction, shave, feather edges, and touch up with thin paint layers so the repair disappears into the surrounding finish.
Sand and Feather Rough Edges Before Repainting
Start by sanding the raised or jagged edges of the repaired area with fine-grit sandpaper.
Then feather the perimeter so the shift to the surrounding ceiling is smooth and barely perceptible.
Use careful sanding techniques and feathering methods to blend.
Follow these steps:
- Light, even passes
- Check edges by touch
- Wipe dust away
- Re-sand if needed
- Inspect in raking light
Spot-Prime Bare Patches Before Recoating
Before you recoat, spot-prime any bare patches so the new paint adheres evenly and the finish looks uniform. You’ll use spot prime techniques to seal drywall and knots; let primer dry fully. Targeted bare patch solutions prevent flashing and sheen differences. Apply thin coats, feather edges, and inspect under good light before full recoating.
| Step | Action |
|---|---|
| 1 | Clean |
| 2 | Prime |
| 3 | Dry |
| 4 | Inspect |
| 5 | Recoat |
Choose Rollers and Brushes for Clean Ceiling Cuts
Choose rollers and brushes that give you control at the edge so you can cut in cleanly without backtracking; a 3/8″ nap roller for smooth ceilings and a 1/2″–3/4″ nap for lightly textured surfaces, paired with a high-quality angled sash brush, will make tight, consistent ceiling cuts easier.
- Pick roller types for surface texture
- Match brush sizes to trim width
- Use an angled sash brush
- Keep a steady wrist
- Load tools moderately
Paint Types That Make Cutting-In Easier
Once you’ve picked the right roller and brush for clean edges, pick a paint that helps you control the cut-in: paints labeled “self-leveling” or “high-flow” reduce brush and roller marks, and a paint with a tad more open time (slower drying) gives you extra seconds to smooth lines.
Choose satin or eggshell paint finishes for forgiving cut-ins, and match cutting techniques to the formula.
Inspect Under Light: Reveal Hidden Flaws
When you angle a bright work light across the ceiling, it exposes hairline ridges, missed spots, and feathered edges that look fine in normal lighting but show up as glaring flaws later.
Use lighting angles for effective flaw detection and act on what you see.
- Scan edges slowly
- Move light side-to-side
- Note low-contrast streaks
- Mark with pencil
- Reinspect before repainting
Fixes for Textured Ceilings vs. Smooth Ceilings
If your ceiling is textured, you’ll want to match that texture before you try to clean up the paint line so repairs blend in.
For smooth ceilings, focus on sanding and feathering the edge for a seamless finish.
Use the matching or smoothing technique first, then touch up paint to hide the repair.
Match Texture First
Matching the ceiling texture before repainting makes uneven paint lines much easier to hide, because the paint will sit and reflect light the same way across the joint.
You’ll focus on texture matching and consistent ceiling patterns. Do these steps:
- Inspect existing texture closely
- Test patch blends off to the side
- Use matching tools and compounds
- Feather edges into the old texture
- Prime before final paint
Smooth Edge Techniques
Edges matter: getting a clean shift depends on whether your ceiling is textured or smooth, because each surface needs a different approach to feather, sand, and tape so paint lines disappear. You’ll adjust edge finishing and paint application: use flexible tape and skim for texture; sand and crisp tape for smooth.
| Surface | Tool | Tip |
|---|---|---|
| Textured | Skim | Blend |
| Smooth | Sand | Crisp |
When to Touch Up a Small Area vs. Repaint Whole Ceiling
How do you decide whether to touch up a small spot or repaint the whole ceiling? You weigh damage, visibility, and effort, using touch up techniques for quick fixes and routine ceiling maintenance to delay full repaint.
- Size of blemish
- Paint age and sheen
- Edge visibility
- Accessibility
- Time versus cost
Troubleshoot Bleed, Feathering, and Color Mismatch
First, you’ll identify what’s causing paint bleed—poor surface prep, low-quality tape, or wet paint can all be suspects.
Then you’ll learn simple fixes for feathered edges, like sanding and glazing to blend shifts.
Finally, you’ll match color by testing small patches and using tinted primer or thin glazes to correct any mismatch.
Identify Paint Bleed Causes
When paint bleeds, feathers, or looks off in color, you’ll want to pinpoint the exact cause before reaching for more paint—each problem has a different fix.
- Poor surface preparation allows stains and texture to show through.
- Excessive paint application causes runs and bleed.
- Low-quality tape or wrong removal angle pulls edges.
- Moisture or humidity affects adhesion.
- Old or mismatched primer alters final hue.
Fix Feathering And Mismatch
If you’ve identified that feathering, paint bleed, or color mismatch is the issue, you can correct each problem with focused fixes rather than more paint.
For feathering techniques, sand lightly, feather edges with a damp brush, and use thin glaze to blend.
Stop bleed by sealing with primer or caulk.
For color matching, get a sample, test small patches, then adjust tint before full touch-up.
Frequently Asked Questions
Can Uneven Ceiling Lines Cause Mold or Moisture Issues?
Uneven ceiling paint lines won’t directly cause mold, but they can hide moisture issues; you’ll need mold prevention and moisture control measures, inspect for leaks, improve ventilation, and fix damaged areas to prevent mold growth.
Can You Use a Paint Sprayer to Fix Jagged Ceiling Edges?
Yes — 72% of pros use sprayers for speed; you’ll use paint sprayer techniques and ceiling edge tips to control overlap, keep consistent distance, mask thoroughly, and feather edges, ensuring smooth, even ceiling lines every time.
How Do Temperature and Humidity Affect Paint Cutting-In?
Temperature effects and humidity levels change drying time, so you’ll adjust paint application accordingly: higher humidity and cooler temps slow drying and can cause bleed, while warm, low humidity speeds drying and demands faster cutting-in and tack control.
Are There Eco-Friendly Tapes or Paints That Prevent Bleed?
Like a fresh breeze, yes — you can pick eco friendly options: low-VOC paints and paper masking or painter’s caulk as tape alternatives. You’ll prevent bleed by prepping surfaces, pressing edges, and sealing gaps carefully.
Can Pets or HVAC Drafts Ruin Fresh Ceiling Edges?
Yes — pets and HVAC drafts can ruin fresh ceiling edges: you should control pet hair, keep pets away, and use draft control like vents closed or fans off until paint cures to prevent wobble, dust, and smudges.
Conclusion
You’ve got this—fixing that jagged ceiling line is mostly about steady hands, the right tools, and knowing when to touch up versus redo. Inspect under good light, use sharp edges or proper tape, feather your brush strokes, and match texture before you paint. Like trimming a hedge, small snips (light sanding, tiny touch-ups) can make a messy edge look deliberate. Take your time, work methodically, and the line will look pro-level.