
How to Get Paint Off of Walls – Safe Removal Methods for All Paint Types
Start by identifying the paint type and testing for lead if the home was painted before 1978; wear a respirator, gloves, and eye protection. For fresh water-based paint, use soap and water; soften dried latex with a plastic scraper or heat gun; use mineral spirits for oil-based paints. Try low-toxicity chemical strippers or steam on textured or plaster walls, and sand carefully with dust control. Follow containment and cleanup rules, and keep going to learn detailed steps and precautions.
Who This Guide Helps and How to Use It
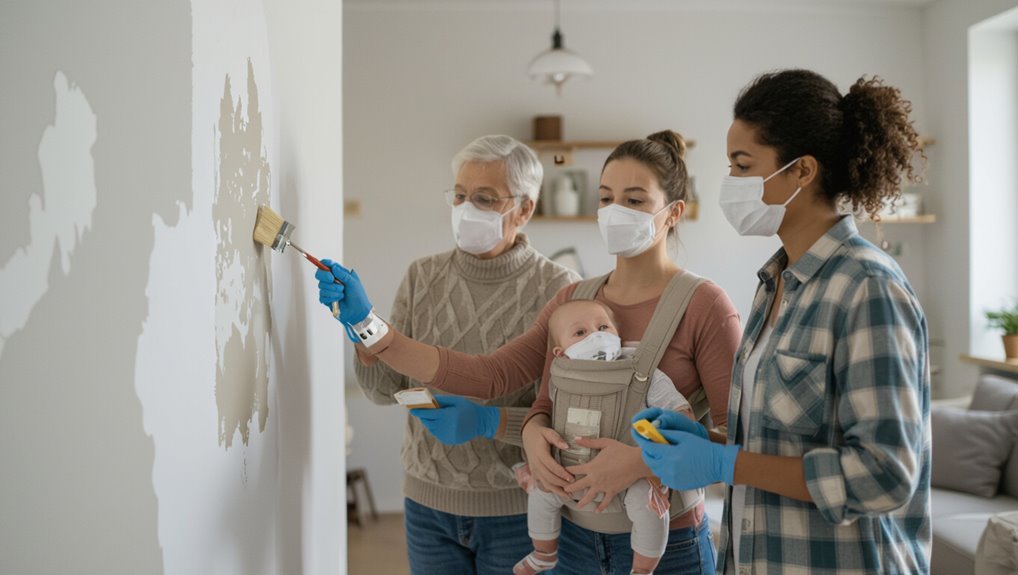
Who’s this guide for?
You’re a DIY enthusiast tackling paint removal or wall restoration and need clear steps.
You’re a DIY enthusiast restoring walls or removing paint and need clear, practical steps.
You’ll get practical tips, tool suggestions, and safety precautions to plan projects confidently.
Use sections selectively based on paint type and surface, follow warnings, and prep worklists.
This guide helps you decide methods, estimate time, and avoid common mistakes while staying safe.
Quick Answer: Safest First Step to Remove Paint From Walls
Because safety matters most, start by testing for lead paint before doing anything else: you should assume older coatings might contain lead and protect yourself with a kit or professional test.
Once lead is ruled out, choose paint removal techniques suited to your wall surface considerations, wear PPE, ventilate, and begin with the least abrasive method to avoid damage and health risks.
How to Identify the Paint Type on Your Wall
Wondering whether your wall’s paint is oil- or water-based? You can check paint characteristics visually and by touch: glossy oil paints feel smoother, water-based dries matte and smells lighter. For paint identification, try a small rubbing test with alcohol or soap and water. Compare results to this quick guide:
| Test | Oil-based | Water-based |
|---|---|---|
| Rub | Little change | Softens/removed |
When and How to Test for Lead Paint
If your wall was painted before 1978 or you’re unsure about its history, test for lead before scraping, sanding, or stripping any paint.
You’ll want prompt lead paint testing to avoid health risks. Follow steps clearly:
- Buy an EPA-recognized test kit.
- Wear basic protection.
- Collect samples gently.
- Send to a certified lab for confirmation.
Tools, PPE, and Supplies to Gather First
Before you start stripping paint, gather the right PPE—respirator, gloves, eye protection, and coveralls—especially if there’s any chance of lead.
You’ll also want basic hand tools like scrapers, putty knives, and sanding blocks.
Finally, stock up on chemical strippers, paint remover pads, drop cloths, and cleaning supplies so the job goes smoothly.
Essential Personal Protective Equipment
Because scrubbing or stripping paint kicks up dust, chips, and fumes, you’ll want the right PPE and tools at hand before you start work.
You’ll follow safety protocols and gather protective gear to protect skin, lungs, and eyes.
- Respirator (P100)
- Safety goggles
- Nitrile gloves
- Disposable coveralls
Keep a ventilation plan and a first-aid kit nearby.
Basic Hand Tools
With your PPE in place and the area ventilated, gather the basic hand tools you’ll use to remove paint effectively and safely.
You’ll want a sturdy putty knife, multi-tool with scraper blades, wire brush, sanding block, and assorted sandpapers.
Keep drop cloths and painter’s tape nearby for wall preparation.
Have a small vacuum or brush to clear dust as you work.
Chemical And Surface Supplies
Gather a few key chemical and surface supplies before you start: a paint stripper suited to your paint type (gel for vertical surfaces, liquid for small areas), a solvent or mineral spirits for cleanup, chemical-resistant gloves and eye protection, and disposable rags or shop towels.
- Safety (PPE)
- Chemical compatibility
- Surface preparation tools
- Cleanup supplies
Prepare the Room to Protect Surfaces and Air
Start by clearing the room of as much furniture and decor as you can, then cover anything that must stay with drop cloths or plastic sheeting; this prevents splatters and makes cleanup far quicker. Arrange furniture for easy access, plan room arrangement, and open windows to boost air circulation. Seal vents, tape edges, and use a fan or respirator if needed.
| Task | Tip |
|---|---|
| Clear | Remove items |
| Cover | Use drop cloths |
| Ventilate | Open windows |
| Seal | Tape vents |
| Protect | Wear mask |
Methods by Paint Type: Overview and Decision Guide
Because different paints bond and cure differently, you’ll choose removal methods based on the paint type, surface, and how much you want to preserve the wall.
So identify whether you’re dealing with water-based latex, oil-based, enamel, or specialty coatings before picking solvents, heat, or scraping techniques.
Focus on paint removal and surface preparation.
Choose based on:
- Safety
- Speed
- Preservation
- Cost
Remove Fresh Water‑Based Paint With Soap and Water
If the paint is still tacky or just dried, you can usually remove water-based (latex) splatters with plain soap, warm water, and a soft cloth or sponge—work gently to avoid damaging the wall finish.
Blot, rinse the cloth frequently, and use light circular motions.
These fresh paint techniques rely on prompt action and careful soap application so you lift residue without spreading or abrading the surface.
Soft‑Scraping Latex Paint Without Damaging Drywall
Gently scrape dried latex spots with a plastic putty knife or a credit card held nearly flat to the wall to lift paint without gouging drywall; work in short, controlled strokes and stop as soon as you feel resistance so you don’t pull paper or create divots.
Use soft scraping techniques and prioritize drywall protection.
Gentle scraping wins — protect the drywall first by using soft, careful techniques to lift spots safely.
- Breathe.
- Go slow.
- Test first.
- Patch gently.
Use Heat Tools Safely on Interior Walls
One simple option is a heat gun or hair dryer used at a moderate distance to soften paint so you can peel or scrape it away; keep the tool moving, hold it several inches from the wall, and never let any spot get hot enough to blister the drywall paper.
You should follow heat application techniques, monitor surface temperature, wear protection, and account for wall material considerations to prevent damage.
Choose and Use Chemical Strippers for Latex Paint
When latex paint won’t budge, pick a stripper formulated for water-based finishes and the surface you’re working on.
Test a small, hidden area to confirm compatibility and how long it needs to sit.
Always wear gloves, eye protection, and guarantee good ventilation while following the product’s instructions.
Choose Proper Stripper Type
Before you grab any chemicals, match the stripper to latex paint and your surface—water-based paints react differently than oil-based or shellac finishes, and wrong choices can harm drywall, wood, or trim.
Pick from paint stripper types that suit latex: methylene chloride alternatives, caustic gels, solvent blends, or eco friendly alternatives. Choose one that won’t damage finish, breathe safely, and follow instructions.
- Safety
- Effectiveness
- Surface care
- Disposal
Test Compatibility First
Start with a small, out-of-sight patch to confirm the stripper works on your specific latex paint and substrate.
You’ll try different test methods—cotton swab, brush, or small spread—timing each to check effectiveness.
Observe adhesion, staining, and substrate reaction to assess paint compatibility.
If the patch fails, try a different formulation until you find one that lifts paint without damaging the wall.
Follow Safety Precautions
Because chemical strippers can release strong fumes and harm skin or finishes, you’ll take protective steps before applying them:
- Wear full safety gear—gloves, goggles, respirator—to feel secure.
- Open windows, use fans, follow ventilation tips to clear fumes.
- Cover floors and nearby surfaces to avoid damage and anxiety.
- Keep a first-aid kit and emergency contact ready; don’t rush.
How to Remove Oil‑Based Paint With Solvents
Tackle oil-based paint with the right solvent and you’ll dissolve it rather than gouging or scrubbing the wall raw.
Test small areas first to confirm paint compatibility and avoid damage.
Apply solvent applications sparingly with a cloth or brush, let it penetrate, then wipe softened paint away.
Work ventilated, wear gloves, and dispose of used rags safely to prevent fires.
Pick the Right Solvent and Neutralize Residues
Match the solvent to the paint type—mineral spirits for oil-based, acetone or lacquer thinner for tougher coatings—and always check the manufacturer’s label.
Test the solvent in a small, hidden area to make sure it won’t damage the wall or finish.
After you’ve removed the paint, rinse the area thoroughly and neutralize any solvent residue so the surface is safe for repainting.
Match Solvent To Paint
Before you grab a bottle, identify the paint type—water-based (latex, acrylic) or oil-based—so you can choose a solvent that’ll actually dissolve it without damaging the wall.
Use solvent selection for proper paint compatibility, then neutralize residues to prevent staining or fumes.
How it feels matters:
- Relief
- Confidence
- Safety
- Satisfaction
Test Small Hidden Area
Wondering how to avoid ruining your wall? Before full treatment, do hidden area testing: apply chosen solvent to a discreet spot, wait, blot, and inspect for color loss or finish damage.
You’ll confirm compatibility with wall paint and adjust solvent strength if needed. Record results and ventilation needs so you proceed safely across the rest of the surface.
Rinse And Neutralize Residue
After you’ve removed the paint, rinse the area thoroughly to remove any solvent traces and neutralize residues so they won’t continue to react with the wall finish.
You’ll want careful rinsing techniques and residue neutralization to protect paint and health. Follow steps that reassure you:
- Blot excess solvent gently.
- Rinse with mild soapy water.
- Neutralize per solvent instructions.
- Dry and inspect.
Sanding Painted Walls: When and How to Sand
If your painted walls show gloss, drips, or rough patches, sanding is the quickest way to create a smooth, paint-ready surface.
You’ll assess adhesion, remove loose flakes, and blend edges using appropriate sanding techniques for surface preparation.
Work progressively from coarse to fine grit, keep dust controlled with a vacuum or mask, and wipe down thoroughly before priming or repainting for best results.
Orbital Sander vs. Hand Sanding: Choose the Right Tool
Choosing between an orbital sander and sanding by hand comes down to the size of the job, the finish you want, and how much effort you’re willing to put in.
You’ll weigh speed versus control, sanding techniques, and tool durability. Decide based on surface area, edges, and patience:
- Rapid progress
- Fine control
- Less fatigue
- Lower cost
Removing Paint From Textured and Plaster Walls
Tackle textured and plaster walls carefully, because their uneven surfaces hide paint in crevices and can be easily damaged by aggressive methods.
Use gentle textured wall techniques: soft scrapers, nylon brushes, and low-pressure steam to loosen paint without flattening texture.
For plaster wall considerations, test a small area, repair cracks first, and prefer chemical strippers formulated for plaster to avoid sanding through the surface.
Remove Paint Splatters and Drips Without Scarring
After you’ve addressed textured or plastered areas, handle paint splatters and drips with care so you don’t leave gouges or shiny spots.
After treating textured or plastered areas, remove paint splatters carefully to avoid gouges or glossy spots.
You’ll use gentle paint removal techniques and wall protection strategies to preserve finish. Calmly follow steps that minimize damage and frustration:
- Soften with warm soapy water.
- Scrape gently with a plastic blade.
- Use a mild solvent sparingly.
- Feather edges with fine abrasive.
Removing Paint From Brick, Concrete, and Masonry (Outside)
When paint ends up on brick, concrete, or other masonry outside, you can usually remove it without damaging the surface if you pick the right method and work methodically.
Start with a stiff brush and mild detergent for fresh brick paint; for stubborn spots, use a pressure washer on low and chemical stripper rated for masonry.
Protect surrounding areas and use proper masonry tools.
Safe Methods for Trim, Baseboards, and Moldings
Before you start, protect floors and nearby walls with drop cloths and tape off hardware so you don’t spread mess or damage finishes.
For painted trim and baseboards, consider low-odor, gentle chemical strippers formulated for wood and follow the label directions and ventilation tips.
Use soft scrapers, fine-grit sanding sponges, or a heat gun on low settings to remove remaining paint without gouging the molding.
Prep And Protect Surroundings
While you tackle paint removal from walls, protect trim, baseboards, and moldings to prevent damage and staining; use low-tack painter’s tape, plastic sheeting, or craft paper to seal edges and joints without lifting finishes.
Focus on surface preparation and apply protective coverings carefully. Follow these steps to stay calm and confident:
- Tape precisely
- Mask seams
- Cover floors
- Inspect seals
Gentle Chemical Strippers
Since trim, baseboards, and moldings often can’t take abrasive scraping, choose gentle chemical strippers formulated for wood and delicate finishes and apply them sparingly with a small brush or soft cloth.
You’ll want an environmentally friendly formula, test in an inconspicuous spot, work in small sections, and wipe residue promptly.
Follow label instructions for safe handling and guarantee effective application without damaging profiles.
Gentle Mechanical Techniques
Use soft, controlled mechanical methods to remove paint from trim, baseboards, and moldings without gouging profiles or stripping delicate details.
You’ll rely on gentle scraping and light sanding with mechanical buffers, protecting contours and finishes.
Proceed slowly, testing small areas first, and clean debris as you go to preserve edges and paint lines.
- Recover pride
- Regain calm
- Reveal beauty
- Feel relief
Lead Paint Removal and Containment Best Practices
Lead paint demands careful handling because old coatings can release toxic dust and chips that poison people—especially children and pregnant people—when disturbed.
You should do home testing, understand abatement regulations, and get a professional evaluation if results are positive.
Use safe containment: seal work areas, control dust with HEPA, wet methods, and dispose debris per rules to minimize health risks and exposure.
When to Stop and Hire a Professional Abatement Crew
If you suspect lead paint hazards or find extensive chipping, peeling, or dust, stop and don’t try to handle it alone.
You’ll also want professionals if removing the paint risks complex structural damage or will require major repairs.
A licensed abatement crew has the tools and training to contain hazards and protect your home and family.
Lead Paint Hazards
When you’re dealing with paint that might contain lead, stop work and call a certified abatement crew as soon as you suspect widespread contamination or disturbed surfaces exceed small, easily contained areas.
You shouldn’t risk family safety; lead paint creates serious health risks.
Consider professional help if you notice:
- Dust clouds
- Peeling over large areas
- Children present
- Pregnancy in household
Complex Structural Damage
1. You should stop if scraping reveals compromised structural integrity, extensive moisture damage, sagging plaster, or exposed wiring; call an abatement crew. They’ll assess hazards, stabilize framing, and contain contaminants. Don’t risk collapse or contamination—pros handle permits, testing, and repairs.
| Fear | Damage | Relief |
|---|---|---|
| Unsafe | Hidden rot | Expert care |
| Overwhelmed | Mold | Secure home |
Patching, Skim‑Coating, and Preventing Surface Damage
Before repainting, you’ll want to patch holes, skim-coat uneven areas, and protect surrounding surfaces so the new finish looks seamless and lasts.
Use patching techniques to fill, sand, and feather edges; apply a thin skim coat for smoothness; tape and cover for surface protection.
Feel reassured, proud, calm, and excited:
- Relief
- Pride
- Calm
- Excitement
Clean and Prep the Surface for Repainting
Start by removing dust, grease, and loose paint so your new coat will adhere properly—wipe walls with a degreasing cleaner or trisodium phosphate solution, rinse well, and let them dry. For effective surface preparation and wall cleaning, sand glossy spots, repair imperfections, and prime bare areas.
| Task | Tool |
|---|---|
| Degrease | TSP |
| Sand | 120–150 grit |
| Patch | Spackle |
| Prime | Bonding primer |
| Clean | Microfiber rag |
Eco‑Friendly and Low‑VOC Paint Removal Options
When you need to strip paint with less harm, consider low‑toxicity chemical strippers that use safer solvents and biodegradable formulas.
You can also opt for mechanical removal—heat guns, sanding with dust extraction, or gentle scraping—to avoid chemicals altogether.
We’ll compare effectiveness, safety, and cleanup so you can pick the best option for your space.
Low‑Toxicity Chemical Strippers
Although you’ll want to avoid harsh solvents, low‑toxicity chemical strippers give you effective paint removal with far fewer fumes and health risks, using biodegradable ingredients or milder solvents to loosen coatings without the danger of traditional methylene chloride.
You’ll appreciate eco friendly options and prioritize chemical safety.
Follow steps to feel confident:
- Read label.
- Ventilate well.
- Wear PPE.
- Dispose responsibly.
Mechanical Removal Alternatives
If you prefer to avoid chemicals altogether, mechanical removal methods give you effective, low‑VOC options for stripping paint—think heat guns, infrared tools, hand scrapers, and sanding with proper dust control.
You’ll use mechanical scraping, a power sander, heat gun or hand tools, paired with dust containment, surface protection and safety measures to capture paint chips and minimize exposure while restoring the substrate efficiently.
Typical Costs and Time: Checklist by Method and Paint Type
One clear way to plan is to match removal method to paint type, since costs and time vary widely: you’ll need cost estimation and clear time requirements.
Consider this checklist to set expectations and avoid surprises:
- Scraping (latex): low cost, moderate time.
- Heat/chemical (oil/lead concerns): higher cost, longer time.
- Sanding (smooth finishes): moderate cost, variable time.
- Professional demo: high cost, fastest time.
Fixes for Peeling, Ghosting, Residue, and Gouges
When paint peels or leaves ghosting and residue, you’ll want to assess the damage before you start.
For peeled areas and gouges, you’ll scrape, sand, and fill with a suitable patching compound, then prime.
For stubborn residue or stains, you’ll clean, spot-treat, and use a stain-blocking primer so new paint sticks and looks even.
Fixing Peeling Paint
Because old paint can lift, flake, or leave ghostly patches, you’ll want to tackle peeling, ghosting, residue, and gouges methodically to restore a smooth, durable finish.
Understand peeling paint causes and focus on preventing peeling.
Then:
- Scrape loose edges—be firm but careful.
- Sand feathered edges for a seamless blend.
- Clean dust and grease thoroughly.
- Prime and repaint with compatible products.
Repairing Gouges And Residue
If gouges, stubborn residue, or ghosting mar your walls, tackle them by matching the repair method to the damage: sand shallow gouges, fill deeper ones with spackling for proper gouge repair, then sand smooth.
For residue cleaning, use a mild detergent or trisodium phosphate substitute, rinse, and let dry before priming.
Prime stained or repaired areas, then repaint for a seamless finish.
Safety Checklist: During Work and After Cleanup
A simple safety checklist will keep you protected while you remove paint and during cleanup: wear gloves and eye protection, guarantee good ventilation, keep a respirator handy for dust or strong fumes, and keep flammable materials and open flames away from solvents.
- Check safety gear — fit, condition, replace if needed.
- Seal and label waste.
- Ventilate until odor’s gone.
- Do a post cleanup inspection for hazards.
Frequently Asked Questions
Can Paint Removal Void Homeowner Insurance or Warranties?
Yes — you can void coverage if paint removal causes paint damage or structural harm; insurers may deny insurance claims for negligent work, and warranties can be voided if you alter surfaces or ignore manufacturer instructions.
How to Dispose of Paint and Contaminated Cleanup Materials Legally?
You might worry it’s tedious, but you’ll follow paint disposal methods: recycle water‑based paint, take oil/contaminated wastes to hazardous waste facilities, and obey cleanup material regulations by bagging, labeling, and using approved drop‑off or collection programs.
Will Paint Removal Release Harmful Fumes Days Later?
Yes — you can experience fume exposure days later if solvents or old lead-based paint were used; you’ll notice symptoms and face potential long term effects if ventilation, cleanup, and protective measures weren’t adequate, so ventilate and monitor.
Can Pets or Plants Be Harmed During Interior Paint Removal?
Yes — while you’re removing paint, pet safety and plant protection matter: fumes and dust can harm them, so you’ll isolate animals, relocate plants, ventilate well, use low-tox products, and clean thoroughly to minimize risks.
Are There Tax Credits or Rebates for Eco-Friendly Paint Removal?
You might qualify for rebates or tax credits if you choose eco friendly solutions for paint removal techniques; check federal, state, and local programs, energy-efficiency incentives, and waste-management grants, and keep receipts for documentation and eligibility.
Conclusion
So you’ve learned the sensible, safe ways to evict paint from your walls without turning your house into a toxic art project. Don’t be that person who grabs a blowtorch because Pinterest lied to them. Test for lead, suit up, pick the right remover, and patch like a pro. If it still looks terrible, blame the color, not your tools—then call a pro before your DIY confidence becomes a municipal ordinance.
