How to Get Scratches Off Painted Walls and Restore a Clean Look
You can remove most scratches yourself with the right approach: start by cleaning the area with mild soap and a microfiber cloth, then try a magic eraser for surface scuffs. For shallow scratches, lightly sand edges and apply matching touch-up paint, feathering outward. For deep gouges, fill with lightweight spackle, sand smooth, prime, and repaint. Use furniture pads and bumpers to prevent damage, and keep going to learn step‑by‑step techniques and tips.
Quick Answer Can You Remove Scratches from Painted Walls?
Yes—you can often remove light surface scratches with a gentle cleaner, a magic eraser, or touch-up paint.
If the scratch only affects the top coat or finish, you can repair it without repainting, but deeper gouges that expose drywall or primer usually require repainting or filling.
Start by evaluating the depth so you know whether a quick fix will do or if you’ll need a larger repair.
One-sentence direct solution
You can usually remove light scratches from painted walls by cleaning the area, gently buffing with a soft cloth or fine-grade abrasive, and touching up with matching paint or a stain-covering marker.
For simple fixes, learn how to get scratches off painted walls by prepping, testing a discreet spot, then carefully blending touch-up paint or using a color-matched marker for a near-invisible repair.
When removal is possible vs when repainting is necessary
If the scratch only affects the paint surface—no gouge into drywall or primer—you can usually remove or hide it with cleaning, gentle buffing, and a touch-up.
If the damage exposes drywall, creates a groove, or flakes paint, you’ll need to fill, sand, prime, and repaint.
Evaluate depth and surrounding finish; shallow marks are fixable, deep ones require repainting for a seamless result.
Understanding Wall Paint and Scratches
You’ll want to know what type of paint and finish you’re working with—flat, eggshell, satin, semi-gloss, or gloss—because each shows and hides scratches differently.
Light surface scuffs often polish out on glossier finishes, while flat paint can look more noticeable and be harder to blend.
Also assess depth: is it a surface mark, paint scraped off, or a drywall gouge, since each needs a different repair approach.
Types of paint and finish (flat, eggshell, satin, semi-gloss, gloss)
Paint finishes range from flat to high-gloss, and each level affects how scratches show and how easy they are to repair. You’ll choose flat for low sheen, eggshell for subtle sheen, satin for durability, semi-gloss for trim, and gloss for high shine. Consider touch-up methods and cleaning based on finish.
| Finish | Typical use |
|---|---|
| Flat | Ceilings, low-traffic |
| Gloss | Trim, doors |
How scratches affect different finishes
Different sheens don’t just change appearance—they change how scratches look and how you’ll fix them.
In flat or matte finishes, scratches blend more but show texture changes. Eggshel and satin hide mild marks yet reveal light abrasions. Semi-gloss and gloss highlight every line with shine contrast.
You’ll choose gentler touch-ups for low sheen and careful polishing or spot paint for high sheen.
Depth of damage: surface scuffs vs paint removal vs drywall gouges
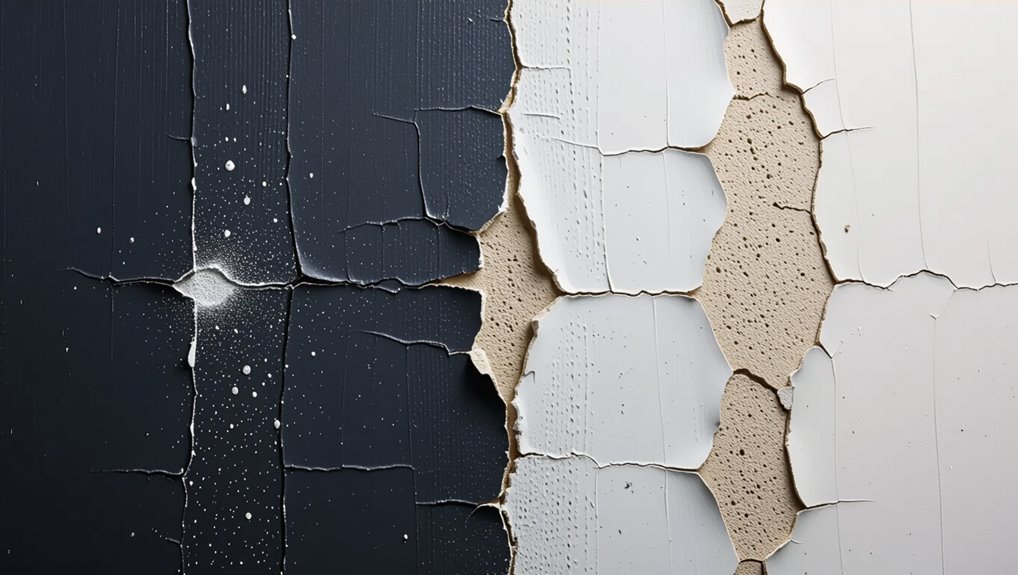
While some marks only scuff the surface and others strip away paint or gouge the drywall, knowing which you’re facing changes how you fix it.
Light scuffs usually lift with cleaning or gentle erasing.
Paint removal needs touch-up with matching paint and feathering.
Drywall gouges require filling, sanding, priming, then repainting.
Assess depth before you start to choose the right repair.
Assessing the Scratch Step-by-Step Inspection
Start by cleaning the scratched area so you can see the true extent of the damage.
Run a fingertip test and inspect the edges to judge whether the scratch is surface-only or deeper.
If you spot primer or damaged drywall beneath the paint, choose a patch-and-prime approach; if it’s paint-only, a touch-up or light sanding will usually do.
Step 1: Clean the area to reveal true damage
Before you decide how to fix a scratch, clean the area so you can see the true damage.
Use a soft cloth, mild detergent, and water to remove dirt, grease, and dust. Rinse and dry thoroughly.
Avoid harsh scrubbing that could worsen paint.
Once clean, you’ll clearly see whether it’s surface scuffing, paint loss, or deeper gouging needing repair.
Step 2: Run the fingertip test and edge inspection
Next, run a fingertip test and inspect the scratch edges to judge depth and repair needs.
Lightly glide your finger along the mark: if it catches, the scratch is deeper and needs filling; if it feels smooth, gentle buffing or touch-up paint may suffice.
Note paint flakes, raised edges, or discoloration to determine whether sanding, filler, or spot painting is required.
Step 3: Identify substrate damage (paint-only vs primer/drywall)
When you inspect the scratch closely, determine whether it only disturbed the paint film or cut through to primer or drywall—because that changes how you’ll repair it.
Look for color contrast, texture change, and loose flakes.
Paint-only scratches feel smooth at the edge and show underlying color; primer or drywall exposure reveals raw beige/white, roughness, or crumbled gypsum that needs stabilization.
Decision guide: repair method selection
Now that you know whether the scratch only disturbed paint or exposed primer/drywall, decide how to fix it based on depth, length, and location. Inspect closely: hairline = touch-up; shallow = sanding + paint; deep = filler; long = multiple passes. Use this quick reference:
| Condition | Repair |
|---|---|
| Hairline | Touch-up |
| Shallow | Sand + paint |
| Deep | Filler + paint |
| Long | Multiple passes |
Tools and Materials You’ll Need
Before you start fixing scratches, gather the right cleaning supplies, repair tools, and materials so you don’t stop mid-job.
You’ll also want a few optional specialty products on hand for tougher marks or touch-ups.
Here are the essentials to assemble:
- Cleaning supplies and basic repair tools (erasers, sandpaper, putty knives)
- Repair materials (spackling, primer, touch-up paint, clear coat)
- Optional specialty products (magic erasers, rubbing compound, paint pens)
Cleaning supplies
Gather a few basic cleaning supplies and you’ll handle most wall scratches without calling a pro.
You’ll need a soft microfiber cloth, mild dish soap, a bucket of warm water, and a gentle all-purpose cleaner or diluted vinegar for stubborn marks.
Have a magic eraser or melamine sponge on hand for scuffs, plus paper towels and gloves to protect your hands.
Repair tools (erasers, sandpaper, putty knives)
For basic scratch repair you’ll want a small kit of hand tools: a soft eraser or vinyl eraser for surface marks, fine-grit sandpaper (220–320 grit) for smoothing raised edges, and a flexible putty knife for applying and feathering spackle or wood filler.
Keep sandpaper folded to control pressure, use the eraser gently to test finish, and choose a thin, flexible knife for neat, level fills.
Repair materials (spackling, primer, touch-up paint, clear coat)
Choose the right repair materials to make scratches disappear and blend the fix into your wall.
Use lightweight spackling for shallow gouges and a small putty knife to smooth.
Prime patched areas when paint sheen or color differs.
Match touch-up paint in finish and tint—test on a scrap.
Finish with a thin clear coat for durability on high-traffic spots.
Optional specialty products (magic erasers, rubbing compound, paint pens)
A few specialty products can make quick work of surface scratches without a full repair.
You can use a magic eraser gently to lift scuffs, a fine rubbing compound for light paint abrasion, and paint pens to precisely fill thin scratches.
Test each on an inconspicuous spot first, work lightly, and wipe clean so finish and color match remain consistent.
Step-by-Step Repair Methods (from least to most invasive)
Start with the least invasive fixes and work up to full repairs so you don’t do more than necessary.
First you’ll remove surface scuffs, then blend minor paint loss, next fill and repaint deeper scratches, and finally repair damaged drywall before repainting.
I’ll walk you through each method step by step.
Method A Remove surface scuffs and marks (no paint loss)
Start by gathering your materials: a mild detergent, soft cloths, a magic eraser, and something dry for a final polish.
You’ll clean the area, treat scuffs with the magic eraser or soapy cloth as needed, then rinse and dry.
Follow these simple steps in order and you’ll remove most surface marks without touching up paint.
Materials and prep
Before you begin, gather a soft microfiber cloth, a melamine foam eraser (magic eraser), mild dish soap, a bowl of warm water, and a clean towel so you can test and treat scuffs without damaging the paint.
Also have a small bucket, disposable gloves, and good lighting.
Choose an inconspicuous spot to test materials and note paint finish before proceeding.
Step-by-step actions (clean, mild detergent, magic eraser, dry polish)
Gather your testing materials and approach the mark with a plan: wipe the area with a damp microfiber cloth, try a mild detergent solution on a hidden spot, then gently work the scuff with a melamine foam eraser if the paint holds up, and finally dry and lightly buff the area to restore sheen.
Work in small circles, rinse residue, assess progress, and stop if paint dulls; repeat as needed.
Method B Blend minor scratches in paint (superficial paint loss)
For minor paint loss you’ll want the right materials and a clean workspace: mild cleaner, fine sandpaper, matching touch-up paint, small brushes, and a tack cloth.
Start by cleaning the area, lightly sanding the edges of the scratch, then apply thin coats of touch-up paint.
Feather the new paint into the surrounding finish so it blends smoothly and becomes nearly invisible.
Materials and prep
You’ll need a few basic items to blend minor paint scratches: a soft cloth, a mild degreaser or soapy water, fine-grit sandpaper (320–400), painter’s tape, a small artist’s brush or foam applicator, matching paint (touch-up or leftover), and a clear matte or satin finish if your wall’s sheen needs correcting.
Gather protective gloves, a disposable palette or plate, paper towels, and good lighting to inspect color match.
Step-by-step actions (clean, fine sanding, touch-up paint application, feathering)
Start by cleaning the scratched area with a soft cloth and mild degreaser or soapy water so paint and dust won’t interfere with adhesion.
Lightly sand with fine 220–320 grit until smooth. Wipe residue, apply matching touch-up paint with a small brush or sponge, and feather edges outward to blend.
Let dry, assess, and repeat thin coats until the finish matches.
Method C Fill and repaint deeper scratches and gouges
For deeper scratches and gouges you’ll need a few basic materials—spackling compound, a putty knife, sandpaper, primer, matching paint, and clean rags.
Start by cleaning the area, press in spackling to fill the damage, let it dry, then sand smooth before priming and repainting.
Finish with a final feathered coat of paint for a seamless repair.
Materials and prep
Before you tackle filling and repainting deeper scratches and gouges, gather the right materials and set up a clean, well-lit workspace.
You’ll need spackling compound, a putty knife, sandpaper (various grits), primer, matching paint, paintbrush or small roller, tack cloth, drop cloths, painter’s tape, and a respirator or mask.
Inspect the damage, remove loose debris, and ventilate the room.
Step-by-step actions (clean, fill with spackling, sand, prime, paint, finish)
Tackle deeper scratches and gouges by working through a clear, repeatable sequence: clean the area, apply spackling to fill the damage, sand smooth once it’s dry, prime the repaired spot, repaint to match, and finish with a light feathering for a seamless blend.
Use a putty knife for even fill, 120–220 grit sandpaper, oil- or water-based primer as needed, then thin coats of matching paint.
Method D Repair damaged drywall before repainting
If the scratch has damaged the drywall paper or left a hole, you’ll need to patch the wall before repainting.
Start by cutting out the damaged area, fitting a patch, applying joint compound in thin layers, sanding smooth, then priming and painting.
I’ll walk you through each step so you can get a seamless finish.
When to use drywall patching
When scratches gouge through paint and expose the drywall—or when dents and holes are deep enough that simple spackling won’t hold—you’ll need to patch the drywall before repainting to get a smooth, lasting finish.
Use patching for cracks, ragged edges, water-damaged paper, or holes larger than a fingernail. If texture or underlying gypsum is compromised, patching prevents future paint failure and visible repair lines.
Step-by-step actions (cut, patch, compound, sand, prime, paint)
Start by cutting away loose paper and crumbled gypsum to create a clean, solid edge around the damaged area; you’ll then apply a patch if the hole is larger than a fingernail.
Tape or mesh the patch, apply joint compound in thin coats, sanding between layers.
Prime the repaired spot, then paint to match.
Clean tools and inspect for seamless finish.
Comparison of Repair Options and When to Use Each
Now that you’ve seen step-by-step fixes, you’ll want to weigh cost, time, permanence, and skill needed to pick the right one. Below is a quick emotional snapshot to help you decide — it may make you breathe easier or nervously reconsider which method to try. Use cheaper, quicker fixes for small scuffs and reserve more permanent, skillful repairs for deep gouges.
| Option feeling | Reality check |
|---|---|
| Relief of a quick fix | Low cost, low time, temporary |
| Satisfaction of a lasting repair | Higher cost, more time, higher skill |
Cost, time, permanence, skill level comparison
Although some fixes look simple, the cost, time, permanence, and skill required vary a lot between methods, so you’ll want to pick the one that matches your budget, schedule, and comfort level.
Quick solutions like erasers or touch-up pens are cheap and fast but temporary. Spackling and repainting cost more, take longer, and last.
Hire pros for best permanence if you lack confidence.
Common Mistakes and How to Avoid Them
Don’t grab the wrong grit or sand until you remove too much paint, because over-sanding creates more work.
Don’t skip primer or pick the wrong type, and don’t mismatch sheen or color—those choices make repairs obvious.
Also, don’t rush drying or skip feathering edges, since wet paint and hard edges will stand out.
Using wrong grit sandpaper or over-sanding
Using the wrong grit sandpaper or over-sanding can do more harm than good, so be deliberate about your approach.
Choose a fine grit (220–320) for paint smoothing; avoid coarse papers that gouge. Sand lightly, follow the grain or stroke direction, and check often.
Stop when edges blend; excessive sanding thins paint and exposes primer or drywall, creating extra repair work.
Skipping primer or using wrong primer
If you skip primer or pick the wrong one, your touch-up will likely peel, show stains, or fail to hide the repair.
You should choose a primer suited to the surface—stain-blocking for marks, bonding for glossy surfaces, or drywall primer for new patches.
Apply thin, even coats, let them dry fully, and only then paint to guarantee adhesion and a seamless finish.
Mismatching paint sheen or color
When you touch up scratches with paint that doesn’t match the original color or sheen, the repair will stand out even if the brushwork’s perfect.
Test paint on an inconspicuous spot, compare sheen under room lighting, and use the same finish (flat, eggshell, satin, semi-gloss).
Blend edges by feathering with thin coats and match brand and batch when possible to guarantee seamless repairs.
Rushing drying times and not feathering edges
Because paint needs time to settle, rushing the drying process or skipping feathered edges will make repairs obvious and uneven.
Let paint cure fully before you touch it; use fans or climate control but don’t force it with heat.
When blending, feather strokes outward with a soft brush or roller to thin edges so the patch fades into the surrounding wall seamlessly.
Prevention and Best Practices to Keep Walls Scratch-Free
To keep scratches from happening in the first place, you should use simple protective measures like furniture pads, door bumpers, and high-traffic paint in busy areas.
Stick to gentle cleaning routines that remove dirt without abrasive scrubbing.
For rooms that see more wear—hallways, kids’ rooms, and entryways—pick more durable finishes to reduce future touch-ups.
Protective measures (furniture pads, bumpers, high-traffic paint)
If you want your painted walls to stay scratch-free, start by installing simple protective measures: stick felt pads under chair and table legs, add rubber bumpers to doors and furniture corners, and choose a high-traffic or scrubbable paint finish in busy areas.
Inspect pads regularly, replace worn ones, mount bumpers where impact happens, and pick satin or semi-gloss for durability without sacrificing appearance.
Regular cleaning routines that avoid abrasion
Along with pads and bumpers, a careful cleaning routine will keep minor marks from turning into scratches.
You should dust frequently with a soft microfiber cloth, spot-clean stains with mild detergent and water, and avoid abrasive scrubbing or harsh chemicals.
Test cleaners on an inconspicuous area first, use gentle circular motions, and dry surfaces to prevent moisture damage that can weaken paint and invite abrasion.
Choosing durable finishes for certain rooms
When you’re picking paint for high-traffic rooms, choose finishes that resist scuffs and wipe clean easily: satin or semi-gloss hold up better than flat, and high-performance acrylics or enamel formulas add extra durability for kitchens, hallways, and kids’ rooms.
Also pick washable primers, consider scrubbable certifications, and use darker or patterned colors where marks are likely so touch-ups blend and maintenance stays simple.
Quick DIY Tips and Shortcuts
You can tackle most small scuffs with things you already have at home, and sometimes a paint pen or touch-up kit is all you need.
Try these quick options before you call in a pro:
- Best household items for small scuffs
- When a paint pen or touch-up kit is enough
- When to call a professional
Best household items for small scuffs
Although small scuffs can look stubborn, you can remove most with common household items in minutes; grab a magic eraser, toothpaste, baking soda paste, or a soft cloth and you’re ready to try quick fixes that won’t harm most paints.
Use gentle circular motions, test a hidden spot first, blot with a damp cloth, and dry. Repeat lightly; stop if paint lifts.
When a paint pen or touch-up kit is enough
One quick fix that often does the trick is a paint pen or touch-up kit, which lets you match color and fill scratches without repainting the whole wall.
You’ll use it for small chips, hairline scrapes, and faded spots when texture and sheen match.
Clean the area, test on an inconspicuous spot, apply thin layers, and let each dry fully before evaluating.
When to call a professional
If that paint pen didn’t blend the chip or the wall’s texture still looks off, it’s time to contemplate professional help.
Call a pro when scratches are extensive, underlying damage exists, paint is peeling, or color matching fails repeatedly.
Pros’ll assess substrate issues, repair plaster, and repaint seamlessly.
Budget for quotes and timelines; prioritize lasting fixes over quick patches.
FAQ Common Questions
You probably have a few quick questions before you start fixing scratches, like whether a magic eraser can harm your paint or if hairline scratches can be repaired without repainting.
You’ll also want to know how to match touch-up paint, how long to wait between primer and paint, and whether spackling will show through thin coats.
I’ll answer each of these clearly so you can pick the right fix.
Can a magic eraser damage paint?
Wondering whether a Magic Eraser can harm your paint? You should test a hidden spot first—its melamine foam is mildly abrasive and can dull or remove thin, flat, or poorly cured paint.
Use light pressure, avoid glossy or freshly painted areas, and rinse the wall afterward. If scuffing appears, stop and choose a gentler cleaner or touch-up instead.
How do I match paint color for touch-ups?
How do you match paint for touch-ups without making the patch obvious?
Check leftover cans for color/finish codes, or bring a chip to a paint store for color-matching.
Test small patches on hidden areas and let them fully dry—lighting changes shade.
Use the same finish (eggshell, satin) and thin coats, feathering edges with a damp sponge to blend.
Adjust mix only if needed.
Can I fix hairline scratches without repainting?
Can you fix hairline scratches without repainting? Yes—you often can.
Clean the area, then rub a white eraser or a damp microfiber to reduce visibility. For painted finishes, try a non-gel toothpaste or baking soda paste applied gently; wipe and buff dry.
Use a furniture touch-up marker matching the sheen if needed. Deep gouges still need filler and paint.
How long should I wait between primer and paint?
Before you paint, let the primer fully dry—usually 1 to 4 hours for fast-drying primers and up to 24 hours for oil-based or high-build primers—so the topcoat adheres properly and cures evenly.
Check the primer label for specific dry and recoat times. Touch the surface; it should feel dry, not tacky.
If humidity’s high, wait longer to avoid patchy finish or adhesion problems.
Will spackling show through thin paint?
If you use a very thin or sheer paint, spackling can sometimes telegraph through the finish, especially over larger repairs or when the patch isn’t sanded smooth and primed.
To prevent show-through, sand flush, apply a quality stain-blocking primer, and feather the edges.
Match texture, use multiple light coats of paint, and inspect under varied lighting to confirm the repair is invisible.
Visual Guide and Before/After Examples
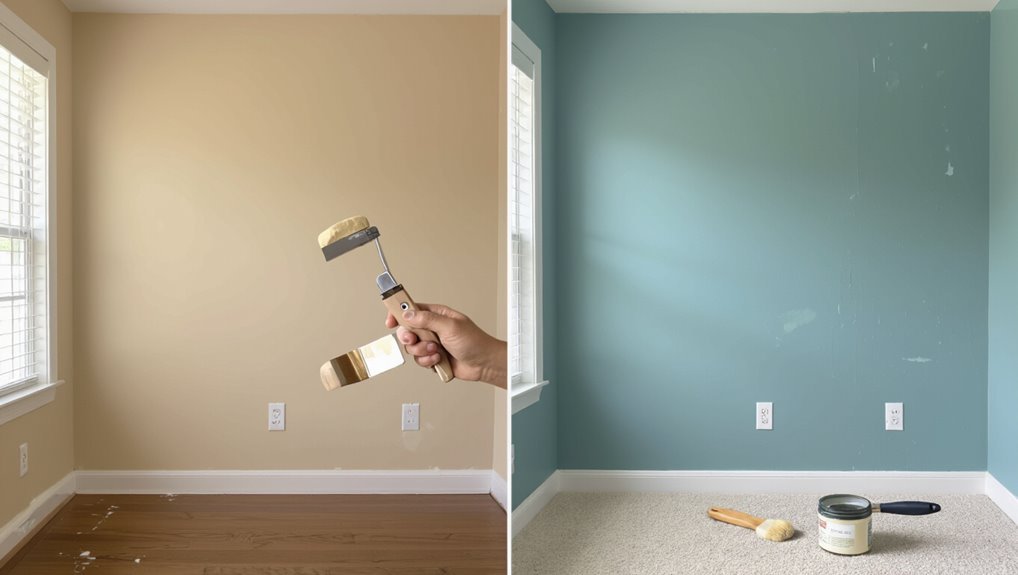
Anyone can understand the steps faster with clear visuals, so this section shows close-up photos and labeled diagrams of common scratches, the tools you’ll use, and each repair stage so you can compare damage and results at a glance.
You’ll see step-by-step shots: assess, sand, spackle, prime, paint. Compare before/after to judge blending, texture match, and when to repeat steps for a seamless finish.