How to Get a Smooth Paint Finish on Walls Every Single Time
You can get a perfectly smooth wall finish by prepping thoroughly: clean, repair dents and cracks, sand glossy spots, and prime. Use quality acrylic-latex paint, a good angled brush for cutting in, and a 3/8″–1/2″ nap roller or a sprayer set to the correct tip and pressure. Maintain a wet edge, apply thin even coats, sand lightly between coats, and control temperature and humidity. Follow these basics and you’ll see how to achieve pro-level results.
How to Get a Smooth Paint Finish on Walls Every Single Time
When you want flawless walls, start by prepping thoroughly: clean surfaces, repair dents and cracks, sand glossy areas smooth, and apply a quality primer so paint adheres evenly.
You’ll choose high-quality paint and the right sheen, use a good roller or sprayer, maintain a wet edge, and sand between coats.
These steps show you how to get a smooth paint finish on walls reliably.
Quick Answer Key Steps at a Glance
You’ll get a smooth finish by prepping surfaces, using the right tools, and applying paint in thin, even coats.
Keep essential tools handy—sanders, tack cloths, quality rollers/brushes, painter’s tape, primer, and good paint.
Follow those steps in order and you’ll cut mistakes and speed up the job.
One Sentence Summary of the Process
Although it looks simple, getting a smooth paint finish comes down to a clear sequence: prep surfaces, repair imperfections, sand smoothly, remove dust, apply primer if needed, cut in carefully, roll with even pressure and proper overlap, allow full drying between coats, sand lightly between coats, and finish with a final inspection and touch-ups to guarantee an even, durable, professional-looking result.
Essential Tools and Materials
Now that you know the step-by-step flow for a smooth paint finish, gather the right tools and materials to make each step go smoothly.
You’ll need quality supplies so prep, application, and cleanup succeed.
- Primer, paint (closed-cup), and finish coat
- Rollers, brushes, angled brush, and a pole
- Sandpaper, tack cloth, filler, caulk, drop cloths, painter’s tape
Basic Understanding What Makes a Finish “Smooth”?
To get a truly smooth paint finish, you need to know which paint types and sheens produce the slickest results, how the underlying surface condition matters, and how your application technique shapes the final texture.
Choose the right finish for the job, prep and prime surfaces so they’re even, and use consistent tools and strokes to avoid brush or roller marks.
Keep your technique steady and correct problems early, and you’ll cut down on bumps, orange peel, and uneven sheen.
Paint Types and Finishes: Which Yield Smooth Results
Paint finish comes down to three things: the paint’s formulation, the sheen level, and how it’s applied.
For smooth walls, pick high-quality acrylic latex or alkyd for durability and levelling. Mid to low sheens—eggshell or satin—hide minor flaws yet still smooth under a good roller or spray.
Flat hides texture but won’t clean as well.
Surface Characteristics That Affect Smoothness
When you’re aiming for a truly smooth finish, the surface itself matters as much as the paint: its texture, porosity, and imperfections determine how evenly the coat lays and how light reflects.
You’ll inspect for bumps, nails, and seams, sand rough areas, fill holes, and prime porous or patched sections so the paint levels evenly and hides flaws instead of highlighting them.
How Application Technique Impacts Final Texture
Having prepped the surface, you’ll find the way you apply paint determines whether the finish reads silky or streaky.
Use consistent strokes, maintain a wet edge, and avoid overworking areas. Roll or brush with even pressure, load tools properly, and sand between coats when needed.
Technique controls film thickness and texture, so practice steady, deliberate motions for a uniform, smooth result every time.
Prep Work The Foundation for a Smooth Finish
Before you pick up a brush, you’ll want to assess and repair any dents, cracks, or loose texture so the surface is even.
Clean the walls thoroughly to remove dust, grease, and stains, then sand with the right grits and tools to feather edges and create proper tooth.
Finally, choose and apply the appropriate primer for the surface and paint type to guarantee adhesion and a uniform finish.
Assessing and Repairing Wall Imperfections
Although paint can hide minor flaws, a truly smooth finish starts with carefully evaluating and repairing wall imperfections. You’ll save time and get better results if you fix dents, cracks, nail holes, and texture issues first.
Inspect walls under raking light, mark defects, sand glossy spots, fill with appropriate compound, feather edges, sand flat, and primer-seal repairs before painting.
Cleaning Walls: Dust, Grease, and Stains
Since dirt, grease, and dust can keep paint from adhering and highlight flaws, you should thoroughly clean walls before you paint.
Wipe with a microfiber cloth, then wash greasy areas with a mild degreaser or TSP substitute. Rinse, spot-treat stains, and let walls dry completely.
Remove cobwebs, dust baseboards, and vacuum corners to guarantee a clean, paint-ready surface.
Sanding: Techniques, Grit Progression, and Tools
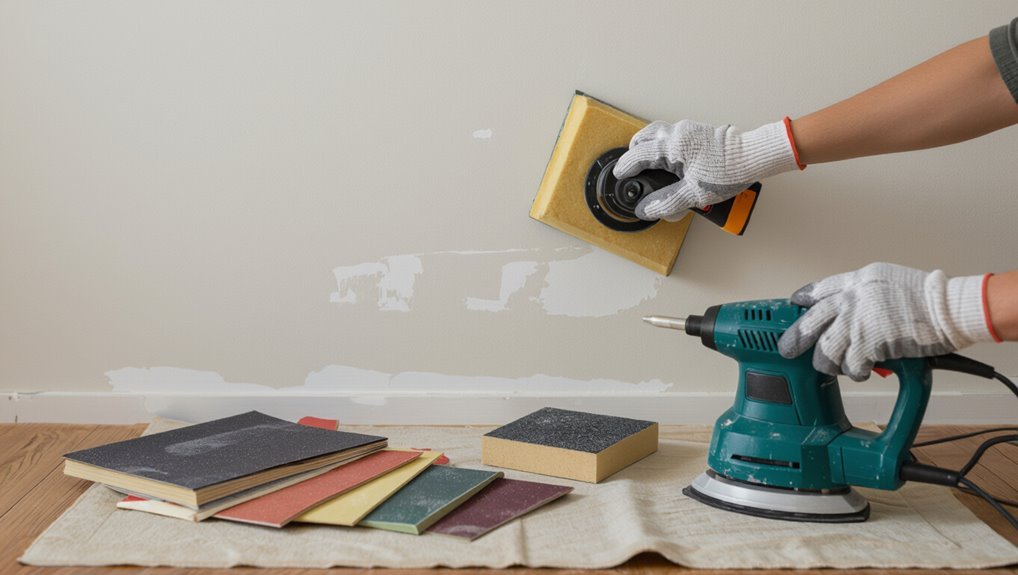
Start sanding with a clear plan: choose the right grit, tool, and technique to remove imperfections without overworking the surface.
Begin with 80–120 grit for rough spots, follow with 150–180 for smoothing, and finish at 220 for a paint-ready surface.
Use a sanding block or random-orbit sander for even pressure, keep dust controlled with a vacuum or tack cloth, and inspect frequently.
Priming: When, What Type, and How to Apply
When you’ve sanded and cleaned the surface, priming locks in a smooth base that helps paint adhere evenly and hides minor flaws.
Choose oil-based for stains or raw wood, latex for drywall, and bonding primers for glossy or tricky surfaces.
Apply thin, even coats with a roller and angled brush for edges, allow full drying, then lightly sand before your finish coats.
Choosing Paint, Tools, and Supplies
Now you’ll pick the paint, tools, and extras that actually make a smooth finish possible.
Choose the right paint type and sheen, decide between brush, roller, or sprayer based on the surface and finish you want, and match roller naps and brush filaments to the job.
I’ll also cover sprayer tips and useful additives that improve flow and leveling so your final coat looks flawless.
Selecting the Right Paint Type and Finish
Choosing the right paint and finish shapes both the look and durability of your project, so pick materials that match the surface and room conditions.
For high-traffic areas, choose durable, washable acrylic latex with satin or semi-gloss.
For living rooms and ceilings, use matte or eggshell to mask imperfections.
Match paint formulation to substrate (drywall, plaster, trim) and guarantee proper primer for adhesion.
Brushes vs Rollers vs Sprayers: Pros, Cons, and Best Uses
Once you’ve picked the right paint and primer for the surface, the tool you use will determine how that finish actually looks and performs. Choose brushes for detail, rollers for speed and even texture, and sprayers for ultra-smooth, fast coverage if you can mask properly.
| Tool | Strength | Best use |
|---|---|---|
| Brush | Precision | Trim, corners |
| Roller | Speed | Walls, ceilings |
| Sprayer | Smoothness | Large areas |
Recommended Roller Naps, Brush Types, and Sprayer Tips
Although the basics are simple, picking the right roller nap, brush type, and sprayer settings makes a big difference in how your paint goes on and how long the finish lasts.
Use 3/8″–1/2″ naps for smooth to semi-smooth walls, natural-bristle angled brushes for oil or trim, synthetic for water-based paints, and keep sprayer tip size, pressure, and overlap consistent for even coverage.
Additives and Extenders to Improve Flow and Leveling
One simple way to get a factory-smooth surface is to add the right flow and leveling additives to your paint; they thin brush and roller marks, reduce surface tension, and give the finish time to self-level before curing.
Use manufacturer-recommended levels, stir thoroughly, and test a small area.
Consider slow-drying extenders for hot, dry conditions and avoid over-thinning, which weakens adhesion.
Step by Step Application Process (Main How To)
Start by taping and protecting trim and surrounding areas so you won’t have to fix drips or accidental marks later.
Then cut in carefully for crisp edges, choose a consistent rolling technique for even coverage, or set up a sprayer correctly and use steady passes for a smooth finish.
Between coats, respect drying times and do light sanding to knock down imperfections before the next layer.
Step 1 Taping and Protecting Trim/Surroundings
Before you touch a brush, protect the trim and surrounding areas so paint goes only where you want it; masking now saves cleanup and touch-ups later.
You’ll prep surfaces, tape edges, and shield floors. Follow these steps:
- Clean and dry trim.
- Apply painter’s tape with firm pressure.
- Cover floors and furniture with drop cloths, securing edges.
Step 2 Cutting In: Methods for Crisp, Smooth Edges
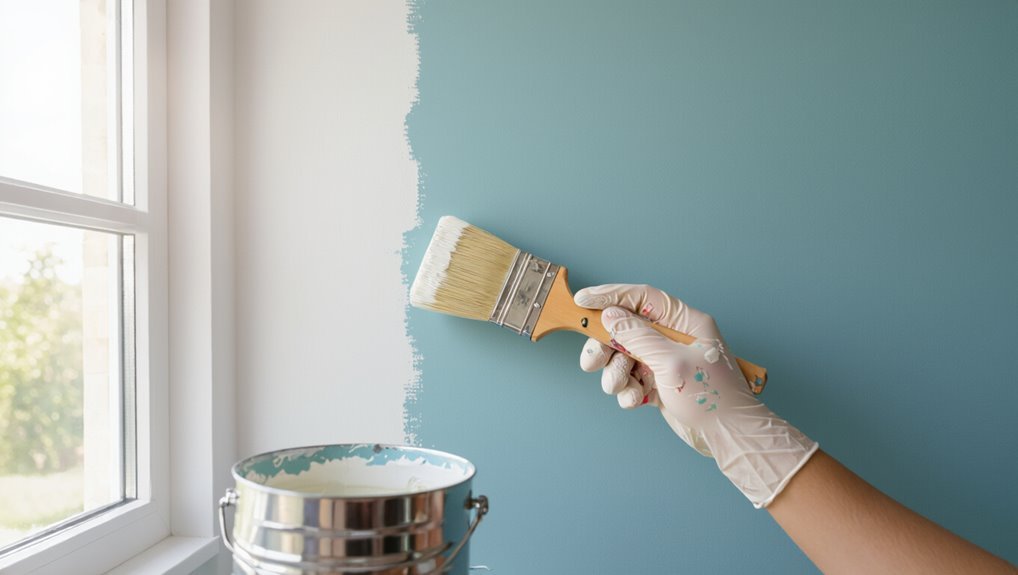
Cutting in lets you paint clean lines where walls meet trim, ceilings, and corners, and getting it right makes the rest of the job faster and neater.
Use a high-quality angled sash brush, load it lightly, and paint a steady 2–3 inch band.
Hold the brush like a pencil, feather the edge, and smooth overlaps.
Work top-down and keep a wet edge.
Step 3 Rolling Technique for an Even, Smooth Coat
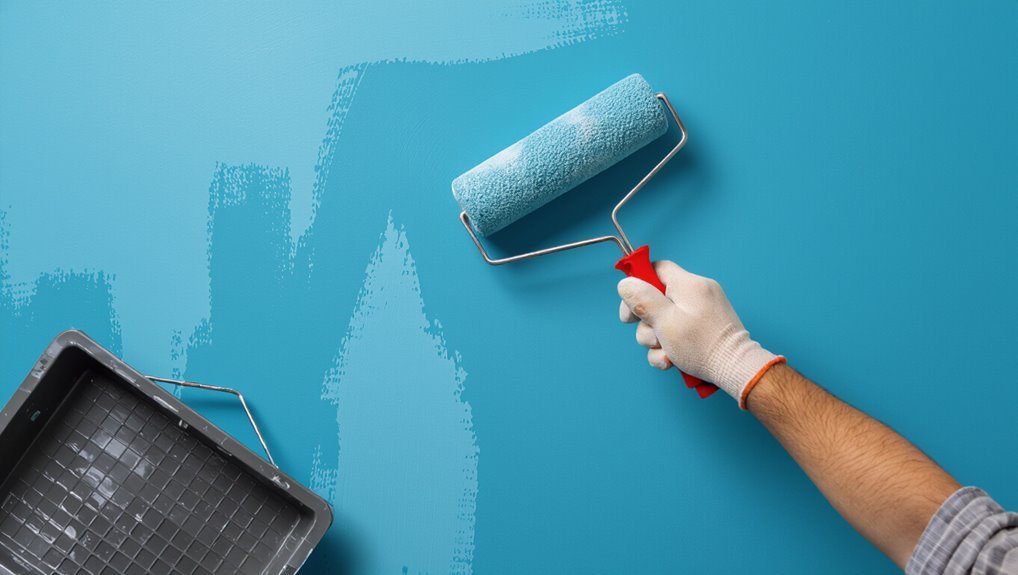
1. Load a 3/8″–1/2″ nap roller evenly, remove drips, and work in 4×4 foot sections.
Roll a “W” then fill it without pressing hard, keeping a wet edge. Overlap each pass slightly, maintain consistent pressure, and finish with light, smooth long strokes to level texture.
Inspect for missed spots and touch up before paint skins over.
Step 4 Using a Paint Sprayer: Setup and Pass Technique
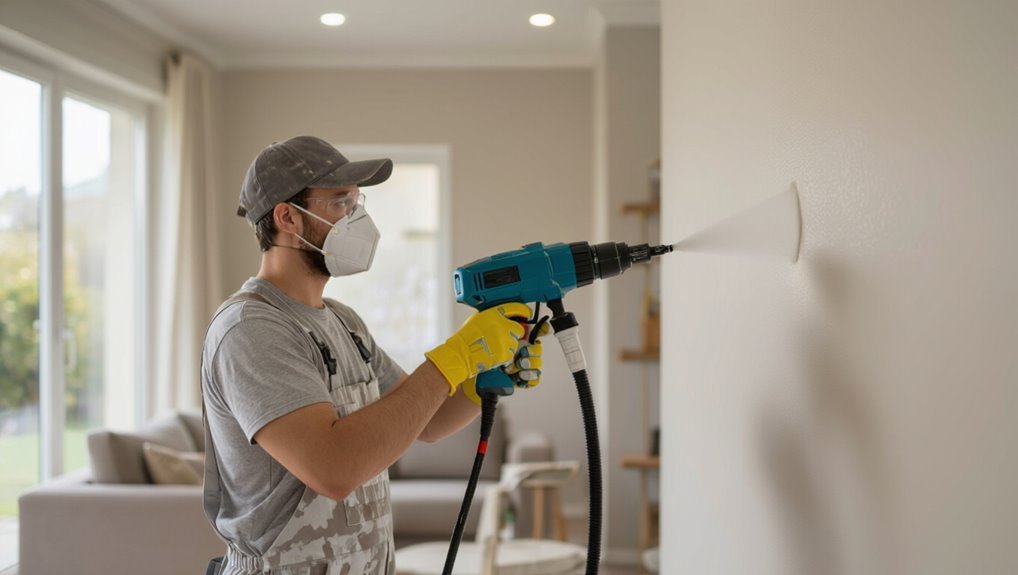
If you prefer a faster, more uniform finish than rolling can give, a paint sprayer will save time and produce a fine, even coat—especially on large walls, ceilings, or textured surfaces.
Adjust tip size and pressure for your paint, thin as recommended, and test spray on cardboard. Hold the gun 8–12 inches away, move steadily in overlapping horizontal passes, keeping speed consistent for uniform coverage.
Step 5 Drying Times Between Coats and Light Sanding
While you wait between coats, follow the paint maker’s recommended drying times and only sand lightly when the surface is just dull to the touch; this prevents gumminess and guarantees proper adhesion for the next layer.
Use fine 220–320 grit sandpaper, a light hand, and a clean tack cloth to remove dust.
Check edges and corners for smoothness before proceeding.
Step 6 Applying Additional Coats and Final Touches
Now you’ll apply additional coats and finish details methodically: work from the least-visible areas outward, maintain even, thin layers, and overlap each pass slightly to avoid streaks or ridges.
After proper drying, inspect for thin spots, feather edges with a light brush or roller, touch trim and corners carefully, and apply a final full coat.
Let cure fully before reinstalling fixtures.
Troubleshooting Common Problems and Fixes
When a finish isn’t smooth, you’ll want to identify whether you’re seeing brush marks, roller stippling, or lap marks and correct your technique or tools.
Check for bubbles, blisters, or orange peel to determine if it’s a temperature, solvent, or surface-compatibility issue, and address it before recoating.
For visible drips, runs, sags, or patchy coverage and color variations, stop, sand or feather the defect, and reapply with proper thinning and overlap to prevent recurrence.
Brush Marks, Roller Stippling, and Lap Marks Causes and Corrections
If you want a truly smooth paint finish, you need to understand how brush marks, roller stippling, and lap marks form so you can stop them before they happen.
Use proper tools: quality brushes, a dense nap roller, and correct thinner or paint viscosity.
Maintain a wet edge, apply even pressure, and back-roll to blend.
Sand between coats and avoid overworking paint.
Bubbles, Blisters, and Orange Peel Texture Diagnostics and Remedies
Although you’ve likely seen bubbles, blisters, or orange peel and assumed they’re just cosmetic, each defect points to a specific cause and needs a targeted fix.
Check for moisture, poor adhesion, or wrong thinner/temperature.
Pop blisters, sand, prime with stain-blocking primer.
For orange peel, sand lightly, thin paint per label, adjust spray settings or roller nap.
Recoat under proper conditions.
Visible Drips, Runs, and Sags Prevention and Repair
Because paint is fluid, it’ll run if you overload the brush or roller, and those runs quickly turn into obvious drips and sags that ruin a smooth finish.
Prevent them by loading less, using even strokes, and working top-to-bottom. If a sag appears, lift excess with a clean brush, feather edges, sand when dry, and repaint thinly.
Inspect under good light before declaring the job done.
Patchy Coverage and Color Variations How to Fix
When paint goes on thin or streaky, you’ll notice uneven color, flashing, or areas where the substrate shows through; these issues often stem from insufficient priming, low-quality paint, wrong sheen, or poor application technique.
To fix it, sand and re-prime bare spots, use higher-quality paint, match sheen, apply even thin coats with proper roller nap, and allow full drying between coats.
Preventive Strategies and Best Practices
To prevent issues before they start, you’ll control temperature, humidity, and ventilation and keep your mixing, pouring, and work pace consistent.
You’ll also maintain brushes and tools during sessions to avoid contamination or drag.
Finally, know when a pro is worth it by weighing the job’s scope against costs.
Environmental Controls: Temperature, Humidity, and Ventilation
If you want a consistently smooth finish, control the worksite’s temperature, humidity, and airflow so paint cures evenly and dust isn’t drawn into the film.
Aim for manufacturer-recommended temps, keep relative humidity stable (typically 40–60%), and use gentle, filtered ventilation to remove fumes without creating turbulent drafts.
Monitor conditions, adjust HVAC or dehumidifiers, and pause work if extremes threaten proper curing.
Consistency in Mix, Pouring, and Work Pace
Because even small variations change how paint levels and cures, keep your mixes, pouring method, and work pace consistent so every panel and coat behaves the same.
Measure ratios, stir uniformly, and use the same pour height and bead width. Work in predictable sections, maintaining wet edges and steady speed.
Consistent technique prevents lap marks, color shifts, and uneven texture, giving reliable smooth results.
Maintenance of Tools During Paint Sessions
When you keep your rollers, brushes, and spray tips clean and inspected throughout a session, you’ll avoid clogs, stray fibers, and buildup that wreck a smooth finish.
Wipe excess paint between passes, strain cans, rotate rollers, and use proper cleaning solvents on the spot.
Check ferrules and tip patterns, replace worn nap or brushes promptly, and store tools protected to maintain consistent coverage and edge control.
When to Call a Pro Scope and Cost Considerations
Although you can tackle many smoothing tasks yourself, knowing when to call a pro prevents costly mistakes and saves time; hire an experienced painter for large surface areas, complex textures, high ceilings, tricky trims, or any job that involves lead paint or structural repairs.
Get written estimates, compare hourly versus project rates, confirm insurance and warranties, and weigh DIY savings against potential rework costs.
Comparison of Techniques for Different Wall Types
When you want a smooth finish, you’ll use different techniques on smooth drywall versus textured walls—sanding and skim-coating work well for drywall, while texturing may need flattening or selective skim coats.
For plaster, masonry, and previously painted surfaces you’ll pick prep and primers tailored to absorbency and adhesion.
I’ll walk you through the specific steps and materials for each wall type so you can choose the right approach.
Smooth Drywall vs Textured Walls: Technique Differences
If your walls are smooth drywall, you’ll use different prep and application techniques than you would on textured surfaces, because each finish requires specific tools, sanding, and paint consistency to get an even result. You’ll sand, skim, and roll smoothly; textured walls need stippling, thicker paint, and careful cutting.
| Surface | Prep | Technique |
|---|---|---|
| Drywall | Sand/skim | Roller/brush |
| Texture | Clean/prime | Stipple/nap |
| Both | Prime | Multiple coats |
Plaster, Masonry, and Previously Painted Surfaces: Tailored Approaches
Because plaster, masonry, and previously painted surfaces each absorb, bond, and wear differently, you’ll use distinct prep and painting methods for reliable results.
For plaster, repair cracks, sand lightly, and use a high-adhesion primer.
For masonry, clean, patch mortar, and apply a masonry primer or elastomeric sealer.
For previously painted walls, scuff, remove gloss, fill imperfections, and prime bare spots before repainting.
Checklist Pre Painting and Post Painting Workflow
A clear checklist keeps you on track before you open a can and after the last coat dries. You’ll prep, paint, and inspect with purpose.
Follow this simple workflow:
- Surface prep: clean, sand, patch, and prime.
- Painting: use right tools, thin coats, dry times.
- Post-paint: remove tape, inspect for runs, touch up, clean tools, ventilate.
FAQ
You probably have a few practical questions before you start—how many coats do you need, and is sanding between coats always required?
Can you get a pro-level look with just a roller, which sheen hides flaws best, and how do you fix a wall that ended up too glossy or uneven?
I’ll answer each of these so you can choose the right tools and steps for a smooth result.
How many coats do I need for a truly smooth finish?
Wondering how many coats you’ll need for a truly smooth finish? Generally, two coats of quality paint give uniform coverage, but one well-applied primer plus one finish coat often beats two finish coats.
If you’re changing from dark to light, repairing patches, or using low-quality paint, plan a third coat. Sand lightly between coats for the smoothest result.
Can I get a professional smooth look with a roller only?
Really—can you achieve a pro-smooth finish using only a roller? Yes, with the right roller (high-density foam or microfibre), quality paint, proper technique and consistent pressure.
Work in a wet edge, use a roller extension for even strokes, and back-roll lightly to remove stipple.
Rollers can deliver professional results on flat or eggshell walls when applied carefully and patiently.
Is sanding between coats always necessary?
When do you need to sand between coats? You don’t always have to.
Sanding helps remove brush marks, dust nibs, and raised texture after primer or the first coat. Lightly scuff-sanding between oil or high-build coats improves adhesion and smoothness.
For quality latex finishes with proper application, a wipe with a tack cloth often suffices unless imperfections remain.
What paint sheen hides imperfections best while still looking smooth?
Which sheen hides flaws best depends on the surface and how close people will get to it: flat (matte) paints conceal bumps and brush marks because they don’t reflect light.
Satin and eggshell hide minor imperfections while still offering a soft sheen that’s easier to clean.
Semi-gloss or gloss will spotlight every imperfection despite their durability.
Choose flat for low-traffic areas; pick eggshell or satin for balance.
How do I fix a wall that turned out too glossy or uneven?
If your paint came out glossier or patchier than you expected, you can fix it without repainting the whole wall.
Lightly sand shiny or uneven spots with fine-grit paper, wipe dust, then apply a thin coat of matching flat or eggshell paint using a high-quality roller.
Feather edges to blend. For small areas, a satin touch-up may even out sheen without noticeable seams.