How to Get Touch-Up Paint to Match Your Wall Perfectly
You can get touch-up paint to match your wall perfectly by first identifying the original color, sheen, and aging effects, then testing small swatches under the room’s light. Clean and prime the spot, use thin, feathered coats with a small brush or mini roller, and let each coat dry fully before evaluating. Blend edges gently and buff to harmonize sheen. If the match still stands out, try spectrophotometer mixing or consider a full repaint; keep going to learn exact techniques.
Quick Answer Will Touch-Up Paint Match My Wall?
It depends on a few things: how old the paint is, the finish and texture of the wall, and how well you can blend the new paint into the old.
If the color hasn’t faded much and the area is small, a careful touch-up will usually be good enough.
If the wall’s finish, lighting, or age make differences obvious, you’ll need to repaint the whole panel for a seamless match.
Instant summary of factors that determine match
Although a touch-up can blend in for small spots, whether it matches depends on a few key factors: paint color accuracy, finish (sheen), age and fading of the existing wall, application method, and lighting conditions.
You’ll need precise color matching, identical sheen, proper surface prep and the same roller/brush technique to learn how to get touch up paint to match wall and minimize visible differences.
When touch-up will be good enough vs. when repainting is necessary
So after checking color accuracy, sheen, and lighting, you’ll want to decide whether a touch-up will be sufficient or if a full repaint is needed.
Touch-up works for small, isolated chips or scuffs where texture and gloss match.
Repaint when large areas, faded sections, or visible blending lines remain.
If in doubt, test a small patch and view from typical angles before committing.
Understanding Paint Matching Basics
Color comes from pigments, undertones, and sheen, and you’ll need to evaluate all three when matching.
Remember that age, lighting, and finish can change how a color looks on your wall.
Common mismatches come from fading, surface dirt, or using a different sheen than the original.
How paint color is defined (pigments, undertone, sheen)
Think of paint as three parts working together: pigments that set the actual hue, undertones that nudge that hue warmer or cooler, and sheen that changes how light plays off the surface.
You’ll check pigment mix for dominant colors, identify subtle undertones (yellow, pink, green, blue), and pick matching sheen—flat, eggshell, satin, gloss—to guarantee touch-ups blend visually and reflect light similarly.
Why age, light, and finish alter perceived color
Because paint doesn’t stay the same over years, you’ll often find a fresh can doesn’t look identical to the wall you’re touching up.
Time alters pigments subtly, and surface wear changes how light reflects. Different lighting angles and bulb types shift perceived hues, and finish—matte, eggshell, gloss—modifies contrast and depth.
You should view samples under the room’s typical lighting before committing.
Common causes of mismatch (fading, dirt, sheen difference)
While you might expect a fresh coat to blend seamlessly, several everyday factors make touch-ups stand out: fading from sunlight, surface dirt or oils, and differences in sheen between old and new paint.
You should clean and degrease before painting, compare samples in the room’s light, and match finish (matte, satin, gloss).
Minor sanding and thin coats help blend edges for a seamless repair.
Prep: Assessing the Wall and Existing Paint
Before you buy paint, identify the original by checking for a leftover can, peeling off a small chip, or taking a sample to the store.
Test potential matches on different walls and at different times of day so you can see how the color shifts in various light.
Also note the wall’s sheen and texture—flat, eggshell, satin, or glossy and smooth or stippled—since those affect how the touch-up will look.
How to identify the original paint (sample, can, chip)
Start by collecting whatever clues you can: a paint can tucked in a closet, a small chip behind a switch plate, or a scrape of paint you can lift with a razor.
Note any labels—brand, sheen, color name or code. If you find only a chip, press it onto white paper for a sample.
Photograph labels and chips for paint-match services.
Testing in different light and locations
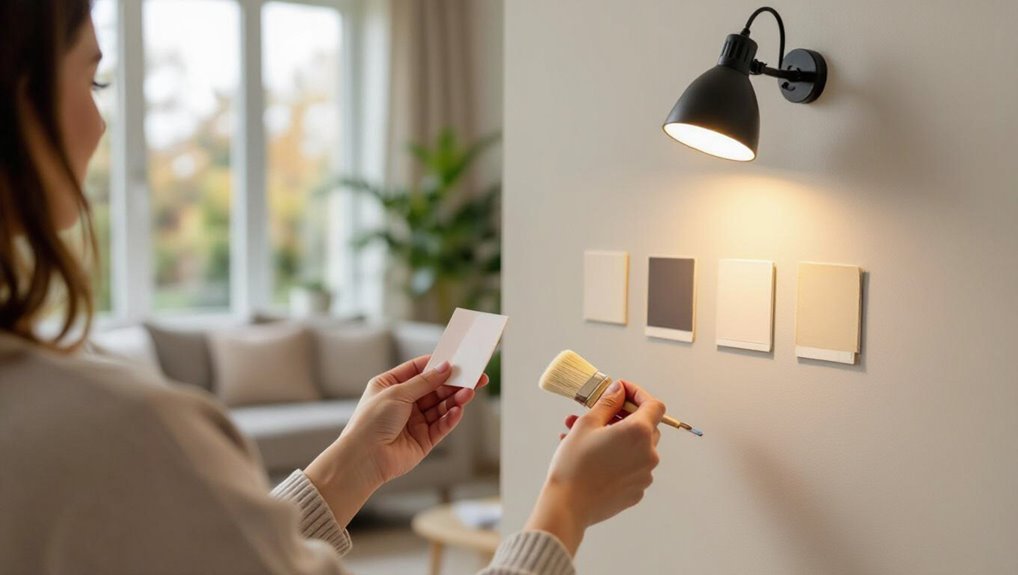
Once you’ve got a sample or label, remember paint can look different depending on light and placement, so test it where it will actually live.
Apply small swatches in several spots: near windows, under artificial light, and in shadowed corners.
Check at different times of day and view from typical angles.
Note any shifts before buying more paint.
Determining sheen and surface texture
To match touch-up paint, check both the sheen and the wall’s texture so your patch blends, not stands out.
Hold a small mirror at different angles to identify gloss level—flat, matte, eggshell, satin, semi-gloss, or gloss.
Run your fingertips and compare textures: smooth, orange peel, or knockdown.
Match both sheen and finish technique before painting for invisible repairs.
Quick Methods to Get a Close Match
If you still have the original can or a clearly labeled sample, start there since it’s the easiest route to a true match.
Swatch small blended samples on an inconspicuous wall area to see the paint’s dry color and texture before committing.
For tiny nicks or fast fixes, use a commercial touch-up pen or brush—follow the product instructions and feather the edges so it blends with the surrounding finish.
Using leftover original can or labeled paint
When you still have the original can or a labeled sample, matching touch-up paint becomes a lot easier because you’re working from the exact formula used on the wall.
Use that paint for small repairs, shake and stir thoroughly, and test in an inconspicuous spot.
Note batch numbers on the label; if levels differ, thin slightly or add same-sheen base to match finish.
Swatching and blending small samples on the wall
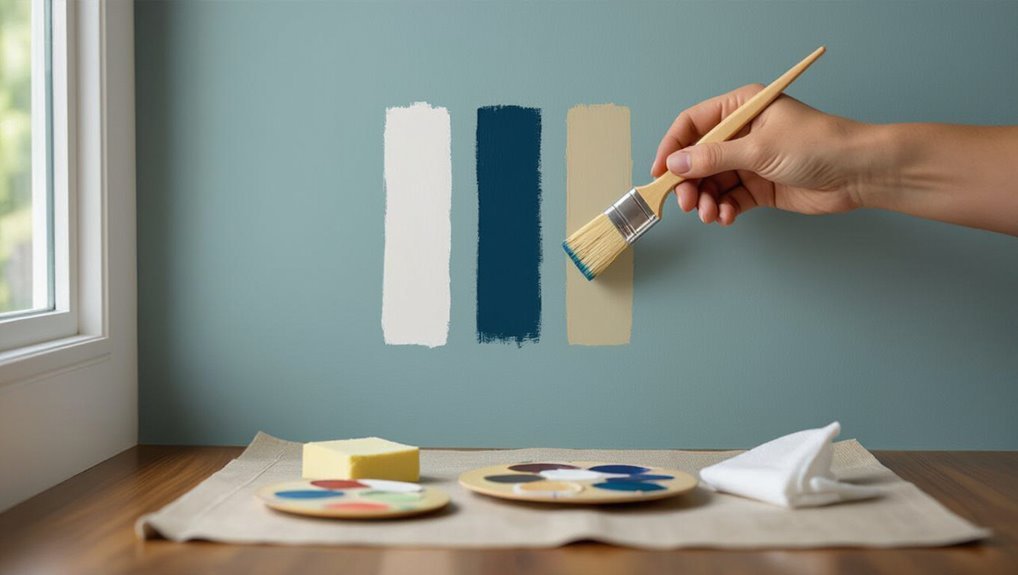
Having the original can help, but you’ll still want to confirm the match on the wall itself—small sample swatches let you see how light, texture, and sheen change the color in real conditions.
Apply tiny patches of candidate mixes in several spots: near trim, midwall, and low light.
Let them fully dry, compare at different times of day, then blend the best match into surrounding paint.
When and how to use commercial touch-up pens and brushes
Although a perfect factory match can be hard to achieve, commercial touch-up pens and small brushes let you fix scuffs and chips quickly without repainting the whole wall.
Choose a pen or brush that matches sheen and color closely, test in an inconspicuous spot, apply thin layers, feather edges, and let each layer dry.
Clean tools and store properly for future fixes.
Step-by-Step Touch-Up Process
Before you start, get the spot clean and prepped with the right materials so paint will stick.
You’ll sand and feather the edges, prime any bare areas, then apply touch-up paint with the correct tools and strokes, allowing proper drying time.
Finish by feathering and blending to match the sheen and texture for an invisible repair.
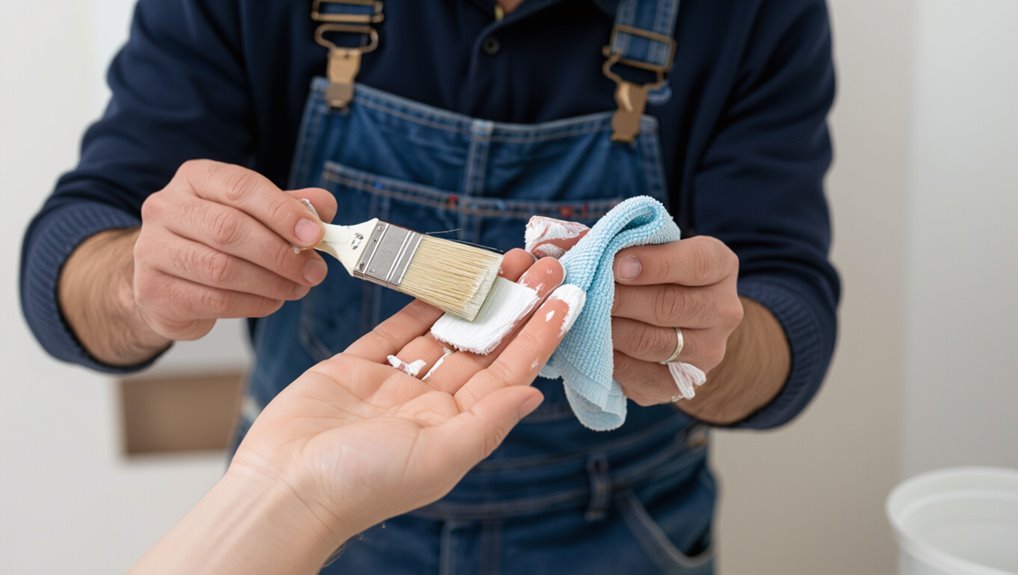
Step 1 Clean and prepare the spot (materials and technique)
Start by clearing loose paint, dust, and grease from the repair area so the new paint will adhere properly.
- Wipe with a damp cloth and mild detergent, then dry.
- Use rubbing alcohol on stubborn grease, letting it evaporate.
- Remove flaking paint with a putty knife and vacuum debris.
Gather matching primer, clean rags, and gloves before you proceed.
Step 2 Sanding and feathering edges for smooth transition
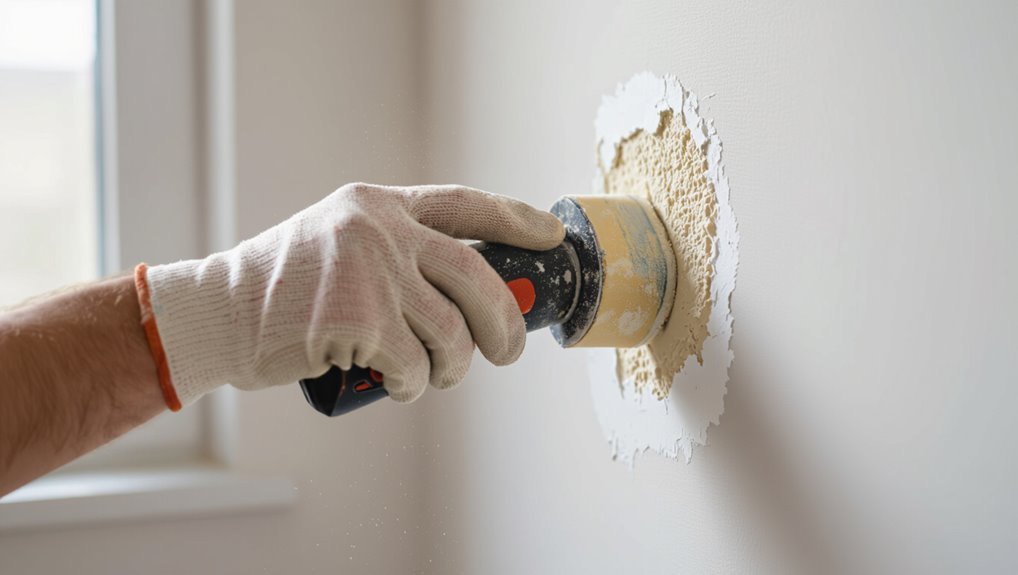
Now you’ll sand and feather the repair so the new paint blends seamlessly with the surrounding wall.
Use fine-grit (220–320) sandpaper, sanding the patch flush and tapering the edges into the surrounding paint.
Keep strokes light and even, wipe dust with a tack cloth, and check connections by eye.
The goal is a smooth, barely perceptible edge for flawless coverage when you paint.
Step 3 Primer selection and spot-priming technique
Choose a primer that matches the repair’s needs and apply it only to the patched area so the new paint sticks evenly and doesn’t show through; for small drywall or plaster fixes pick a high-quality stain-blocking, high-adhesion primer (latex-based for typical interior walls, shellac or oil-based for tannin or water stains), and for glossy surfaces use a bonding primer.
- Clean and dry the patch.
- Apply thin, even coats; sand if needed.
- Let primer fully cure before painting.
Step 4 Applying touch-up paint: tools, strokes, and drying times
When you’re ready to apply the touch-up paint, gather the right tools—a small brush or foam applicator, a mini roller for larger spots, a paint tray or palette, and a clean cloth—and work in thin, controlled strokes so the new paint blends into the surrounding wall without building up ridges.
Keep brush strokes aligned with the wall’s texture, feather the edges, and allow each thin coat to dry fully before evaluating if another coat’s needed.
- Use thin coats.
- Dry between coats.
- Match stroke direction.
Step 5 Feathering and blending to match sheen and texture
After the paint has dried and you’re happy with coverage, focus on feathering and blending to match the wall’s sheen and texture.
Lightly mist a damp sponge or soft brush around edges, gently softening the paint boundary.
Rub in short, overlapping strokes, preserving original texture.
If sheen differs, polish with a very light buff using a microfiber cloth until finish harmonizes with surrounding wall.
Step 6 When to repaint an entire wall for best uniformity
If touch-ups still show seams, color shifts, or texture differences after blending, it’s time to contemplate repainting the whole wall for a uniform finish.
Repaint when multiple touch-ups are visible, lighting highlights inconsistencies, or the original coat is faded or dirty.
Strip, prime, and roll the entire surface for consistent sheen and texture so repairs disappear and the wall looks cohesive.
Advanced Matching Techniques
When a basic touch-up won’t cut it, you’ll want to compare store color-matching against professional spectrophotometry to see which gives a closer start.
Ask for tinted touch-ups with exact mixes and any additives specified, and be ready to test small samples.
If the tone or sheen still looks off, use a thin glaze, varnish, or toner to tweak undertone and gloss until it blends.
Color matching at paint stores vs. professional spectrophotometry
Although paint stores can often get you very close, pro spectrophotometry reaches a level of precision most retail counters can’t match. You can bring a sample to a store for visual matching or a scanner for lab-grade reads; each has tradeoffs in accuracy, lighting control, and cost.
| Store matching | Spectrophotometry |
|---|---|
| Quick, cheap | Exact, costly |
| Subjective | Objective |
| Limited lighting | Controlled lab |
| Good for small fixes | Best for tricky shades |
Tinted touch-ups: how to request exact mixes and additives
After you’ve decided between a store match and spectrophotometry, you’ll need to ask for specific tints and additives to get a flawless touch-up.
Tell the tech your sheen, base (white, tinted), and provide a clipped sample.
Request exact pigment codes and milliliter amounts, note any UV inhibitors or fast-dry agents, and insist on batch-matching documentation so you can reorder identical mixes later.
Using glazes, varnishes, or toners to adjust undertone and sheen
If you need to fine-tune an almost-right touch-up, glazes, varnishes, and toners let you subtly shift undertone and sheen without repainting the whole area.
You’ll apply thin glaze layers to warm or cool a patch, use toners to tweak hue, and select varnish sheen to match gloss.
Test on a scrap, dry fully, and build gradually until it blends.
Comparison: DIY Touch-Up vs. Hiring a Pro
You can save money and time doing a simple touch-up yourself, but results usually depend on your skill and how faded or textured the wall is.
Hiring a pro or a professional color matcher costs more and takes longer, yet it’s likelier to give a seamless, color-accurate finish for tricky spots or large repairs.
Call a professional when the patch needs perfect blending, involves complex textures, or the color has markedly aged.
Cost, time, and likely outcome comparison
Comparing DIY touch-ups to hiring a pro comes down to three clear trade-offs: cost, time, and the likely finish you’ll get. You’ll save money DIY but spend more time and risk visible seams; pros cost more, work faster, and usually blend better. Use this quick comparison:
| Factor | DIY | Pro |
|---|---|---|
| Cost | Low | High |
| Time | Long | Short |
| Finish | Variable | Consistent |
When to call a professional color matcher or painter
When a patch won’t blend after your best DIY attempts, call a professional color matcher or painter to save time and frustration.
Choose a pro if the finish is uneven, the color varies with light, or the area is large or textured. They’ve calibrated tools, formulas, and spray equipment to match sheen and tone accurately, reducing redo risk and preserving your wall’s look.
Common Mistakes and How to Avoid Them
Don’t overlook sheen differences or you’ll match color but still see the patch.
Always clean and prime bare spots before painting, and check your samples under multiple light sources so you’re not surprised later.
If a touch-up fails, sand the area smooth, re-prime if needed, and feather in new paint for a seamless repair.
Mistake: Ignoring sheen differences
Even if the color is perfect, a mismatched sheen will make the patch stand out, so you need to match finish as carefully as you match tint.
Check the original finish—flat, eggshell, satin, semi-gloss—and use the same.
Test a small area, view from different angles and lighting, and adjust until the repaired spot reflects light identically to the surrounding wall.
Mistake: Applying paint over dirty or unprimed spots
Matching sheen won’t help if the surface underneath isn’t prepared properly. You must clean grease, dust, and chalking thoroughly, then sand glossy edges and fill holes.
Primer seals porous or repaired areas so touch-up paint adheres and reflects light consistently. Skipping these steps creates visible patches and flaking later.
Take the time to prep; it’s the difference between noticeable repairs and seamless blending.
Mistake: Testing only under one light source
Where do you think your touch-up looks best?
If you check color only under one light, you’ll miss shifts caused by daylight, incandescent, or LED bulbs.
Inspect samples at different times and with each type of room lighting. Move the swatch around walls and view from various angles.
That simple habit prevents surprises and guarantees a consistent match in everyday conditions.
How to correct a failed touch-up
If you inspected your swatch under multiple lights and still ended up with an obvious mismatch, don’t panic — you can fix a failed touch-up without repainting the whole wall.
Feather the edges with fine sandpaper, blend new paint in thin layers, and match sheen.
If color still stands out, apply a slightly larger feathered patch or repaint the whole panel for uniformity.
Best Practices and Preventive Tips
Keep a sealed, labeled sample of your paint so you can match it later, and store it where temperature swings won’t thicken or separate the color.
Clean walls regularly to prevent dirt and marks that make touch-ups stand out.
Also remember that light and seasonal fading change how a color reads, so plan touch-ups for similar lighting conditions or recoat larger areas when needed.
Storing leftover paint and labeling for future touch-ups
Because touch-ups rarely happen right after a job, store leftover paint properly so it stays usable months—or even years—down the road.
Label cans with date, room, and finish. Seal lids tightly and invert briefly to create a vacuum seal. Keep cans cool, dry, and out of sunlight.
- Note color code
- Record mixing details
- Store upright on shelf
Regular cleaning and maintenance to minimize noticeable spots
1 simple habit can dramatically reduce how often you need touch-ups: clean walls regularly. Wipe smudges, fingerprints, and spills with a soft cloth and mild detergent before stains set.
Dust baseboards and trim weekly to prevent grime buildup. Treat splatters promptly and spot-clean with gentle motions.
Routine care keeps paint looking uniform, so repairs blend seamlessly when you do touch-ups.
Planning for seasonal light changes and fading
Regular care helps paint look consistent now, but you should also plan for how sunlight and seasons will change its appearance over time.
Note sun exposure patterns, rotate furnishings or artwork to promote even fading, and choose UV-resistant finishes.
Keep a small sealed sample of your mixed paint for future touch-ups, and schedule reassessment yearly so you can refresh areas before differences become obvious.
Tools, Products, and Materials Checklist
Gather a small kit of the right brushes, mini rollers, and applicators so you can match the wall’s finish precisely.
Include primer, your matched paint, and a few additives like slow-dry or flow improver for smoother blending.
Keep specialty items on hand — stain blockers for tannin or water marks and texture sprays for stippled or orange-peel surfaces.
Recommended brushes, rollers, and applicators
Choosing the right applicators makes the difference between a seamless repair and an obvious patch, so pick tools that match your paint type and the wall’s texture.
Use soft-bristle brushes for trims, micro-rollers for smooth walls, and small foam pads for feathering edges.
- Angled sash brush
- 4″ microfiber roller
- Foam touch-up pad
Primers, paints, and additives to carry for touch-ups
Because touch-ups run into surprises, keep a compact kit with primers, the exact paint, and a few smart additives so you can fix spots on the spot.
Pack essentials and stay ready:
- Primer touch-up pens or small can for adhesion.
- Matched paint in sample pots plus a sealed dispenser.
- Additives: mild flow improver, slow-dry extender, and a small stirring stick.
When to use specialty products (stain blockers, texture sprays)
Once you’ve got primers, matched paint, and a few additives ready, you’ll also want a small set of specialty products for problem spots:
Reach for stain blockers when tannin bleed, water stains, or marker show through the finish; use texture sprays to recreate orange peel, knockdown, or popcorn finishes on repaired areas; and keep a shellac-based spot primer for stubborn stains or smoke damage.
Use them sparingly.
FAQ
You probably have specific questions like when to touch up after painting, whether you can mix brands, or why touch-ups sometimes read lighter or darker than the wall.
You’ll also want to know if tiny patches can disappear under bright light and how to handle textured or popcorn finishes.
Below are clear answers and practical tips to each of these issues.
How long after painting should I attempt a touch-up?
How long should you wait before doing a touch-up?
Wait until the paint’s fully cured, not just dry to the touch. Latex usually cures in 2–4 weeks; oil-based can take up to 30 days.
Curing guarantees sheen and color stabilize so the patch blends.
Test a small area first; if it looks different, give it more time before reapplying.
Can I mix different brands to get a better color match?
Waiting for paint to fully cure before touching up also helps you decide whether mixing brands is worth trying. You can blend small amounts to tweak hue or sheen, but test mixes on a scrap and let them dry.
Different formulations may alter finish, adhesion, or durability. If results differ, stick with the original brand or consult a pro mixer to avoid long-term problems.
Why does touch-up paint look darker or lighter than the wall?
Because paint appearance depends on more than just color, a touch-up can read darker or lighter than the surrounding wall even when the formula and code match.
Differences in sheen, thickness, application method, underlying primer, and wall aging change reflectivity. Light angle and room lighting shift perception.
Feather the edges, match sheen, apply thin multiple coats, and let it cure before judging.
Will a small patch ever be invisible under bright light?
Will a tiny touch-up ever disappear under bright light? You can get very close, but total invisibility is unlikely.
Bright, directional light reveals sheen, brush marks, and slight color shifts. Match sheen, thin coats, and feather edges to minimize contrast.
Blend while paint’s wet, let it cure, then view from multiple angles. Perfection depends on surface and lighting.
How do I match textured or popcorn-finish walls?
If you managed to minimize sheen and brush marks on a smooth wall, textured or popcorn finishes raise the bar: you’ve got to match both color and surface pattern.
Sample hidden areas, mix paint additives for consistent sheen, and recreate texture with the right tool—spray hopper, stipple brush, or sponge.
Practice on scrap, feather edges, and blend gradually for an invisible repair.
Final Checklist Before You Start Touching Up
Before you grab a brush, do a quick pre-job inspection: check the damage size, surface texture, and lighting conditions.
Decide whether a spot touch-up will blend or if a full repaint is necessary for an even finish. If you’re unsure, test a small area first to confirm your choice.
Quick pre-job inspection list
1 quick checklist will save you time and headaches: inspect the area for dirt, grease, peeling or flaking paint, texture differences, and any underlying stains or repairs that need addressing.
- Clean and degrease the spot; roughen glossy areas.
- Note texture mismatches and plan blending.
- Confirm lighting and test a small swatch to verify color before starting.
Decision guide: touch-up vs. full repainting
Now that you’ve inspected and prepped the area, decide whether touching up will actually blend in or if a full repaint is needed. Check size, texture, age, and lighting. If mismatch risk is high, repaint. Use this quick decision grid:
| Issue | Touch-up | Repaint |
|---|---|---|
| Small, fresh | Yes | No |
| Large/aged | No | Yes |