
How to Hang Heavy Paintings on Any Wall Without Damaging It
You can hang heavy paintings without damaging the wall by first weighing the piece and choosing a secure system like a French cleat, toggle bolts, or masonry anchors for brick or concrete. Locate studs or use appropriate hollow-wall anchors, pre-drill pilot holes, and use level and tape measure for precise placement. Wear safety gear and protect floors during installation. Tighten hardware and add safety clips or museum putty for stability, and keep checking mounts periodically to guarantee long-term security if you want more tips.
How to Hang Heavy Paintings on Any Wall Without Damaging It
You can hang heavy paintings on any wall without causing damage by choosing the right anchors and placement.
For a quick answer: use wall anchors sized for the weight and, when possible, secure into studs or use heavy-duty toggle bolts.
Below I’ll show the best method at a glance so you can pick the simplest, safest option for your wall type.
Quick Answer Best Method at a Glance
One simple, reliable method works for most heavy paintings: mount a wall anchor system that matches your wall type (studs, drywall, plaster, or masonry).
Hang the painting from a sturdy D-ring or French cleat, and use a level and tape measure to position it precisely.
You’ll know how to hang heavy paintings on wall safely: secure anchors, solid hardware, and careful measuring prevent damage and guarantee stability.
Basic Understanding: Why Hanging Heavy Paintings Needs Care
You’ll want to know what makes a painting “heavy” — its weight, size, and frame type — because that determines the hanging method.
Different walls (drywall, plaster, concrete, brick, or hollow partitions) hold weight very differently, so choosing the right anchors and fasteners matters.
If you don’t match the hanging hardware to the painting and wall, you risk cracks, anchors pulling out, or damage to the frame.
What Makes a Painting “Heavy” (weights, size, frame types)
Weight matters: a painting becomes “heavy” not just by its face size but by combined factors like canvas type, stretcher bars, frame materials, backing, and glass—anything that adds mass and changes where the load sits.
You should assess total weight, dimensions, frame depth, hanging hardware, and uneven weight distribution. Those determine anchor choice and mounting height to keep the piece secure and stable.
Types of Walls and How They Hold Weight (drywall, plaster, concrete, brick, hollow walls)
Because different wall materials carry loads in different ways, picking the right anchors and location matters when you hang a heavy painting.
Drywall needs studs or strong hollow-wall anchors; plaster can crack so use toggle bolts or find studs; concrete and brick accept masonry anchors or sleeve anchors; hollow block needs specialized anchors.
Match anchor type and load to avoid failures.
Common Damage Risks (wall cracks, anchors pulling out, frame damage)
When you hang a heavy painting without the right anchors or placement, the risks go beyond a crooked frame: walls can crack, anchors can pull out, and the artwork itself can warp or break.
You can split plaster, strip drywall, or shear screws. Anchors that fail leave large holes and loose debris.
Frames and canvases suffer tension, dents, and dropped-impact fractures if you don’t secure loads properly.
Tools, Materials, and Safety Gear Needed
You’ll need a few essential tools—drill, stud finder, level, tape measure, and hammer—to mount a heavy painting securely.
We’ll compare hardware options like heavy-duty anchors, toggle bolts, and wall plates so you can pick the right fixings for your wall type.
Don’t skip safety gear and precautions: wear eye protection, gloves, and consider a helper to steady the piece while you work.
Essential Tools (drill, stud finder, level, tape measure, hammer)
Before you start drilling, gather the essential tools so the job stays safe and accurate: a drill with appropriate bits, a stud finder, a level, a tape measure, and a hammer.
Check battery charge, bit type, and stud finder calibration.
Use the level and tape measure to mark precise points.
Keep a hammer handy for anchors and adjustments, and wear eye protection while you work.
Hardware Options Explained
Think of the hardware as the foundation for your hanging system: pick anchors, screws, hooks, or wall plates based on wall type, painting weight, and frame fittings. Choose heavy-duty anchors for drywall, toggles for hollow walls, masonry screws for brick, and rated picture hooks for wood studs. Match screw length to frame and use anti-slip hangers.
| Choice | Feeling |
|---|---|
| Toggle | Secure |
| Masonry | Confident |
| Anchor | Reassured |
| Hook | Calm |
| Plate | Proud |
Safety Gear and Precautions
Because hanging heavy paintings involves weight, sharp edges, and power tools, you should gather the right tools and protective gear and follow simple precautions.
Wear gloves, safety glasses, and closed-toe shoes. Use a stud finder and level.
Follow this checklist:
- Gloves and safety glasses
- Stud finder, level, drill
- Helper and clear workspace
Step-by-Step: Preparing to Hang a Heavy Painting
Start by measuring and marking the ideal height and center so the painting sits balanced in the room.
Then locate studs or assess the wall type to decide whether you’ll use wood screws, toggle bolts, molly bolts, or masonry anchors.
Finally, pre-drill and install the appropriate anchors or inserts for your wall and hardware before hanging the piece.
Step 1 Measure and Mark: Determining Ideal Height and Centering
Before you drill or hammer, measure and mark precisely so the painting hangs at the right height and sits perfectly centered.
Stand back, decide eye-level placement (usually 57–60 inches from floor to center), measure the painting’s center, and transfer that to the wall.
Use a level and pencil to mark mounting points, double-check distances to nearby features, then re-measure before proceeding.
Step 2 Locate Support: Finding Studs and Assessing Wall Structure
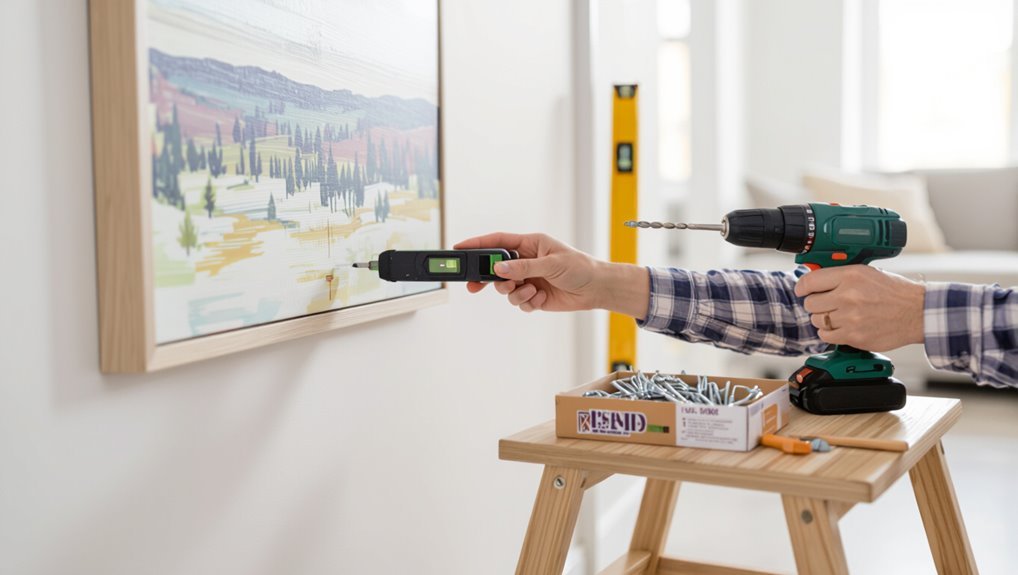
Once you’ve marked the center, locate the wall’s structural support so your hanging hardware can carry the painting’s weight—use a stud finder to trace studs, tap to listen for solid backing, or check electrical outlet studs as clues.
Verify stud edges, measure vertical spacing, and note plaster, drywall, or masonry. Confirm with a small pilot drill or inspection hole before committing to anchors or screws.
Step 3 Choose Appropriate Hardware Based on Wall Type
While the stud location tells you where to anchor, choosing the right hardware depends on both wall type and the painting’s weight—use heavy-duty screws into studs for the strongest hold, toggles or molly bolts for hollow drywall, and masonry anchors for brick or concrete.
- Match hardware rated above painting weight.
- Prefer corrosion-resistant finishes.
- Use two anchors spaced for balance.
Step 4 Pre-drilling and Using Anchors or Inserts (when to use toggle bolts, molly bolts, masonry anchors)
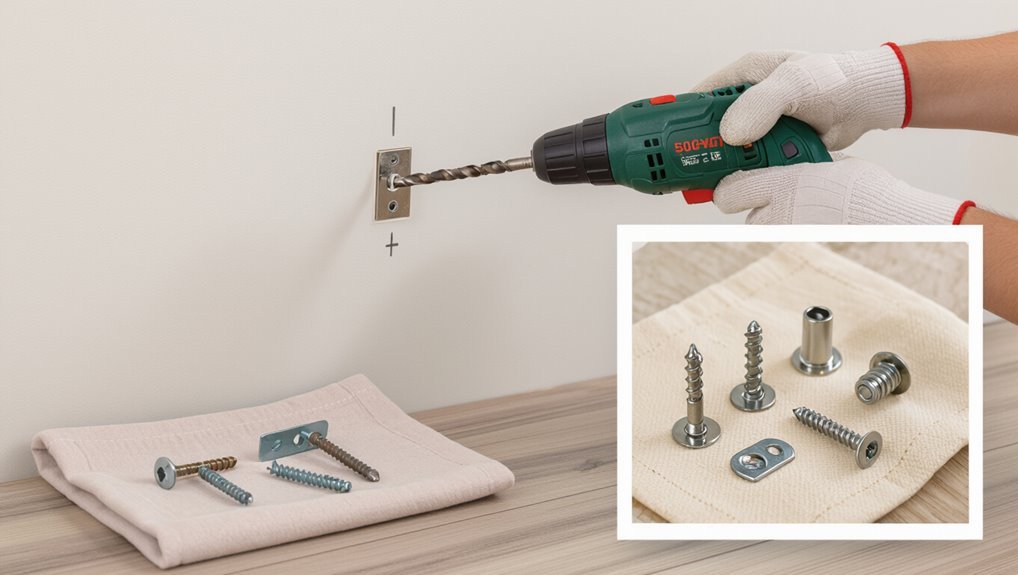
Now that you’ve chosen anchors suited to your wall and weight, you’ll prepare the exact holes and install the inserts that will carry the load.
Mark drill points with a level, use the correct drill bit for wood, metal, or masonry, and drill straight.
Use toggle bolts for hollow studs, molly bolts for medium-weight hollow walls, and masonry anchors for brick or concrete.
Tighten securely.
Step-by-Step: Installing Hardware and Mounting the Painting
Now you’ll install the hardware, choosing studs when possible or rated wall anchors when studs aren’t available.
Pick a hanging system rated for the painting’s weight—French cleats, D-rings with heavy wire, or a rail system—and attach it exactly per the manufacturer’s instructions.
After mounting, level the piece, secure any shifting points, and perform a final weight test before leaving it unattended.
Step 5 Installing into Studs vs. Using Wall Anchors
Before you start drilling, decide whether you’ll mount into studs or rely on wall anchors — that choice determines the hardware you buy and the level of safety you get.
If you hit a stud, use long wood screws for maximum support.
For drywall without studs, select rated anchors (toggle, molly, or heavy-duty plastic) sized to the painting’s weight and follow manufacturer specs for secure installation.
Step 6 Hanging Systems for Heavy Art (French cleat, D-rings, wire, rail systems)
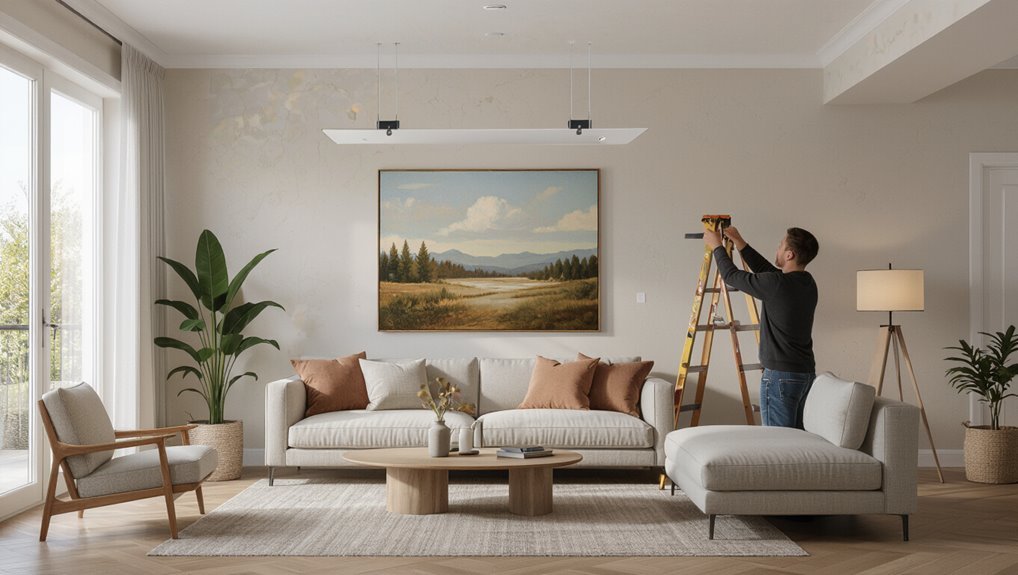
Step 6 shifts from planning to action: choose a hanging system that matches your artwork’s size, weight, and wall type, then install its hardware precisely so the piece hangs level and secure.
Use French cleats for very heavy, flush mounts; D-rings for rigid frames; stainless-steel wire for flexibility on solid anchors; and rail systems for adjustable gallery layouts.
Follow manufacturer screw and spacing specs.
Step 7 Leveling, Securing, and Final Weight Test
1. Level the painting using a bubble or digital level; adjust hangers until it’s perfectly horizontal.
Secure anchors, tighten fasteners, and add safety clips or museum putty to prevent tipping.
Gently push and pull to confirm stability.
Finally, perform a weight test: press upward and outward to guarantee mounts hold the load without shifting.
Recheck level and tighten if needed.
Wall-Specific Instructions and Variations
Different wall types need different hardware and techniques, so you’ll want to match your method to drywall, plaster, masonry, brick, or rental surfaces.
I’ll cover finding hidden reinforcement in hollow walls, preventing plaster cracks when drilling, choosing the right masonry or sleeve anchors and bits, and how to avoid damaging brick or using minimally invasive options for rentals.
Follow the specific tips for each wall to keep your heavy painting secure without unnecessary damage.
Drywall and Hollow Walls: Best Practices and Hidden Reinforcement
Because drywall and other hollow walls can’t hold big loads without help, you’ll need specialized anchors and reinforcement to hang heavy paintings safely.
Use toggle bolts, molly anchors, or hollow-wall anchors rated above the painting’s weight.
Whenever possible, mount a plywood or French cleat spanning studs to distribute load.
Check anchor weight ratings, pre-drill correctly, and avoid relying on adhesive hooks alone.
Plaster Walls: Drilling, Anchors, and Crack Prevention
When you’re working with plaster walls, take care to avoid hairline cracks and loose lath by drilling slowly, supporting the area, and choosing anchors designed for plaster’s brittle nature.
Use a small pilot bit, back the plaster with a padded board or scrap wood, and install molly or toggle-style anchors rated for plaster.
Tighten gently and check for movement to prevent spreading cracks.
Masonry and Concrete: Using Masonry Anchors and Drill Bits
Plaster and concrete require very different approaches, so switch your tools and technique when you move to masonry or poured concrete.
Use a hammer drill with a carbide masonry bit sized for the anchor. Drill perpendicular, clear dust, then install sleeve, wedge, or drop-in anchors rated for the load.
Tighten slowly, avoid over-torquing, and check anchor ratings and embedment depth for safety.
Brick Walls: Avoiding Mortar, Using Sleeve Anchors or Brick Clips
If you’re mounting a heavy painting on brick, aim for the brick face rather than the mortar joints so the fastener bites solid material and carries the load safely.
Use sleeve anchors sized for brick thickness or stainless-steel brick clips that grip without drilling through mortar.
Pre-drill with a masonry bit, clean dust, and torque anchors to manufacturer specs to prevent cracking or loosening over time.
Rental Walls and Temporary Solutions (minimally invasive methods)
Because you can’t always drill into rental drywall or paneling, focus on minimally invasive hanging methods that protect the wall and meet lease rules.
Use high-strength removable hooks, adhesive picture hangers rated for weight, and French cleats paired with Command strips for added support.
Consider tension rods, lean large frames against the wall, or use freestanding easels.
Always test and follow manufacturer weight limits.
Comparison of Mounting Methods and When to Use Each
Choosing the right mounting method comes down to the weight and size of the painting, the wall material, and whether you’ll ever move it—each option has trade-offs in strength, permanence, and ease of installation. You’ll pick anchors for drywall, screws for studs, and masonry fixings for brick. Use the chart to match needs.
| Method | Best for | Permanence |
|---|---|---|
| Anchor | Medium weight | Removable |
| Stud screw | Heavy | Permanent |
| Masonry | Brick/stone | Permanent |
Common Mistakes and How to Avoid Them
Don’t rely on picture wire alone for heavy pieces—use proper mounts or cleats for safety.
Always locate studs or pick anchors rated for the painting’s weight, and double-check balance and hardware ratings before you hang.
Also think about placement: avoid hanging too high and aim for centered, eye-level positioning.
Mistake 1 Overreliance on Picture Wire Alone
One common mistake is relying on picture wire alone to support a heavy painting; it can stretch, slip, or fail at the fastener, leaving the artwork vulnerable.
You should treat wire as a backup, not the primary support. Use secure hardware and a proper hanging method, check wire condition regularly, and tighten or replace frayed wire to prevent sudden drops and frame damage.
Mistake 2 Ignoring Studs or Using Wrong Anchors
If you skip studs or grab the wrong anchors, your heavy painting can pull out of the wall and cause serious damage.
Always locate studs with a reliable finder and fasten into them when possible.
For drywall, choose anchors rated for the painting’s weight—toggle bolts or heavy-duty molly anchors work.
Test the anchor’s hold before hanging to avoid accidents.
Mistake 3 Incorrect Weight Rating or Poor Balance
When you pick hardware that’s underrated or hang a painting without checking its balance, the result can be a crooked frame, damaged wall, or a falling artwork — sometimes all three.
Always confirm the combined weight of frame, glass, and hanging wire, choose anchors rated above that weight, and test balance before finalizing.
Use two anchors for large pieces to distribute load evenly.
Mistake 4 Hanging Too High or Poor Placement
Ever stood back and felt something was off, even though the picture’s centered? You’re probably hanging it too high or choosing poor placement.
Aim for the center at eye level (57–60 inches), consider room scale, and align with furniture.
Use a cardboard template to preview position before drilling. Step back, adjust, and trust proportions to make the piece feel intentional.
Prevention, Maintenance, and Best Practices
You should schedule routine checks of hangings and reinforce mounts at the first sign of looseness or stress.
Pay attention to humidity and temperature changes that can warp frames or weaken fasteners, and protect walls and floors with drop cloths and corner guards during installation.
Call a professional or use specialized mounting when the piece is unusually heavy, valuable, or the wall structure is uncertain.
Routine Checks and When to Reinforce
Although a proper hang should last for years, check your heavy painting regularly so small issues don’t turn into falls.
Inspect anchors, screws, and hangers every six months; look for looseness, rust, or wall cracking. If you spot movement, tighten fasteners or upgrade to heavier-duty anchors.
Reinforce immediately after any impact or if the painting shifts noticeably over time.
Climate and Humidity Considerations for Frames and Walls
Routine checks will catch mechanical problems, but climate and humidity can slowly undermine both frame and wall integrity if you don’t manage them.
Monitor humidity (ideally 40–55%), avoid rapid fluctuations, and use dehumidifiers or humidifiers as needed.
Keep paintings away from direct sunlight and heat sources that dry wood or soften adhesives.
Inspect frames and wall finishes periodically for warping, mold, or loose joints, and act promptly.
Protecting Walls and Floors During Installation
1 simple precaution can save you from scratches, paint scuffs, and dents when installing heavy paintings: prepare the work area before you lift a frame.
Clear traffic, lay down protective pads, and gather tools within reach. Use soft cloths on wall contact points and corner protectors on frames.
Follow this checklist:
- Drop cloths
- Corner guards
- Nonmarking pads
When to Call a Pro or Use Specialized Mounting
After you’ve protected floors and walls, decide whether the job fits your skills or needs specialized help: call a pro when the painting is oversized, extremely heavy, mounted on fragile plaster, or when the wall’s structure is uncertain.
If you’re unsure about anchors, studs, wiring, or seismic restraints, get expert help.
Professionals guarantee safe anchors, proper load distribution, and neat finishes, preventing damage and liability.
Quick Troubleshooting Guide
Having trouble keeping your heavy painting secure or straight? Check fast fixes below and act confidently to prevent damage.
Having trouble keeping your heavy painting secure or straight? Try quick fixes to prevent damage and hang with confidence.
- Tighten or replace hanging hardware; verify screws hit studs or use proper anchors.
- Level the frame with a small bubble level; adjust wire tension or add bumpers to stop shifting.
- Inspect wall surface for crumbling plaster or moisture; repair before rehanging.
FAQ
You’ll get clear answers to common concerns like how to tell if a stud will hold your painting and whether you can trust drywall without a stud.
I’ll also cover the safest systems for very large or awkward pieces, what happens to walls when anchors come out, and the ideal hanging height for viewing.
If you have a specific painting or wall type, mention it and we’ll address that scenario.
How do I know if a stud can hold a heavy painting?
How can you tell whether a wall stud will safely support a heavy painting?
Check stud material (wood or metal) and thickness; wood studs typically hold more.
Use a stud finder, expose a small area if needed, and inspect for damage or rot.
Calculate weight versus fastener rating—use heavy-duty screws or structural anchors into the stud.
If unsure, consult a pro.
Can I hang a heavy painting on drywall without studs?
If the stud inspection or fastener ratings won’t work for your piece, you can still hang a heavy painting on drywall—but you’ll need the right anchors and methods.
Use heavy-duty drywall anchors (toggle bolts, molly bolts) sized for the load, install per instructions, and spread weight across two or more anchors.
Check weight limits, tighten securely, and periodically inspect for movement or wall damage.
What is the safest hanging system for very large or awkward-shaped art?
When you’re dealing with very large or oddly shaped art, the safest approach is a professional hanging system that transfers the weight to studs or a structural backing; never rely on single drywall anchors.
Use French cleats, brass picture hooks anchored to studs, or plywood/metal rails fixed to structure.
Balance points, secure multiple attachment points, and consider hiring a pro for installation and alignment to guarantee safety.
Will anchors damage my wall when removed?
Curious about the damage anchors leave behind? You’ll usually get a small hole and some paint distress when you remove anchors.
Plastic anchors can crumble; toggle bolts leave larger holes.
Patch with spackle or a drywall repair kit, sand, and repaint for an invisible fix.
For minimal repair, use removable anchors designed for hollow walls or picture hooks rated for your painting’s weight.
How high should I hang a painting for optimal viewing?
How high should you hang a painting for the best view? Aim for the center at about 57–60 inches from the floor, the museum standard, so viewers see it naturally while standing. For seating areas, lower the center 8–12 inches. Consider ceiling height, furniture, and sightlines; measure rather than guess, and adjust slightly for oversized or small pieces to keep composition balanced.
