How to Keep a Painting From Fading and Preserve Its Color Over Time
To keep a painting from fading, limit its light exposure—avoid direct sun and bright artificial lights and aim for under 50 lux for sensitive works. Stabilize temperature and humidity (around 65–75°F and 40–60% RH), use archival materials, and add UV-protective glazing or conservation-grade varnish. Dust gently with soft brushes and avoid household solvents. Inspect regularly for cracking, flaking, or mold. For valuable or damaged works, consult a conservator for tailored care, and further guidance follows below.
Quick Answer How to Keep a Painting from Fading
To keep a painting from fading, you should limit light exposure, control humidity and temperature, and use UV-protective glazing or varnish.
Store or hang works away from direct sunlight and bright artificial lights, and run a dehumidifier or HVAC to maintain stable conditions.
Regularly inspect and clean gently, and consult a conservator for valuable pieces.
One-sentence summary of the most effective preservation steps
If you want your painting to stay vivid, keep it out of direct sunlight, control temperature and humidity (ideally around 65–75°F and 40–55% RH), use UV-filtering glazing or window films, avoid high heat and pollutants, and handle or store it framed and supported to prevent physical damage.
To summarize how to keep a painting from fading: stabilize environment, limit light exposure, use protective glazing, and minimize handling.
Basic Understanding Why Paintings Fade
You’ll notice paintings fade mainly because light triggers photochemical reactions that break down pigments and binders.
Environmental factors like humidity, temperature swings, and airborne pollutants accelerate that damage, and some pigments, varnishes, or supports are simply more vulnerable than others.
Also remember that manufacturing choices and framing (glazing, backing, and mounting) strongly influence how long a work will retain its original appearance.
How light causes fading (photochemical reactions)
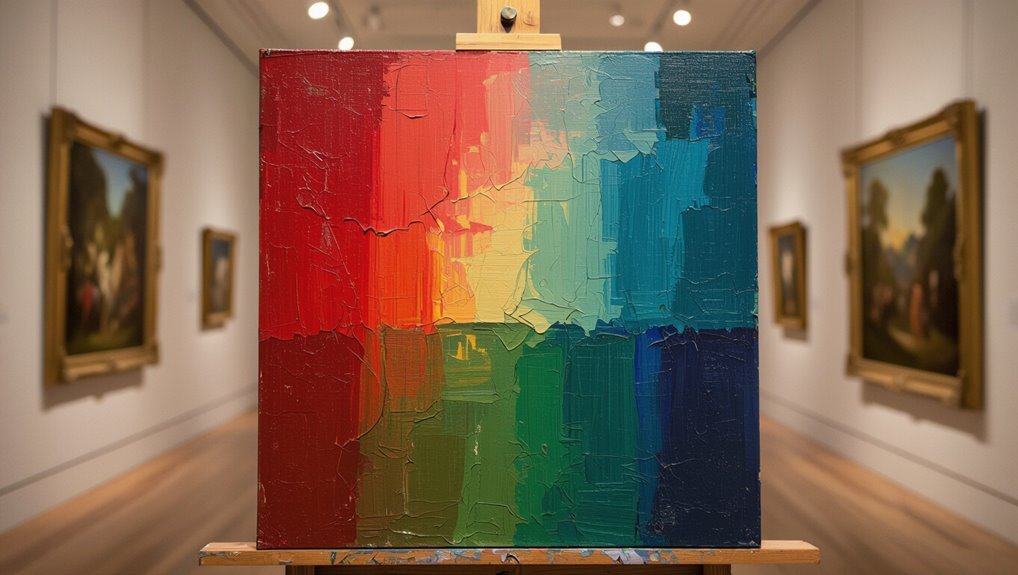
When light hits a painting, its energy can break chemical bonds in pigments and binders, triggering photochemical reactions that gradually alter colors and weaken the paint film.
You should know UV and high-energy visible light create free radicals, fade dyes, and oxidize oils.
Over time these changes shift hue, reduce saturation, and make paint brittle, so limit exposure and use UV-filtering glazing.
Environmental factors: humidity, temperature, pollutants
Although light often gets the blame, humidity, temperature, and airborne pollutants play just as big a role in how paintings age, so you should understand how they interact with materials.
Fluctuating humidity and heat cause swelling, contraction, and cracking; high moisture fosters mold.
Pollutants like sulfur dioxide and ozone chemically degrade surfaces and varnishes.
Keep conditions stable, ventilated, and filtered to minimize damage.
Material vulnerability: pigments, binders, supports, and varnishes
Because every component of a painting reacts differently to light, heat, and pollutants, understanding pigments, binders, supports, and varnishes lets you predict—and prevent—fading and failure.
Check pigments for fugitive dyes, choose stable binders, and inspect supports for acidity or warping.
Varnishes protect but yellow; pick reversible, UV-resistant types.
Regular, gentle care minimizes chemical breakdown and preserves color integrity.
Manufacturer and framing impact on longevity
Knowing the materials gives you a head start, but the maker’s choices and the way a painting’s framed often determine how fast those materials break down.
You should inspect artist reputation, archival-grade substrates, and UV-resistant varnishes. Proper stretcher tension, acid-free backing, and spacer mats prevent physical and chemical damage.
Choose conservation framing and UV-filter glazing to slow fading and preserve color integrity.
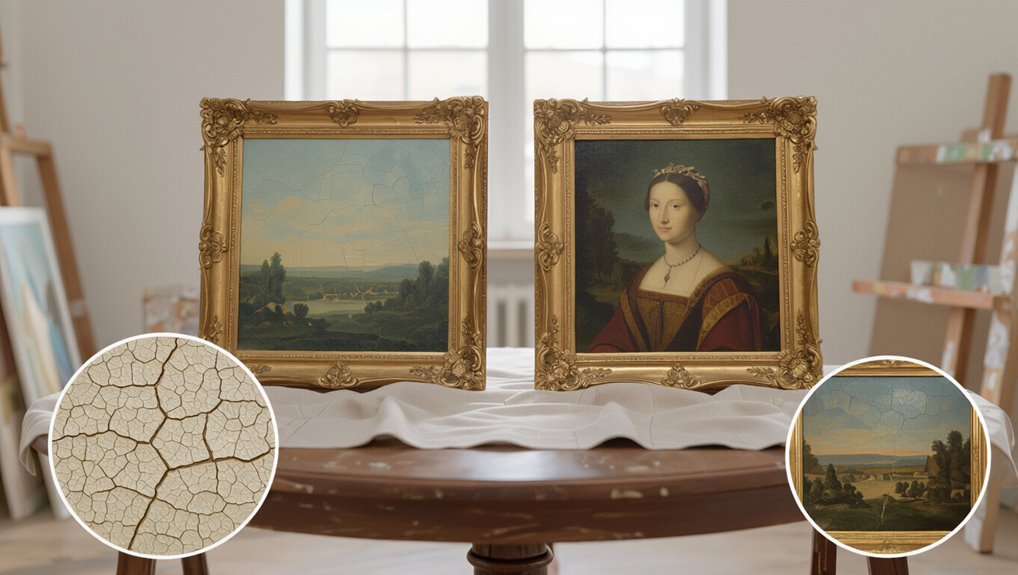
Immediate Assessment Evaluate Your Painting’s Current Condition
Start with a simple visual inspection checklist: check for flaking paint, discoloration, cracks, and surface grime.
Learn to tell faded pigments from dirt by gently testing a small, inconspicuous area or comparing to unexposed edges.
If you see structural damage, active flaking, or aren’t sure what you’re looking at, consult a professional conservator.
Visual inspection checklist
Before you move the painting or touch its surface, take a close, systematic look and note anything unusual—flaking paint, cracks, discoloration, warping, tears, or loose stretcher bars.
Use this quick checklist to record condition and decide next steps:
- Surface: gloss, dust, blistering, or scuffs
- Structure: canvas tension, frame stability, stretcher integrity
- Edges/back: labels, insect holes, mold, or water stains
Identifying faded pigments vs. surface dirt
How can you tell whether a painting looks dull because pigments have faded over time or because surface dirt and varnish have accumulated?
Examine under strong, even light and gently blow or dust with a soft brush; if colors revive locally after careful surface cleaning (test a hidden area), grime is likely.
True pigment loss shows through ground or lighter binder and won’t improve with surface cleaning.
When to consult a professional conservator
If cleaning tests suggest pigments are intact but the painting still looks compromised, or if you spot flaking paint, recent water damage, mold, structural cracks, or unstable canvases, call a professional conservator for an immediate assessment.
They’ll diagnose losses, surface instability, and past restorations, advise stabilization or climate control, and give safe treatment options.
Don’t delay; prompt care prevents irreversible color loss and structural failure.
Primary Preservation Steps
Now you’ll start practical steps to protect the painting: control light exposure, set stable humidity (around 40–60%) and temperature (around 18–21°C), and remove surface dust with gentle, dry methods.
Next, consider protective varnishes or UV-resistant coatings and choose appropriate framing and glazing to shield the work.
Follow these primary actions in order and consult a conservator for any cleaning beyond light dusting.
Step 1 Control light exposure
Because light drives most forms of fading and deterioration, you should limit a painting’s exposure to both daylight and strong artificial light.
Hang artworks away from direct sun, use UV-filtering glazing or window film, and install dimmable, cool LED fixtures.
Rotate displayed pieces, employ protective curtains or shades when not viewing, and monitor light levels with a simple lux meter to prevent cumulative damage.
Step 2 Regulate environment: humidity and temperature targets
When you control temperature and relative humidity, you dramatically reduce cracking, mold, and paint layer separation; aim for a stable environment rather than perfect numbers.
Keep RH around 45–55% and temperature near 18–21°C (64–70°F), avoiding rapid swings.
Use humidifiers, dehumidifiers, and HVAC controls with hygrostat monitoring, and place paintings away from vents, exterior walls, and uninsulated spaces.
Step 3 Clean safely: methods for surface dust and grime
If you’re dealing with surface dust or light grime, start gently to avoid abrading varnish or lifting pigment—use a soft natural-bristle brush or a low-suction museum-grade vacuum fitted with a micro-attachment and a screen to catch loose particles.
Work in small sections, brushing toward yourself, and avoid solvents.
For stubborn dirt consult a conservator; improper wet cleaning or chemicals can cause irreversible damage.
Step 4 Use protective varnish or UV-resistant coatings
Apply a protective varnish or a UV-resistant coating to lock in color, even out gloss, and shield the paint layer from dust, pollutants, and light damage.
Choose a removable, reversible varnish compatible with your medium, test it on a small area, and apply thin, even coats in a dust-free space.
Let each layer cure fully before rehanging or handling the painting.
Step 5 Proper framing and glazing options
Choosing the right frame and glazing protects your painting from physical damage, environmental hazards, and light exposure while also supporting its long-term stability.
Select archival, acid-free backing and spacers to prevent contact. Use UV-filtering glass or acrylic—museum glass reduces reflections.
Guarantee a sturdy frame that allows ventilation and secure hanging hardware. Have delicate or valuable works framed by a conservator.
Step 6 Safe handling, transportation, and storage practices
When you move, handle, or store a painting, treat it as a fragile, irreplaceable object: always wear clean cotton or nitrile gloves, support the work from its strongest edges or stretcher bars, and keep it vertical to avoid sagging or pressure on the surface.
Use padded, rigid crates for transport, avoid stacking, control temperature and humidity, and store upright in a dark, ventilated area away from pests.
Materials, Tools, and Products What to Use and Avoid
You’ll want to choose glazing and UV-filter options that match the painting’s medium and exposure to light.
Use solvent-free or conservation-grade varnishes and the appropriate adhesives for oil, acrylic, or watercolor surfaces.
Stick to soft brushes, lint-free cloths, and mild solvents recommended for conservation, and avoid harsh chemicals like acetone or household cleaners.
Recommended glazing types and UV filters
Although varnishes and glazing films both protect and change how a painting looks, you should pick materials designed for optical clarity, reversibility, and long-term stability. Use neutral pH, non-yellowing glazes and UV-filtering acrylic films; avoid permanent, glossy coatings that trap solvents. Match filter strength to light exposure and consult a conservator for archival-grade choices.
| Type | Use case |
|---|---|
| UV acrylic film | Window protection |
| Conservation glaze | Surface protection |
| Neutral varnish | Temporary finish |
| Museum-grade glass | Display filtering |
Best varnishes and adhesives for different media (oil, acrylic, watercolor)
Because each painting medium has different sensitivities and aging behaviors, you’ll want to choose varnishes and adhesives that match the support, binder, and conservation goals—reversible, stable, and non-yellowing products for oils; flexible, acrylic-compatible varnishes for acrylics; and lightweight, removable surface coatings or sprays for watercolors.
Pick archival PVA or wheat starch paste for paper mounting, damar-free synthetic varnishes for oils, and water-based acrylic mediums for flexible adhesion.
Safe cleaning tools and solvents vs. dangerous products to avoid
When you clean a painting, use soft, non-abrasive tools and reversible, conservation-grade solvents so you don’t damage original paint or varnish.
Test solvents on an inconspicuous area, work slowly with cotton swabs, and blot—don’t rub.
Avoid household cleaners, acetone, ammonia, and abrasive pads; they strip varnish and dissolve pigments.
When unsure, consult a conservator before attempting treatment.
Strategies for Different Painting Types
Different painting materials need different care, so you’ll learn practical steps for each type.
For oil paintings we’ll cover varnishing, inpainting, and lining; for acrylics, cleaning, reapplying varnish, and managing flexibility.
You’ll also get guidance on framing watercolors with mats and archival backing, plus precautions for mixed-media and contemporary works.
Oil paintings: varnishing, inpainting, and lining considerations
Varnishing, inpainting, and lining are key interventions you’ll consider for oil paintings, each aimed at stabilizing, protecting, or visually reintegrating the work without obscuring the artist’s intent.
You should test varnish compatibility, use reversible conservation-grade materials, match inpainting to original pigments and gloss, and reserve lining for structurally compromised canvases.
Documenting every step for future conservators is essential.
Acrylic paintings: cleaning, varnish reapplication, and flexibility concerns
Because acrylics remain more flexible and water-sensitive than oils, you’ll need a different approach to cleaning, reapplying varnish, and addressing movement-related issues.
Dust gently with a soft brush; avoid water or solvents on unvarnished surfaces.
Use a removable acrylic varnish if needed, applied thinly under stable humidity.
Support warped canvases and avoid rigid frames that stress paint layers.
Watercolors and works on paper: framing with mats, glazing, and archival backing
When you frame watercolors and works on paper, prioritize protection from light, dust, and humidity by using mats, glazing, and an archival backing that keep the artwork separated from glazing and provide a stable microclimate.
Use UV-filtering acrylic or glass, acid-free mats with a 2–3mm spacer, and buffered or neutral pH backing.
Seal the frame and avoid direct sunlight and fluctuating humidity.
Mixed media and contemporary materials: special precautions
After framing paper-based works, you’ll likely encounter paintings that mix paints, adhesives, plastics, metals, or found objects—materials that age and react very differently than stretched canvas or watercolor paper.
You should document components, avoid direct varnishing, use barrier layers or conservation-grade adhesives, control humidity and light, and consult a conservator for reactive materials to prevent corrosion, embrittlement, or solvent damage.
Common Mistakes That Accelerate Fading
You’ll speed up fading if you use incorrect cleaning methods or harsh solvents that strip pigments and varnish.
Leaving paintings unframed or in direct sunlight, storing them in damp, hot, or stacked conditions, and mounting with non-archival materials all make deterioration worse.
Avoid these mistakes to keep colors stable and surfaces intact.
Incorrect cleaning methods and harsh solvents
Because solvents and abrasive methods can strip away delicate paint layers and original varnish, using the wrong cleaners is one of the fastest ways to damage a painting.
Don’t scrub, soak, or apply household cleaners. Test any product on an inconspicuous edge or consult a conservator.
Use mild, pH-neutral solutions and soft brushes or cotton swabs, and avoid repeated wetting that swells ground and loosens pigment.
Poor framing and direct sunlight exposure
When you hang a painting without UV-filtering glass or a proper spacer, sunlight and indoor lighting will slowly bleach pigments and yellow varnish, causing uneven fading and loss of detail.
Position works away from direct sun, use UV-filtering glazing or museum glass, add a spacer to prevent frame contact, and rotate displays periodically to minimize cumulative light damage.
Improper storage conditions and stacking works
If you store paintings in damp basements, hot attics, or tightly stacked piles, you’ll accelerate fading, mold growth, and surface abrasion.
Instead, keep works upright, separated by acid-free pads or felt, and in a climate-controlled space with stable humidity and moderate temperature.
Inspect periodically for pests or condensation, rotate storage locations occasionally, and never place heavy objects on top—prevent physical damage and light deterioration.
Using non-archival materials for mounting and backing
Although it may seem harmless, using non-archival mounting and backing materials can dramatically speed up fading and deterioration of a painting.
You should avoid acidic boards, glue with corrosive chemicals, and wood that emits vapors. Choose pH-neutral, lignin-free supports and archival tapes.
Proper materials prevent chemical reactions and discoloration, extend vibrancy, and reduce restoration needs—so pick archival components from the start.
Long-Term Care Plan and Maintenance Schedule
Set a regular inspection schedule—monthly for high-risk works, quarterly for stable pieces—and look for changes in color, flaking, mold, or frame damage.
Plan seasonal tasks like UV-window checks, humidity adjustments, and gentle dusting, plus an annual deep review of varnish and backing.
Keep concise condition reports with dated photos each visit so you can track changes and actions over time.
Regular inspection intervals and what to look for
Start by scheduling inspections at clear, regular intervals—typically every 3 to 6 months for paintings on display and every 6 to 12 months for works in storage—so you catch problems early.
Check for dust accumulation, surface grime, fading or color shifts, cracking or paint lifting, frame or stretcher warping, insect activity, and signs of humidity damage like mold or bloom.
Record findings and act promptly.
Seasonal and annual maintenance tasks
When you plan seasonal and annual maintenance, map tasks to the rhythms of the year so inspections, cleaning, and environmental checks happen predictably.
Spring and fall are good times for thorough inspections and light cleaning. Summer calls for humidity control checks, and winter requires monitoring heating-related dryness.
You should:
- Check and adjust humidity and temperature controls.
- Do gentle dusting and spot-cleaning as needed.
- Inspect frames, hanging hardware, and glazing for wear.
Record-keeping: condition reports and photographic documentation
Although it’s easy to overlook, keeping clear condition reports and dated photographs is essential for tracking a painting’s state over time and guiding maintenance decisions.
You should log materials, measurements, observed changes, and environmental readings. Photograph details, full view, and labels with date and lighting notes.
Store records digitally and back them up, so you can compare, plan interventions, and provide evidence for conservators or insurers.
When to Seek Professional Conservation
If you notice flaking paint, mold, severe discoloration, or structural damage, you should contact a conservator right away.
A professional will assess condition, explain treatment options and risks, and give an estimate and timeline.
Look for conservators with credentials, references, and membership in recognized conservation organizations, and ask about documented experience with works like yours.
Signs that require a conservator’s intervention
Because small problems can quickly worsen, you should call a conservator as soon as you notice structural damage, active deterioration, or anything you can’t safely address yourself.
Seek help for flaking or lifting paint, mold growth, significant discoloration, water stains, insect damage, torn canvas, warped stretcher, or persistent surface grime.
Don’t wait—early professional care preserves color and prevents loss.
What to expect from professional conservation services
When you contact a conservator, expect a professional assessment followed by a clear plan: they’ll examine the work closely, document its condition, and explain the risks, proposed treatments, timeframe, and costs before doing any hands-on work.
You’ll get prioritized, minimally invasive options, condition reports, and care recommendations.
Conservators may stabilize paint, consolidate flaking, address varnish, and advise on safe display and storage to prevent recurrence.
How to find and vet a qualified conservator
How do you know it’s time to call a conservator? Look for structural damage, active flaking, mold, or severe discoloration beyond cleaning.
Check credentials: membership in AIC or regional conservation bodies, formal training, and insurance.
Ask for references, condition reports, treatment proposals, and cost estimates.
Verify lab access and ethical standards.
Get a written agreement before work begins.
Cost Considerations and Budget-Friendly Options
You can handle many preservation tasks yourself—like controlling light, humidity, and using basic framing—to avoid pricey treatments.
For problems beyond routine care you’ll need a professional, so prioritize spending on conservation when the work or value warrants it.
Focus your budget on quality materials for immediate protection (UV-filtering glass, acid-free backing) and save on noncritical items.
DIY prevention vs. professional treatments
Although DIY steps like cleaning dust, controlling humidity, and using UV-filtering glass can stretch your budget, some issues—stains, flaking paint, or structural damage—still need a conservator’s touch.
You can handle regular maintenance and minor varnish retouches, but risky repairs, inpainting, or consolidation require pros.
Balance costs: use DIY for prevention, hire conservators for irreversible or high-value interventions to protect long-term color.
Affordable materials and where to spend vs. save
When budgeting for painting care, focus your spending where it prevents irreversible loss and save on routine, low-risk items you can replace.
Invest in UV-filtering glass, archival varnish, and proper framing; those protect pigment long-term.
Save on consumables like gloves, microfiber cloths, and basic storage boxes.
Shop sales, compare suppliers, and prioritize certified conservation materials for irreplaceable works.
Case Examples and Before/After Scenarios
You’ll see typical fading problems—yellowed varnish, light-bleached pigments, and edge darkening—and learn the corrective approaches that address each issue.
I’ll walk you through a few successful preservation case studies that show step-by-step treatments and their outcomes.
These before-and-after scenarios will help you recognize when a painting needs professional care versus simple preventative measures.
Typical fading problems and corrective approaches
If paint has faded on your artwork, you can usually trace the cause and choose a targeted remedy rather than guessing at a full restoration.
Identify light damage, pigment instability, varnish yellowing, or dirt loss.
Use UV protection, gentle cleaning, selective inpainting, or varnish removal and recoat.
Test small areas, document steps, and consult a conservator for complex or irreversible fixes.
Successful preservation case studies
A few real-world case studies show how targeted interventions can revive paintings without erasing their history.
You’ll see a sun-faded landscape regain tonal balance after UV-filtering glazing and gentle solvent cleaning.
A water-stained portrait recovered subtle hues through localized consolidation and inpainting.
These examples illustrate choosing minimal intervention, documenting each step, and monitoring results to preserve color without falsifying the artist’s intent.
FAQs Common Questions About Preventing Fading
You’ll find answers here to common questions about preventing fading, like how much light is safe and how often varnish should be reapplied.
You’ll also learn what can (and can’t) be permanently restored, whether it’s safe to clean old paintings yourself, and the best storage conditions for long-term preservation.
Keep reading for clear, practical guidance you can use right away.
How much light is safe for displaying a painting?
How much light is safe depends on the type of pigments and materials in the painting, but you can use guidelines—measured in lux and UV levels—to keep fading minimal.
Generally, keep sensitive works under 50 lux and stable, lightfast pieces under 150 lux.
Eliminate UV with filtered lighting, avoid direct sunlight, rotate displays, and monitor exposure time to limit cumulative light damage.
How often should varnish be reapplied?
When should you reapply varnish depends on the varnish type, the painting’s condition, and its exposure to light and pollutants; generally, check every 3–10 years.
Inspect for yellowing, uneven sheen, cracks, or dirt buildup.
Clean gently before recoating, and test a small area.
Use reversible, conservation-grade varnish and consult a conservator for valuable or fragile works to avoid damage.
Can faded colors be permanently restored?
Can faded colors be permanently restored? You can often recover vibrancy, but restoration depends on damage type.
A conservator can consolidate pigments, remove discolored varnish, and inpaint losses to reinstate appearance. True original molecules lost to light may be irreplaceable, so results vary.
Consult a qualified restorer for assessment; they’ll recommend realistic goals and reversible treatments to preserve integrity.
Is it safe to clean old paintings myself?
Curious whether you should tackle cleaning an old painting yourself? You can do gentle dusting with a soft brush or microfiber, but avoid water, solvents, or household cleaners.
Old varnish, flaking paint, or hidden repairs need a conservator’s assessment. When in doubt, consult a professional; improper cleaning can cause irreversible color loss, abrasion, or chemical damage requiring costly restoration.
What are the best storage conditions for long-term preservation?
If you want your paintings to keep their color and structure for decades, store them in a stable, controlled environment: cool, dark, and moderately dry with minimal temperature and humidity swings.
Keep temperatures around 60–70°F (15–21°C) and relative humidity near 45–55%.
Avoid direct sunlight, fluorescent lights, basements, and attics.
Use archival materials, clean storage racks, and allow air circulation.