How to Keep Painted Cabinets From Chipping Long-Term
You can keep painted cabinets from chipping long-term by prepping and sealing surfaces, cleaning away grease, and sanding or deglossing before priming with a bonding, stain‑blocking primer. Use a durable cabinet-grade paint (100% acrylic or alkyd enamel), apply two to three thin, sanded coats, and finish with a clear protective topcoat. Control humidity, avoid impacts, and tighten hardware to prevent stress. Follow proper maintenance and targeted repairs, and you’ll learn practical steps and pro tips to extend the finish.
What Causes Cabinet Paint to Chip?
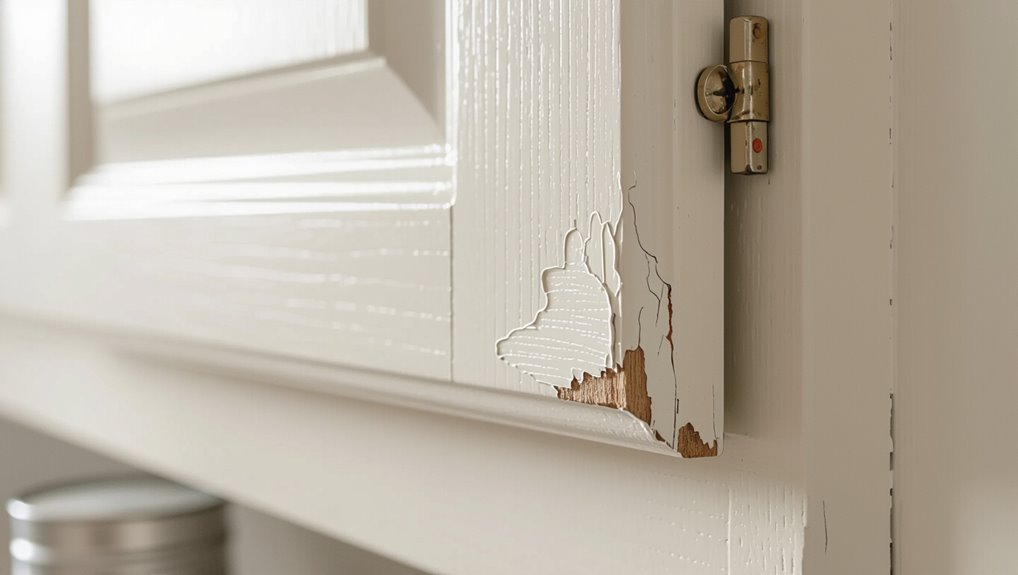
When painted cabinets chip, it’s usually because the paint couldn’t properly bond to the surface or it’s been stressed beyond its limits.
Paint chips when the finish can’t bond to the surface or is pushed beyond its limits.
You’ll notice poor paint adhesion from dirt, grease, moisture, or inadequate sanding.
Movement, impacts, and humidity swell cabinet materials, breaking the bond.
Temperature swings and incompatible primers or finishes accelerate failure.
Address substrate prep and stable conditions to prevent chipping.
Which Paint Types Resist Chipping Best?
When you want cabinets that stand up to daily use, choose paints known for durability like acrylic-latex and alkyd formulas.
Pair those with hard, protective finishes—polyurethane or water-based clear coats—to reduce chipping.
I’ll explain which combinations work best for different surfaces and traffic levels.
Best Durable Paints
Choose paints formulated for hard use — like 100% acrylic latex and alkyd (oil-based) enamels — because they bond strongly, resist abrasion, and flex with temperature changes so they chip far less.
You’ll prefer paint systems labeled for cabinets or trim, which deliver durable finishes and improved paint longevity.
Apply thin, even coats, allow full cure, and avoid cheap interior wall latex meant for low-traffic areas.
Finishes That Last
Although appearance matters, the finish you pick determines how well painted cabinets resist chips and wear; go for enamel-style sheens like semi-gloss or satin formulated for trim or cabinets, because their harder surfaces and better adhesion shed scuffs and are easier to clean. Choose long lasting finishes and follow simple cabinet maintenance to preserve edges.
| Finish | Benefit |
|---|---|
| Semi-gloss | Durable, easy clean |
| Satin | Subtle, resilient |
| Urethane | Extra hard |
| Waterborne alkyd | Low VOC, tough |
Why Primer Choice Affects Durability
You’ll want a primer that bonds tightly to bare wood so the paint has a stable base and won’t lift.
Pick one with stain-blocking properties if tannins or old finishes could bleed through and ruin your topcoat.
Also choose a primer with some flexibility so it moves with the wood over time instead of cracking and letting paint chip away.
Bonding To Bare Wood
When you’re painting bare wood, the primer you pick determines how well the finish will stick and how long it lasts.
Use proper bonding techniques and thorough wood preparation to prevent chips. Choose adhesion primers for tight grain, sand between coats, and seal knots.
Follow this checklist:
- Clean and sand
- Use adhesion primer
- Sand between coats
- Seal problem areas
Stain-Blocking Properties
Because stains, tannins, and prior finishes can bleed through paint and undermine adhesion, pick a primer with proven stain-blocking properties to keep your cabinets durable.
You’ll get better stain resistance and consistent paint adhesion, preventing discoloration and premature chipping.
Choose a primer labeled for blocking tannins and water stains, apply per instructions, and allow full cure before topcoating to guarantee long-term protection.
Primer Flexibility Over Time
Stain-blocking primers stop bleed-through, but they also need to flex as your cabinets expand and contract. Rigid primers can crack or pop off over time, taking the paint with them.
- Choose primers that advertise primer flexibility.
- Test adhesion on a scrap before full application.
- Match primer type to wood and finish for primer longevity.
- Maintain stable humidity to reduce movement and stress.
How to Assess Cabinet Material and Wear
If you want painted cabinets to last, start by identifying the material and inspecting common wear points: solid wood, plywood, MDF, and thermofoil all react differently to paint and damage.
You should do a brief wear assessment: check edges, hinges, drawer fronts, and moisture exposure.
Note previous repairs, surface texture, and adhesion issues to choose compatible prep and coatings.
When to Strip vs. Paint Over Old Finish
Now that you’ve identified the cabinet material and wear points, decide whether to strip the old finish or paint over it by weighing adhesion, surface condition, and the type of existing coating.
If finish is intact and paint compatibility is good, you can scuff and prime; if flaking or oil-based, use stripping techniques.
- Test adhesion
- Inspect for damage
- Match primer to finish
- Choose safe stripper
How to Clean Cabinets Before Painting
Before you paint, you’ll need to remove grease and grime so the new finish can stick.
Sand or degloss the surfaces to roughen smooth varnish or lacquer for better adhesion.
Finish by wiping everything with a TSP substitute to remove residue and let it dry before priming.
Remove Grease And Grime
Because kitchen cabinets collect grease and grime faster than you realize, you should clean them thoroughly before painting so the finish will bond and last.
Use effective cleaning techniques focused on grease removal to guarantee adhesion. Follow these steps:
- Degrease with a trisodium phosphate substitute.
- Wipe with microfiber and warm water.
- Rinse and dry fully.
- Inspect for residue before priming.
Sand And Degloss Surfaces
Start by sanding and deglossing the cabinet surfaces so paint will adhere evenly; use 120–150 grit sandpaper for bare wood or 220 grit for painted or laminated finishes, and follow with a liquid deglosser for slick, glossy areas.
You’ll employ targeted sanding techniques, wipe dust off, and inspect for gloss spots. Proper surface preparation guarantees primer and paint bond, reducing future chipping.
Clean With TSP Substitute
Once you’ve sanded and knocked down glossy spots, you’ll want to remove grease, grime, and sanding dust so primer and paint can stick properly.
Use an eco friendly cleaners TSP substitute, dilute per label, and wipe with a microfiber cloth. Focus on thorough surface preparation to prevent lifting.
- Mix per instructions
- Test small area
- Rinse well
- Dry completely
How to Sand Cabinets for Adhesion
Sanding your cabinets properly is the single most important step to guarantee new paint adheres and resists chipping.
Begin with 120–150 grit to remove gloss, follow with 220 grit for a smooth bite, and vacuum between passes. Use a sanding block or orbital sander for even pressure.
Combine these sanding techniques with proper adhesion methods: degrease, tack cloth, and a high-quality bonding primer.
How to Repair Dents, Dings, and Veneer
Before you prime or paint, you’ll want to fix any surface dents and dings so the finish lays smoothly.
For shallow dents you can use wood filler or a sanding-sealer technique, and for damaged veneer you’ll need to glue, clamp, or patch the area before refinishing.
Taking care of these repairs now prevents chips and makes your paint job last.
Fixing Surface Dents
Dents, dings, and loose or bubbling veneer are common problems that make painted cabinets look worn even when the finish is otherwise sound.
You can fix shallow dents with steam or wood filler, prioritize dent prevention and surface protection, and sand and repaint carefully.
Follow these steps:
- Clean
- Steam or fill
- Sand smooth
- Prime and paint
Repairing Veneer Damage
Repair damaged veneer by evaluating how deep the problem is and choosing the right fix—steam for shallow dents, wood filler or epoxy for deeper gouges, and patching or replacing loose veneer when the damage is extensive.
You’ll sand, glue, clamp, and blend repairs, then prime and repaint. Proper veneer repair improves appearance and durability; regular cleaning and gentle handling aid damage prevention.
Best Primers for Cabinets by Substrate
When you’re picking a primer for painted cabinets, match the primer to the cabinet substrate to guarantee adhesion and prevent chipping.
Consider wood type considerations and primer adhesion techniques for lasting results.
Choose specially formulated primers for:
- Raw wood: oil-based or stain-blocking latex
- Veneer: high-bonding shellac or bonding primer
- Laminate: adhesion promoter/etching primer
- Metal: corrosion-inhibiting primer
How to Pick a Topcoat Sheen and Formula
You’ll want to balance sheen level tradeoffs—higher sheens resist scuffs better but show flaws and brush marks more.
Pick a topcoat chemical type (water-based acrylic, alkyd, or hybrid) based on durability, yellowing resistance, and dry time.
Match sheen and formula to your wear needs and the look you want so your cabinets stay chip-free longer.
Sheen Level Tradeoffs
Choosing the right sheen for your cabinet topcoat balances looks with durability, so think about where the cabinets sit and how they’ll be used.
Use sheen selection to weigh gloss impact versus concealment and wear. Consider:
- High gloss for easy cleaning and scratch resistance.
- Semi-gloss for balance.
- Satin to hide imperfections.
- Matte for low reflection but more vulnerable to scuffs.
Topcoat Chemical Types
The finish you pick is as important as the sheen—different topcoat chemistries give you varying levels of durability, flexibility, and ease of application, so match the formula to how cabinets will be used and maintained.
Choose among polyurethane, acrylic, conversion varnish, or waterborne urethane by comparing topcoat types and chemical properties: solvent resistance, hardness, yellowing, and cure time to fit traffic and cleaning needs.
Apply Paint for a Smooth, Durable Finish
Start by laying out a clean, dust-free workspace and gather high-quality brushes or a foam roller, plus a smooth, durable paint formulated for cabinets.
Work in even strokes, keep a wet edge, and sand lightly between passes for a smooth application and durable finish.
Apply thin, controlled layers and let each dry fully.
- Brush technique
- Roller pressure
- Light sanding
- Dry time
How Many Coats for Coverage and Strength
Most cabinets need two to three thin coats of paint to balance coverage and durability; you’ll get good opacity with two coats, then add a third only if the finish still looks thin or you want extra toughness.
Space coats, sand lightly between them, and use consistent application techniques. Your layering strategy should aim for thin, even films that cure fully to resist chips and wear.
When to Spray, Brush, or Roll Cabinets
After you’ve built up thin, even coats, pick the application method that matches your goals and skill level: spraying gives the smoothest, fastest finish for flat panels and hardware-free doors; brushing works well for detailed work, edges, and touch-ups; rolling can speed coverage on slab doors while producing fewer brush marks than hand-brushing.
- Match spray techniques to finish comparison and ventilation.
- Choose brush types for corners and trim.
- Use roller methods on broad, flat surfaces.
- Time application timing and tool selection to avoid runs and guarantee uniform coverage.
Dry and Cure Times: Between Coats & Use
Because paint needs time to both dry and fully cure, you’ll want to wait the manufacturer’s recommended interval between coats and before putting cabinets back into service; drying (surface solvent evaporation) can take a few hours, while curing (chemical hardening) often requires days to weeks depending on product and conditions. Use proper drying techniques and follow curing processes to avoid premature wear.
| Stage | Time | Tip |
|---|---|---|
| Dry | Hours | Ventilate |
| Handle | 24–48h | Gentle |
| Full cure | Days–weeks | Avoid stress |
How to Seal Cabinet Edges and Seams
Before you paint, fill gaps and hairline seams with a paintable caulk so moisture and movement don’t chip the finish.
After caulking and sanding, apply edge tape along cabinet doors and drawer fronts for extra protection where paint tends to wear.
These simple steps create a smoother, longer-lasting edge that keeps chips from forming.
Fill Gaps With Caulk
When you see tiny gaps or seams where cabinet edges meet, caulk’s the quickest way to stop paint from flaking and give the finish a clean, professional look.
You’ll use precise caulk application for durable gap filling before priming and painting.
- Choose paintable silicone or acrylic.
- Cut tip small.
- Smooth with wet finger.
- Let cure fully.
Seal With Edge Tape
After caulking seams, use edge tape to protect cabinet edges from chips and moisture where paint tends to wear first.
You’ll gain edge tape benefits like impact resistance and moisture sealing. Measure, cut, and heat-activate or iron tape smooth; press firmly along edges.
Trim excess, sand lightly if needed, and repaint or touch up. Proper application techniques guarantee long-lasting, chip-resistant cabinet finishes.
Protect Hardware and Hinges During Painting
Start by removing loose hardware and loosening hinges so you can work cleanly and avoid paint buildup that causes sticking or misalignment.
Use hardware protection and hinge masking to shield metal. Follow these steps:
- Label and bag screws.
- Cover hinges with low-tack tape.
- Pad knobs with foam.
- Reinstall hardware after cure time to prevent scratches.
Reinforce High‑Contact Areas (Edges & Pulls)
While the hardware is protected and hinges are loosened, pay special attention to edges and pulls because they’re where paint takes the most abuse.
You should add edge protection—thin tape or corner guards—before sanding and priming. For pulls, use pull reinforcement like washer-backed screws or felt pads to reduce abrasion.
Regularly inspect these spots and touch up nicks promptly to prevent peeling.
How to Cure Painted Cabinets for Hardness
One to three weeks of controlled curing will make your cabinet paint reach its full hardness, so plan for gentle use and proper conditions during that time.
You’ll monitor cure time and manage hardness factors by controlling environment and handling. Follow these steps:
- Keep steady 65–75°F and 40–50% humidity.
- Avoid heavy contact for one week.
- Ventilate without drafts.
- Clean gently with a soft cloth.
How to Spot‑Test Adhesion Before Rehanging
After curing, you’ll want to confirm the paint’s grip before putting doors and hardware back on.
Perform a small adhesion test: press and lift a piece of low-tack tape, or score a tiny X and apply tape to check pull-off.
Do a small adhesion test—press and lift low-tack tape, or score a tiny X and pull to check adhesion.
Test areas should mirror finish and substrate so you verify paint compatibility.
If it fails, strip and re-prime before rehanging.
Touch Up Chips Without Visible Seams
If a small chip appears once your cabinets are rehung, you can make the repair virtually invisible by matching texture and feathering edges before you paint.
Use precise touch up techniques to blend finish and avoid buildup. Sand lightly, apply thin filler, feather paint, and finish with matching sheen for seamless repairs.
- Sand
- Fill
- Paint
- Blend
How to Clean Painted Cabinets Safely
Keep up a habit of daily light wiping to remove dust and prevent grit from scratching the paint.
When you need more than a wipe, use gentle cleaning solutions like diluted dish soap or a pH-neutral cleaner.
Never use abrasive pads or harsh scrubbing tools that can wear through the finish.
Daily Light Wiping
When you wipe painted cabinets lightly every day, you remove dust and spills before they settle in and dull the finish.
You’ll protect edges and avoid abrasive scrubbing by adopting simple daily cleaning protective measures. Use a soft microfiber cloth and gentle pressure, and dry immediately.
- Microfiber cloth
- Light pressure
- Weekly hardware check
- Immediate drying
Gentle Cleaning Solutions
One simple, safe cleaner you can make uses one part white vinegar to three parts warm water—add a few drops of mild dish soap for extra grease-cutting power—applied with a soft microfiber cloth and wiped dry immediately.
Use eco friendly cleaners for routine upkeep, spray sparingly, and blot spills fast. Rinse residue with plain water, dry thoroughly, and rotate microfiber cloths to avoid grit buildup.
Avoid Abrasive Tools
Avoid scrubbing with steel wool, scouring pads, or stiff-bristled brushes—these tools scratch and wear through paint, making chips and finish failure more likely.
You should use soft cloths and gentle cleaners for cabinet maintenance to preserve paint protection.
Follow these steps:
- Microfiber wipe
- Mild soap solution
- Soft-bristle toothbrush (for creases)
- Dry immediately after cleaning
Prevent Moisture and Heat From Causing Chips
Because painted cabinet finishes weaken when exposed to steam and direct heat, you should control moisture and temperature to prevent chips.
Install moisture barriers behind sinks and under countertops, run exhaust fans during cooking, and fix leaks promptly.
Use heat shields near stoves and dishwashers, keep cabinets ventilated, and avoid placing hot appliances directly against painted surfaces to extend finish life.
Common DIY Painting Mistakes to Avoid
When you rush prep, skip proper priming, or use the wrong paint, the finish will chip sooner than you’d expect.
You must follow correct surface preparation, guarantee proper paint mixing, and avoid common shortcuts.
Do these four things:
- Clean and sand thoroughly.
- Use a compatible primer.
- Mix paint to manufacturer specs.
- Apply thin, even coats and let cure.
How Seasonal Changes Affect Paint Longevity
Although paint can look fine after a weekend project, seasonal temperature and humidity shifts seriously affect how long your cabinet finish lasts; colder, damp conditions slow curing and make paint more brittle, while hot, dry air can cause it to dry too fast and crack.
You should monitor temperature fluctuations and seasonal humidity, control moisture, and account for environmental factors to reduce paint expansion and chipping.
When to Call a Professional Refinisher
If your cabinets keep chipping despite touch-ups and proper care, it’s time to contemplate a professional refinisher.
You should call one when damage is widespread, finish failures repeat, or you lack time.
Evaluate refinisher qualifications and project complexity before hiring.
- Widespread chips
- Repeated failures
- Limited time
- Check qualifications and scope
Budgeting for Durable Cabinet Refinishing
Planning a durable cabinet refinishing job means balancing materials, labor, and long-term value so you won’t be repainting again in a year.
You’ll prioritize cost effective materials and factor labor for prep, sanding, and sealing.
Compare quotes, buy quality primers and long lasting finishes, and set aside a small contingency for unexpected repairs so the finish holds up without overspending.
Choose Hardware That Reduces Wear
When you pick hinges, pulls, and knobs, go for designs that keep paint from rubbing or chipping at contact points.
Choose durable hardware materials and smooth handle design to minimize abrasion. Consider finishes that resist wear and rounded edges that won’t catch paint.
- Soft-close hinges
- Low-profile pulls
- Protective backplates
- Metal or coated alloys
Maintenance Routines to Keep Paint Chip‑Free
Because regular care prevents small nicks from turning into bigger chips, you should adopt a simple maintenance routine: clean cabinets gently with a mild, non-abrasive cleaner, dry them thoroughly, and touch up dings promptly with matched paint or a fine-tip touch-up pen.
Inspect hinges and edges monthly, address loose hardware, keep spills off finishes, and follow proper paint application techniques when repairing to guarantee durable results.
Quick Checklist to Prevent Cabinet Paint Chipping
1 simple checklist can keep your painted cabinets looking crisp: follow these compact, actionable steps for cabinet maintenance and painting techniques that reduce chipping.
- Clean surfaces regularly and remove grease.
- Sand lightly before touch-ups.
- Use quality primer and durable topcoat.
- Address loose hinges and hardware promptly to prevent impact damage.
Frequently Asked Questions
How Long Before Newly Painted Cabinets Can Be Cleaned Safely?
You can safely clean newly painted cabinets after about 7–30 days, depending on paint curing; start gentle cleaning techniques at one week with mild soap, avoid harsh scrubbing, and wait a full cure before heavy cleaning.
Can Children’s Sticky Hands Cause Premature Chipping?
“Too many cooks spoil the broth” — yes, kids’ sticky hands can cause premature chipping because sticky residue attracts dirt and abrades finishes over time, reducing paint durability, so you should wipe spills promptly and reinforce edges.
Do Magnets or Adhesive Hooks Damage Painted Cabinet Surfaces?
Yes — magnets or adhesive hooks can damage paint if you use heavy magnet types or rough hook materials; you should choose soft-backed, lightweight magnets and low-tack adhesive hooks, and test a small hidden area first.
Will Using Furniture Wax Protect Painted Cabinet Fronts?
Yes — furniture wax helps protect painted cabinet fronts by adding a moisture-resistant barrier and minimizing surface wear; you’ll gain furniture wax benefits while following cabinet maintenance tips like gentle cleaning, avoiding abrasive tools, and reapplying wax periodically.
How Do Expansion Gaps Around Doors Affect Paint Chips?
Too-large expansion gaps let doors shift, causing impact and flex that weakens paint adhesion and promotes chips; too-tight gaps misalign hardware, so you should adjust door alignment and maintain consistent gaps to prevent stress and flaking.
Conclusion
Treat your cabinets like a well-worn book: handle them gently, choose durable paints and primers like trustworthy pages, and mend small tears before they widen. Match finish to use, swap hardware that rubs, and clean with a soft hand—little rituals that keep edges intact. Over time, careful choices and steady upkeep weave a protective spine, so chips stay rare footnotes rather than the story’s worn-out chapters.