How to Paint Walls Without Touching Ceiling Like a Pro
You can paint walls without touching the ceiling like a pro by cutting in first with a steady angled brush, keeping a 30–45° angle and light pressure to lay a narrow wet band, then rolling toward that band to blend. Use painter’s tape or an edger on tricky edges, protect floors and furniture, and use thicker latex paint to reduce drips. Work in short strokes, remove tape at 45°, and keep touch‑up tools ready—keep going to learn tool choices and tricks.
Quick Answer: Paint Walls Without Touching the Ceiling
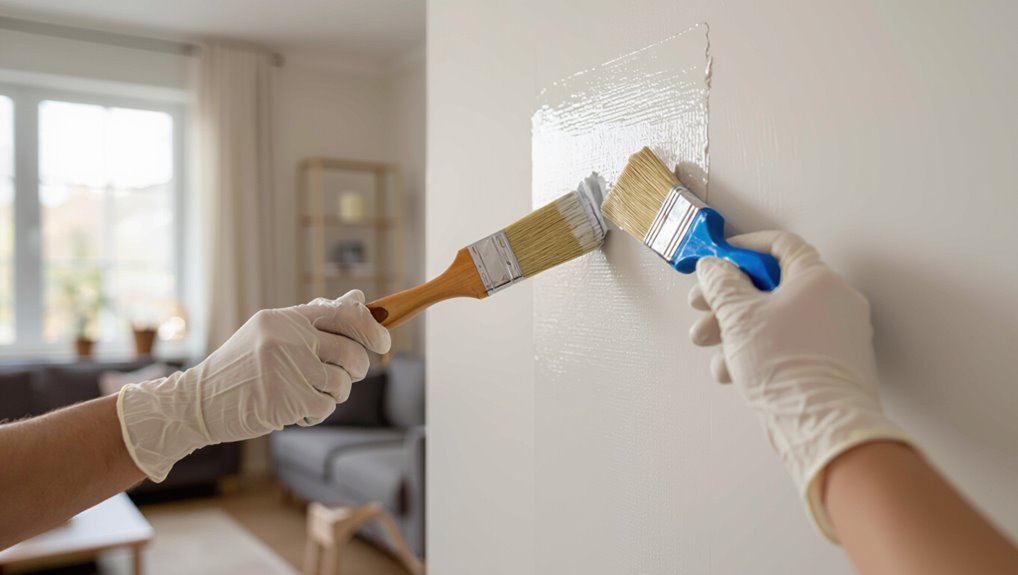
When you want crisp edges without mess, start by cutting in with a steady hand: load a high-quality angled brush, rest your wrist against the wall for control, and paint a narrow band about an inch from the ceiling before rolling the rest of the wall.
You’ll use steady strokes, maintain wet edges, and apply minimal pressure for precise wall painting and reliable ceiling protection.
Gather Essential Tools for Clean Wall‑Ceiling Edges
Tools matter: gather a steady angled brush, a high‑nap roller and tray, painter’s tape, a good drop cloth, a small paint edger or shield, and a ladder or step stool that gives you solid footing.
With these, you’ll control edge definition, steady handwork, and quick corrections.
Practice precise tape application, secure seams, and keep tools handy so you work confidently and avoid ceiling smudges.
Choose Paint and Finish to Minimize Bleed and Drips
Now that you’ve prepped your edges and organized your gear, pick a paint and finish that cut down on bleed and drips.
Choose thicker, high-quality acrylic or latex paint types with good hide and body. For finish options, favor matte or eggshell indoors to mask imperfections and slow runs; use satin where washability matters.
Stir gently and maintain proper viscosity.
Prep the Room: Clear Furniture and Protect Floors
Before you start rolling, clear the room of furniture and fragile items so you’ve got a clean, open workspace; cover remaining pieces and the floor with durable drop cloths or plastic sheeting secured with painter’s tape to prevent slips and paint seepage. Arrange furniture for access, label covered items, and prioritize floor protection to keep edges clean.
| Task | Purpose |
|---|---|
| Move furniture | Access walls |
| Cover items | Protect finishes |
| Tape edges | Seal gaps |
| Lay drop cloths | Floor protection |
| Label zones | Organized workflow |
Repair Seams Where Ceiling Meets Wall
If you see cracks or gaps where the ceiling meets the wall, patching them before painting will give you a clean, professional finish.
Inspect the seam for loose drywall tape or crumbling compound. Remove debris, apply joint compound or caulk for a ceiling gap, smooth with a putty knife, sand when dry, and wipe dust.
Seam repair prevents paint lines and guarantees crisp edges.
Choose the Right Painter’s Tape
Pick a tape with the right adhesion for your surface—low-tack for delicate finishes and stronger adhesive for rougher textures.
Apply it firmly along edges to prevent bleed-through, then remove it while the paint is still tacky or just dry to the touch depending on the tape’s instructions.
Test a scrap first so you know how it sticks and when it pulls cleanly.
Tape Adhesion Tips
When you want crisp paint lines and clean removal, choosing the right painter’s tape makes all the difference; consider surface type, paint weight, and how long the tape will stay put.
Press tape edges firmly with a flat tool for full adhesion, test for surface compatibility, and pick tape rated for tape longevity.
Clean, dry surfaces prevent bleed and guarantee secure bonds.
Tape Removal Timing
Once the paint’s dry to the touch, plan your tape removal so you don’t pull up fresh paint or leave a jagged edge.
Use tape removal tips: score the edge with a razor if paint’s tacky, pull tape back on itself at a 45° angle, and remove slowly.
For ideal timing, wait until paint cures enough to resist lifting but not fully hardened.
Prep Taped Surfaces: Clean and Prime for Better Adhesion
Although taping gives you crisp lines, you’ll get the best paint adhesion if you clean and prime the taped areas first.
Use proper cleaning techniques and priming methods to guarantee bond. Follow these steps:
- Wipe tape edge with mild detergent.
- Rinse and dry thoroughly.
- Apply a compatible primer along the edge.
- Let primer cure before painting for lasting adhesion.
Tape Like a Pro: Straight, Continuous Lines
Cleaning and priming the taped edge sets you up for a clean finish, but the tape itself still determines how sharp your line will be.
Use consistent tape placement, press edges firmly with a plastic card, and choose quality tape.
Employ overlapping tape techniques for long runs and remove tape at a 45° angle while paint’s tacky to keep continuous, straight lines without smudges.
How to Hold and Load a Cutting‑In Brush
You’ll want to grip the cutting‑in brush like a pencil—thumb and index steady, wrist relaxed—to keep control for precise lines.
Load the brush by dipping only the lower third into paint and gently tapping off excess so you don’t overload the bristles.
With that grip and loading technique you’ll maintain paint control for sharp edges and fewer drips.
Proper Brush Grip
Getting a solid grip on your cutting‑in brush sets the tone for crisp, controlled edges—so hold it like a pencil, not a paint roller.
You’ll use basic brush techniques and experiment with grip styles to steady your hand.
Follow this quick checklist:
- Rest thumb opposite fingers.
- Grip nearer ferrule for control.
- Use light pressure.
- Angle brush toward ceiling.
Loading The Brush
Start by holding the cutting‑in brush like a pencil—thumb opposite fingers and the ferrule close to your grip.
Then dip only the lower third of the bristles into the paint so you load enough for smooth coverage without drips.
Keep your wrist relaxed, use short controlled strokes, and check paint consistency—too thin causes runs, too thick resists flow.
Practice this brush technique for crisp edges.
Maintaining Paint Control
One reliable way to keep paint under control is to hold the cutting‑in brush like a pencil—thumb opposite fingers with the ferrule near your grip—so you get precise movements and steady pressure.
- Dip quarter‑way for consistent load.
- Wipe excess on bucket rim.
- Use short strokes for edge precision.
- Rest wrist, not elbow, to steady lines and improve paint techniques.
Cut In: Brush Strokes and Angle for a Crisp Line
When you cut in, hold the brush at a 30–45° angle and use steady, controlled strokes to lay a thin bead of paint along edges; this gives you a crisp line without excess paint seeping under tape or onto trim.
Use proper brush angles and cutting techniques, working from ceiling to wall in short, overlapping strokes.
Keep the brush loaded but not dripping.
Seal Taped Edges With the Back‑Roll Method
After taping your edges, you’ll seal them with a back‑roll to force paint under the tape and prevent bleed‑through.
This works because the roller pushes paint into any gaps and flattens the tape edge for a tighter bond.
I’ll show you the roller type, pressure, and technique to do it quickly and cleanly.
Why Back‑Roll Works
Because taped edges are the most vulnerable part of a paint job, you’ll want to back‑roll them to lock the coating into the tape and substrate; this method forces paint into the small gap and smooths the overlap so you get a crisp line without risking bleed.
- back rolling benefits: better adhesion
- reduces bleeding
- evens texture
- creates seamless connections
How To Back‑Roll
Now that you’ve sealed taped edges by pressing paint into the gap, you’ll use a roller to complete the job—back‑rolling locks paint into the tape and smooths the overlap for a clean edge.
Load a short‑nap roller evenly, roll lightly over the taped seam away from the ceiling, and repeat with overlapping passes.
These back rolling techniques guarantee even paint application and crisp lines.
When to Use an Angled Edger or Shield?
Want crisp, straight lines without taping? Use an angled edger or shield when precision matters. Consider:
- angled edger advantages for tight corners and quick trims.
- shield efficiency when ceilings are textured.
- Use edger for short runs; shield for long stretches.
- Practice pressure control to avoid drips and gaps for professional edges.
Roll the Wall Without Touching the Ceiling
To keep paint off the ceiling, start by cutting in with an angled brush along the edge so you have a clean line to roll toward.
Once the cut-in’s dry, apply painter’s tape for an extra-clean barrier if the surface or your technique needs it.
Then roll up to the taped or brushed edge, using light pressure to avoid splatter.
Use an Angled Brush
Although cutting in sounds tricky, an angled brush gives you control so you can roll right up to the ceiling without smudging it.
Use angled brush techniques and know brush types to finish cleanly.
Steps:
- Load lightly.
- Hold at a 45° angle.
- Use short, controlled strokes.
- Blend into the rolled section promptly to avoid lap marks.
Tape A Clean Edge
A strip of painter’s tape along the ceiling gives you a foolproof boundary, so you can roll the wall without worrying about smudging the trim.
Press tape firmly, smooth edges, and use proper tape techniques to prevent bleed.
Paint toward the tape, remove it while paint’s tacky but not wet, and inspect for edge precision.
Touch up tiny flaws with a fine brush.
Blend Cut‑In and Rolled Paint for Invisible Joins
Start by feathering the cut‑in edge so the brushed paint tapers toward the rolled area. Then immediately roll over the same section while the paint’s still wet to blend the seam.
Use these blending techniques for seamless shifts:
- Light pressure with brush
- Short roll strokes
- Maintain wet edge
- Match paint load and direction
Drying Times and When to Remove Tape
When the paint feels tacky but not wet, you’re approaching the right time to remove tape—usually after the paint’s dry-to-touch time but before full cure—to avoid peeling or leaving a ridge.
Check manufacturer drying techniques and environmental factors; low humidity or fans speed things up.
Match tape types to surface and paint; peel slowly at a 45° angle while paint’s still slightly tacky for clean edges.
How to Fix Bleeding, Jagged Lines, and Smears
Paint mishaps like bleeding, jagged lines, and smears are fixable if you act promptly and use the right tools; you’ll save time by addressing issues before the paint fully cures.
- Check paint consistency and adjust for bleeding prevention.
- Use proper brush selection and application angles for edge precision.
- Employ touch up techniques and technique differences for jagged edges.
- Use smoothing methods for smear removal.
Speed vs. Precision: Tape Only or Freehand Cut‑In?
You can tape for faster, mess-free edges when time’s tight.
If you want sharp control and cleaner lines near trim, cut in freehand with a steady brush.
Or combine both—tape broad areas and freehand tricky spots for the best of both.
Tape For Faster Edges
One quick way to speed up your cut‑in is to use painter’s tape, but that comes with tradeoffs in precision and time spent applying and removing it.
You’ll balance tape techniques with edge precision by choosing the right tape and method.
- Clean surface
- Press seam firmly
- Paint light coats
- Remove angled, while wet
Freehand For Sharp Control
If you want sharper control and less prep, freehand cut‑ins will speed things once you’ve got a steady hand—especially compared with the time spent applying and removing tape.
You’ll rely on freehand techniques and practiced brush control to create clean edges. Work slowly, load the brush correctly, anchor your wrist, and keep a light touch.
Practice on scrap drywall before tackling ceilings.
Hybrid: Best Of Both
When you want both speed and clean edges, go hybrid: tape the tightest, most visible seams and freehand the rest.
You’ll save time and keep crisp corners by combining hybrid painting with practiced edge techniques.
Use this quick checklist:
- Tape visible seams first.
- Cut in freehand where accessible.
- Feather roller strokes outward.
- Remove tape while paint’s tacky.
Specialized Situations: Textured Ceilings, Crown Molding, High Walls
Because textured ceilings, crown molding, and high walls each demand different tools and techniques, you’ll want to plan your approach before you open a can of paint.
Because textured ceilings, crown molding, and tall walls need different tools, plan your painting approach before you start.
For textured ceilings use low‑pressure sprays or careful stippling; protect with robust ceiling protection.
Tape and angled brushes suit crown molding.
For high walls, use extension poles, sturdy ladders, and specialized techniques to maintain straight lines and steady coverage without touching the ceiling.
Cleanup, Touch‑Ups, and Storing Leftover Paint
Gather your tools and tackle cleanup before the paint fully cures: wipe rollers and brushes with the appropriate solvent, rinse trays and drop cloths, and remove tape carefully to avoid peeling fresh edges.
- Blot drips and sand dried spots.
- Use targeted cleanup techniques for edges.
- Do precise touch‑ups with small brushes.
- Seal cans tightly for proper paint storage; label color and date.
Quick Checklist: Paint Walls Without Touching the Ceiling
Before you move away from touch‑ups and storage, make sure your ceiling edge stays clean by preparing a focused plan: gather tape, angled brush, drop cloths, and ladder; pick paint techniques that suit your wall texture; test color selection near the trim; cut in with steady strokes, feathering toward the wall; keep a wet edge; remove tape before fully dry; store leftover paint labeled.
Frequently Asked Questions
Can I Paint Walls Without Touching the Ceiling When Using Spray Paint Indoors?
Yes — you can. Use spray paint techniques and careful wall preparation: mask the ceiling with painter’s tape and plastic, ventilate, practice nozzle control, spray low-pressure, keep consistent distance, and feather edges to avoid overspray and drips.
How Do HVAC Drafts Affect Tape Adhesion and Paint Lines?
HVAC drafts can lift tape edges and blur paint lines, so you’ll choose tape selection carefully and use adhesion techniques like cleaning surfaces, pressing edges firmly, and temporarily blocking drafts to keep crisp lines and prevent bleed-through.
What Safety Gear Protects Ceilings From Accidental Spills on Ladders?
A painter spill-proofed a hallway with a drop cloth and guard rails; you should use ladder safety gear like a stable ladder, ceiling protection drop cloths, painter’s tape, paint shields, and a shoulder harness to prevent ceiling spills.
Can Pets or Children in the House Ruin Taped Edges During Drying?
Yes — pets and children can ruin taped edges during drying; you should enforce pet safety and active child supervision, keep them out of the room, use barriers or gates, and distract them until paint fully sets to avoid smudges.
Is There a Quick Fix if Ceiling Texture Flakes off While Cutting In?
Yes — don’t panic like a sitcom homeowner; you’ll patch fast. Scrape loose bits, apply a bonding primer to improve texture adhesion, skim with matching compound for ceiling repair, sand smooth, then repaint once fully cured.
Conclusion
You’ve got this — finish strong by working slowly and confidently. Like the single steady hand a ballet painter used to steady his brush (he cut in a whole room during intermission), take measured strokes and trust your prep: proper tape, the right roller nap and a loaded angled brush. Studies show neat edging cuts rework time by half, so practice once and save hours. Clean up wet edges, touch up tiny spots, and enjoy the flawless line.