How to Limewash Paint a Wall for a Beautiful, Old-World Effect
You can limewash a wall to get a soft, old-world patina by mixing slaked or hydrated lime with water to a milky consistency, testing absorption, and repairing any loose plaster first. Dampen porous surfaces, then brush on thin coats with a stiff masonry brush or roll for coverage, working in small sections and applying two to three coats for depth. Wear gloves and a mask, avoid nonporous walls, and keep conditions mild—keep going to learn techniques, tools, and troubleshooting.
How to Limewash Paint a Wall for a Beautiful, Old-World Effect Quick Answer
You can limewash by mixing hydrated lime with water (and pigment if you want color), then brush or sponge thin, translucent coats onto a clean, porous surface for a soft, aged look.
Choose limewash when you want a breathable, mineral-rich finish that patinates over time and hides imperfections; it’s best on masonry, plaster, or lime-friendly substrates.
If you need a fast-drying, durable, non-breathable coating or heavy stain resistance, a modern latex or acrylic paint is a better choice.
One-sentence summary of the process
Mix lime putty or powdered hydrated lime with water to a milky consistency. Prep and dampen the wall, then brush on thin, overlapping coats—wiping or sponging for texture—letting each coat cure slightly to achieve a breathable, layered old-world finish.
You’ll work methodically, adjust dilution and technique for desired translucence, and allow proper curing between coats when you limewash paint a wall.
When limewashing is a good choice vs. alternatives
When you want a breathable, matte finish that ages gracefully and lets masonry continue to dry, limewashing’s a strong choice—especially on porous or historic surfaces where vapor-permeability and gentle, layered translucence matter more than a perfectly uniform coat.
Choose limewash for exterior brick, stone, or lime mortar; pick paint or acrylic for high-traffic, nonporous, or waterproofed surfaces needing durable, uniform coverage.
What Is Limewash and Why Choose It
Limewash is a simple, mineral-based coating made from slaked lime and water that gives walls a soft, matte patina.
You’ll recognize its historical charm in old cottages and churches, where its subtle texture and translucent color create that timeless, aged look.
It’s also breathable, durable, and low‑toxicity, so you get an eco-friendly finish that helps masonry last.
Definition and composition of limewash
Think of limewash as a traditional, breathable paint made from slaked lime (calcium hydroxide) mixed with water and often a small amount of natural pigment or binder. It reacts with carbon dioxide in the air to form a durable calcium carbonate finish.
You’ll mix lime putty or hydrated lime with water, adjust pigment for color, and sometimes add natural binders for cohesion and improved adhesion.
Aesthetic qualities and historical context
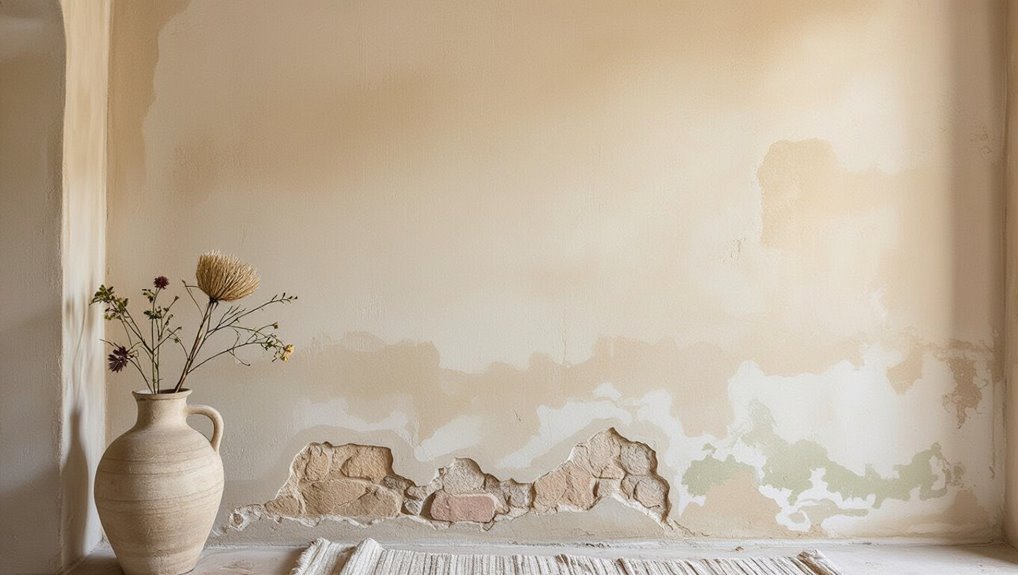
Although rooted in centuries of building practice, limewash still offers a look and feel that many modern paints can’t match: it gives walls a soft, matte translucence with subtle depth from the underlying substrate and tiny variations in pigment.
You’ll appreciate its aged, timeless character—weathered fades, gentle streaks and muted tones—that evokes historic interiors and vernacular architecture while letting surfaces feel lived-in rather than manufactured.
Practical benefits: breathability, durability, eco-friendliness
Because it soaks into masonry instead of sitting on the surface, limewash lets walls breathe—moisture passes through the coating and evaporates harmlessly, reducing trapped damp and the risk of mold.
You’ll get long-lasting, flexible protection that resists cracking, self-heals tiny blemishes, and stays vapor-permeable.
It’s low-toxicity, mineral-based, and biodegradable, so you’ll choose an eco-friendly finish with minimal indoor pollutants.
Surfaces Suitable for Limewashing
You’ll get the best results on porous, breathable surfaces like masonry, plaster, brick, and textured walls.
Avoid smooth non-porous surfaces and previously painted latex unless you prep or strip them first.
Test porosity and adhesion with a simple water drop and tape pull test to confirm the limewash will absorb and bond.
Best surfaces (masonry, plaster, brick, textured walls)
Texture matters: limewash works best on breathable, porous surfaces like masonry, plaster, brick, and rough-textured walls because they let the lime penetrate and chemically bond rather than just sit on the surface.
You’ll find limewash enhances character, sealing small gaps while allowing moisture to escape.
Use cured, dust-free substrates; remove loose material and repair deep cracks before applying for even absorption and a durable, authentic finish.
Surfaces to avoid (smooth non-porous, previously painted latex)
1. You should avoid smooth, non-porous surfaces and walls coated with latex paint because limewash won’t bond or will peel.
Choose more receptive substrates instead.
Common surfaces to skip:
- Glossy tile, glass, metal
- Smooth sealed drywall or plaster with latex finish
- Previously latex-painted masonry without stripping or proper preparation
If you can’t prepare them, don’t limewash—it’s likely to fail.
How to test surface porosity and adhesion

Before you start limewashing, test whether the surface is porous and the existing coating will let the lime penetrate—this simple check tells you if the finish will bond or just peel.
Press a damp sponge against the wall for 30 seconds: water should darken and absorb. If it beads, sand or strip to expose porous material.
Do an adhesion tape test before full application.
Tools, Materials, and Safety Checklist
Before you start limewashing, gather hydrated lime, pigment, water, salt, and any recommended additives, plus buckets and mixing tools.
You’ll need application tools like brushes, rollers, a sprayer, a trowel, and a masonry brush for different surfaces.
Wear gloves, eye protection, and a respirator as needed, and make sure the work area is well ventilated.
Required materials (hydrated lime, pigment, water, salt, additives)
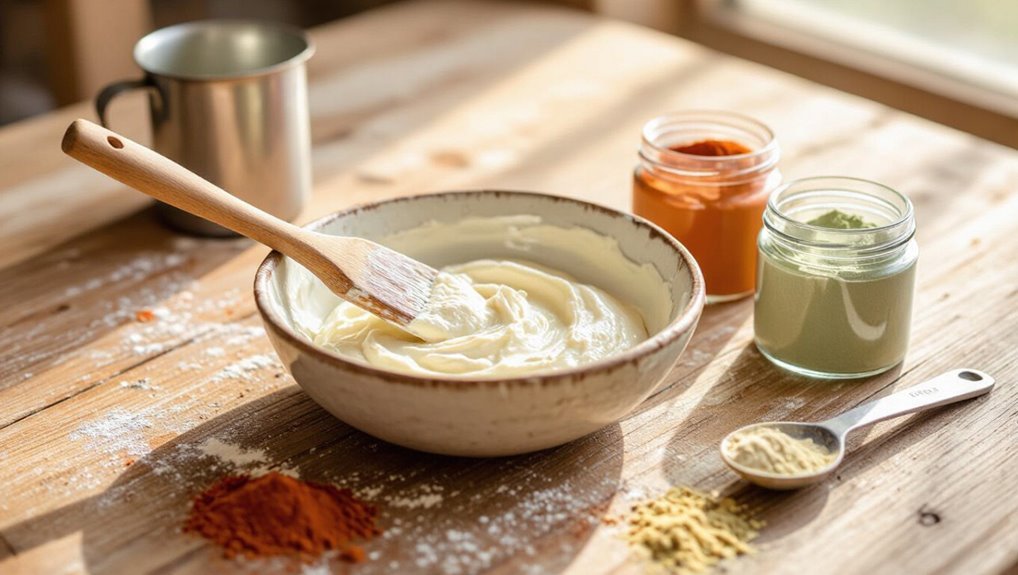
Mixing a reliable limewash starts with five essentials: hydrated lime, a compatible pigment, clean water, a pinch of salt for adhesion, and any additives you choose to tailor durability or workability. Gather and measure precisely, then:
- Use hydrated lime mixed to creamy, lump-free consistency.
- Add pigment gradually for even color.
- Stir in salt and optional additives to improve bonding and longevity.
Tools (buckets, brushes, rollers, sprayers, trowel, masonry brush)
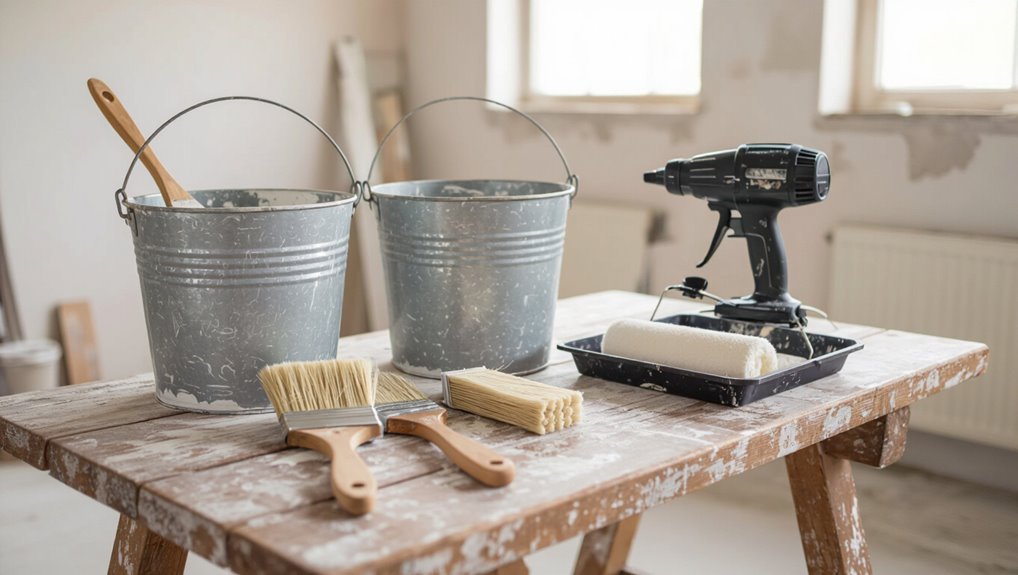
Buckets, brushes, rollers, sprayers, a trowel and a stiff masonry brush are the essential tools you’ll use to apply and finish limewash.
You’ll want sturdy buckets for mixing, varied brushes for texture, and a trowel for patching. Choose rollers or sprayers for coverage depending on surface.
- Mixing and holding
- Application and texture
- Trowel work and finishing
Safety gear and ventilation precautions
1 essential rule: protect yourself and guarantee good airflow whenever you work with limewash.
Wear chemical-resistant gloves, eye protection, and an N95 or better mask to block dust and fumes. Use long sleeves and sturdy footwear.
Ventilate by opening windows, using fans to create cross-breezes, and pausing if you feel dizzy.
Keep a first-aid kit and clean water nearby.
Preparation Steps
Before you limewash, you’ll inspect the wall for cracks or loose mortar and make any necessary repairs.
Then you’ll clean away dirt, efflorescence, and flaking paint, rinse and pre-wet porous areas for even absorption, and mask off floors and adjacent surfaces.
Taking these prep steps guarantees the limewash will adhere and look uniform.
Step 1 Inspect and repair the wall (cracks, loose mortar)
Start by closely inspecting the wall for cracks, crumbling mortar, and loose or flaking material—you’ll need a solid, clean surface for limewash to adhere properly.
Repair as needed, then proceed methodically:
- Remove loose material and widen hairline cracks for proper filling.
- Repoint or patch mortar with compatible lime-based mortar or filler.
- Allow repairs to cure fully before any further preparation.
Step 2 Clean the surface: removing dirt, efflorescence, peeling paint
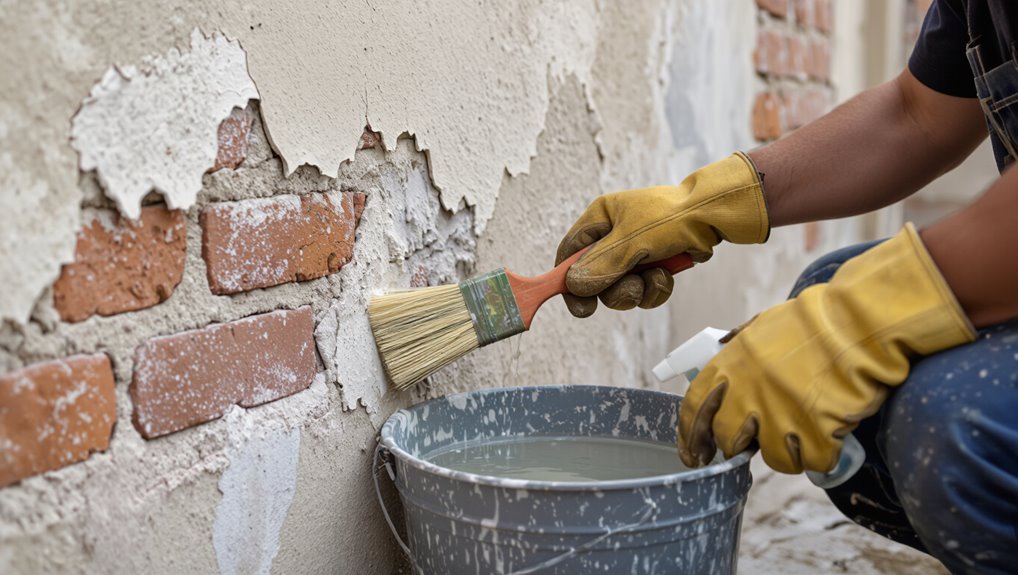
With repairs cured, you’ll need a clean, stable surface so the limewash bonds properly.
Scrub away dirt and loose paint with a stiff brush or scraper, removing flaking layers.
Treat efflorescence by brushing dry salts off; for stubborn deposits use a mild muriatic solution following safety steps.
Rinse thoroughly and let the wall dry completely before proceeding.
Step 3 Rinse and pre-wet porous surfaces for even absorption
Dampen the surface evenly so the limewash soaks in rather than beads up.
Use a mist spray or soft sponge to wet porous masonry, letting excess drain for a few minutes.
Work section by section, keeping the substrate uniformly moist but not dripping.
Re-wet any dry spots immediately during application to guarantee consistent absorption and color throughout the finish.
Step 4 Masking and protecting adjacent surfaces and floors
Before you apply limewash, protect everything you don’t want stained: tape off trim, cover floors with drop cloths or plastic sheeting, and shield windows, hardware, and nearby plants.
You’ll work cleanly if you:
- Use low-tack painter’s tape for clean edges.
- Overlap plastic seams and weight corners to prevent blowouts.
- Lay rosin paper or canvas drop cloths for high-traffic protection.
Mixing Limewash: Ratios and Techniques
Now you’ll mix the limewash, starting with a basic recipe and clear ratios so you get consistent results.
You can add pigments in small test batches to find the exact shade before committing to the whole job.
Adjust the water and slake time to tweak consistency and workability for your surface and application method.
Basic limewash recipe and mixing ratios
A simple limewash starts with three basic ingredients—hydrated lime putty (or powdered hydrated lime), water, and pigment—and you’ll adjust ratios based on surface porosity and the look you want. Mix 1:1 for thin washes, 1:2 for body, 1:3 for heavier coverage. Stir thoroughly, strain, and apply thin coats, allowing carbonation between layers.
| Ratio | Consistency | Use |
|---|---|---|
| 1:3 | Thin | Sheer |
| 1:2 | Medium | Standard |
| 1:1 | Thick | Opaque |
| 2:1 | Very thick | Textured |
Adding pigments and testing color batches
Once you’ve got a base limewash mixed to the consistency you want, it’s time to add pigment and test small batches so you can control tone and coverage.
Use earth pigments or mineral oxides, stir thoroughly, and label proportions.
Apply test patches on board and the wall, let them cure, then evaluate color, opacity, and bonding.
Adjust pigment in measured increments until satisfied.
Adjusting consistency and workability
Start by aiming for a consistency like heavy cream: it should flow smoothly from your brush or sprayer without running in rivulets, but still cling to vertical surfaces for good coverage.
Thin with water in small increments, stir thoroughly, and test on scrap. If it skins or sags, adjust lime or water.
Maintain mixed batches for uniform texture and application speed.
Application Methods and Step-by-Step Process
Now you’ll choose an application method—use a brush for a traditional, textured finish or a roller/sprayer if you want speed and a different surface.
Work in manageable sections for the first coat, aim for even coverage, and watch drying times and conditions to avoid problems.
Plan on at least one or two additional coats for depth and opacity, spacing them only after the previous coat has properly dried.
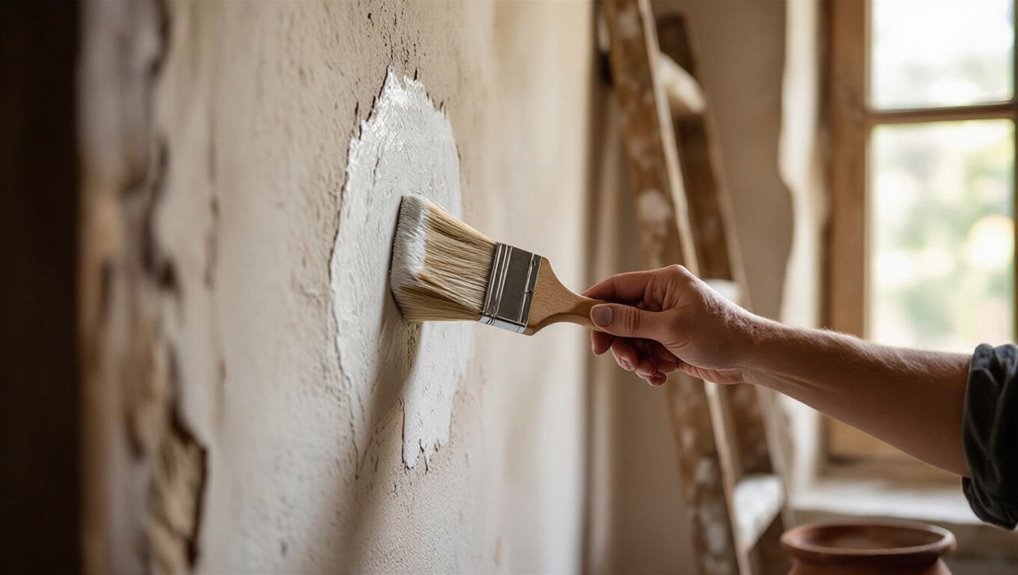
Method A Brush application (traditional finish)
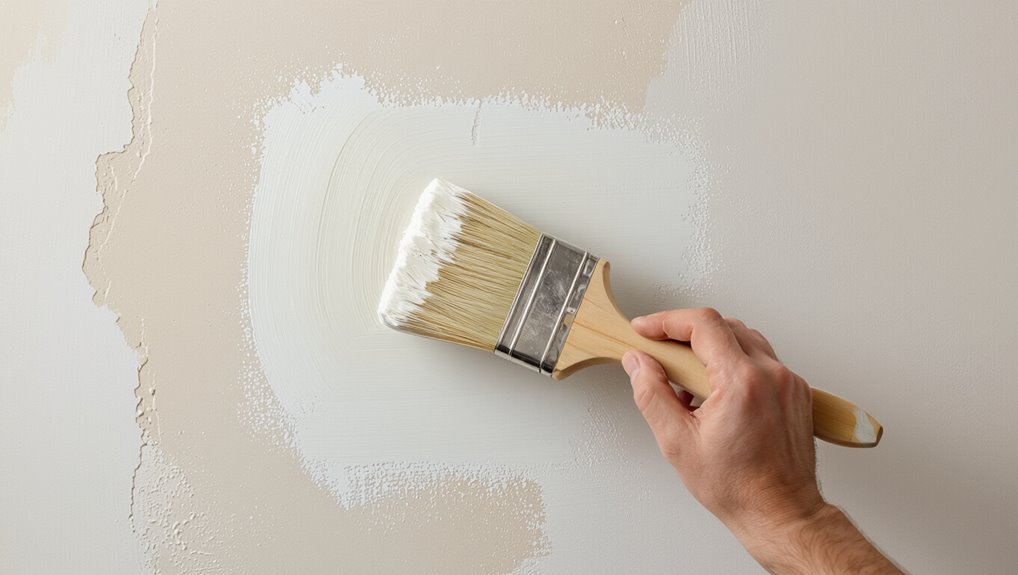
Method A — the brush application — gives you the most control and the truest traditional limewash texture; load a natural-bristle brush, work in overlapping vertical strokes, and keep edges wet to avoid lap marks.
Apply thin, translucent coats, scoring subtle irregularities for an aged look. Let each coat cure fully, then lightly scumble or feather for softened shifts and depth.
Method B Roller or sprayer application (faster, different texture)
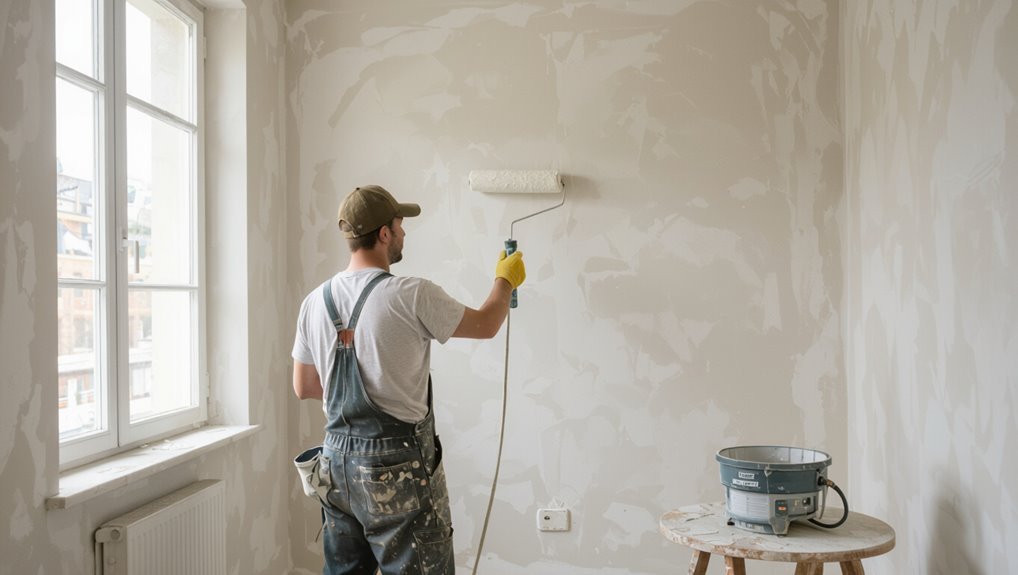
For a quicker, more uniform finish, grab a roller or sprayer and lay down thin, even passes of limewash—rollers give a soft, stippled texture while sprayers create a fine, misted coat that soaks into pores differently.
Work steadily, overlap passes slightly, and keep the mixture well stirred. Adjust pressure and nap size for coverage and texture, and mask trim to avoid overspray.
Step 6 First coat: working in sections and recommended coverage
With your roller or sprayer prepped and the mixture stirred, start the first coat by working in manageable sections—about 3×3 to 4×4 feet—so the limewash stays wet enough to blend where panels meet.
Apply thin, even layers, avoiding drips and pooling. Overlap each pass slightly for uniform texture, cover about 50–70% opacity, and stop when the wall reads consistently.
Step 7 Drying time and environmental considerations
Because limewash cures through carbonation rather than simple evaporation, drying time depends on temperature, humidity, and airflow—expect tack-free surface in a few hours but full cure can take several days to weeks.
Work in mild, dry conditions (50–70°F, low humidity) with good ventilation. Avoid sealing or heavy traffic until cured.
Monitor weather for outdoor projects and adjust timing accordingly.
Step 8 Subsequent coats for depth and opacity (how many and when)
After the first coat has set to a tack-free feel, you’ll judge how many more coats you need based on the coverage and look you want.
Apply additional thin coats, waiting full drying between each.
Two to three coats usually build depth and opacity; more may be needed for darker backgrounds or fuller coverage.
Stop when the texture and translucence satisfy you.
Step 9 Creating special finishes: whitewashing, lime glaze, distressed look

When you want a look beyond solid limewash, try three simple special finishes—whitewashing for a soft, sun-faded effect; lime glaze for subtle color and sheen; and a distressed finish for aged character—and follow distinct application steps for each to get predictable results.
For whitewash, dilute heavily and rag or brush; for glaze, tint and apply thin layers; for distressing, sand selectively after curing.
Finishing, Sealing, and Maintenance
Decide whether to limeproof right away or wait until the coat’s cured, choosing a breathable sealer if you need water resistance.
For long-term care, you’ll want a simple cleaning routine, occasional touch-ups, and repointing of mortar joints as they wear.
When repairing damaged areas, blend fresh limewash into the old to avoid visible seams and match texture and pigment.
When to seal or limeproof and suitable sealers
Although limewash itself is breathable and often fine left unsealed, you’ll want to seal or limeproof surfaces exposed to moisture, heavy handling, or stains to protect the finish and color.
Use breathable, mineral-based sealers—silicate or limewater treatments—for masonry. For interior high-traffic areas, choose a breathable acrylic or siloxane sealer.
Test first; apply thin, even coats to preserve texture and vapor permeability.
Long-term maintenance: cleaning, touching up, repointing mortar
Sealing helps protect limewash in vulnerable areas, but ongoing care will keep the finish looking good for years.
Clean gently with a soft brush and mild, pH-neutral soap; avoid pressure washing.
Touch up thin or worn spots by feathering new limewash into old.
Inspect mortar joints annually; repoint with a compatible lime mortar to prevent moisture damage and preserve the wall’s breathability.
Repairing damaged limewash without visible seams
Small, well-planned repairs keep limewash seamless and natural-looking; start by matching the texture and pigment of the original coat before you touch the wall.
Test small patches, feather edges, and work damp-to-damp for blending.
- Mix small batches matching hue and grit
- Apply with light, varied strokes to mirror texture
- Keep repairs slightly lighter; they darken as they cure
Common Problems and How to Fix Them
If your limewash is powdering, flaking, or won’t stick, check for damp, loose substrate or improper mixing and remedy it before repainting.
For uneven color, blotches, or streaks, you’ll want to correct application technique, adjust dilution, and feather new coats into old ones for a seamless finish.
If white crusts or salt deposits appear, identify and treat efflorescence at the source and use proper cleaning and sealing to prevent recurrence.
Poor adhesion, flaking, or powdering causes and remedies
When limewash doesn’t stick, flakes, or leaves a dusty residue, it’s usually because the surface wasn’t properly prepared, the underlying paint or substrate is incompatible, or moisture’s at work behind the scenes; you’ll fix most of these by addressing contamination, matching materials, and controlling damp.
Remove loose paint, clean grease and dust, etch glossy surfaces, use breathable primers or true lime products, and repair leaks or rising damp before recoating.
Uneven color, blotching, and streaks prevention and correction
Once you’ve fixed adhesion and moisture issues, uneven color, blotching, and streaks become the most visible problems left to solve.
Work in consistent lighting and wet edges, thin limewash for even absorption, and apply multiple thin coats rather than one heavy one.
Blend overlaps with a damp brush or sponge while still wet, and sand minor blotches between coats before recoating.
Efflorescence and salt deposits identification and treatment
Although salt deposits may look like surface dirt, efflorescence is a crystalline residue caused by water drawing soluble salts out of masonry and evaporating on the surface.
You’ll recognize it as powdery white streaks or crusts that reappear unless you address the moisture source.
Remove deposits with a stiff brush, rinse, let dry, fix leaks or improve drainage, then reapply limewash after confirming the wall is dry.
Best Practices and Pro Tips
Before you start, check weather and temperature—limewash cures best in mild, dry conditions to avoid streaking or poor adhesion.
Keep color consistent by batching mixed limewash for large areas and feathering at joints so seams disappear.
Use the right tools—natural-bristle brushes, stippling brushes, and ragging techniques—to achieve that authentic old‑world texture.
Weather and temperature guidelines for best results
When you limewash, aim for mild, dry conditions—ideally between 50°F and 75°F with low humidity—so the wash cures evenly and bonds to the substrate.
Work in shaded areas, avoid direct sun or wind that dries too fast, and don’t limewash if frost or rain are likely within 24–48 hours.
Monitor forecasts and plan short sessions for consistent curing.
Color consistency across large areas and joints
If you want a uniform look across large walls and along joints, mix enough limewash to cover each section and keep a wet edge so overlaps blend seamlessly.
Work in consistent batches, note pigment ratios, and label mixes. Feather shifts and avoid restarting mid-panel.
Touch up quickly with the same batch or remix using measured proportions.
Test patches confirm final tone before proceeding.
Tools and techniques pros use for authentic old-world texture
Because authentic old-world texture relies as much on technique as materials, pros bring a handful of specialized tools and deliberate motions to the job: trowels and hawks for thin, irregular application; limewash brushes and natural-bristle masonry brushes for soft, streaky strokes; sponges and rags for lifting and mottling; and metal scrapers or tamping brushes to add subtle scuffs.
- Use varied pressure and angles for depth.
- Layer washes, letting partial drying create veining.
- Finish with selective abrasion to expose underlying tones.
Comparison: Limewash vs. Paint vs. Whitewash
Now let’s compare limewash, conventional paint, and whitewash so you can pick the right finish for your wall.
You’ll see how they differ in breathability, durability, and appearance, plus the upfront cost and long-term lifecycle.
This will help you balance looks, maintenance, and budget.
Breathability, durability, and appearance comparison
When you compare limewash, traditional paint, and whitewash, you’ll notice clear differences in breathability, durability, and final look that affect both performance and maintenance. You’ll prefer limewash for porous walls and moisture control; paint for high-traffic durability; whitewash for subtle translucence. Assess substrate and desired aging.
| Feature | Effect |
|---|---|
| Breathability | Limewash best |
| Durability | Paint best |
| Appearance | Whitewash subtle |
| Maintenance | Paint easiest |
Cost and lifecycle comparison
While upfront costs vary, you’ll find lifecycle expenses depend more on maintenance frequency and substrate prep than initial price alone.
Limewash costs less material-wise but needs periodic reapplication and surface prep; it ages gracefully.
Modern paint costs more initially and often lasts longer between coats but may require stripping later.
Whitewash sits between both.
Factor labor, repairs, and longevity when choosing.
Project Planning: Time, Cost, and Materials Estimator
You’ll start by measuring square footage and using coverage rates to calculate how much limewash and primer you’ll need per wall.
Expect a small room to take a few hours, a medium project a day or two, and large jobs several days or more depending on drying and coats.
If the surface is damaged, the scale is large, or you’re short on time, consider hiring a pro; otherwise you can handle most smaller DIY jobs.
How to calculate material quantities per square foot
Start by measuring the wall’s surface area in square feet so you can convert coverage rates into exact quantities of limewash, primer, and additives; multiply length by height for each wall, subtract openings like windows and doors, then add a contingency (usually 10–15%) for waste and touch-ups.
| Item | Coverage/sq ft | Quantity |
|---|---|---|
| Limewash | 150 | Calculate |
| Primer | 250 | Calculate |
| Additives | varies | Calculate |
Typical timeframes for small, medium, and large projects
Small projects—like a single accent wall or a small room—typically take a day to two: plan for a few hours of prep (cleaning, masking, priming), a full coat or two of limewash with drying between passes, and final touch-ups.
- Medium rooms: 2–4 days with extra drying and mild repairs.
- Large rooms: 4–7 days including scaffolding and staged coats.
- Whole-house: 1–3+ weeks staged by area.
When to hire a professional vs. DIY
Wondering whether to tackle limewashing yourself or call a pro? Weigh skill, time, and surface complexity.
If you’re comfortable with prep, layering, and weather-sensitive curing, DIY saves money on small areas.
Hire a professional for large surfaces, historic finishes, uneven substrates, or when you need guaranteed results and faster completion.
Factor labor, materials, and risk into your decision.
Frequently Asked Questions
You probably have a few quick questions before you start, like whether limewash will adhere to existing paint and how long it lasts outdoors versus indoors.
You’ll also want to know if it’s safe around kids and pets, whether you can tint it to modern colors, and how to remove or cover old limewash.
Below are clear answers to each of these common concerns.
Can limewash be applied over existing paint?
Curious whether limewash will stick to your painted wall? You can limewash over many paints, but adhesion depends on surface type and preparation.
Glossy, oil-based, or poorly adhered paint needs sanding, deglossing, or removal. Clean, repair, and prime porous or chalky finishes first.
Test a small area to confirm bond and desired appearance before committing to the whole wall.
How long does limewash last outdoors vs. indoors?
How long limewash lasts depends largely on exposure and surface prep: indoors it can remain attractive for many years with only occasional touch-ups, while outdoors it weathers faster and may need reapplication every 3–10 years depending on climate, sunlight, and substrate.
You’ll extend lifespan by using breathable surfaces, proper priming, and periodic maintenance; expect faster fading on sunny, wet, or abrasive exteriors.
Is limewash safe for homes with children and pets?
Many people choose limewash because it’s low in toxins and breathes well, making it a good option for homes with kids and pets when applied and cured properly.
You should ventilate during application, keep children and animals away until fully dry, and wear gloves and masks.
Once cured, limewash is inert, dust-resistant, and less likely to off-gas than many synthetic paints.
Can limewash be colored to match modern palettes?
If you liked limewash for its low-toxin finish and breathability, you’ll be pleased that you can also get modern colors from it.
You can tint limewash with mineral pigments or earth oxides to achieve muted pastels, greys, and deeper tones.
Test small batches for consistency, remember lime’s natural brightening and aging, and expect subtle, textured results rather than flat, uniform paint.
How do I remove or cover old limewash?
Looking to freshen a wall with old limewash? You can remove loose limewash by gently scraping and brushing with a stiff bristle brush, then rinse and let dry.
To cover, prime with a high-alkali primer, then apply breathable masonry paint or new limewash. Test a small area first.
For stubborn layers, consult a pro to avoid damaging masonry.
Visual Inspiration and Case Examples
You’ll see how limewash transforms spaces through crisp before-and-after photos and close-ups of texture variations.
I’ll walk you through short case studies showing an interior room, an exterior wall, and a decorative accent to inspire your own project.
After each example, you’ll get practical notes on technique and finish so you can recreate the look.
Before-and-after scenarios and texture variations
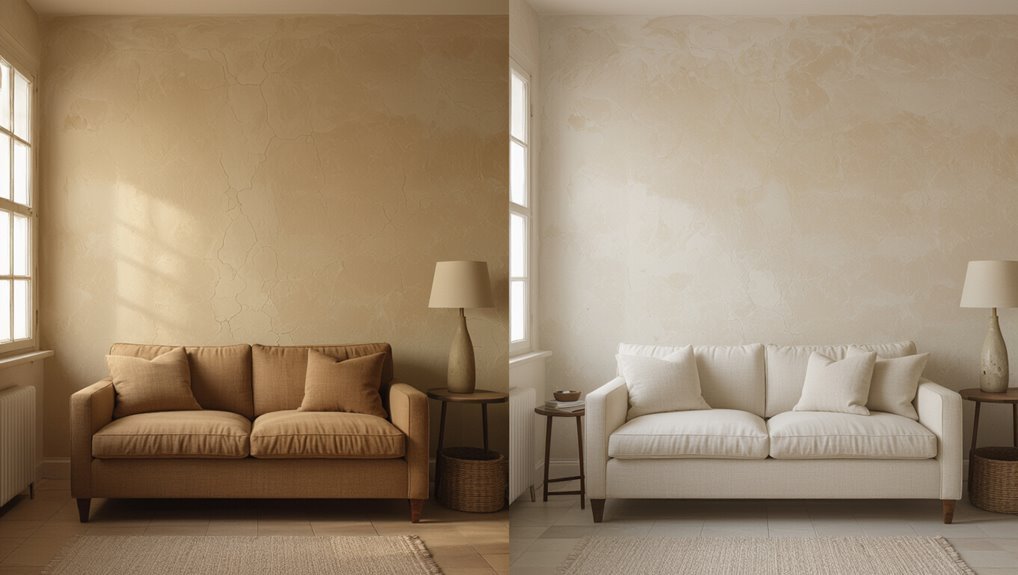
Before-and-after photos make it easy to see how limewash transforms a space—from flat, painted surfaces to soft, textured walls that catch light differently across the day.
You’ll notice subtle variations: thin washes show streaky, breathable patinas; heavier coats create chalky, matte depth.
Texture depends on brushwork, dilution, and substrate.
Use samples to compare tones and tactile effects before committing.
Short case studies: interior room, exterior wall, decorative accent
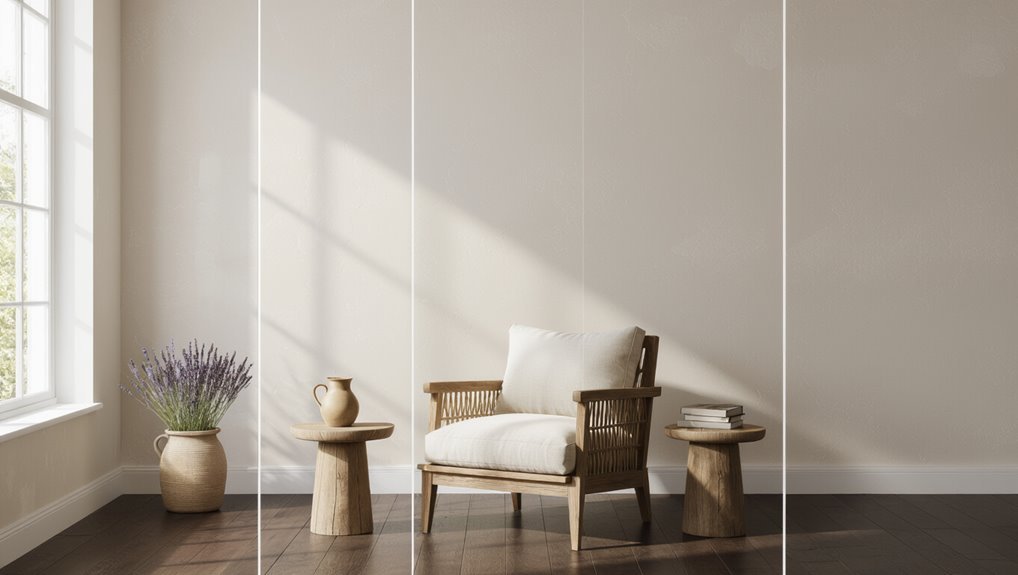
Three quick case studies show how limewash adapts: an airy living room where thin, white-washed coats soften sunlight and reveal brick grain; a south-facing exterior that uses heavier, lime-rich layers for weather resistance and a matte finish; and a painted accent wall where tinted limewash adds depth and subtle striation without masking texture.
You’ll learn application timing, finish selection, and maintenance tips for each setting.