
How to Make Textured Wall Art That Looks Expensive and Custom
You can make textured wall art that looks expensive and custom by starting with a solid substrate like stretched canvas or a sturdy panel, then building layered texture with modeling paste, fine sand, and plant-fiber additives. Keep a refined neutral palette, add metallic accents sparingly, and balance composition with negative space. Use palette knives, thin glazes, and satin varnish for controlled sheen and durability. Follow mounting and sealing best practices, and keep going to learn layout options and pro techniques.
How to Make Textured Wall Art That Looks Expensive and Custom
You can get a high-end look by focusing on a simple composition, rich textures, and a restrained palette.
I’ll outline what actually makes textured wall art read as expensive, the materials and tools that give a luxe finish, and the basic techniques you should know to execute it.
With a few smart choices and straightforward methods, you’ll create custom pieces that look intentional and polished.
Quick Direct Answer Overview of the simplest path to a high-end textured piece
When aiming for a luxe-looking textured wall piece, focus on three simple pillars: a sturdy substrate, layered texture for depth, and a refined neutral palette with metallic accents.
You’ll want to know how to make a textured wall art that reads custom and polished. Follow this quick path:
- Choose solid substrate
- Build layered texture
- Prime and neutralize
- Add selective metallics
What Makes Textured Wall Art Look Expensive?
Although expensive-looking textured wall art comes from skilled execution, you don’t need pro tools to get that high-end, custom feel; focus on material choices, layered depth, and finish details.
You’ll make pieces look expensive by balancing scale, contrast, and negative space, refining edges, and using consistent color stories.
Crisp composition, subtle sheen, and thoughtful framing sell that bespoke, gallery-quality impression.
Materials and Tools That Create a Luxe Look
If you want textured wall art that reads custom and luxe, pick materials and tools that deliver intentional depth, refined edges, and a cohesive finish.
Choose quality substrates, pigments, and metals. Use tools that create clean shifts and controlled texture.
- Stretched canvas or panel
- High-pigment acrylics and metallics
- Modeling paste and fine sand
- Palette knives and soft brushes
Basic Techniques You Should Know (overview)
Now that you’ve picked quality substrates, pigments, and tools, start practicing a handful of reliable techniques that give your piece a high-end, custom look.
Learn to layer, carve, glaze, and accent with intention. Practice controlled texture, subtle color washes, edge definition, and focal contrast.
Keep compositions balanced and finishes consistent.
- Layering
- Carving
- Glazing
- Accenting
Planning Your Design and Budget
Start by picking a style—modern, rustic, minimalist, abstract, or organic—that fits your room and mood.
Measure the wall and decide on size, scale, and exact placement so the piece feels intentional. Then set a realistic budget and prioritize high-impact materials.
Pull together a mood board and color palette to keep choices focused and costs under control.
Choosing a Style: Modern, Rustic, Minimalist, Abstract, or Organic
Looking for a cohesive direction for your textured wall art? You’ll pick a mood that guides materials, color, and finish. Consider:
- Modern: clean lines, metallic accents.
- Rustic: reclaimed wood, rough texture.
- Minimalist: muted palette, subtle relief.
- Organic: flowing shapes, natural fibers.
Choose one style to streamline decisions and keep your budget focused.
Determining Size, Scale, and Wall Placement
A single large piece or a curated cluster can change how a room feels, so measure your wall and think about sightlines before buying or making anything; aim for artwork that covers about 60–75% of the visible wall space above furniture to keep proportions pleasing and avoid overcrowding.
Hang pieces at eye level (center ~57–60 inches), consider ceiling height, and leave breathing room around frames.
Setting a Realistic Budget and Sourcing High-Impact Materials
Because your design choices will drive costs, set a clear budget before you shop so you can prioritize bold, high-impact materials—like textured plaster, heavy-weight linen, or hand-mixed pigments—where they’ll make the biggest visual difference, and save on filler elements such as simple frames or standard backing.
- List essentials and nice-to-haves.
- Price sample sizes first.
- Buy statement materials locally.
- Reuse tools to cut costs.
Creating a Mood Board and Color Palette
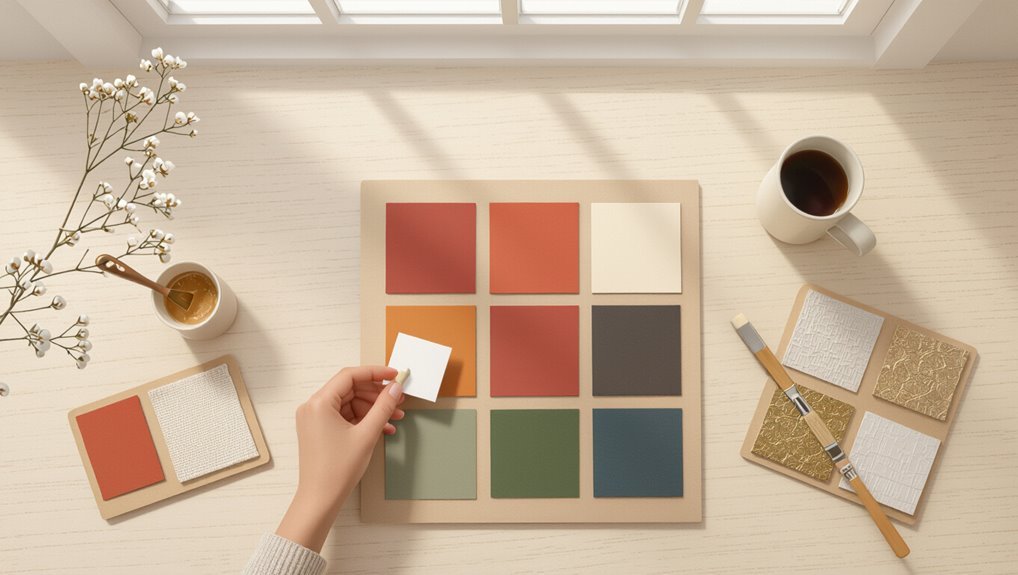
Now that you’ve set a budget and chosen where to spend on statement materials, start pulling visual references to guide decisions and keep costs aligned with your vision.
Collect textures, finishes, and color swatches. Arrange images by mood—warm, cool, neutral—and pick a dominant, secondary, and accent hue.
Use your board to simplify purchases, reject impulse buys, and guarantee cohesive, high-impact results.
Step-by-Step Process to Create Textured Wall Art
You’ll start by prepping your substrate and workspace so everything’s stable and clean.
Then you’ll build the support—frames or panels—before layering plasters, modeling paste, or joint compound to shape texture and add fabric, paper, wood, metal, or found objects for dimension.
Finish by sanding, carving, and refining the surface until the piece reads exactly how you want.
Step 1 Preparing the Substrate and Workspace
Step 1 sets the foundation: clear, stable substrate and an organized workspace make your textured wall art easier and more enjoyable to build.
Choose a smooth, rigid panel or primed canvas, check for warps, and sand edges. Clean surfaces, dust thoroughly, and gather tools and materials within reach.
Protect your table and floor with drop cloths and guarantee good lighting and ventilation.
Step 2 Building Structure: Frames, Panels, and Relief Bases
With your substrate prepped and workspace organized, start building the supporting structure that will give your piece depth and stability.
Cut and assemble a simple frame or stretcher, mount panels securely, and add battens or foam blocks for raised relief areas.
Check alignment and squareness, reinforce corners with screws or glue, and seal edges to prevent warping before you move on to texturing.
Step 3 Creating Texture: Plasters, Modeling Paste, Joint Compound, and Additives
Once you’ve got your support sorted, you can start building texture by choosing and applying the right body—plaster, modeling paste, or joint compound—plus any additives that alter drying time, flexibility, or surface tooth.
Mix and test small batches, apply with tools, and refine surfaces.
Consider:
- Plaster — fine, fast-setting
- Modeling paste — holds peaks
- Joint compound — smooth, sandable
- Additives — retarders, flex enhancers
Step 4 Adding Dimension: Fabric, Paper, Wood, Metal, and Found Objects
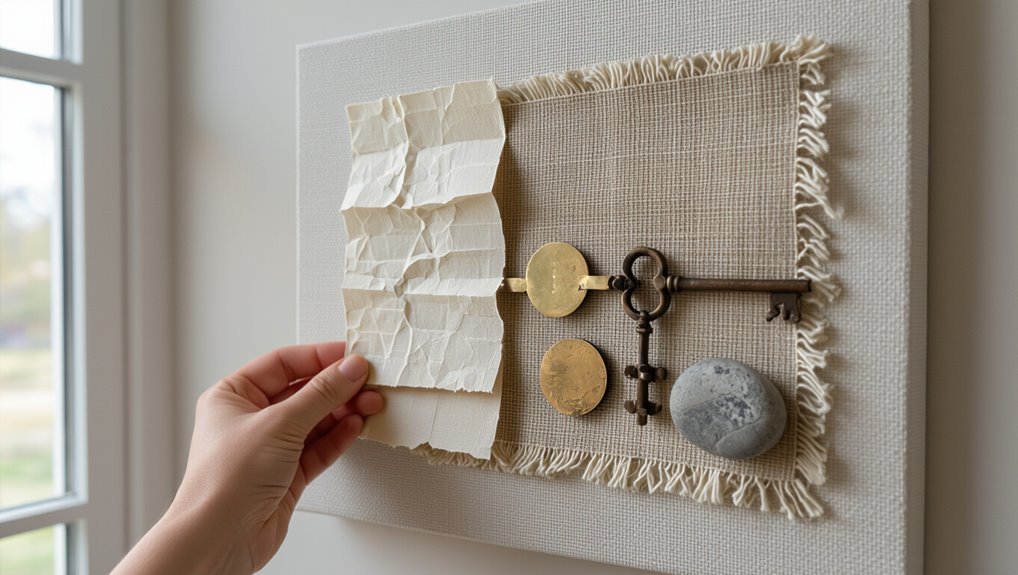
Although texture gives your piece depth, adding dimensional elements turns it into a tactile landscape you can explore by touch and sight; layer fabric scraps, paper strips, thin wood shapes, metal accents, or found objects with strong adhesive or embedding into wet paste.
Arrange varying heights and weights for contrast, secure edges, and consider balance and shadow to make the composition feel intentional and cohesive.
Step 5 Sanding, Carving, and Refining Texture
Start by evaluating the surface and deciding which areas need softening, sharpening, or reshaping; sanding will smooth changes, carving will create crisp edges and relief, and refining ties everything together.
Work with coarse to fine grit, test cuts lightly, and keep tools steady. Blend shifts, remove dust between passes, and step back often to guarantee balance and intentional texture without overworking the piece.
Step 6 Priming and Sealing Before Painting
With your texture shaped and refinements made, you’ll want to protect and prepare the surface before applying color; priming and sealing locks in texture, creates uniform absorption, and prevents paint from soaking unevenly.
Choose a clear or tinted acrylic primer, apply thin even coats with a brush or spray, let each coat dry fully, and lightly sand between coats for a smooth, stable painting ground.
Step 7 Painting Techniques for a High-End Finish (washes, dry brushing, metallics)
Once you’ve sealed the texture, move on to layering paint in controlled steps so each technique—washes, dry brushing, and metallic highlights—adds depth without obscuring detail.
You’ll work intentionally:
- Thin washes to tint recesses.
- Scrub excess for subtle gradients.
- Dry brush raised areas with light strokes.
- Feather metallics sparingly for refined shimmer.
Step back, adjust contrast, repeat sparingly.
Step 8 Final Finishes: Glazes, Varnishes, and Protective Coatings
Although the texture and paint layers set the tone, the final finishes—glazes, varnishes, and protective coatings—lock in depth, control sheen, and guard your work; you’ll apply them deliberately to enhance color, protect surfaces, and manage the final look.
Choose a glaze for subtle depth, satin or matte varnish for desired sheen, and a clear protective coat for durability; test first.
Step 9 Mounting Hardware and Installation Tips
Step 9 covers the practical but essential steps for hanging your piece—choosing hardware rated for the weight, positioning anchors or french cleats for stability, and planning placement so the texture catches light as you meant.
Measure precisely, mark studs, and use a level. Test mounts with temporary supports, tighten securely, and protect walls with bumpers.
Hang, step back, and adjust for perfect alignment.
Design Variations and Project Examples
You can tailor textured wall art to any space, from minimal panels that suit modern interiors to large mixed-media statement pieces.
Try framed small works that look gallery-made, or create triptychs and modular sets for flexible layouts.
Use quick project templates with material lists to speed up execution.
I’ll show examples and practical tips so you can pick the right format and materials for your next project.
Minimal Textured Panels for Modern Interiors
When you want a clean, contemporary look that still feels tactile, minimal textured panels strip decoration down to deliberate lines, subtle reliefs, and restrained materials.
You’ll choose monochrome palettes, matte finishes, and shallow geometry. Install modular panels for rhythm, mix plaster, wood, or fiberboard for warmth, and keep joints precise.
These panels enhance light and shadow without overwhelming your modern interior.
Large-Scale Statement Pieces with Mixed Media
Although large-scale pieces can dominate a room, mixing media lets you balance impact with nuance so the work reads as integrated rather than overpowering.
Combine plaster texture, metal leaf, fabric strips, and found objects on a stretched canvas or panel.
Plan focal zones, vary relief depth, and use a limited palette.
You’ll create dramatic, cohesive installations that feel bespoke and elevated.
Framed Small Works that Look Gallery-Made
A small, well-framed piece can read like a gallery discovery rather than a DIY afterthought, and you’ll get that effect by refining scale, materials, and presentation.
Choose archival matting, narrow metal or wood frames, and textured surfaces on small canvases or panels.
Limit palette, emphasize one focal texture, and use professional hanging hardware so each work reads intentional, polished, and collectible.
Triptychs and Modular Sets for Custom Layouts
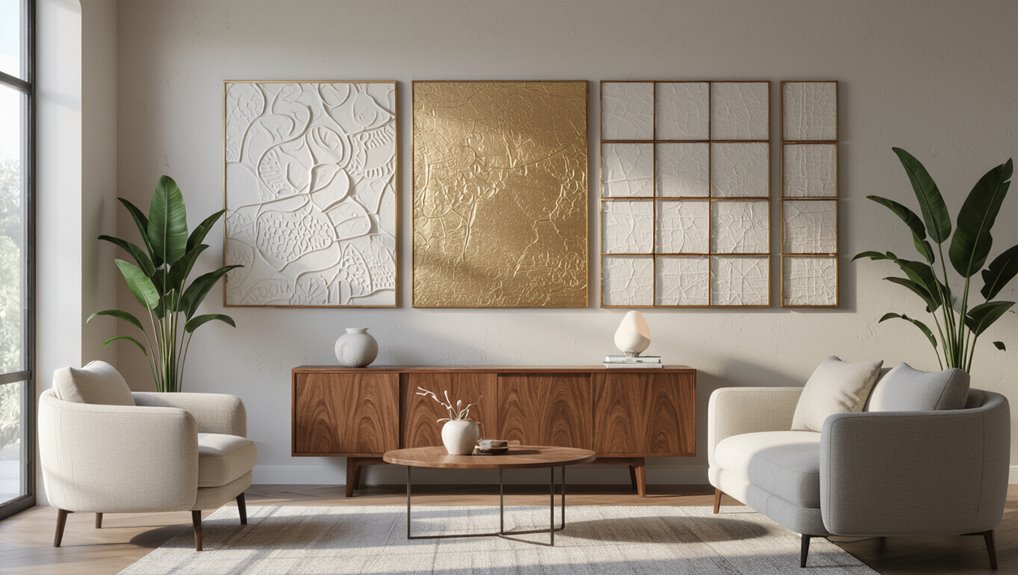
Small framed works set a high bar for finish and scale, and you can extend that polished look by arranging related pieces into triptychs or modular sets that read as a single composition.
You’ll design variations by repeating motifs, shifting color palettes, or altering texture density.
Modular layouts let you customize span and rhythm for different walls, creating cohesive, gallery-quality installations.
Quick Project Templates with Material Lists
Get started fast with ready-made templates you can adapt for any wall: each project below lists exact materials, approximate costs, and step-by-step variations so you can choose scale, color, and texture density without guessing. Pick a template, gather supplies, and follow concise steps to finish in an afternoon. Use the table for quick reference.
| Project | Key materials |
|---|---|
| Minimal Grid | Canvas, joint compound |
| Layered Wave | Plaster, palette knife |
| Geometric Blocks | MDF, acrylic paint |
| Organic Panel | Texture paste, fabric |
Comparison: DIY Techniques vs. Professional Methods
When weighing textured wall art options, you’ll want to compare cost, time, and the skill each approach requires.
Consider which projects you can realistically DIY versus those worth hiring a pro for, and think about which tools and materials justify your investment.
That way you can decide whether to tackle the work yourself or commission expert results.
Cost, Time, and Skill Comparison
Although doing textured wall art yourself can save money, you’ll trade off time and sometimes finish quality compared with hiring a pro. You’ll weigh cost, timeline, and skill honestly: DIY demands learning and patience; pros deliver speed and polish. Use the table to feel choices viscerally.
| Choice | Cost | Time |
|---|---|---|
| DIY | Low | Long |
| Pro | High | Short |
| Hybrid | Mid | Mid |
When to DIY and When to Commission a Pro
You’ve weighed cost, time, and skill—now decide which path matches your goals and limits.
If you want a weekend project, simpler textures, and personal satisfaction, DIY saves money and gives creative control.
Hire a pro when you need flawless finishes, complex techniques, structural prep, or guaranteed timelines.
Consider resale value, warranty, and your patience before committing to either route.
Tools and Materials Worth Investing In
If you’re serious about textured wall work, invest selectively: some tools and materials will pay off whether you DIY or hire a pro, while others are only worth it for advanced techniques or repeated use.
Buy quality trowels, hawks, flexible spatulas, sanding blocks, primer, and breathable texture compound.
Rent or hire spray rigs, large mixers, and scaffolding for big or complex jobs.
Common Mistakes and How to Avoid Them
When you’re creating textured wall art, watch for four common mistakes that can ruin the finished piece: overworking or underworking the texture, choosing colors that cheapen the look, skipping proper sealing that affects durability, and improper mounting that leads to warping.
Address each problem early with simple fixes—practice texture timing, test color samples, use recommended sealants, and follow mounting guidelines.
If you catch these issues before installation, your artwork will look professional and last longer.
Mistake 1 Overworking or Underworking Texture
Although texture can transform a wall from flat to striking, working it too much—or too little—will undermine the effect. You’ll want deliberate strokes and measured layering: stop when patterns feel cohesive, not fussy.
Conversely, avoid sparse application that reads unfinished. Test on scrapboard, time drying stages, and step back frequently so your texture reads intentional, balanced, and professionally restrained.
Mistake 2 Poor Color Choices That Cheapen the Look
Because color sets the mood and reads instantly from across the room, choosing the wrong palette can make textured wall art look cheap or garish.
You should limit high-contrast neon mixes, avoid muddy browns, and test hues against natural and artificial light.
Pick a restrained palette, use one accent color, and sample full-size swatches on your textured surface before committing.
Mistake 3 Skipping Proper Sealing and Durability Steps
If you skip sealing your textured wall art, the finishes won’t hold up to dust, moisture, or everyday contact, and the piece will look worn far sooner than it should.
Seal raw media with an appropriate clear coat, use UV-resistant varnish for painted areas, and test adhesion on a scrap.
Regularly dust and avoid harsh cleaners so your work stays crisp and protected.
Mistake 4 Improper Mounting and Warping Issues
Sealing protects the surface, but it won’t stop a panel from bowing or falling if you mount it wrong—so you’ll want to plan mounting and backing before finishing.
You should:
- Use a rigid backing (plywood or MDF).
- Attach French cleats for even support.
- Add cross braces to prevent warp.
- Mount with screws into studs or anchors.
Best Practices, Tips, and Pro Techniques
When you layer materials, start with broad forms and add details to build depth without crowding the piece.
Use directional lighting to cast shadows that emphasize texture, and test different bulbs and angles before final placement.
Plan material combinations for contrast and easy upkeep so your work stays striking with minimal maintenance.
Layering Strategies for Depth and Visual Interest
Although layering can seem complex, you’ll get compelling depth by combining varied textures, scales, and finishes with a clear focal point in mind.
Start with a dominant element, then add mid-sized pieces and small accents to guide the eye. Vary relief and sheen, repeat a motif for cohesion, and limit your palette so layers read intentional rather than cluttered.
Using Light and Shadow to Enhance Texture
Layering sets the stage, but light and shadow bring those layers to life by carving out relief and amplifying surface detail.
Position directional lighting to accent ridges and cast crisp shadows, varying intensity for mood. Use angled spotlights, side lighting, or movable track lights to test effects.
Photograph pieces under different setups to choose the most dramatic, consistent display that highlights texture without overexposure.
Combining Materials Without Looking Cluttered
If you want mixed materials to read as deliberate rather than chaotic, focus on a clear hierarchy: pick a dominant material, one or two supporting textures, and small accents that echo tone or finish.
Limit color palette, repeat shapes or finishes, and vary scale for balance.
Use negative space to prevent crowding, secure connections with mounting or trim, and test layouts before finalizing.
Maintenance and Long-Term Care for Textured Art
Because textured pieces catch dust, oils, and moisture differently than flat art, regular, purposeful care will keep them looking their best and protect your investment.
You should clean, inspect, and control environment routinely. Follow these steps:
- Dust gently with soft brush weekly.
- Spot-clean with damp cloth and mild soap.
- Check for loose elements monthly.
- Maintain stable humidity and avoid direct sun.
Tools, Materials, and Where to Buy Them
You’ll want a compact toolkit—palette knives, texture brushes, a quality trowel, and a good adhesive—that covers beginner and intermediate projects.
I’ll point out high-quality materials that give gallery-level finishes, budget-friendly substitutes that still read luxe, and where to buy each from reliable retailers and specialty suppliers.
With the right mix of tools and sources, you’ll get professional results without overspending.
Must-Have Tools for Beginners and Intermediate Makers
Getting the right tools makes textured wall art easier and more fun, whether you’re just starting or ready to up your game—think a palette knife set, quality brushes, a reliable heat gun, various texture mediums (modeling paste, joint compound, or acrylic gels), and durable mixing containers.
You’ll also want to buy sensibly:
- Drop cloths
- Sanding pads
- Measuring spoons
- Stiff sponges
High-Quality Materials That Mimic Gallery Finishes
When you want gallery-caliber results, choose materials designed for archival stability and refined texture—think titanium white and lightfast pigments, professional-grade acrylic gels and molding pastes, linen or heavyweight cotton canvases, and metal-oxide primers that guarantee crisp edges and long-term adhesion.
- Titanium white paint (artist grade)
- Heavybody acrylic gel medium
- Linen canvas, primed
- Metal-oxide primer and UV varnish
Budget Substitutes That Still Look Luxe
If you want luxe-looking textured wall art without blowing your budget, smart substitutions will get you there: use joint compound over canvas for depth, acrylic metallic paints instead of expensive leaf, foam molding cut and sealed for raised edges, and thrifted frames refreshed with spray primer.
- Joint compound
- Metallic acrylics
- Foam molding
- Thrifted frames
Reliable Retailers and Specialty Suppliers
1 reliable source can make or break a project, so know where to buy the right tools and materials: big-box stores like Home Depot and Michaels cover basics and seasonal deals. Specialty art suppliers such as Blick and Jerry’s Artarama stock professional-grade acrylics, mediums, and canvases.
Online marketplaces like Amazon and Etsy are great for unique trims, foam molding, and thrifted frames—while don’t overlook local hardware stores and salvage yards for unexpected finds and better prices on tools and bulk supplies.
You’ll also check specialty finish suppliers, mold makers, and fabric stores for texture-specific items and fast shipping options.
FAQ
You’ll want quick answers to common concerns like drying and curing times, the best surfaces to work on, and whether rental-friendly options exist.
I’ll also cover safe, non-toxic materials and practical tips for transporting and hanging large textured pieces without damage.
If you have a specific project, tell me the size and materials and I’ll give tailored advice.
How long does it take for textured wall art to dry and cure?
How long will your textured wall art take to dry and fully cure?
Drying times vary: surface-dry in 1–24 hours depending on medium, thickness, humidity, and temperature.
Thicker texture or heavy gels can take several days to surface-dry and up to 2–4 weeks to fully cure.
Allow full curing before sealing, framing, or hanging to avoid smudging, cracking, or adhesion issues.
What surface is best for creating textured wall art?
When choosing a surface for textured wall art, pick one that’s sturdy, has good tooth, and can handle the weight and moisture of your mediums.
Use primed hardwood panel, thick cradled board, or heavy-duty canvas mounted on a solid frame. These resist warping and accept adhesives, gels, and heavy textures.
Avoid flimsy canvases or thin MDF without proper sealing.
Can I make textured art that’s safe for rental walls?
Wondering if textured pieces can work in a rental? Yes.
Choose lightweight, flat-backed panels or canvases and keep depth under about 1–1.5 inches to avoid pressure on hooks. Use removable mounting: command strips rated for the weight or picture-hanging hooks.
Avoid heavy frames, wet adhesives, and sharp hardware. Test mounting small pieces first and document conditions to protect your security deposit.
How do I transport and hang large textured pieces without damage?
If you’re moving large textured pieces, plan for protection and support from the start: pad surfaces with bubble wrap and foam, avoid direct pressure on raised areas, and crate or box flat when possible.
Use soft straps and carry with two people.
For hanging, locate studs, use appropriate anchors or French cleats, and level carefully to prevent stress on edges or texture.
What are safe, non-toxic materials for textured finishes?
Protecting and handling textured work goes hand in hand with choosing safe materials. So before you add anything dramatic to a surface, pick finishes that won’t off‑gas or irritate skin.
Use water‑based acrylic paints, natural clay, joint compound, and low‑VOC varnishes or sealers.
For texture, try plant‑fiber additives, cellulose paste, and non‑solvent glues; always cure fully and ventilate the workspace.
