How to Make a Textured Wall: Creative Diy Design Ideas
You can turn a plain wall into a textured focal point with simple, low-cost methods like sponging, rag-rolling, or drywall compound washes. Prep and prime the surface, practice on scrap boards, and work in small sections for even results. Choose a style—subtle Venetian plaster, bold stucco, or reclaimed wood—match texture scale to your furniture and lighting, and seal with a washable finish for durability. Keep going to learn step-by-step techniques and maintenance tips.
Best DIY Textured-Wall Methods for Beginners
Anyone can add texture to a room without years of experience—start with simple, low-risk methods like sponging, rag-rolling, and drywall compound washes.
You’ll find textured wall finishes easy when you use beginner friendly techniques: practice on a scrap board, choose water-based materials, and work in small sections.
Clean tools between passes and test paint colors after texture cures.
Choose the Right Textured Wall Style for Your Room
Now that you’ve practiced basic techniques, think about which textured style will actually work in the room and with your lifestyle.
Consider textured wall themes—subtle Venetian plaster for elegance or bold stucco for drama.
Match texture scale to furniture and light, and prioritize room color coordination so textures enhance rather than clash.
Pick a focal wall if you want impact without overwhelming the space.
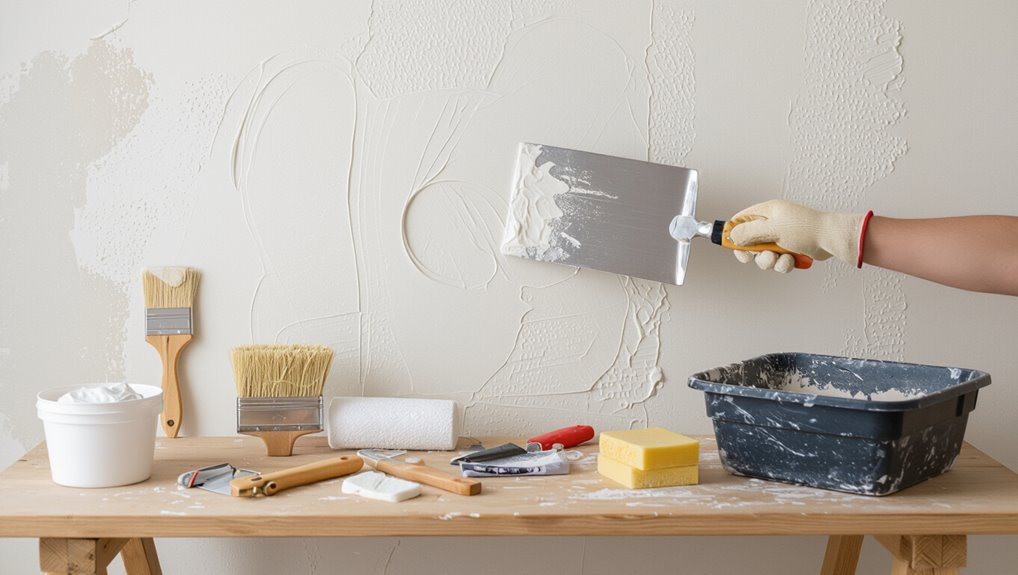
Gather Tools & Materials for DIY Texture
Before you start, gather an essentials checklist so you’ve got the right tools—trowels, hawks, rollers, and mixing buckets.
Pick the texture materials that suit your style, from joint compound to specialty plasters or textured paint.
Don’t forget safety gear and prep items like drop cloths, goggles, masks, and sanding supplies to protect yourself and your room.
Essential Tools Checklist
1 practical checklist will save you time and headaches when tackling textured walls: gather the right tools and materials so you can work efficiently and get consistent results.
For tool selection, include trowels, hawk, rollers, mixing paddle, sanding block, and various knives. Match tools to your chosen texture techniques, keep spare blades, drop cloths, and proper safety gear to avoid delays.
Materials For Texture
Materials make the difference between a finished textured wall that looks professional and one that falls flat, so gather them with purpose.
Choose plaster, joint compound, textured paint, sanding blocks, trowels, brushes, and rollers. Add natural materials like sea sponge, burlap, or wood for varied effects.
Pick texture techniques—stamping, stippling, combing—matched to your design and materials.
Safety Gear And Prep
Now that you’ve picked your textures and supplies, gear up for a safe, organized workspace.
Wear goggles, a respirator, gloves, and knee pads. Tape plastic to protect floors and furniture, and lay drop cloths.
Turn off HVAC to limit dust spread. Read product labels and follow safety precautions.
Plan wall preparation steps, clear the area, and keep tools within reach for efficient, accident-free work.
Repair & Prime Walls Before Texturing
Before you start texturing, inspect the walls for cracks, holes, and loose plaster so you can patch them properly.
Fix any damage, sand smooth, and wipe away dust to guarantee a clean surface.
Then apply a quality primer to seal the wall and promote even adhesion of your texture.
Inspect For Damage
Even if your walls look fine at a glance, inspect them closely for cracks, holes, loose paint, and water stains so your texture will adhere and look professional.
Perform a damage assessment and wall inspection room by room. Mark areas needing patching, sanding, or replacement.
Check trim, corners, and behind fixtures. Document issues so your repair plan is efficient and complete before texturing.
Apply Quality Primer
Start by choosing a high-quality, stain-blocking primer and apply it evenly across repaired and bare areas so your texture bonds properly and colors read true.
For primer application, roll or brush in consistent strokes, cutting in edges carefully. Let it dry fully; this step enhances adhesion, seals patches, and evens porosity.
These primer benefits guarantee uniform texture finish and truer final color.
Prep Walls for a Long-Lasting Texture Finish
When you’re prepping walls for a textured finish, clean, repair, and prime with purpose so the texture will adhere evenly and last.
You’ll remove dust, grease, and loose paint, patch holes, sand glossy areas, and secure even wall surface preparation.
Choose primers compatible with your texture application techniques, let everything fully dry, and mask trim to guarantee a durable, professional result.
Budget-Friendly Texture Techniques Under $50
With the wall prepped and primed, you can get creative without spending much—many textured finishes cost under $50 and use basic tools you likely already have. Choose budget saving options and creative techniques like sponge, rag, or comb finishes. Compare simple supplies:
| Technique | Cost |
|---|---|
| Sponge | <$20 |
| Rag | <$15 |
| Comb | <$25 |
Step-by-Step Venetian Plaster for a Polished Wall
Although Venetian plaster looks luxe, you can achieve a polished, marble-like finish using simple materials and a few patient passes of trowel work.
Although Venetian plaster appears luxurious, you can create a marble-like, polished finish with basic materials and careful trowel work
You’ll follow Venetian techniques to build thin layers, burnish between coats, and seal for polished finishes.
- Prep and skim
- Apply thin coats with a trowel
- Burnish and seal for sheen
Create Rustic Faux Plaster With Joint Compound
If you liked the smooth, polished look of Venetian plaster but want something more lived-in, try creating a rustic faux plaster finish using joint compound.
You’ll skim thin layers, let each dry, then distress with a damp sponge or sanding pad for character.
Blend tones with diluted paint washes and seal with matte clear coat.
These faux plaster techniques suit any rustic design.
Apply Skip Trowel Texture for Subtle Depth
A skip trowel texture gives your walls soft, irregular peaks and valleys that catch light without shouting for attention.
You’ll use skip trowel techniques for subtle texture application, working with a hawk and trowel to skim thin compound.
Tips:
- Load a small amount and apply light, random strokes.
- Vary angle for natural variation.
- Sand sparingly and prime before painting.
Use Drywall Mud: Mix, Tools & Timing for Knockdown & Skip
Moving from the skip trowel’s light skim, you’ll rely on drywall mud to get the body and working time needed for both knockdown and skip textures. Use proper mixing techniques, a hawk, trowel, knife, and watch drying time between passes.
| Tool | Action | Result |
|---|---|---|
| Hawk | Hold mud | Control |
| Trowel | Spread | Texture |
| Knife | Knockdown | Flatten |
Make a Stippled Texture Using a Paint Roller
Start by prepping the wall—clean, patch holes, and prime so the texture sticks.
Pick the right roller nap (short for subtle, longer for heavy stipple) and a patterned sleeve if you want more definition.
Load the roller evenly and use a consistent stippling motion, working in small sections until the finish looks uniform.
Prep The Wall
Before you roll, clean and repair the wall so the texture will bond evenly; wipe away dust, fill holes with spackle, sand smooth, and remove loose paint or wallpaper.
Use these wall preparation techniques and surface cleaning tips to guarantee adhesion:
- Degrease and rinse thoroughly.
- Patch and sand imperfections.
- Prime repaired areas and let dry completely before stippling.
Choose Roller Type
Choose the right roller nap to get the stippled look you want: a short nap (1/4″–3/8″) gives a subtle texture, a medium nap (3/8″–1/2″) creates a more pronounced stipple, and a long nap (3/4″ or more) produces heavy, rustic peaks.
Pick a roller suited to your paint thickness, test roller patterns on scrap, and plan texture application direction for consistent results.
Apply Stipple Technique
Roll the loaded roller evenly over a test board, then bring it to the wall and apply with steady, overlapping passes to build that stippled texture; keep the roller perpendicular to the wall and maintain consistent pressure so peaks form uniformly.
- Load roller moderately for even coverage.
- Vary pressure and speed for subtle texture variation.
- Work in sections, blend edges to keep the stipple technique seamless.
Create Strie (Linen) Effects With Brushes
Strie (linen) effects give walls a soft, fabric-like look and you can achieve them simply with brushes and glaze.
Work vertically with a wide, dry brush, dragging glaze in steady, overlapping strokes. Use varying pressure and alternate brushes to avoid uniformity.
Practice strie brush techniques on a board first.
Follow linen effect tips: thin glaze, consistent direction, and quick blending for subtle, elegant texture.
Layer Paint Glazes for Soft, Aged Texture
When you layer thin glazes of contrasting tones, you’ll build a soft, aged patina that reads like weathered plaster rather than flat paint.
You’ll control glaze application and texture layering to suggest depth without heavy relief.
- Mix glaze thinly for translucence.
- Work in small sections, blend with a rag.
- Seal lightly to unify finish.
Install 3D Wall Panels for Instant Dimension
Add 3D wall panels to give any room instant depth and a modern, sculptural look. You’ll learn 3D panel benefits like easy visual impact and sound dampening.
Add 3D wall panels for instant depth, modern sculptural style, and added sound dampening.
Follow clear Installation tips: measure, level, use adhesive or screws.
Seek Design inspiration from geometric repeats or organic waves.
For Maintenance advice, dust regularly and touch up paint to keep panels crisp and clean.
Build a Reclaimed Wood Accent Wall on a Budget
You can find affordable reclaimed wood at salvage yards, online marketplaces, or local construction sites—just check for pests and rot.
Prep the wall by cleaning, leveling, and adding a moisture barrier or furring strips where needed.
Then measure, stagger, and fasten the planks securely for a professional-looking accent without breaking the bank.
Sourcing Reclaimed Wood
Although it takes some patience, sourcing reclaimed wood for your accent wall can save money and give your room unique character.
You’ll focus on reclaimed wood sourcing and sustainable materials by checking these options:
- Salvage yards and demolition sites.
- Online marketplaces and local listings.
- Reclaimed-wood suppliers and recycling centers.
You’ll inspect for nails, rot, and consistent thickness before buying.
Preparing Wall Surface
Before you start nailing boards to the studs, clear and prep the wall so the reclaimed wood will sit flat and last; remove trim, patch holes, and check for moisture or mold that could damage the wood.
You’ll inspect studs, shim where needed, and sand uneven plaster.
Good wall preparation guarantees different texture types read cleanly and prevents warping, rot, or future repair headaches.
Installing Wood Planks
Start by laying out your planks on the floor to plan the pattern and mix of tones so you can avoid awkward seams and balance short lengths.
Then measure, trim, and install horizontally or vertically, securing with nails or adhesive.
Consider wood plank patterns and finishing techniques for cohesion.
- Measure precisely
- Stagger joints
- Seal and finish
Install Shiplap or Tongue-and-Groove Wall Panels
Install shiplap or tongue-and-groove panels to add clean, linear texture and instant character to a room; they’re straightforward to fit, work with painted or stained finishes, and suit modern or rustic styles.
For efficient shiplap installation, measure and level, stagger seams, and use a pneumatic nailer.
Learn tongue and groove techniques to guarantee tight, gap-free joins and a professional finish.
Create Geometric Raised Panels Using MDF
If you liked the clean lines of shiplap, you can escalate that linear look into a bold focal wall by building geometric raised panels with MDF.
You’ll focus on MDF selection, accurate cutting, and careful panel installation to get crisp seams and depth.
Steps:
- Measure and plan layout.
- Cut MDF pieces to shape.
- Attach, fill seams, and paint.
Use Stencils and Joint Compound for Patterned Texture
Using stencils and joint compound lets you create repeatable, tactile patterns that transform a flat wall into an architectural feature without specialized tools.
You’ll tape the stencil, apply joint compound with a trowel or putty knife, then lift carefully for crisp edges.
Vary compound thickness for relief, sand lightly when dry, and repeat stencil techniques across the surface for consistent, elevated texture.
Make an Industrial Concrete-Look Wall With Paint
A concrete-look painted wall gives your room that cool, industrial edge without the cost or mess of real cement; you’ll build depth with layered paint, texture glaze, and simple tools like rollers, brushes, and rags.
- Prime, base coat, then use concrete techniques with a sponge.
- Add gray tones, scumble, and blend for varied paint finishes.
- Seal lightly to protect the faux concrete.
Apply Metallic Finishes for Luxe Textured Walls
Choose the right metallic paint for your base and topcoat—some offer pearl sheens, others heavy metal pigments that highlight texture.
I’ll explain application techniques like brushing, ragging, and dry-brushing so you get consistent shimmer without streaks.
Finally, seal the finish and follow simple maintenance tips to preserve the look and prevent tarnishing.
Choosing Metallic Paints
Anyone can elevate textured walls by picking the right metallic paint—start by matching the finish to your room’s light and mood, since high-shine silvers and golds reflect more and highlight texture, while brushed or metallic glazes offer subtler depth without overwhelming the space.
Consider metallic color options and paint finishes when choosing:
- Warm golds for cozy rooms
- Cool silvers for modern spaces
- Aged bronze for depth
Application Techniques Explained
Start by laying out your tools and prepping the surface so the metallic finish adheres evenly and highlights the texture’s peaks and valleys.
You’ll work in small sections, brushing into crests and wiping back from recesses to emphasize textural contrasts.
Use layering techniques—thin glazes, dry brushing, and gentle patinas—to build depth.
Blend edges and step back frequently to judge overall sheen.
Sealing And Maintenance
Before the metallic finish fully cures, protect your work with a compatible clear sealer applied in thin, even coats so the sheen stays true and the texture remains defined.
You’ll use sealing techniques and follow maintenance tips to preserve luster and prevent tarnish.
- Clean gently with a microfiber cloth.
- Reapply sealer annually in low humidity.
- Touch up scratches quickly.
Pair Wallpaper and Texture Paste for Layered Walls
When you pair wallpaper with texture paste, you get depth and pattern that neither material achieves alone.
You’ll apply wallpaper patterns first for visual interest, then add texture paste over selected sections to build relief and highlight motifs.
Work in small areas, use stencils or palette knives, and test adhesion.
Let each layer dry fully to preserve crisp edges and avoid bubbling.
Protect & Seal Textured Walls for High-Traffic Areas
For high-traffic areas you’ll want to choose a durable sealant that stands up to bumps and frequent contact.
Pick finishes that are easy to clean—washable eggshell or satin sheens work well over textured surfaces.
Apply the sealant per manufacturer instructions to keep texture intact and maintenance simple.
Choose Durable Sealants
Because textured finishes catch scuffs and grime, you’ll want a tough sealant that’s built for heavy use; choose a product labeled “high-traffic” or “washable” and confirm it bonds to your specific texture (plaster, sand, or acrylic).
Consider durable options and common sealant types you can apply confidently:
- Polyurethane — hard, durable.
- Acrylic sealer — breathable, clear.
- Epoxy — ultra-tough for extreme wear.
Cleanable Finish Options
If you want textured walls that stay looking fresh in busy rooms, pick a finish designed to be cleaned without dulling or trapping dirt.
Use washable paints or clear water-based sealers labeled for high-traffic areas. Test cleaning techniques—mild detergent, soft sponge, spot-clean first.
Choose durable finishes that resist abrasion and staining so you can maintain texture without repainting or damaging the surface.
Fix Common Texture Problems: Cracks, Peeling, Lumps
Dealing with cracks, peeling, and lumps in textured walls doesn’t have to derail your project—start by identifying each problem’s cause so you can choose the right fix.
Use targeted crack repair, peeling solutions, lump correction, and texture restoration methods.
- Patch and sand small cracks.
- Remove loose material, prime, retexture.
- Reblend lumps, feather edges, repaint.
Remove or Smooth an Existing Texture Safely
When you want a smoother finish, remove or tame existing texture methodically to avoid damage and dust spread.
Start by testing a small area, use wetting for soft textures or scraping for hard ones, and wear protection.
Combine texture removal techniques with joint compound skim coats, sanding with a dustless vacuum, and safe smoothing methods to prep walls for priming and repainting.
Match Trim & Molding to Textured Walls
Once your walls are smooth or the texture is tamed, you’ll want trim and molding that complements rather than clashes with the surface.
Match profiles and finishes to achieve texture contrast and color harmony.
Consider:
- Simple, narrow trim for subtle texture.
- Bold, ornate molding to echo rough surfaces.
- Matte or satin finishes to balance sheen and depth.
Choose Paint Colors to Highlight Wall Texture
Pick paint colors that celebrate rather than hide your wall texture, because the right hue and finish will amplify shadows, depth, and character.
Choose tones using color psychology to set mood—warm neutrals cozy, cool grays calm—then pick paint finishes that suit texture: flat hides imperfections, eggshell shows subtle relief, satin highlights more.
Test samples on small areas before committing.
Light a Textured Wall to Enhance Shadows & Depth
Place directional lighting at an angle to graze the surface so the texture casts small, dramatic shadows.
Use adjustable accent fixtures like wall washers or spotlights to control where those shadows fall.
You’ll get more depth and visual interest by experimenting with placement and beam width.
Directional Lighting Placement
When you aim light across a textured wall at an angle, the relief becomes more pronounced because shadows and highlights reveal every ridge and groove; positioning fixtures so light grazes the surface will amplify depth without adding visual clutter.
Use directional placement to balance ambient lighting and create intentional shadow play:
- Place downlights low and angled.
- Use track lights for adjustability.
- Avoid flat frontal illumination.
Accent Light Fixtures
Accent fixtures bring texture to life by casting focused beams that carve out shadows and highlights; you’ll want to choose fittings that let you direct light precisely so the wall’s relief reads clearly from your main viewing angles. Use adjustable fixture styles, balance with ambient lighting, and position for grazing light.
| Type | Beam | Best Use |
|---|---|---|
| Spot | Narrow | Accents |
| Wallwash | Wide | Even glow |
| Track | Adjustable | Flexible layouts |
Use Textured Walls Effectively in Small Spaces
Although textured walls can seem overwhelming in a tight room, they’ll actually add depth and personality without closing the space in if you choose scale and placement carefully.
Use textured wall benefits to create focal points, aiding in maximizing small spaces.
Try:
- Accent a single short wall.
- Use subtle, light-reflecting textures.
- Keep color neutral and trim minimal to avoid clutter.
Style Textured Walls With Accent Furniture & Art
If you want your textured wall to feel curated rather than cluttered, pair it with a few well-chosen pieces of furniture and art that echo its scale, color, and rhythm.
Choose accent color combinations that pick up texture highlights, and position art at eye level.
Balance weight with furniture arrangement—low-profile seating, a slim console, and spaced-out frames keep the wall readable and refined.
When to Hire a Pro for Complex Wall Textures & Structural Issues
When your project goes beyond simple skimming or decorative finishes—think elaborate Venetian plaster, multi-layered lime washes, or textures that require substrate rebuilding—you should call a pro.
They’ll assess structural issues, advise on compatible materials, and prevent costly mistakes.
- Request a texture assessment and timeline.
- Get written professional advice on materials and permits.
- Hire pros for structural repairs, moisture or adhesion problems.
Frequently Asked Questions
Can Textured Walls Affect Indoor Air Quality or Off-Gassing?
Yes—you can worsen indoor air quality because textured finishes and off gassing materials can emit VOCs. You should pick low‑VOC products, ventilate during application, and use air purifiers to reduce indoor air pollutants and odors.
How Do Textured Walls Impact Resale Value?
Textured walls can boost or hurt resale value depending on resale trends and buyers’ design preferences; you’ll attract those who like character but risk deterring buyers wanting neutral finishes, so consider subtle textures or easy-to-remove options.
Can You Texture Ceilings the Same Way as Walls?
Yes — you can texture ceilings like walls; contrasting ceiling techniques and wall materials will shift a room’s feel, so you’ll choose methods carefully, match durability and prep, and avoid heavy textures that stress ceiling structure.
Are Textured Surfaces Harder to Childproof or Babyproof?
Yes — textured surfaces can be trickier to childproof because they collect dust and offer grip for climbing; you’ll need extra child safety measures, careful design considerations, durable finishes, and frequent cleaning to keep kids safe.
What Maintenance Schedule Is Needed for Exterior Textured Walls?
About 70% of exterior issues stem from neglected upkeep, so you should inspect textured walls quarterly, clean with gentle pressure washing and soft brushes, apply seasonal cleaning techniques, and follow prompt repair tips for cracks, resealing, and repainting as needed.
Conclusion
You’ve learned beginner-friendly methods, how to pick a style, and the prep, tools, lighting, and styling tips to make textured walls sing. Try a simple knockdown or plaster accent, prime and repair first, and place a vintage gramophone or neon lamp to show texture in dramatic light. If walls are badly damaged or you want elaborate Venetian plaster, call a pro. Now grab your trowel and go create depth and personality.