
How to Make Wall Paint Glossy Without Buying New Paint
You can make painted walls glossier without buying new paint by cleaning, smoothing, and adding a clear topcoat or quick polish. Start by washing with warm water, mild detergent, and a splash of vinegar, then sand lightly to smooth imperfections. For small areas, buff with a microfiber cloth and mineral oil or use furniture polish; for larger areas use a water‑based polyurethane or acrylic clear coat applied in thin, even layers. Test first—keep going to learn more techniques and tips.
Quick Answer How to Make Wall Paint Glossy Without Buying New Paint
You can make existing wall paint glossier by applying a clear gloss-enhancing topcoat, using a paint-friendly furniture polish for small spots, or buffing with a microfiber and a little mineral oil.
Use a clear topcoat for whole walls or high-traffic areas, polish for quick touch-ups, and buffing for small patches or smoothing sheen.
Pick the method based on wall size, finish condition, and how durable you need the shine to be.
One-sentence solution
If you want a quick gloss without buying new paint, apply a clear high-gloss furniture or cabinet lacquer with a synthetic brush or foam roller over clean, dull-dry walls for a durable shiny finish.
For a simple one-sentence solution to how to make wall paint glossy, sand lightly, clean, then roll on two thin lacquer coats, allowing proper dry time between each.
When to use these methods (best scenarios)
After sanding lightly, cleaning, and applying thin lacquer coats as described above, it’s helpful to know when this shortcut works best: use it on interior walls that are already in good condition—smooth, free of peeling or heavy texture, and not exposed to extreme moisture—when you want a durable, high-sheen update without a full repaint.
Use it for focal walls, trim, or rental touch-ups; avoid bathrooms and basements.
Basic Understanding Gloss Levels and Why Paint Appears Matte or Glossy
Gloss in paint refers to how much light the finish reflects — higher sheen means more reflection and a shinier look.
Matte paints use more pigment, different binders, and textured formulations that scatter light, so they appear flat.
Even a glossy paint can look dull if the wall is rough, dirty, or uneven, because surface condition changes how light reflects.
What ‘œgloss’ means in paint (reflection, sheen)
Think of gloss as how much light a painted surface throws back at your eyes; it’s the paint’s level of reflectivity or sheen.
Gloss describes how sharp and bright highlights look: high-gloss returns clear reflections and resists scuffs, while low-gloss scatters light, yielding a softer, muted appearance.
You’ll judge gloss by viewing angles and light intensity, which reveal surface smoothness and shine.
Why some paints are matte (pigment, binder, texture)
If high-gloss paints throw strong reflections, matte finishes do the opposite by scattering light so surfaces look flat and soft.
Matte appearance comes from more pigment and less binder, creating microscopic roughness that diffuses light. Some binders reduce sheen by absorbing light.
Flat additives and textured particles further break reflections, so you’ll see color without shine rather than crisp highlights.
How surface condition affects perceived gloss
Because the same paint can look shiny or dull depending on the surface beneath it, you should care about preparation as much as the formula.
Smooth, clean surfaces reflect light uniformly, boosting gloss. Roughness, dirt, old texture, or uneven primer scatter light and make paint read matte.
Sand, fill, clean, and prime properly so your existing paint will appear glossier without changing the product.
Overview of Safe Approaches (What You Can and Cannot Change)
You can change a lot about how glossy a wall looks by focusing on surface preparation—cleaning, sanding, and priming—without touching the paint formula.
You can’t safely turn a matte paint into a true high-gloss finish after it’s cured without recoating or using a compatible gloss product.
Be aware that sanding or applying clear topcoats has limits and risks, like uneven sheen or adhesion problems, so follow recommended products and techniques.
Surface preparation vs. altering the paint formula
When aiming for a glossier finish, focus first on what you can control: surface prep, application technique, and the paint sheen you buy—those factors change final gloss reliably and safely.
You’ll clean, sand, and prime to guarantee smoothness, use consistent roller or brush strokes, control drying conditions, and apply thin even coats.
Don’t tamper with the paint’s chemical formulation.
Risks and limits of changing sheen after application
Although you can tweak a painted surface’s appearance after it’s dry, your options are limited and come with trade-offs: light sanding and topcoats can raise sheen in localized areas, but you can’t reliably convert a low-sheen or flat paint into a true high-gloss finish without re-coating with a glossier product.
Attempts to force gloss by additives or heavy polishing often cause patchiness, adhesion problems, or altered durability. You can spot-sand, apply clear gloss polyurethane or acrylic sealer, or accept a semi-gloss result—but test first, work in small sections, and expect imperfect uniformity and possible maintenance issues.
Step-by-Step Methods to Increase Wall Paint Gloss
Before you start, you’ll want to follow a clear sequence: deep-clean and degrease the walls, sand and smooth any imperfections, then choose a finishing method like a clear glossy topcoat, a DIY glaze/polyurethane mix, or — where it’s safe — careful heat or steam to slightly reflow the paint.
You’ll get the best results by prepping thoroughly and testing products or techniques on a small patch first.
Keep safety and paint compatibility in mind as you proceed.
Method 1 Deep Cleaning and Degreasing
1 simple deep-clean can make a big difference: grease, dirt, and grime sit on paint and scatter light, making your walls look flat instead of glossy.
You’ll wipe walls top-to-bottom with a microfiber cloth and a mix of warm water, mild detergent, and white vinegar. Rinse, dry thoroughly, and treat stubborn spots with a degreaser.
Clean surfaces reflect light better.
Method 2 Sanding and Smoothing the Surface
Start by roughing up the surface so new light can bounce evenly off your walls: sanding removes bumps, old gloss, and uneven texture that scatter light and dull the finish.
Use 120–220 grit sandpaper, sand lightly in even strokes, feather edges, and smooth imperfections.
Clean dust with a tack cloth, inspect for flaws, and repeat gentle sanding until the surface feels consistently smooth.
Method 3 Applying a Clear Glossy Topcoat (various types)
Now that your walls are smooth and dust-free, you can boost shine by adding a clear glossy topcoat.
Choose water-based polyurethane, acrylic sealer, or clear varnish suited for walls. Test in a small area, then apply thin, even coats with a high-quality brush or roller, allowing proper drying between coats.
Lightly sand between coats for a flawless, durable glossy finish.
Method 4 Using DIY Glaze or Polyurethane Mix
Mix a DIY glaze or polyurethane blend to raise gloss without stripping color: combine a clear water-based polyurethane or acrylic gloss with a glazing medium or with a little water to thin (follow product guidelines), stir thoroughly, then test the mixture on an inconspicuous wall patch to confirm sheen and compatibility.
Roll or brush evenly, work quickly to avoid lap marks, and allow full cure before light use.
Method 5 Heat Gun/Steam to Slightly Reflow Paint (where safe)
Method 5 uses controlled heat—from a heat gun or steam—to slightly reflow the paint’s surface so it smooths and reflects more light.
However, you should only attempt this on fully cured, water-based paints and in well-ventilated areas.
Test a small, hidden spot first.
Keep the heat low, move constantly to avoid blistering, and let the wall cool fully before evaluating gloss.
Method 6 Light Buffing and Polishing for Semi-gloss finishes
If the heat or steam approach feels too risky for your walls, you can achieve a noticeable shine with light buffing and polishing aimed at semi-gloss finishes.
Start by cleaning the surface, then use a soft microfiber pad with a small amount of automotive or furniture polish.
Work in circular motions, buff gently, and wipe residue.
Test a hidden spot first to avoid damage.
Materials, Tools, and Products Needed
Before you start, gather the right cleaning supplies and degreasers, a range of sandpaper grits plus sanding tools, and the safety gear you’ll need for good ventilation.
Decide which clear topcoat suits your wall—water- or oil-based polyurethane, varnish, or lacquer—and pick appropriate application tools like brushes, rollers, microfiber cloths, or foam applicators.
Having the correct products and protective equipment on hand will make achieving a durable, glossy finish much easier.
Cleaning supplies and degreasers
While glossy paint reflects light beautifully, it only looks that way when the surface is truly clean. So gather a few reliable cleaning supplies and a quality degreaser before you start; you’ll want microfiber cloths, a soft-bristled scrub brush, a bucket, mild dish soap, and a dedicated water-based or citrus degreaser to cut grease and grime without damaging primer or paint.
- Microfiber cloths
- Soft-bristled scrub brush
- Water-based or citrus degreaser
Sandpaper grits and sanding tools
After you’ve removed grease and grime, you’ll need the right sandpaper grits and tools to smooth imperfections and create a surface the gloss will grip.
Start with medium, finish with fine, and use appropriate tools for even results.
- 120–150 grit for scuffs and leveling
- 220–320 grit for smoothing before sheen
- sanding block or orbital sander for consistent pressure
Types of clear topcoats: water-based polyurethane, oil-based polyurethane, varnish, lacquer
Although you can get a glossy finish straight from high-gloss paint, choosing the right clear topcoat — water-based polyurethane, oil-based polyurethane, varnish, or lacquer — will determine durability, yellowing, drying time, and the tools and safety gear you’ll need.
Pick based on room use and ventilation:
- Water-based: low odor, fast dry, non-yellowing.
- Oil-based: tough, slow cure, may yellow.
- Lacquer/varnish: very durable, strong fumes.
Application tools: brushes, rollers, microfiber, foam applicators
Picking the right topcoat is only half the job — the tools you use will determine how smooth and glossy the finish looks.
Choose quality tools and keep them clean. Use:
- High-density foam rollers for even application and minimal texture.
- Natural or synthetic angled brushes for edges and trim.
- Microfiber cloths or foam pads to smooth drips and buff sheen between coats.
Safety gear and ventilation
Because you’ll be working with solvents, sprays, and airborne particles, you should gear up and ventilate the space before you start—wear a respirator rated for paint fumes or VOCs, chemical-resistant gloves, safety goggles, and coveralls.
Set up cross-ventilation with fans or open windows to keep fumes moving out of the room.
- Respirator (NIOSH-rated)
- Chemical-resistant gloves
- Eye protection and coveralls
Detailed How-To Steps (Step 1 → Step 6)
Before you start, inspect and test a small, inconspicuous area to see how the existing finish reacts.
Then clean thoroughly, sand and repair any imperfections using the right grit sequence, and mix your chosen topcoat or glaze to the recommended ratios.
Finally, apply the topcoat with proper techniques, follow drying times, and plan the number of coats for the gloss level you want.
Step 1 Inspect and test a small inconspicuous area
When you’re ready to change the finish, start by inspecting and testing a small, inconspicuous area so you can confirm adhesion, color shift, and the final gloss without risking the whole wall.
Choose a corner or behind furniture, let any product dry fully, and check for peeling, streaks, or unwanted sheen.
Record results before proceeding to larger sections.
Step 2 Clean thoroughly (process and timing)
Since grime and dust block proper adhesion and can dull a fresh gloss, you’ll clean the wall thoroughly before any primer or paint goes on.
First, remove loose dust with a microfiber cloth or vacuum.
Then wash with a mild detergent solution, rinse with clean water, and let the surface dry fully—usually 24 hours in good ventilation—before proceeding.
Step 3 Sand and repair imperfections (grit sequence and tips)
Grab your sanding tools and inspect the wall for dents, drips, or rough spots you’ll need to fix; start with a coarse grit to level major flaws, then move through finer grits to feather edges and smooth the surface for paint.
Fill holes with spackling, sand cured patches flush, wipe dust with a damp cloth, and re-check for imperfections before proceeding.
Step 4 Choose and prepare the topcoat or glaze (mix ratios, thinning)
Pick a topcoat or glaze that matches the sheen and durability you want, then mix and thin it precisely so the finish goes on smoothly and levels without runs.
Choose water-based polyacrylic for easy cleanup or a glazing medium for subtle depth.
Follow manufacturer ratios, start with minimal thinner, stir gently, strain, and test on a scrap to confirm flow and drying behavior.
Step 5 Apply topcoat: techniques, drying times, number of coats
With your topcoat mixed and tested, you’re ready to apply it evenly and confidently; good technique here determines sheen uniformity and streak-free results.
Work in manageable sections, using a high-quality synthetic brush or foam roller and long, even strokes.
Follow manufacturer drying times between coats—usually 2–4 hours for waterborne, longer for oils.
Apply 1–3 thin coats for glossy, durable coverage.
Step 6 Finish: light sanding between coats, final curing, buffing
Step 6 wraps up the job: after each topcoat has dried to the manufacturer’s minimum time, you’ll lightly sand between coats with a fine-grit abrasive, clean the surface of dust, and repeat until you’ve achieved the desired gloss and smoothness before a full cure and optional buffing.
Let paint cure fully (usually 24–72 hours), then inspect, buff gently with a soft cloth or a foam pad for extra sheen.
Comparison of Topcoat Options (Durability, Appearance, Ease)
Now you’ll compare common topcoat choices so you can pick what fits your needs.
You’ll weigh water- vs. oil-based polyurethane for durability and yellowing, then look at varnish, lacquer, and acrylic gloss for sheen, drying time, and ease of use.
That way you can balance appearance, longevity, and how much work each option requires.
Water-based polyurethane vs. oil-based polyurethane
Although both water-based and oil-based polyurethanes can give your painted walls a durable, glossy finish, they differ in how they look, perform, and handle during application. You’ll choose water-based for clearer, fast-drying, low-odor results; pick oil-based for richer amber tones and tougher abrasion resistance. Apply thin coats and lightly sand between layers for best adhesion.
| Feature | Quick note |
|---|---|
| Appearance | Water: clear; Oil: amber |
| Dry time | Water: fast; Oil: slow |
| Durability | Water: good; Oil: superior |
| Odor | Water: low; Oil: strong |
| Sanding | Both need light sanding |
Varnish vs. lacquer vs. acrylic gloss
When you’re choosing a topcoat for glossy walls, varnish, lacquer, and acrylic each bring distinct strengths in durability, appearance, and ease of use—so pick based on the look you want and how much maintenance you’ll tolerate. Varnish = durable, warm sheen; lacquer = high gloss, fast; acrylic = easy, UV-stable. Choose based on traffic, sheen preference, and ventilation.
| Option | Quick note |
|---|---|
| Varnish | Durable, ambering |
| Lacquer | Ultra-gloss, fumes |
| Acrylic | Clear, low-odor |
Common Mistakes and How to Avoid Them
Before you start glazing or spraying, check the surface and product so you don’t trap dirt or use a topcoat that’s incompatible with glossy finishes.
Pay attention to sanding—too much or too little ruins adhesion and smoothness—and apply thin, even coats to prevent drips and sheen variations.
Also guarantee good ventilation and follow safety precautions when using solvents or spray equipment.
Mistake 1 Applying topcoat over dirty or glossy-incompatible surfaces
If you slap a topcoat onto a dusty, greasy, or glossy-incompatible surface, it won’t adhere properly and the finish will fail fast.
Clean thoroughly with a mild degreaser, remove flaking paint, and scuff-sand glossy areas to create tooth.
Wipe away residue, let dry, then test a small patch.
Proper prep guarantees adhesion and a durable, even sheen.
Mistake 2 Using the wrong product for painted walls
Because paint types and finishes differ, grabbing the wrong product can wreck the look—or the adhesion—of your walls.
Don’t use oil-based poly over latex without proper primer; don’t apply high-build gloss additives to delicate eggshells.
Read labels, match solvent types, and test a small area.
Using a compatible sealer or primer guarantees adhesion, durability, and the glossy finish you want.
Mistake 3 Over-sanding or under-sanding
Sand too aggressively or not enough, and you’ll ruin the smooth surface needed for a true glossy finish.
You should sand lightly with fine-grit paper to scuff, removing imperfections without dipping into base coats.
Test a small area, wipe dust, and feel for uniformity. If it’s rough, sand more; if it’s thin or patchy, stop and patch before proceeding.
Mistake 4 Too-thick coats causing drips and uneven sheen
Once your surface feels smooth and even, don’t ruin it by applying paint too thickly — heavy coats will sag, run, and leave a blotchy sheen that defeats the glossy look you worked for.
Work in thin, even layers, feather edges, and wait recommended dry times. Use a quality roller or brush and multiple light coats for consistent gloss without drips or texture flaws.
Mistake 5 Poor ventilation and safety oversights
If you skip proper ventilation and basic safety measures, you’ll risk headaches, dizziness, or worse from solvent fumes and airborne particles while trying to get a glossy finish.
Always open windows, run fans, and use a respirator rated for paint vapors.
Wear gloves and eye protection, cover furniture, and dispose of rags safely.
Don’t rush—safety prevents accidents and long-term harm.
Best Practices and Pro Tips for a Professional-Looking Gloss
To get a pro-looking gloss, you’ll match sheen across textures by sanding lightly and using the right primer and finish for each surface.
Blend repairs by feathering edges, tinting touch-up paint, and applying thin, even coats so the patch disappears.
Keep the shine longer with gentle cleaning, spot-touching scuffs promptly, and call a professional when large areas, extensive repairs, or tricky finishes are involved.
How to achieve an even sheen across different wall textures
Because glossy finishes highlight every surface detail, getting an even sheen across textured walls starts with matching your preparation and application to the texture itself.
Identify texture type, sand or scuff smooth peaks lightly, and clean dust.
Use a quality primer to equalize porosity.
Apply gloss with consistent pressure and overlap, choosing a nap roller or brush suited to the texture for uniform coverage.
Blending repaired areas with existing paint
After prepping and matching texture, you’ll want repaired spots to disappear under the new gloss rather than stand out; careful blending is the difference between a DIY patch and a pro finish.
Feather edges with fine sandpaper, wipe dust, and apply thin glaze or diluted paint in multiple light coats.
Use a soft brush or small roller, overlap surrounding paint, and let each layer cure fully.
Maintenance tips to keep walls glossy longer
Keep a regular cleaning and care routine so your glossy walls keep reflecting light and looking fresh.
Dust weekly with a microfiber cloth, wipe fingerprints and smudges with a mild detergent and water, and avoid abrasive cleaners.
Use felt pads on furniture, control humidity to prevent peeling, touch up scuffs promptly, and rotate decor to prevent uneven gloss loss for consistent shine.
When to call a professional
If your glossy finish shows widespread peeling, uneven sheen, or damage from moisture and you don’t have the tools or time to fix it, call a pro—these issues need experience, proper surface prep, and often specialized primers or equipment to get a uniform, long-lasting gloss.
Hire someone when repairs exceed simple cleaning or touch-ups, when texture matching matters, or when you want durable, warranty-backed results.
Quick Decision Guide Which Method to Use When
When you need a glossy finish fast, pick the quick-seal spray or a high-gloss paint for small areas.
For larger rooms or imperfect walls, you’ll want sanding, priming, and a proper gloss coat to avoid showing flaws.
If you’re uncertain, match the method to the room’s traffic level and surface condition to get the best long-term result.
Quick scenarios with recommended approach
Although the right technique depends on your surface and time constraints, this quick decision guide helps you pick the most effective way to add gloss—buffing for small scuffs, targeted glazing for spotty sheen, high-gloss repainting for uneven coverage, and clear coat or varnish when you want sheen without changing color.
Choose based on damage, size, and permanence:
- Small scuffs: buff and polish.
- Patchy sheen: glaze targeted areas.
- Large or dull walls: clear coat or repaint.
FAQs
You probably have a few practical questions before you start, like whether any matte paint can be made glossy permanently and if a clear coat will shift your color.
You’ll also want to know how many clear topcoats give a true high gloss, whether polyurethane is safe to use over latex indoors, and how long to wait before cleaning a newly glossed wall.
Read on for concise answers to each.
Can I make any matte paint glossy permanently?
Wondering if you can turn any matte paint glossy permanently? You can increase sheen long-term by applying compatible gloss clear coats or varnishes, but results depend on surface prep and paint chemistry.
Some matte finishes resist adhesion or yellowing; test a small area first. Permanent success means choosing products designed for durability and following manufacturer instructions precisely to avoid peeling or uneven shine.
Will adding a clear coat change the color of my paint?
Will a clear coat change your paint color? Usually not remarkably.
Clear coats are transparent, so they preserve hue but can deepen saturation and gloss, making colors appear richer or slightly darker when wet.
Test a small area first: lighting, sheen, and surface texture affect perception.
Use a compatible, non-yellowing clear product to avoid long-term discoloration.
How many coats of clear topcoat do I need for a high gloss?
If a clear coat deepened your paint’s color the way it often does, you’ll probably want to know how many coats are needed to reach a high gloss finish.
Usually two thin coats give noticeable sheen; three build a durable, mirror-like gloss.
Sand lightly between coats with fine grit, remove dust, and apply evenly.
Stop after three unless instructions say otherwise.
Is it safe to use polyurethane over latex paint indoors?
Is it safe to brush polyurethane over latex paint indoors? You can, but choose water-based polyurethane for lower fumes and faster drying.
Make sure the room’s ventilated, wear a respirator if ventilation’s limited, and lightly scuff and clean the painted surface first for adhesion.
Test a small area to confirm compatibility and finish.
Avoid oil-based poly indoors unless you can manage strong odors and VOCs.
How long before I can clean a newly glossed wall?
How soon can you wipe a newly glossed wall?
Wait at least 24 hours for surface dry before light dusting; for gentle cleaning with a damp cloth, 48–72 hours is safer.
Full cure can take up to 2 weeks, so avoid abrasive scrubbing or strong cleaners during that time.
When cleaning, use mild soap, soft cloth, and test a small inconspicuous spot first.
Visuals and Examples
You’ll want clear before-and-after photos and simple technique illustrations to show how each step changes the gloss.
Include close-up shots of product application and texture so readers can see brush, roller, or spray differences.
Finish comparison photos under the same lighting will make it easy to judge results.
Before-and-after photos and technique illustrations
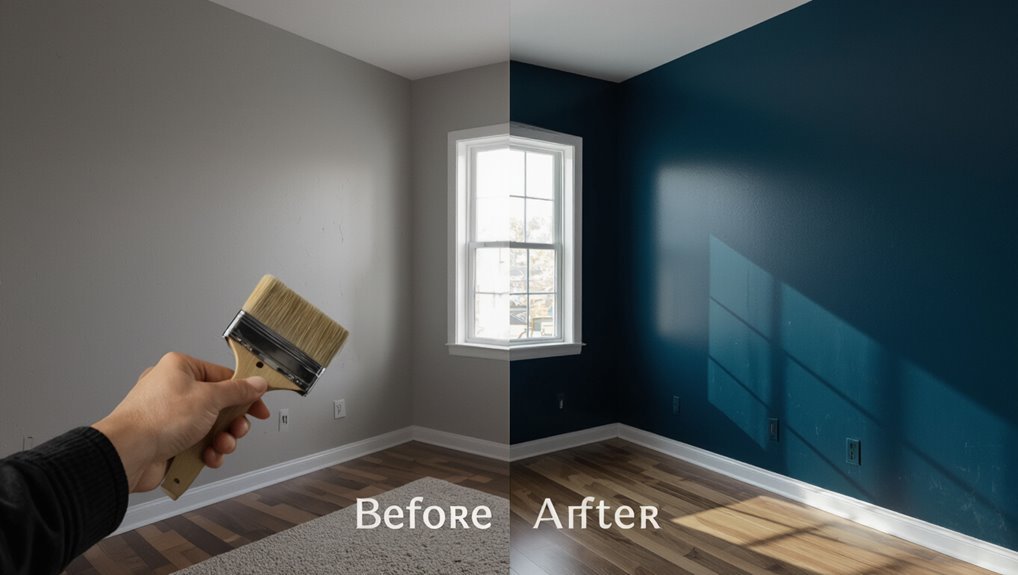
Before-and-after photos and clear technique illustrations show the real impact of finishing choices and make it easier for you to reproduce glossy results. They highlight differences in sheen, reveal common mistakes like brush marks or uneven gloss, and demonstrate tool handling and layering in a glance.
Use labeled steps and arrows to guide timing, stroke direction, and drying checkpoints so you can copy the process confidently.
Product application close-ups and finish comparison
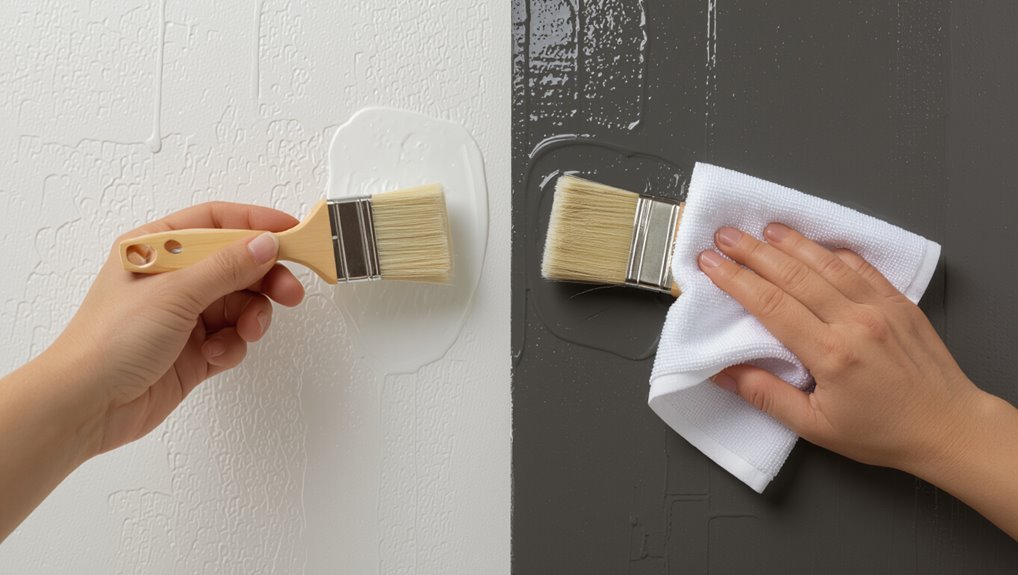
Those side-by-side photos set the stage for a closer look at product application and finish comparison.
You’ll examine brush strokes, roller texture, and glaze thickness in tight crops that reveal sheen, streaks, and pooling.
Compare satin, semi-gloss, and faux-gloss outcomes under the same light.
Note touch-up techniques and drying differences so you can replicate the best glossy effect on your walls.
