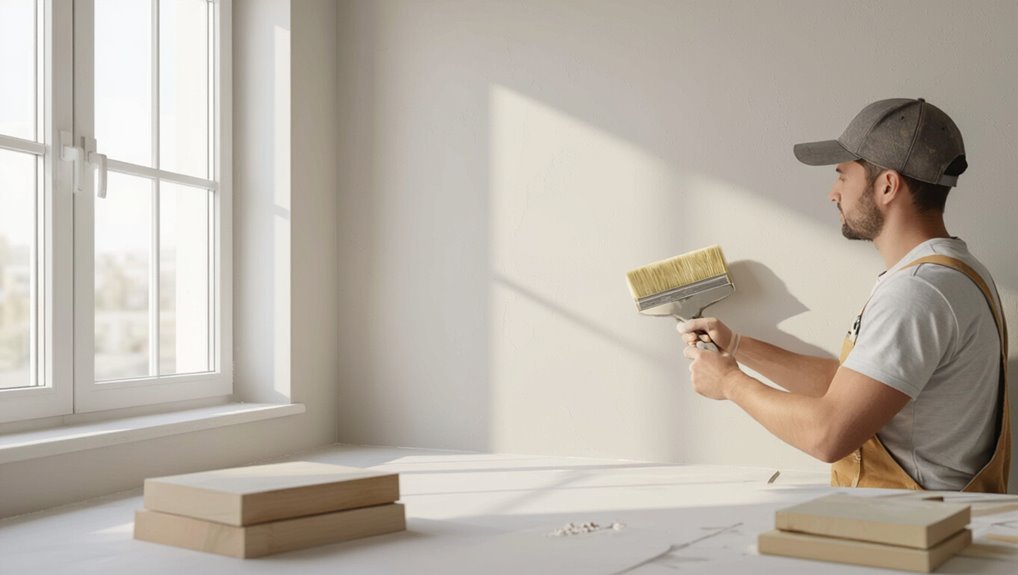
How to Make Wall Smooth Before Painting for Perfect Finish
You’ll get a perfect finish by inspecting, repairing, sanding, and priming so paint lays down evenly. Walk the room to mark cracks, holes, and damp spots, then scrape loose paint and strip wallpaper as needed. Patch small dents with spackle, use backing for big holes, sand edges smooth with fine grit, and wipe away dust. Apply primer over repairs and porous areas, then paint in thin coats. Keep going and you’ll find step‑by‑step tips and tool choices next.
What This Guide Helps You Achieve
This guide helps you get walls ready for a flawless paint job by showing the straightest, most efficient steps: how to assess surface damage, remove bumps and old texture, fill holes and cracks, sand for a uniform finish, and choose the right primers and tools so your new paint lays down smoothly and lasts.
You’ll learn practical wall preparation techniques and surface smoothing methods to save time and guarantee an even, durable finish.
Quick Checklist: Prep a Wall in One Afternoon
Got a few hours? You can finish basic wall preparation using efficient smoothing techniques and a tight plan.
Tackle dust, dents, and primer so paint goes on smooth. Follow this quick checklist:
- Clean and sand trouble spots
- Fill holes, let compound dry, sand smooth
- Prime patched areas and let cure
You’ll save time and get a consistent surface for painting.
When You Must Smooth Walls Before Painting
If your walls show cracks, peeling, water stains, or uneven texture, you should smooth them before painting to guarantee the finish looks professional and lasts longer.
You’ll smooth when damage, glossy finishes, or varied wall types will show through new paint. Choose smoothing techniques appropriate to drywall, plaster, or wood.
Don’t skip smoothing if imperfections will affect durability or appearance.
Inspecting Walls: A Simple Step‑by‑Step Check
Start by walking the room and scanning the walls for cracks, holes, peeling paint, or other surface damage.
Don’t forget to touch areas to spot soft patches and use a flashlight to reveal hidden moisture stains or mold.
If you find damp spots or mold, stop and address the source before smoothing and painting.
Check For Surface Damage
Before you patch or sand, take a close look for surface damage so you know exactly what needs fixing.
You’ll identify issues that hurt paint adhesion and note areas needing cracks inspection.
Check for flaking, dents, or loose texture, then mark repair spots.
- Flaking paint
- Hairline cracks
- Dents and gouges
Spot Moisture And Mold
While you inspect for cracks and dents, also look for signs of moisture and mold, because these issues can ruin a fresh paint job and indicate bigger problems behind the wall.
Use simple moisture detection: touch, smell, and a moisture meter.
If you find mold, clean with appropriate cleaners, dry thoroughly, fix leaks, and apply mold prevention primer before smoothing and painting.
Common Wall Problems and How to Spot Them
Walls rarely give away their issues at a glance, so you’ll need to look for specific signs—cracks, bubbling or peeling paint, stains, nail pops, and uneven texture—that tell you what’s going on beneath the surface.
You’ll check wall texture and paint adhesion, then note severity. Look for:
- hairline and structural cracks
- water stains or mold spots
- uneven patches and nail pops
Remove Loose Paint and Flaking Texture
Now that you’ve identified cracks, stains, and areas with poor adhesion, it’s time to clear away loose paint and flaking texture so new coatings will stick.
Use paint scraping with a firm putty knife or scraper, working gently to avoid gouges.
Follow with texture evaluation to spot remaining weak spots, then sand feathered edges.
Vacuum and wipe surfaces before priming.
Strip Wallpaper and Remove Adhesive Residue
Start by scoring or steaming the paper to loosen the adhesive, then peel sections away in manageable strips so you don’t gouge the drywall.
After wall stripping, scrape remaining paste gently and use a sponge with warm water or a commercial solvent for adhesive removal. Rinse and dry thoroughly.
- Work top to bottom
- Test solvents first
- Protect floors and trim
Clean Walls for Better Paint Adhesion
Before you paint, make certain you clean the surface so paint will stick evenly and last longer.
You should remove dust, grease, and mildew using mild detergent, trisodium phosphate alternative, or diluted bleach for mold. Rinse well and let dry.
Follow simple cleaning techniques and adhesion tips: wipe with microfiber, sand glossy spots lightly, and make sure no residue remains before priming to maximize bond and durability.
Repair Small Nail Holes and Dents
Start by finding and cleaning any nail holes or dents with a damp cloth so filler will adhere.
Use a lightweight spackling compound to fill imperfections, let it dry, then sand smooth.
Finally, wipe away dust and prime the repaired spots before painting.
Locate And Clean Imperfections
Walk the room with a bright light held at an angle so you can spot small nail holes, dings, and surface dents; those tiny flaws catch the eye after a fresh coat, so you’ll want to mark and clean each one before priming.
Use surface inspection and gentle cleaning techniques, then:
- Wipe debris with a damp cloth
- Remove dust with a soft brush
- Degrease oily spots before repair
Fill, Sand, And Prime
Grab a putty knife and a small tub of spackling compound—you’re going to fill each nail hole and dent so the surface reads flat under paint.
Choose appropriate filler types for interior walls or deeper gouges. Let dry fully, then use fine-grit sanding techniques to feather edges until smooth.
Wipe dust, apply primer over repairs, and paint for an invisible finish.
Fix Larger Drywall Holes and Gouges
When you’re dealing with holes bigger than a quarter or deep gouges, you’ll need more than simple spackling—these repairs require patching or backing to restore structural integrity before you skim coat.
You’ll use drywall patching, mesh or backing, and joint compound for proper gouge repair.
Follow basic steps:
- Clean and square the hole
- Install patch or backing
- Apply compound, sand, prime
Repair Cracks and Hairline Splits
Start by evaluating the crack’s depth and length so you know whether it’s a surface hairline or a sign of movement that needs a stronger fix.
For crack assessment, widen hairlines slightly, clean debris, apply flexible joint compound or caulk, embed fiberglass tape for recurring splits, then skim and sand.
Follow split treatment with primer before painting to guarantee a seamless finish.
When to Replace Damaged Drywall Panels
If your repairs for cracks and hairline splits keep failing or the damage spreads beyond localized spots, you’ll need to contemplate replacing the drywall panel rather than patching it.
Assess water damage, mold, and structural instability before cutting out. Consider drywall types and panel sizes to match existing walls. Replace when repairs won’t restore integrity.
- widespread mold
- sagging or soft panels
- mismatched dimensions
Prep Plaster Walls vs. Drywall (Key Differences)
When you’re prepping for paint, plaster and drywall behave differently — plaster often has harder, uneven textures while drywall is smoother but shows seams.
You’ll use different repair techniques: plaster needs patching and feathering, drywall usually just taping and skim-coating.
Expect plaster to take more prep time and curing, so plan your schedule accordingly.
Surface Texture Differences
Because plaster and drywall were built for different eras and methods, you’ll need different prep approaches for each to get a truly smooth finish.
You’ll assess surface texture and choose techniques matched to texture types. Consider differences in porosity, hardness, and original finish:
- Plaster: harder, often uneven
- Drywall: softer, seams visible
- Both: require sanding, priming, inspection
Repair Techniques Comparison
Although both plaster and drywall need repairs before you prime, the techniques you use will differ sharply because of each material’s properties. You’ll choose repair methods based on material options, tool selection, finish quality, time efficiency and cost analysis. Quick comparison chart:
| Surface | Pros Cons | Best Tools |
|---|---|---|
| Plaster | durable, tricky | plaster trowel |
| Drywall | easy, less durable | drywall knife |
Prep Time Variations
Prep times for plaster and drywall can differ a lot, so plan accordingly: plaster often needs more drying time, multiple skim coats, and careful sanding, while drywall typically requires faster taping, a couple of joint-compound passes, and less curing.
You’ll adjust prep time based on surface conditions and damage severity.
Consider:
- Plaster: longer drying, more coats
- Drywall: quicker taping, less curing
- Moisture impacts schedule
Handle Textured Walls Before Repainting
If your walls have texture, you’ll need to decide whether to preserve, soften, or remove it before repainting; each choice changes the prep steps and finish you’ll get. You’ll assess textured finishes, choose methods, and plan wall preparation accordingly.
| Option | Result |
|---|---|
| Preserve | Minimal sanding |
| Soften | Sand/skim lightly |
| Remove | Heavy prep, patching |
Skim‑Coating: When and How to Smooth a Wall
When your textured or damaged walls won’t sand smooth, skim‑coating gives you a fresh, even surface by applying a thin layer of joint compound across the entire wall; you’ll follow a few precise steps—mixing the compound, troweling on thin coats, letting each dry, and sanding lightly—to get paint‑ready results.
Use proper skimming techniques and controlled compound application.
- Mix to lump‑free consistency
- Apply thin, even coats
- Sand and inspect between coats
Feather Joint Compound for Invisible Seams
Feathering joint compound lets you blend new patches into the surrounding wall so seams disappear under paint; you’ll apply thin, tapered edges with a wide knife and smooth, overlapping strokes to make the shift invisible.
Practice feather application techniques: scrape thin layers, sand lightly between coats, and widen each pass.
These joint compound benefits include seamless shifts and reduced sanding, giving a paint-ready surface.
Choose the Right Filler and Joint Compound
Pick fillers and joint compounds based on the size and type of damage you’re fixing, because using the wrong product wastes time and gives poor results.
Choose filler types for small holes, lightweight spackles for quick fixes, and joint compound for larger seams. Match drying time and texture to paint.
Tips:
- Match depth
- Check drying time
- Consider finish for compound application
Sand Walls Efficiently Without Causing Damage
Start by choosing the right sandpaper grit and tool so you remove bumps without gouging the surface: use 120–150 grit for drywall seams and dried joint compound, 220 grit for light smoothing or primer, a sanding block for flat areas, and a pole sander or sanding sponge for larger or contoured surfaces.
Use gentle, even sanding techniques, test on different wall materials, and clean dust frequently to avoid damage.
Sand Between Coats for a Polished Finish
Sanding between coats evens out imperfections and helps the next layer of paint or primer adhere better.
Sanding between coats smooths imperfections and improves adhesion for a cleaner, longer-lasting finish.
You should lightly scuff with fine-grit sandpaper, remove dust, then apply the next coat for a flawless look.
Focus on proper sanding techniques and polishing tips to refine texture.
- Use 220–320 grit
- Sand lightly, not aggressively
- Wipe with a tack cloth
Control Dust While Sanding (Practical Tips)
When you sand, keep dust down by using wet sanding techniques where appropriate and by setting up a dust extractor or vacuum attachment.
Wet sanding cuts airborne particles and gives you smoother results on drywall joint compound.
Pairing water with a proper dust extraction setup protects your lungs and leaves the room cleaner for painting.
Wet Sanding Techniques
Wet sanding’s biggest advantage is how it nearly eliminates airborne dust, so you’ll breathe easier and spend less time cleaning. By keeping the abrasive surface and the wall slightly wet, particles stick together and drop instead of becoming a fine cloud.
Use wet sanding advantages and select wet sanding tools wisely. Tips:
- Keep water thin and even
- Change grit progressively
- Wring cloths often
Dust Extraction Setup
Because dust can quickly ruin your finish and your lungs, you’ll want a solid extraction setup before you start sanding.
Set up dust collection with a compatible vacuum system, position portable air filtration, and organize your workspace for clear airflow.
Choose proper material selection like low-dust abrasives, maintain tools routinely, and check hoses and seals so the system captures particles efficiently.
Choose the Right Primer for Problem Walls
Primer choice matters for problem walls, so pick one that specifically addresses the issue—stains, heavy repairs, or uneven porosity—rather than assuming a standard base will do.
Primer choice matters—use a primer that targets stains, heavy repairs, or uneven porosity, not a generic base.
You’ll match primer types to wall conditions to block stains, seal patches, or equalize absorbency.
Consider options:
- Stain-blocking alkyd or shellac
- High-build bonding primer
- PVA or acrylic sealer for porous areas
Apply Primer for Even, Uniform Coverage
Start by picking the right primer for your wall type so it bonds and seals properly.
Prepare the surface—clean, sand, and patch any imperfections—so the primer goes on smoothly.
Apply several even, thin coats rather than one heavy one to get uniform coverage and avoid drips.
Choose The Right Primer
When you want an even, long-lasting finish, pick a primer that matches your wall material and the paint you’ll use: latex primers work well on drywall and previously painted surfaces, while oil- or shellac-based primers block stains and seal porous patches.
You’ll consider primer types and plan primer application. Choose based on adhesion, stain blocking, and porosity:
- Adhesion
- Stain blocking
- Porosity
Proper Surface Preparation
Now that you’ve picked the right primer, prep the surface so that it accepts that primer evenly and gives you a uniform finish.
Clean dust, grease, and flaking paint, sand rough spots to match surrounding surface texture, and repair holes or cracks with filler.
Remove loose wall treatments and caulk seams.
Wipe and let dry so the primer bonds consistently for a smooth topcoat.
Apply Even Thin Coats
Apply primer in thin, even coats so each layer bonds properly and hides imperfections without creating drips or texture buildup.
You’ll achieve Even Application by working systematically, letting coats dry fully, and avoiding overload.
Use Thin Layers to build coverage gradually; sand lightly between coats for smoothness.
- Work top to bottom
- Thin, uniform passes
- Sand and recoat as needed
Pick Paint Tools That Hide Minor Flaws
Because the right roller or brush can disguise small imperfections, pick tools that lay paint evenly and create a uniform finish.
You’ll weigh paint rollers vs brushes in tool comparisons, match nap to wall textures, and consider primer selection to aid flaw concealment.
Use smoothing techniques like light stippling and consistent strokes to minimize surface imperfections and achieve professional paint finishes.
Use Chemical Strippers Safely (What to Know)
When you’re removing old paint, pick a chemical stripper suited to the paint type and surface so you don’t damage the wall.
Wear proper PPE, work in a well-ventilated area, and keep a neutralizer or cleanup supplies handy.
Follow the manufacturer’s instructions exactly to protect yourself and the finish.
Choose Right Stripper
If you’re removing old paint or varnish, pick a stripper that matches the coating and the surface — solvent-based for tough oil paints, water-based for latex and sensitive substrates, and gel formulas for vertical or ornate areas.
Consider chemical options and safety considerations when selecting a product.
Evaluate:
- substrate compatibility
- removal strength
- cleanup and disposal requirements
Follow Safety Protocols
Before you apply any chemical stripper, read the label and safety data sheet so you know the hazards, required PPE, ventilation needs, and first-aid steps.
Wear proper safety gear—gloves, goggles, respirator—and follow ventilation guidelines, using fans or open windows.
Work in small sections, never mix products, keep children and pets away, and dispose of residues per local regulations to avoid harm.
Mask and Protect Trim, Floors, and Fixtures
Start by covering trim, floors, and fixtures so paint doesn’t ruin your finishes or create extra cleanup.
You’ll use masking techniques for trim protection and floor coverings, plus fixture safeguarding.
Apply painter’s tape with careful tape application and edge sealing for crisp lines.
Use:
- Low-tack tape for delicate trim
- Drop cloths for floors
- Plastic sheeting for fixtures
How Temperature and Humidity Affect Prep
Now that your trim, floors, and fixtures are protected, pay close attention to temperature and humidity because they directly affect how fillers, primers, and paints behave during prep and drying.
Monitor humidity levels and temperature fluctuations to avoid tacky or cracked finishes.
Consider seasonal changes and weather impacts; aim for ideal conditions for surface preparation.
Watch environmental factors and broader climate considerations to time work.
Prep Rental Walls Without Causing Damage
When you’re prepping rental walls, patch holes carefully to avoid over-sanding or using permanent repairs the landlord won’t accept.
Start by protecting floors, trim, and outlets with drop cloths and painter’s tape so dust and compound don’t cause damage.
Work with removable, landlord-approved materials and take photos before and after to document the condition.
Patch Holes Carefully
Patch holes carefully so you don’t create more work—or risk your deposit.
Use appropriate patch types and filler options: small nail holes take lightweight filler; medium dents need spackling; larger holes require a patch kit.
Sand smooth, dust thoroughly, and apply primer before painting.
Check texture match and avoid overbuilding, so repairs stay low-profile and removable when you move out.
Protect Surfaces First
Before you start sanding or priming repaired spots, protect everything you don’t want ruined—floors, baseboards, trim, and nearby furniture.
Use surface protection methods like drop cloths, plastic sheeting, and painter’s tape to shield areas. Lay heavy-duty cloths, tape edges carefully, and cover vents.
Keep essential painter supplies—gloves, respirator, utility knife—close to avoid tracking dust or paint around.
Prep Exterior Walls for Repainting (Key Steps)
Start by clearing and inspecting the exterior surface so you can spot problem areas and plan the work; remove loose paint, dirt, and mildew with a stiff brush or pressure washer, then let the wall dry completely before proceeding.
For exterior wall preparation and repainting techniques, you should:
- Repair cracks and holes
- Sand rough spots
- Prime bare or patched areas
Finish with proper paint selection and neat application.
Prevent Future Wall Imperfections
Once you’ve repaired and primed the surface, take steps to prevent the same problems from coming back: use high-quality, weather-resistant paints, maintain proper drainage and flashing around windows and doors, seal gaps with flexible caulk, and keep nearby vegetation trimmed to reduce trapped moisture.
| Inspect | Clean | Seal |
|---|---|---|
| Texture techniques | Paint | Caulk |
| Gutters | Trim | Monitor |
You’ll schedule regular wall maintenance and spot-treat issues early.
Troubleshoot Common Prep Mistakes
You’ll want to spot and fix uneven sanding patches before they show through the paint.
Don’t ignore dust, grease, or other contaminants — they’ll prevent primer and paint from adhering properly.
Addressing these issues now saves you from rework later.
Uneven Sanding Areas
If some spots look glossy or feel rough after sanding, you’ve likely missed an area or used uneven pressure; that unevenness will show through paint, so it’s important to identify and correct it before priming.
Check for uneven textures and adjust your sanding techniques. Focus repairs on low spots, feather edges, and blend connections:
- Resand lightly
- Use consistent strokes
- Inspect with raking light
Ignored Surface Contaminants
Missed sanding spots aren’t the only things that’ll ruin a finish—surface contaminants like dust, grease, and old wallpaper adhesive can stop primer and paint from sticking properly.
You should remove surface oils, paint residues, dust buildup, adhesive remnants and grease stains before priming.
Check for moisture issues, structural flaws or previous coatings; address dirt accumulation and environmental factors to guarantee adhesion and a smooth, lasting finish.
Estimate Time and Cost for Smoothing Walls
Estimate the time and cost for smoothing walls by breaking the job into clear steps—inspection, patching, sanding, priming, and cleanup—so you can assign realistic hours and materials to each.
Use cost estimation and time analysis to list supplies, labor, and contingencies.
Prioritize tasks and hourly rates:
- Materials per room
- Labor hours per step
- Contingency buffer (10–20%)
When Hiring a Pro Is Worth It
When your walls need extensive repair, textured skim coats, or a flawless finish for resale, hiring a pro can save time and prevent costly mistakes.
Pros bring specialized tools, experience with drywall and compound application, and a trained eye for hidden issues that DIYers often miss.
You should weigh cost considerations, ask for references, verify insurance and warranties, and follow hiring tips to get reliable results.
Common Myths About Smoothing Walls, Debunked
Curious which tips you can trust? You’ll want straight myth busting for good wall preparation so you don’t waste time or materials.
Don’t assume quick fixes replace proper prep. Remember:
Don’t let quick fixes replace proper prep — follow tried steps for lasting, flawless results.
- Sanding always beats skipping if surface’s rough
- Thick primer won’t hide structural flaws
- One coat can’t cover heavy texture
Stick to proven steps, not shortcuts, for a smooth finish.
Final Quick Checklist and Next Steps
1 quick pass through this checklist will confirm your walls are ready: remove dust and debris, fill and sand any remaining imperfections, wipe surfaces with a damp cloth, apply primer where needed, and lay down drop cloths and tape for clean edges—then gather brushes, rollers, and the correct paint sheen so you can start confidently.
Then make final touches, review painting techniques, and begin painting systematically.
Frequently Asked Questions
Can I Paint Over Nicotine or Smoke-Stained Walls Without Special Treatment?
You can’t just paint over smoke stains without proper surface preparation; you’ll need to clean, degrease, and prime with a stain-blocking primer so paint adheres and stains don’t bleed through, ensuring a lasting, clean finish.
How Do I Prevent Mold Under New Primer in Humid Rooms?
You’ll absolutely banish mold overnight with proper steps: control humidity using dehumidifiers and ventilation, apply mold-resistant primer and paint, fix leaks, guarantee surfaces are dry before priming, and use mold prevention cleaners on susceptible areas.
Will Wallpaper Paste Residues Interfere With Water-Based Primers?
Yes — wallpaper paste residues can interfere with primer compatibility. You should remove old wallpaper remnants, wash and neutralize paste, let walls dry, then test a water-based primer on a small spot before full application.
Can Heated Rollers or Infrared Help Speed Skim-Coat Drying?
Yes — you can use heated rollers and infrared to speed drying; you’ll get heated roller benefits like consistent warmth and quicker surface cure, while infrared drying effectiveness penetrates moisture for faster, controlled skim-coat drying.
Are Voc-Free Primers Sufficient for Stain-Blocking in Kitchens?
Yes — you can, but they’re not magic. VOC-free primers offer decent stain resistance on kitchen surfaces, yet you’ll want specialized stain-blocking formulas for heavy grease, smoke, or tannin stains to guarantee reliable coverage and longevity.
Conclusion
You’ve got the tools and steps to get walls smooth and paint-ready, so don’t skip inspection or prep. Tackle dents, cracks, and texture with the right filler, sandpaper, and primer, working methodically like a surgeon with steady hands. If a job feels bigger than you planned, call a pro. Follow the quick checklist, take your time, and you’ll reward yourself with a flawless finish that looks sharp and lasts.