How to Match Knockdown Texture on Walls So No One Can Tell the Difference
You can make a knockdown texture repair invisible by closely matching droplet size, compound consistency, spray pressure, and knockdown timing so the patch blends with the existing pattern. Study the wall’s scale and randomness, use the same tools and a slightly soupy mix, feather edges and knock down with a broad knife at a low angle after 5–15 minutes, then prime and paint once dry. Follow the step-by-step tips below to get a flawless match.
How to Match Knockdown Texture on Walls So No One Can Tell the Difference
If you want the repair to disappear, start by studying the existing pattern—note the size of the droplets, the angle of the knockdown knife, and how dense the texture is—then replicate those details when you mix, spray, and knife down the new area.
You’ll match sheen, use identical material, test on scrapboard, feather edges, and blend until no seam shows—how to match knockdown texture on walls.
Quick Answer Can You Perfectly Match Knockdown Texture?
Short answer: sometimes.
You can often match knockdown texture exactly if you use the same material, spray settings, and feather the new work into the old.
However, if the original texture is aged, painted, or applied with different tools, you’ll usually need to repaint the whole wall or skim/texture the entire surface for a seamless result.
If you want a foolproof finish, plan on repainting or doing a partial skim rather than expecting a perfect spot repair every time.
Short direct recommendation
You can often get a near-perfect match for knockdown texture, but exact replication depends on factors like the original spray pattern, joint compound age, and your tools and technique.
Test and tweak on scrap drywall, match compound consistency, and mimic spray distance and pressure.
Use the same knockdown knife angle and timing. If unsure, hire a pro for seamless results.
When a perfect match is realistic vs when repaint/partial skim needed
Matching can be realistic in many cases, but you’ll know it’s achievable when the original texture was applied with consistent spray pressure, the joint compound hasn’t yellowed or cracked, and you can recreate the same nozzle distance and knockdown timing.
If edges, substrate damage, or color shift exist, plan a partial skim and repaint or full skim coat; otherwise match, feather, and blend cautiously.
Understanding Knockdown Texture Basics
Knockdown texture is the flattened, mottled finish you get by spraying or troweling joint compound and then dragging a knife over it.
You’ll see it called knockdown, orange peel, or skip trowel depending on the look.
You’ll usually work with thinned drywall compound, a hopper gun or roller, and a knockdown knife.
Remember that light angle and paint sheen can make the texture read heavier or subtler, so match those as carefully as the pattern.
What is knockdown texture?
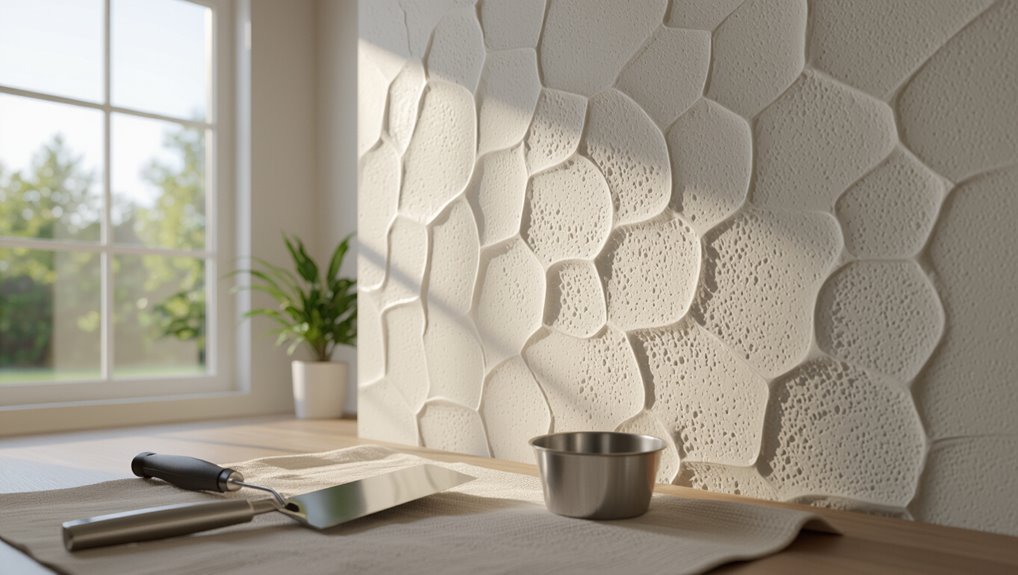
Texture created by thinning joint compound and splattering it across drywall, then flattening the high points with a wide knife, gives walls the distinctive mottled look called knockdown texture.
You’ll recognize its low-relief, irregular patterns that hide imperfections and add visual depth.
You apply compound, wait briefly for partial drying, then drag a knife to “knock down” peaks for a subtle, tactile finish.
Common names and variations (skip trowel, knockdown, orange peel)
Now that you know how the knockdown finish is made, it’s helpful to learn the names and related patterns you’ll run into—because contractors and DIY guides often use different terms for similar looks.
You’ll hear “skip” or “skip trowel” less often, but focus on regional labels like light, medium, heavy knockdown, rain, and splatter textures.
Recognize overlap so you match finish depth and scale.
Typical materials and tools used
A few basic ingredients and the right tools will get you a consistent knockdown finish without guessing.
You’ll need premixed or powdered joint compound, clean water, and a mixing bucket. Grab a hopper or texture sprayer, 18–24″ knockdown knife or wide drywall blade, sanding block, drop cloths, and protective gear.
Keep a hawk or mud pan for small touchups.
How lighting and paint affect perception
When light hits a knockdown wall at an angle, it emphasizes peaks and shadows so you’ll notice the pattern much more than under flat, even lighting.
You should test paint sheens and bulb types: matte hides texture, satin highlights it, glossy exaggerates.
Directional fixtures throw contrast; diffused light softens it.
Match lighting and sheen when blending patches so repairs stay invisible.
Diagnosing the Existing Texture Before You Start
Before you grab materials, inspect the texture’s scale, pattern, and thickness so you know what you’re matching.
Check the substrate—drywall, plaster, or patched areas can change how the mud behaves—and try a sample application on a scrap board to confirm your technique.
If the texture’s irregular, the substrate is uneven, or your sample won’t match, call a pro.
Inspecting texture scale, pattern, and thickness
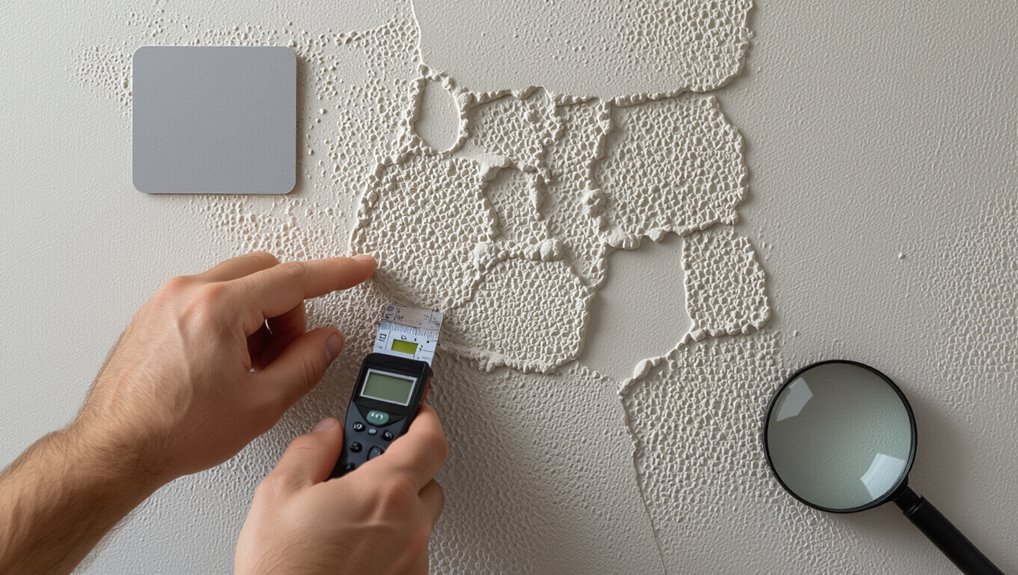
Start by closely examining the knockdown texture to identify its scale, pattern, and thickness so you know exactly what you’re matching.
Measure droplet size and spacing, note whether the pattern is random, directional, or clustered, and gauge mud thickness with a thin tool or fingertip.
Photograph and mark representative areas, then compare samples to replicate the same spray distance, knife angle, and pressure for consistency.
Identifying substrate differences (drywall, plaster, patched areas)
Surface type matters—check whether you’re dealing with drywall, plaster, or a patched spot, because each accepts compound and spray patterns differently.
Tap and feel for hollows, sanding feather edges, and look for paper tape, plaster skim coats, or raised patch seams.
Note absorption differences and hardness; they’ll change texture bond and drying.
Mark variations so you adjust spray pressure and compound consistency accordingly.
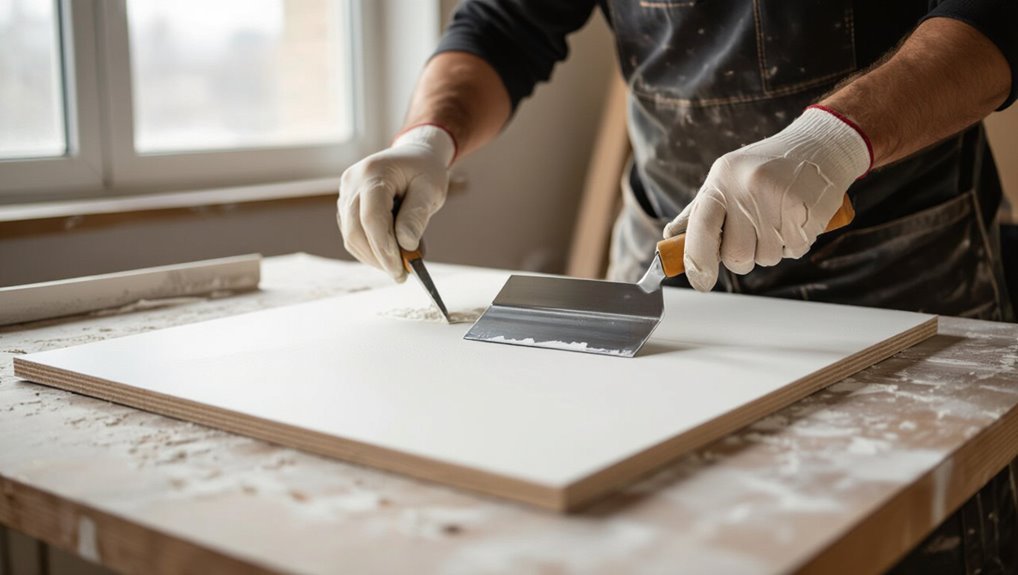
Testing sample application on scrap board
Now that you’ve identified differences in substrate and absorption, grab a scrap of drywall or plywood and recreate the texture mix and spray settings you’ll use on the wall.
Test varying nozzle distances, air pressure, and mix thickness.
Let each sample dry, knock down at the same timing you plan on-site, then compare pattern, sheen, and shadow to the original to refine adjustments.
When to call a pro
If the texture looks uneven, damaged, or you can’t reproduce its pattern after a few tests, call a pro—diagnosing existing texture correctly often requires experience reading materials, joints, and past repairs that aren’t obvious at first glance.
A pro will identify substrate issues, matching compound, and concealed seams, saving time and preventing visible repairs.
Don’t gamble on a visible mismatch.
Tools, Materials, and Prep You’ll Need
Before you match the knockdown texture, gather an essential tools checklist—trowels, hawk, knockdown knife, sanding block, and protective gear—and decide if you’ll use spray equipment or hand techniques.
Pick the right joint compound plus any thinners or additives recommended for your wall type, and have primer on hand.
Finally, prep the surface by cleaning, sanding smooth, and priming so the texture adheres and blends correctly.
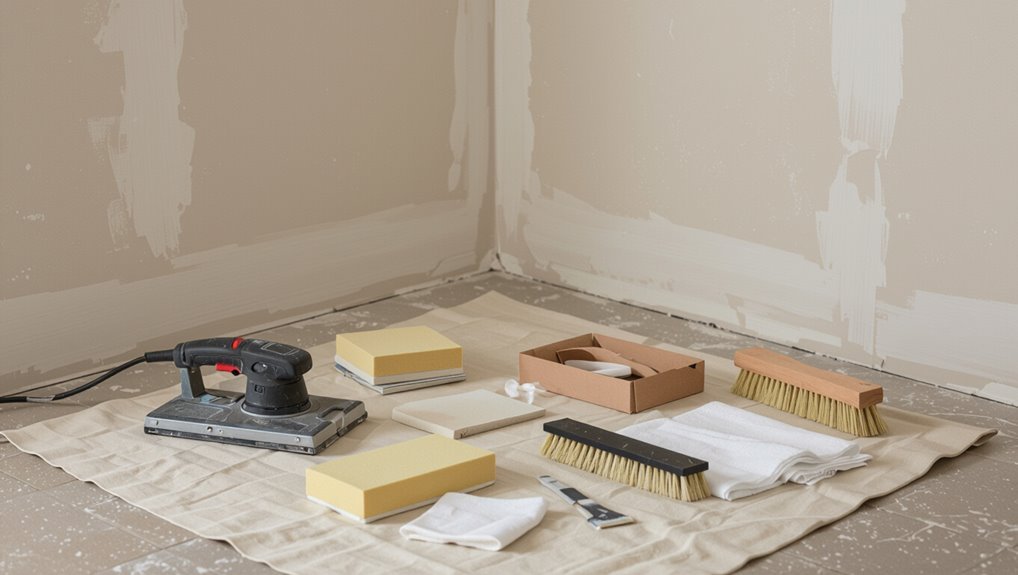
Essential tools checklist
You’ll want a concise set of reliable tools and materials before you start—taping knives, a hopper gun or texture sprayer (or a brush/roller if you’re doing it by hand), joint compound or premixed knockdown texture, sanding tools, drop cloths, masking tape, and appropriate PPE (mask, goggles, gloves).
Keep tools clean and organized; test spray patterns first.
- Taping knives (various widths)
- Texture sprayer or roller
- Sanding block and pole sander
- Drop cloths, tape, and PPE
Recommended joint compounds, thinners, and additives
When matching knockdown texture, pick a joint compound that dries to the right hardness and consistency for your method—lightweight all-purpose or setting-type (powder) compounds are common choices because they spray and knock down cleanly.
Thin with clean water to achieve billowy peaks, use a latex bonding additive for slick surfaces, and consider a retarder in hot conditions to extend working time and prevent premature skinning.
Spray equipment vs hand techniques
If you want consistent coverage and faster work on large surfaces, go with spray equipment; if you’re matching a small patch, tight corners, or want more control over texture, hand tools can do the job.
Sprayers cover quickly and mimic factory knockdown, but require masking and cleanup.
Hand techniques—knockdown knives, trowels, or brushes—let you feather edges and tweak pattern density for an invisible repair.
Surface preparation: cleaning, sanding, and priming
Before you apply texture, prep the surface so the patch blends smoothly with the surrounding wall.
Clean dust, grease, and loose paint with a damp cloth and mild detergent.
Sand edges feathering the repair to a smooth shift.
Remove sanding dust, then prime with a drywall primer or PVA to seal joint compound.
Let dry fully before texturing to guarantee adhesion and color match.
Step-by-Step Guide to Matching Knockdown Texture
You’ll start by preparing the surface and mixing the compound to the right consistency.
Then you’ll apply the texture with your spray or hopper gun, knock it down at the correct time using the proper knife angle and pressure, and feather the edges to blend with the existing wall.
Follow each step in order and adjust as needed to match the surrounding texture.
Step 1 Prepare the surface and surrounding area
Start by clearing the work area and inspecting the wall for loose paint, cracks, or nail pops that would prevent the texture from adhering properly.
You’ll patch, sand, and clean so new texture bonds and looks seamless. Protect floors and trim, remove fixtures, and mark trouble spots for focused repair.
- Patch holes and gaps
- Sand rough edges
- Wipe down dust
- Mask trim and outlets
Step 2 Mix compound to the right consistency
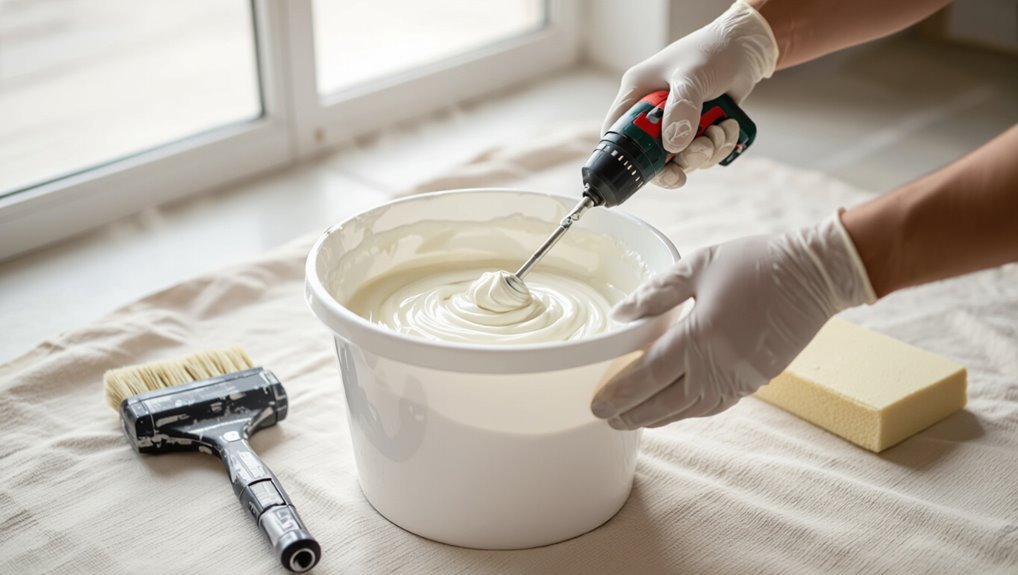
Mix the joint compound to a lump-free, slightly soupy texture so it sprays and spreads like the original knockdown finish; aim for a consistency similar to pancake batter—thin enough to flow through your hopper gun or texture sprayer but thick enough to hold peaks when troweled.
Add water gradually, mix with a drill paddle, skim off bubbles, and test small batches until flow and body match your sample.
Step 3 Apply texture using spray or hopper gun (settings and distances)
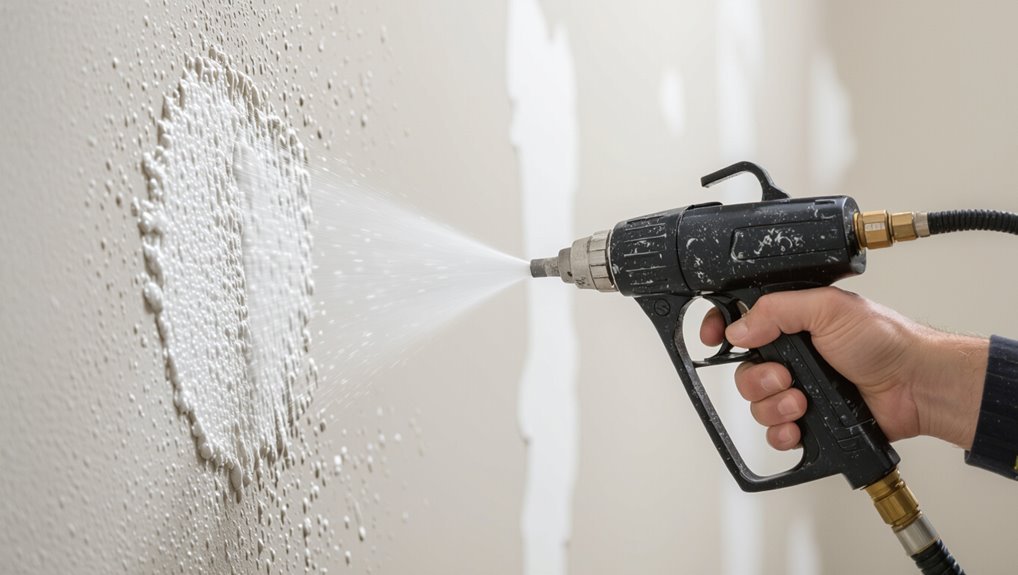
Set your spray or hopper gun to match the pattern size and spray density of the original finish—larger orifices and higher air pressure create bigger droplets and a coarser texture, while smaller settings yield a finer spray.
Hold the gun steady, keep a consistent distance, and overlap passes evenly.
Test on scrap, adjust nozzle, pressure, and material flow until spray matches before working on the wall.
Step 4 Knock down technique: timing, knife angle, and pressure
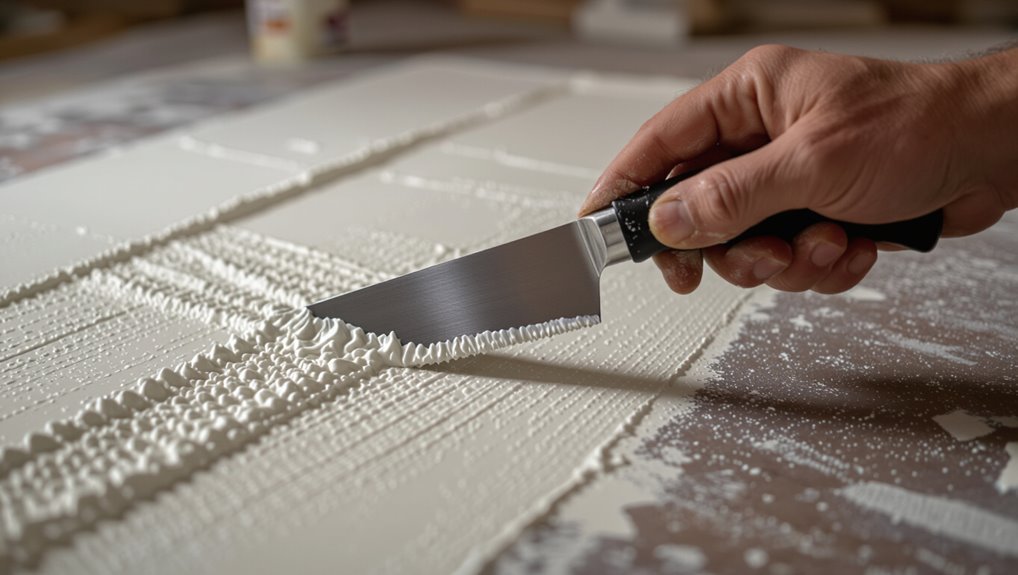
Once the sprayed droplets have partially dried but still hold some moisture — usually 5–15 minutes depending on temperature and humidity — you’ll perform the knockdown by dragging a broad drywall knife across the peaks at a low angle; keep the blade between about 10° and 30° to flatten the tips without gouging the base, use light, even pressure, and work in consistent overlapping passes so the pattern reads uniform.
You’ll glide steadily, watching moisture and adjusting speed to avoid smearing or pulling ridges, rechecking angle and pressure frequently to match nearby texture.
Step 5 Feathering and blending edges into existing texture
When the newly knocked-down area still shows a slight sheen but the blade marks have settled, you’ll feather the edges so the repair disappears into the surrounding texture; use a damp sponge or a clean, slightly flexible knife held at a very low angle to softly blend the perimeter, working from the existing texture toward the patch in short, overlapping strokes that mimic the original pattern.
Lightly lift pressure as you finish.
Step 6 Drying times and when to sand or touch up
After feathering, let the patch sit so you can judge its true appearance as it dries; moisture can hide low spots or make the sheen look off, so give the area time to approach room temperature and humidity before deciding on next steps.
Check after several hours; firm, dry texture means light sanding or gentle knifing to remove high spots.
Re-knockdown only if pattern still mismatches.
Step 7 Prime and paint to finish
Seal the repaired area with a quality primer so paint hides the patch and the texture blends smoothly.
Let it dry fully, then inspect for sheen or absorption differences. Spot-prime if needed.
Use the same paint type and finish as the wall, feathering outward with thin coats.
Apply one or two light coats, checking in different light angles until the repair disappears.
Comparison of Methods and When to Use Each
You’ll want to weigh spray application against hand-trowel knockdown based on area size and texture control, and choose quick patching when repairs are small versus whole-wall replication for large or visible sections. Below is a quick comparison to help you decide. Use the right method to save time and get a seamless match.
| Method | Best Use |
|---|---|
| Spray application | Large areas, consistent texture |
| Hand-trowel knockdown | Small areas needing precise control |
| Quick patching | Minor repairs, tight spots |
| Whole-wall replication | Extensive damage or mismatched finish |
Spray application vs hand-trowel knockdown
When deciding between spray application and hand-trowel knockdown, consider your wall size, desired texture consistency, and budget, because each method trades speed for control: spraying covers large areas quickly and yields a uniform pattern, while troweling gives you tighter control for small repairs and matched irregularities.
Use spray for full rooms; choose trowel for spot work, trim, or uneven surfaces requiring nuance.
Quick patching techniques vs whole-wall replication
If you’re fixing a single nick or a small area, quick patching saves time and blends in without redoing the whole wall; for larger damage, pattern mismatches, or a fresh finish, replicating the entire wall is the safer bet.
Use quick patches for tiny, localized flaws—match compound viscosity, spray or hand-knockdown, feather edges.
Recreate whole-wall texture when seams or sheen differences would show.
Common Mistakes and How to Avoid Them
When matching knockdown texture, you’ll avoid most problems by watching for a few common mistakes: over-smoothing, wrong compound consistency, and incorrect spray pressure or nozzle choice.
Pay close attention to edge blending and seams so they don’t show, and don’t paint until the texture has fully cured.
Follow those checks and you’ll save time and rework.
Over-smoothing or over-knocking down texture
Because you want the repair to blend, don’t over-smooth or over-knock down the texture—doing so flattens the peaks and ruins the pattern you’re matching.
Light, controlled passes with the knife preserve highlights and shadow. Work in small sections, step back often, and stop while texture still reads slightly irregular.
If you overwork it, you’ll need to reapply texture to regain dimension.
Mismatched compound consistency
After you’ve stopped working the knife too much, check the mud itself—using the wrong compound consistency is a common way repairs stand out.
If your mix’s viscosity differs from the existing texture, the droplets, spread, and knockdown behavior won’t match.
Use the same premix or replicate water ratio, test on scrap, adjust slowly, and match drying time before committing to the wall.
Incorrect spray pressure or nozzle choice
One wrong setting or the wrong tip and your repair will shout “new” instead of blending in.
Adjust spray pressure to match original texture density; test on scrap until droplets spread the same.
Use a nozzle size that replicates the original pattern—too large splatters, too small dots.
Fine-tune distance and air volume, and recheck frequently so your patch disappears.
Poor edge blending and visible seams
If your patched area has hard edges or obvious seams, the whole repair will stick out no matter how well the texture itself matches.
Feather compound beyond the visible repair, blend skim coats into surrounding wall, and knock down into the softened edge.
Use a wide knife, sand lightly between coats, and check shifts in raking light so seams disappear before priming and painting.
Painting before texture fully cures
Getting the seams right matters, but don’t let that lead you to rush the next step: painting before the texture has cured.
If you paint too soon, paint sinks into wet peaks, dulls texture, and traps moisture, causing blistering or uneven sheen.
Wait the recommended 24–72 hours, check dryness by touch, then prime and paint for a seamless, durable finish.
Pro Tips and Best Practices for an Invisible Match
To make the repair disappear, you’ll match tool marks and the randomness of the original pattern rather than trying to recreate a single perfect spot.
Pay attention to lighting and paint sheen, use practice sheets and templates to rehearse your technique, and know when a full-wall texture is simpler than endless patches.
With those habits you’ll cut touch-up time and avoid noticeable seams.
Matching tool marks and pattern randomness
When you’re aiming for an invisible match, pay as much attention to the subtle tool marks and the way randomness flows across the wall as you do to color and texture depth.
Study nearby patterns, mimic stroke length, pressure, and knockdown angle. Vary your movements to replicate irregularity, blend edges into existing texture, and step back frequently to confirm the match before the compound dries.
Adjusting for lighting and paint sheen
Once you’ve matched tool marks and pattern randomness, shift focus to how light and sheen change the wall’s look—those factors often reveal any mismatch even if texture is right.
Check finish under real lighting, front and grazing. Match paint sheen (flat, eggshell, satin) and application technique to mirror reflectivity.
Adjust lighting or touch up sheen where highlights expose differences.
Creating practice sheets and using templates
Although practice won’t fix everything, creating dedicated practice sheets and simple templates lets you dial in technique before touching the wall.
Cut drywall scraps to match wall thickness, tape them to a board, and mix texture at the target consistency.
Use cardboard or stiff paper templates to reproduce knockdown spread and tool angles.
Test spray distance and knockdown timing until patterns match.
When to do full-wall texturing instead of patches
Decide to texture the whole wall if the repair area is large, sits in a high-visibility spot, or you’re struggling to match sheen, color, or pattern precisely.
Small patches can draw the eye even when the texture itself looks right. You’ll get uniform appearance, simpler blending, and fewer touch-ups.
Roll or spray the entire surface, then knock down for consistent pattern and finish.
Cost, Time, and When to Hire a Professional
You can expect a DIY patch to take a few hours and cost under $50 in materials, while a full match can eat a day or two and run a few hundred dollars.
If the damage is large, spans multiple rooms, or you can’t get a consistent texture after a couple tries, it’s time to call a pro.
When you request a quote, expect them to inspect the area, outline materials and labor, and give a clear timeline and total price.
Estimated time and material cost for DIY patch vs full match
Matching knockdown texture yourself usually saves money but takes more time and practice than a full professional match, so weigh materials and labor before you start.
A small patch: 1–3 hours, $10–30 (joint compound, primer, touch-up tools).
Full-room match: 6–12 hours plus drying, $50–200 for materials.
Factor learning curve time; DIY pays off on small jobs, pros win on large or visible areas.
Signs that warrant hiring a professional
Sometimes a job calls for a pro—especially when the area is large, highly visible, or you’re short on time.
Hire one if matching requires scaffolding, textured repairs span multiple rooms, or your attempts risk damaging drywall.
Also call a pro when deadlines, resale value, or warranty concerns matter, or when you lack tools, experience, or confidence to achieve an invisible finish.
What to expect from a pro quote
When you call a pro for a knockdown texture match, expect a clear breakdown of costs, a realistic timeline, and criteria for when they recommend full replacement versus spot repair.
They’ll inspect damage, quote labor and materials, and outline prep and drying times so you can plan.
- cost per area and materials
- start-to-finish schedule
- repair vs replace justification
- warranty and cleanup
Before-and-After Care and Maintenance
Let the texture cure fully—typically 24–72 hours—before you touch or paint it so you don’t dent or smudge the pattern.
Keep traffic and furniture away during that time, and clean gently with a soft brush or vacuum to avoid damage.
If a chip happens later, feather the edges, match the compound and spray pattern, and blend so the repair disappears.
Curing times and avoiding damage
Because knockdown compound needs time to set and harden, you’ll want to plan weeks of gentle care before treating the wall like normal.
Keep humidity moderate and temperatures stable to guarantee even curing. Don’t bump, lean ladders, or place heavy items against fresh texture.
Wait at least 7–14 days before light cleaning; full hardness can take longer—avoid scrubbing or drilling until fully cured.
How to repair future chips without detection
If you want future chips to disappear, keep a small repair kit handy and act quickly: dab on matching joint compound, texture it to blend with the surrounding pattern, and feather the edges before it fully sets so the patch becomes invisible once painted.
Clean area, remove loose debris, and use a pointed knife to recreate knockdown peaks. After drying, sand lightly, prime, and touch up with matched paint.
Frequently Asked Questions (FAQ)
You probably have practical questions like how long knockdown texture needs to dry before painting and whether leftover compound from the original job will match.
You’ll also want to know if repainting the whole wall or treating textured ceilings differently helps hide mismatches, and what safety steps to take when spraying texture.
Below are clear answers to those common concerns.
How long does knockdown texture take to dry before painting?
How long will knockdown texture need to dry before you can paint?
Typically it takes 24 to 48 hours to dry sufficiently for priming, but drying can extend to 72 hours in high humidity or poor ventilation.
Verify the surface is completely dry and firm to the touch; if any tackiness remains, wait longer.
Proper drying prevents peeling and guarantees even paint coverage.
Can I match texture with leftover compound from original job?
Wondering whether leftover joint compound will work for matching your knockdown texture? Yes—if it’s the same type (all-purpose vs. lightweight) and hasn’t dried out or been contaminated.
Rehydrate and mix to original consistency, test on scrap, and compare knockdown pattern and sheen. If color or additives differ, the repair may reveal itself; match product and technique for best invisibility.
Will repainting the whole wall help hide mismatched texture?
Curious whether a fresh coat will mask a mismatched knockdown texture?
Repainting alone won’t hide differences in peak height, blade pattern, or shadowing. Paint can unify color and sheen, but texture mismatches stay visible under angled light.
If you want seamless results, fix the texture first — skim, reapply matching knockdown, or feather shifts — then repaint for an invisible finish.
How do I match texture on textured ceilings vs walls?
If you’ve repaired wall texture and are repainting, don’t assume ceilings will behave the same—matching knockdown on ceilings has different challenges than on walls.
Ceilings sit flat, lighting reveals shadows differently, and gravity affects spray and knockdown timing.
Use lighter texture, adjust mix and nozzle, practice overhead on scrap, and feather connections so the repair blends with existing ceiling pattern.
What safety precautions should I take when spraying texture?
Because texture spray creates airborne particles and uses pressurized equipment, you should protect your lungs, eyes, skin, and work area before you start.
Wear an N95 or respirator, safety goggles, and gloves. Cover floors, furniture, and vents with plastic. Guarantee ventilation or use an exhaust fan.
Keep bystanders and pets away, follow tool instructions, and test spray pressure on scrap before working on the wall.