How to Match Orange Peel Wall Texture Like a Professional
You can match orange peel like a pro by evaluating the texture size, then using a gravity-feed or hopper spray gun with the correct tip, pressure and a heavy-cream consistency mix. Prep the patch—clean, sand, mask—and practice on scrap to dial in distance and overlap (12–18 inches, 50% overlap). Feather edges with light misting, sand highs, prime, and paint to blend. Follow the step-by-step tips below to get flawless, invisible repairs.
How to Match Orange Peel Wall Texture Like a Professional (Quick Answer + Hook)
If you need a quick professional fix, spray on a premixed orange peel texture with a touch-up gun, feather the edges, and match paint sheen for the cleanest result.
When an exact match matters—like in high-visibility rooms or sale prep—blend new texture into surrounding areas and test small sections first.
For less critical spots, a localized spray and careful sanding often gives acceptable outcomes without retexturing the whole wall.
Quick Answer The simplest professional approach in 3 sentences
When matching orange peel texture like a pro, start by spraying a small, hidden test patch with a hopper gun set to medium pressure and a fine to medium nozzle so you can dial in droplet size and coverage.
Match material and viscosity, then replicate distance and stroke. Feather edges, let it fully dry, and compare under typical lighting to confirm how to match wall texture orange peel.
When exact match matters common scenarios and outcomes
Matching orange peel texture exactly matters most in visible, high-traffic, or high-value areas—think living rooms, entryways, kitchens, and exterior walls—because even slight differences catch the eye and can lower resale value or throw off a designer’s vision.
You’ll want precise blends when repairing damage, matching fresh paint, or staging for sale; mismatches look amateur, so sample, tweak spray pressure, and test on scrap before committing.
Understanding Orange Peel Texture: What It Is and Why It Matters
Orange peel is a sprayed drywall finish that leaves a subtle, bumpy pattern on your walls instead of a flat surface.
When you repair or repaint, matching that texture matters because any mismatch will show as an obvious patch even after paint.
Textures come in fine, medium, and coarse varieties, so you’ll need to identify which one you have before you try to replicate it.
What is orange peel texture?
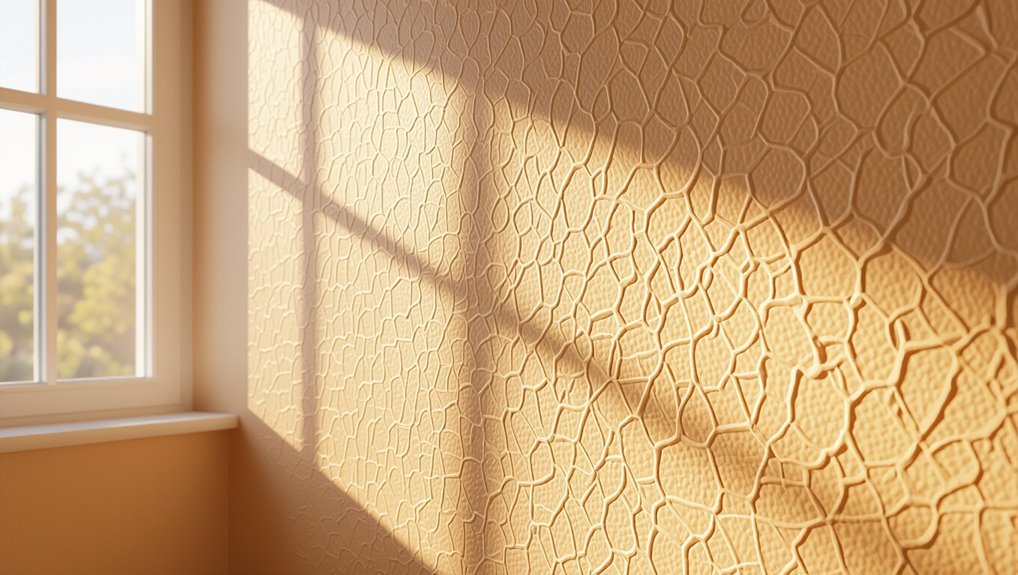
Think of orange peel texture as a subtle, dimpled finish on walls and ceilings that looks like the skin of a citrus fruit.
You get a light, random pattern created by spraying thinned joint compound or texture mix. It hides minor imperfections, adds visual interest, and varies by spray tip, pressure, and distance.
You’ll match it by evaluating scale and density.
Why matching texture is important for repairs and painting
Because a repaired or repainted patch that doesn’t blend with the surrounding finish will jump out, you’ll want to replicate the existing orange peel texture exactly so repairs look seamless and the paint lays and wears consistently.
Matching texture preserves visual continuity, hides imperfections, and guarantees touch-up paint reflects light like the original surface, preventing obvious spots and uneven aging.
Variations in orange peel texture (fine, medium, coarse)
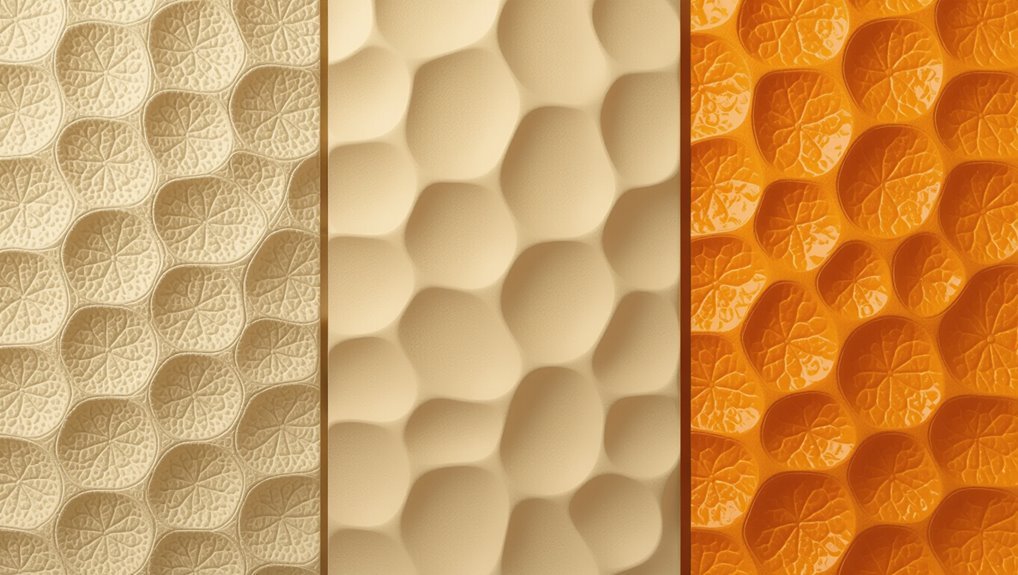
You’ll find orange peel comes in three main grades—fine, medium, and coarse—each defined by the size and frequency of the tiny peaks and valleys on the surface.
You’ll match by eye and touch: fine feels almost smooth, medium shows noticeable texture, and coarse has pronounced dimples.
Adjust spray tip, pressure, and thinners to recreate the correct droplet size and pattern.
Tools, Materials, and Surface Prep Essentials
Before you start matching an orange peel texture, gather the right tools—spray guns, compressors or texture sprayers—and the correct materials like texture compounds, primers, and compatible paints.
Wear proper safety gear and set up a well-ventilated, protected workspace while inspecting the surface for cracks, dents, or different substrates that need special prep.
That checklist will keep your repairs consistent and help you choose the right equipment and products for the job.
Tools professionals use (spray guns, compressors, texture sprayers)
A gravity-feed spray gun, paired with a compressor and a dedicated texture sprayer, gives pros the control and consistency you need to recreate orange peel across a wall.
- HVLP gravity-feed spray gun for fine atomization
- Portable oil-free compressor with stable PSI
- Texture hopper gun for heavier mixes
- Adjustable nozzle kits for pattern tuning
- Respirator and trigger control for steady application
Materials and products (texture compounds, primers, paint types)
Start with the right base products so your orange peel comes out consistent and durable: choose a premixed or powder texture compound formulated for spray application, a high-build primer that seals and levels the substrate, and a paint designed for the finish and wear you want (flat or eggshell hides better than gloss).
You’ll also pick compatible additives and cleanup products.
- Premixed or powder texture compound
- High-build primer
- Paint (flat/eggshell)
- Retarder/thinning additive
- Solvent for equipment cleanup
Safety gear and workspace setup
One clear rule: wear proper PPE and prepare your workspace so you can spray safely and keep the texture consistent.
Put on a respirator, goggles, gloves, and disposable coveralls. Seal or remove furniture, mask trim and vents, and use plastic sheeting with painter’s tape.
Confirm ventilation and stable lighting. Keep tools, extension cords, and drop cloths organized to prevent trips and contamination.
Surface inspection checklist (damage types, substrate differences)
Before you begin mixing compounds or loading your sprayer, inspect the wall carefully so you know what you’re repairing and what materials you’ll need.
Check for cracks, holes, water stains, delamination, and texture mismatches. Note substrate: drywall, plaster, or masonry. Choose appropriate primer and compound.
- Hairline cracks
- Popped nails/screw holes
- Water damage
- Plaster breakdown
- Masonry imperfections
Step-by-Step Process to Match Orange Peel Texture
First, you’ll assess the existing orange peel with visual and tactile tests. Then pick a matching texture product and the correct nozzle/settings.
Next, you’ll prepare the area by cleaning, sanding, and masking. Mix and thin your compound or paint for spraying, and practice on a scrap board while recording the successful settings.
These steps set you up to replicate the texture consistently.
Step 1 Assess and measure existing texture (visual and tactile tests)
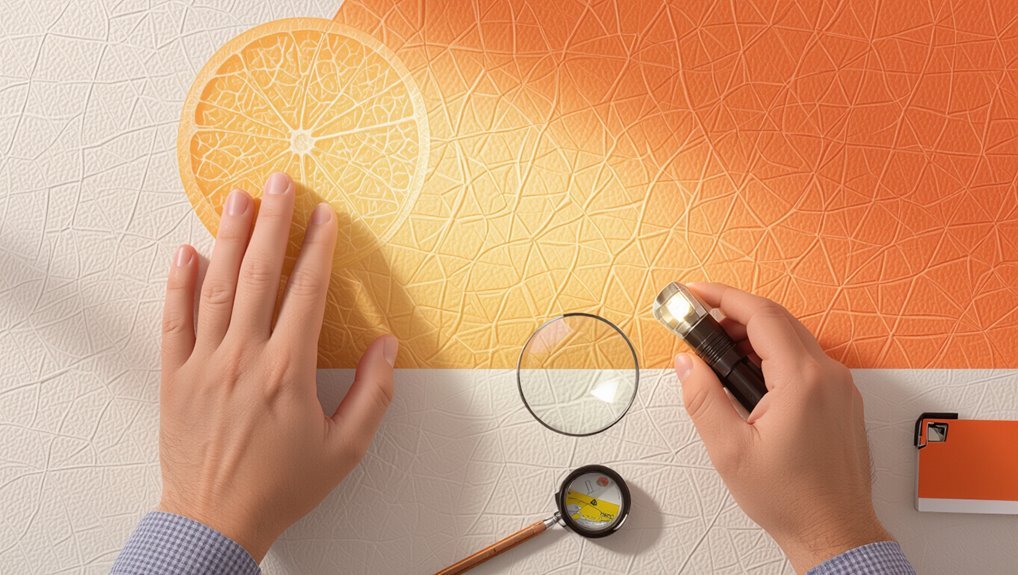
Anyone tackling orange peel texture should start by closely inspecting and feeling the surface—look from different angles under good light and run your hand over the wall to gauge bump size and density.
Measure patch area, note uniformity, and photograph sections for reference.
Use a ruler or caliper to estimate average droplet diameter and spacing, and record findings before planning matching steps.
Step 2 Select matching texture product and nozzle/spray settings
Choose the right spray texture and nozzle carefully, because matching orange peel comes down to product viscosity, droplet size, and spray pattern. Test contractor-grade aerosol or hopper gun textures on cardboard, adjust nozzle size for fine-to-medium droplets, and thin or thicken product to match. Start conservative; build texture in light passes until it visually and tactically aligns with the existing wall.
| Product Type | Typical Nozzle |
|---|---|
| Aerosol | Fine/Medium |
| Hopper gun | 4–6 mm Tip |
| Trowel mix | Not applicable |
Step 3 Prepare the repair area (cleaning, sanding, masking)
Before you spray, prepare the patch so the texture will adhere and blend: clean the area of dust, grease, and loose paint; sand the perimeter smooth; and mask surrounding surfaces to protect them.
Remove debris with a damp cloth, degrease stubborn spots, feather-sand to feather edges, and vacuum.
Apply painter’s tape and drop cloths tightly so overspray won’t hit trim, fixtures, or floors.
Step 4 Mix and thin compound or paint for spraying
Now that the patch is clean, sanded, and masked, you’ll mix and thin the texture material so it sprays and matches the existing orange peel.
Use manufacturer guidelines, then add small amounts of water or thinner until consistency resembles heavy cream. Stir thoroughly to remove lumps.
Strain before loading the sprayer. Test viscosity with a dab on a scrap rag, adjusting in tiny increments.
Step 5 Practice on scrap board and record settings
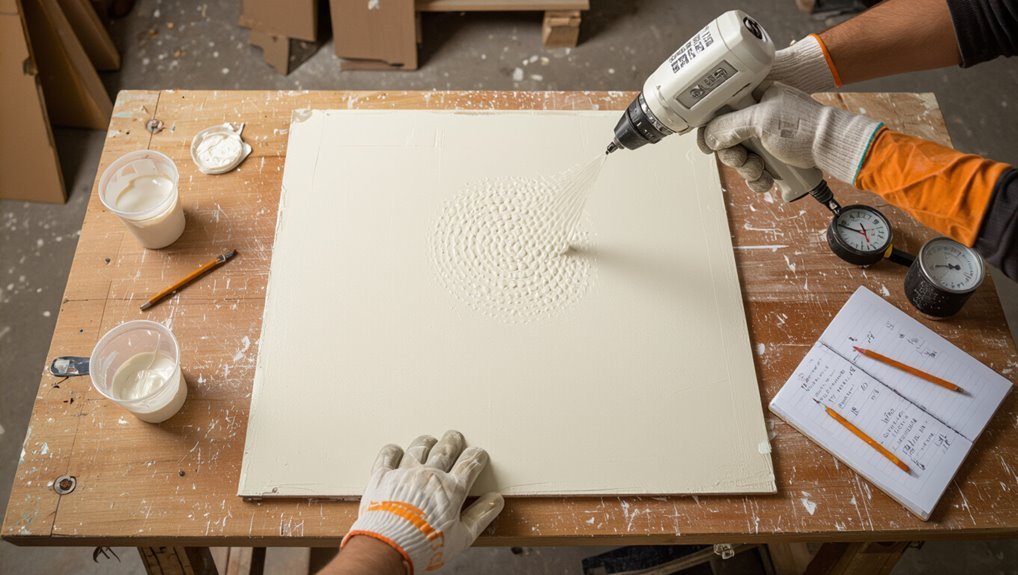
Grab a scrap board and set up your sprayer exactly as you’ll for the wall so you can dial in the right texture without risking the patch.
Spray several passes at varying pressure, nozzle size, and distance. Inspect patterns, note settings that match closest, and photograph results.
Record precise pressure, tip, distance, and mix ratios so you can replicate the match on the actual wall.
Step 6 Spray application technique for seamless blending
Once you’ve confirmed your sprayer settings on the scrap board, position yourself so the gun is level with the patch.
Keep a consistent 12–18-inch distance (adjusted to what matched in your test), and apply even, overlapping passes—about 50% overlap—moving the gun at a steady speed to blend the new texture seamlessly into the surrounding wall.
Maintain consistent pressure, spray in short bursts, and avoid heavy buildup.
Step 7 Feathering and blending edges to hide patch lines
Because your sprayed texture will sit slightly higher or denser at the edges, feather the fresh material into the surrounding wall by lightly misting the perimeter and then making quick, fading passes that reduce spray density toward the old surface; keep the gun moving, shorten your bursts as you approach the edge, and let the pattern break up naturally so the patch lines disappear.
Then step back, inspect junctions, and repeat subtle passes to blend tones and texture.
Step 8 Drying, sanding light imperfections, and repeat coatings if needed
Let the new texture dry fully—typically 24 hours for water-based products, longer in cool or humid conditions—before you touch it; feel for firmness and make sure the surface isn’t tacky.
Lightly sand high spots with fine-grit paper, dust thoroughly, and inspect under good light.
If texture looks thin or uneven, apply another thin coat, match spray pattern, and repeat drying and inspection until satisfied.
Step 9 Prime and finish coat to match sheen and color
After you’re satisfied with the texture and it’s fully sanded and dust-free, it’s time to prime and apply the finish coat to match the existing sheen and color.
Choose a stain-blocking primer, apply evenly, and let it dry.
Test sheen with a small paint patch. Match color with the original or tint at the store, then roll or spray the finish coat for consistent texture and sheen.
Quick DIY Alternatives When You Don’t Have Professional Equipment
If you don’t have a hopper gun, texture brushes, stompers, and aerosol textures can often mimic orange peel for small patches.
You can also combine rolled-on products with light spray mists to blend repairs, but expect subtle differences in finish and feathering challenges.
Know that these DIY methods have limits—they’ll work for minor fixes but may not perfectly match factory-applied texture.
Texture brushes, stompers, and aerosols when they work
When you don’t have a hopper gun or sprayer, texture brushes, stompers, and aerosol cans can still give you a convincing orange peel finish—each tool works best in specific situations, so pick one based on wall size, surface irregularities, and how close you need the match.
Use a stiff brush for light, controlled stipple on small patches; stompers for denser texture on larger areas; aerosols for tight spots and quick blending.
Using rolled-on and sprayed hybrids for small repairs
Because you may not own a hopper gun, combining a rolled-on skim coat with a light spray mist gives you a fast, reliable way to mimic orange peel on small repairs.
You’ll smooth, feather, then mist to match texture. Use these steps:
- Thin joint compound slightly
- Roll thin coat with nap roller
- Feather edges with knife
- Lightly mist with spray bottle or aerosol
- Let cure, then touch up
Limitations and expected visual differences
Although you can get a convincing orange peel finish without a hopper gun, expect some limitations and visible differences compared with professional spraying.
You’ll see less uniform droplet size, occasional flat spots, and slightly more texture buildup near edges.
Match color and sheen carefully, feather repair edges, and accept that DIY methods rarely achieve the seamless, ultra-consistent look of commercial equipment.
Troubleshooting Common Problems and How to Fix Them
If your texture comes out too heavy or too fine, you’ll need targeted fixes like sanding and re-spraying with adjusted mix or nozzle settings.
When seams or lap marks show, feather the edges, blend with a brush or roller, and reapply texture in small overlapping passes.
For drips, paint mismatch, or changes after priming/topcoat, scrape or sand the problem areas, retexture as needed, and spot-prime before recoating to match the surrounding finish.
Problem: Texture too heavy or too fine corrective steps
When your orange peel turns out too heavy or too fine, you can correct it without redoing the whole wall by adjusting application technique, pressure, and material consistency.
For heavy texture, lightly sand high peaks, thin the compound slightly, and reduce spray pressure or increase nozzle distance.
For too-fine texture, thicken mix, raise pressure, or move closer and add a second light pass to build desired orange-peel profile.
Problem: Visible seams or lap marks blending fixes
After smoothing out texture weight issues, you’ll often notice seams or lap marks where spray passes overlap or mud edges meet. These flaws stand out once the surface is dry and lit from certain angles.
Feather the edges by lightly scuffing with fine sandpaper, re-spray or skim a thin mist coat, blend overlap zones, and check under raking light until changes disappear.
Problem: Drips, runs, or orange peel mismatch after paint solutions
Although you took care with spray pressure and technique, drips, runs, or a mismatched orange peel can still show up once paint dries; don’t panic—these issues are fixable.
Lightly sand high spots or runs with fine-grit paper, feather edges, wipe dust, then retexture with a matching spray or brush-splatter technique.
Prime repaired areas if needed, then blend with thin, even coats until texture and sheen match.
Problem: Texture changes after priming or topcoat mitigation
If you fixed drips and matched the orange peel but then notice the texture looks different once you prime or topcoat, don’t assume the base coat failed — priming and topcoats can alter texture by filling or accentuating surface peaks.
Test your chosen primer and topcoat on a scrap, adjust viscosity or use a thinned skim coat, then retexture lightly and recoat for consistent finish.
Common Mistakes Professionals and DIYers Make
Don’t grab the wrong compressor or nozzle and expect a matching texture — equipment choice matters.
If you over-thin or under-thin the compound, skip practice sprays, or neglect surface prep and masking, the finish won’t blend.
I’ll walk you through how to avoid each of these common mistakes.
Wrong compressor or nozzle choice
When you pick the wrong compressor or nozzle, you’ll struggle to get a true orange peel — pressure and spray pattern are everything.
Use a compressor that maintains steady PSI and a nozzle size matched to your hopper or gun. Too small clogs; too large splatters.
Test on scrap, adjust air volume and tip diameter, and lock settings before you spray the wall.
Over-thinning or under-thinning compound
Although thinning the compound can make spraying smoother, getting the ratio wrong ruins the orange peel finish: over-thinned mix runs, creates thin, glossy spots, and weakens adhesion, while under-thinned compound clogs the gun, spits irregular droplets, and produces a coarse, uneven texture.
Check manufacturer viscosity specs, measure water precisely, and adjust in small increments until the spray pattern matches the original texture.
Skipping practice sprays and tests
After you’ve dialed in the compound viscosity, resist the urge to spray the actual wall without testing first.
You should practice on scrap drywall or cardboard to confirm pattern, distance, and pressure. Small adjustments on a test piece save time and prevent costly rework.
Record settings that match the texture so you can replicate them confidently across the room.
Poor surface prep and masking errors
Skimping on surface prep and masking will undo all your careful spray settings, so take the time to clean, patch, and tape off properly before you mix a single batch.
You should sand glossy spots, fill cracks, and remove dust so texture adheres evenly.
Mask trim, outlets, and floors tightly to prevent overspray and uneven edges — sloppy prep ruins the finish.
Best Practices and Pro Tips for a Professional Finish
Keep a clear record of spray settings, nozzle size, and mix ratios so you can reproduce the texture later.
Match paint color and sheen as carefully as you match the orange peel pattern, and know when the job calls for a pro versus a DIY approach.
Finally, follow simple maintenance tips—clean gently, touch up promptly—to keep the texture consistent over time.
How to document settings for future matches
When you’re matching an orange peel texture, record every variable—spray gun model and tip size, compressor PSI, material brand and thinning ratio, nozzle distance, application technique, and ambient temperature and humidity—so you’ll reproduce the result exactly next time.
- Date and project location
- Exact product names and batch numbers
- PSI, tip size, and fan setting
- Thinner ratio and pot life
- Photos of wet and cured texture
Matching color and sheen along with texture
Although you’ve nailed the orange peel texture, achieving a seamless repair also means matching color and sheen precisely.
Since even a perfect texture will stand out if the paint tone or gloss differs, test small swatches, view them in varied light, and blend edges with feathered brushes or spray.
Use the original paint formula, adjust tint sparingly, and match sheen—flat, eggshell, satin—exactly.
When to call a pro vs. when to DIY
If you’ve got a small patch—nail hole or paint-scuffed area—you can usually handle the orange peel repair yourself with the right tools; call a pro when the damage is extensive, structural, or you’re aiming for an invisible, whole-wall match.
DIY when scope is limited, you’re comfortable sanding, feathering, and matching spray patterns.
Hire a pro for large areas, uneven substrates, or color/match uncertainty.
Maintenance tips to keep texture consistent over time
Keep a consistent orange peel texture by establishing simple habits: clean gently with a microfiber cloth and mild detergent, touch up scuffs promptly using the same spray pattern and paint batch when possible, and document product brands and settings (compressor PSI, nozzle size, spray distance) so you can replicate them later.
Inspect annually for chips, sand feathered edges, re-spray small areas matching technique, and store leftover mixed paint labeled with date.
Comparison: Professional Sprayer Setups vs. DIY Methods
When you’re choosing between a pro sprayer setup and a DIY method, think about how performance, cost, and final outcome stack up.
Professionals will usually give faster, more consistent coverage but you’ll pay for equipment and expertise, while DIY approaches save money upfront but require more time and practice to get right.
Also weigh the time investment and learning curve—are you ready to spend hours experimenting, or do you need a reliable result now?
Performance, cost, and outcome comparison
Equipment choice shapes the trade-offs you’ll face: professional sprayer setups deliver faster application, more consistent texture, and better atomization for close-to-factory orange peel results, but they cost more upfront, require setup and cleanup time, and demand practice to avoid runs or overspray; DIY methods—ranging from handheld HVLP guns and aerosol texture sprays to hopper guns and brush-rolled knockdown—are cheaper and simpler to start with, yet they take longer to cover large areas and often yield less uniform texture and more visible seams.
| Option | Cost | Outcome |
|---|---|---|
| Pro sprayer | High | Consistent, smooth |
| HVLP/aerosol | Low | Variable, patchy |
| Hopper gun | Medium | Acceptable, uneven |
| Brush/roll | Lowest | Noticeable seams |
Time investment and learning curve
Learning the ropes matters: professional sprayer setups demand a bigger upfront time commitment to master—you’ll spend hours on setup, tuning pressure and tip sizes, practice passes to calibrate texture, and thorough cleanup—while DIY methods let you start faster but still require repeat attempts to get an even finish.
Expect steeper initial learning with pro gear, but fewer trips and corrections; DIY costs more time overall.
Cost Estimates and Timeframe for Typical Repairs
For a small patch you’ll usually pay less and finish in a few hours, while matching texture for a single room or the whole house raises costs and can take a day to several days.
You’ll want estimates that break out materials, labor (or rental) and any sanding or repainting.
Knowing the typical prep-to-finish timeline helps you plan around drying times and touch-up work.
Small patch vs. room vs. whole-house estimates
A small patch of orange peel texture can often be fixed in an hour or two and costs far less than retexturing an entire room, but if you’re covering multiple walls or a whole house the labor and material scale up quickly and you’ll want a contractor’s estimate. Compare scopes:
| Scope | Time | Est. Cost |
|---|---|---|
| Patch | 1–2 hrs | $20–$75 |
| Room | half day | $150–$600 |
| Whole house | days | $1k–$5k |
Typical timeline from prep to finish
Once you decide to repair orange peel texture, the typical timeline runs from quick prep to final touch-up in a few hours for small patches and up to several days for whole-room or whole-house jobs.
You’ll prep surfaces, apply compound, match texture, sand and prime, then paint.
Small fixes: 2–6 hours.
Room: 1–3 days.
Whole house: several days to a week.
FAQ Matching Orange Peel Texture (3 5 Common Questions)
Got questions about matching orange peel texture?
You’ll learn how to identify fine, medium, or coarse patterns, when a spray can will do the job, and how sanding affects the look without overdoing it.
I’ll also cover switching paint brands/finishes and the right wait time between texturing and painting.
How can I tell if my orange peel texture is fine, medium, or coarse?
Wondering which grade your orange peel texture is?
Compare by eye and touch: fine looks like subtle sandpaper, medium shows visible dimples about 1/16–1/8 inch, coarse has larger, pronounced bumps over 1/8 inch.
Hold a flashlight at a low angle to reveal shadows.
Take a macro photo or press your fingertip—fine feels smooth, coarse feels noticeably bumpy.
Can I match texture with just a can of spray texture?
Can you match orange peel with just a spray can? Yes, for small patches you can get close using a matching spray texture and practice on scrap drywall first.
Hold the can at the right distance, use short bursts, and adjust pressure to mimic the existing pattern.
Bigger repairs or textured blends usually need professional tools or skim coating for seamless results.
Will sanding change the look of orange peel and how much is safe?
If you try matching orange peel with spray texture, you’ll often find sanding becomes part of finishing—but it will change the look.
Light sanding smooths peaks, softens contrast, and can make texture appear flatter. Use fine-grit (220–320) sparingly, testing on scraps.
Avoid aggressive sanding; removing more than surface nibs destroys the orange-peel pattern and forces reapplication to restore depth and uniformity.
How do I match texture when switching paint brands or finishes?
How closely do you need the new paint to match the old finish? When switching brands or sheen, test a small area first.
Use the same application tool and spray pressure or roller nap to recreate texture. Match viscosity with thinning recommendations, and adjust spray tip or roller type if needed.
Feather edges and blend wet-to-wet to avoid visible changes.
How long should I wait between texture application and painting?
Soon after the orange peel texture dries to the touch—usually within 1 to 2 hours in average conditions—you can start painting, but you should wait 24 hours for full cure in most cases to avoid sink-in or adhesion issues.
Follow these quick tips before painting:
- Check for dry, non-tacky surface.
- Confirm consistent temperature/humidity.
- Lightly sand high peaks.
- Prime repaired spots.
- Test paint on a small area.