
How to Paint a Beach Scene on a Wall: Easy Techniques for Stunning Results
You can easily paint a beach scene on a wall with basic supplies and simple steps. Prep the surface, choose acrylic or latex paint, and sketch your design using a grid, projector, or freehand. Block in sky, ocean, and sand, then add gradients, waves, and foreground details like footprints or grasses. Use flat, filbert, and round brushes plus sponges for texture, layer highlights, and seal with a clear coat — keep going to learn tools, techniques, and tips.
Quick Answer Can You Paint a Beach Scene on a Wall Easily?
Yes — you can paint a beach scene on a wall with basic painting skills by sketching a simple layout, blocking in large color areas, and adding details like waves and sand.
Expect a few hours for a small mural or a day or two for larger, more detailed work, and you’ll need acrylic or latex paints, assorted brushes, rollers, painter’s tape, and drop cloths.
It’s an approachable project for beginners willing to practice patience and follow step-by-step guidance.
Short summary of the process and expected results
You can paint a beach scene on a wall with basic tools, some planning, and a little practice: sketch a simple composition, block in large color areas, add mid- and fine-details like waves, sand texture, and focal elements, then seal the work with a clear coat.
You’ll learn how to paint a beach scene on a wall efficiently, producing a cohesive, vibrant mural that complements your space.
Ideal time, skill level, and materials estimate
A few hours to a couple of weekend days is a realistic timeframe for a simple beach mural—longer if you’re adding complex details—so plan around drying times and breaks.
You don’t need pro skills; basic brushwork and blending are enough.
Expect to spend on mid‑grade acrylics, primers, rollers, brushes, painter’s tape, a projector or chalk for layout, plus drop cloths and sealant.
What You Need to Know Before You Start
Before you begin, you’ll want to understand why mural-style beach scenes work well on walls and how different wall types affect your approach.
Check surface prep needs, compare paint types and finishes, and pick the right brushes and tools.
Also plan for safety—ensure ventilation and use protective gear while you work.
Why mural-style beach scenes work well on walls
Because mural-style beach scenes blend broad color fields, simple shapes, and strong horizon lines, they read clearly from a distance and stay visually calming up close.
This means you’ll get impact without overwhelming the room. You can scale elements to fit varied spaces, emphasize mood with limited palettes, and mask imperfections.
They invite relaxation, complement furniture, and suit both bold and subtle decor choices.
Types of walls and surface preparation basics
Start by checking what kind of wall you’ll be painting—drywall, plaster, brick, concrete, or wood—since each needs different prep to hold paint and look good long-term.
Inspect for cracks, damp, peeling, or mold. Clean, sand, and patch defects.
Prime porous or repaired areas. Verify surfaces are dry and dust-free before sketching or taping; proper prep prevents adhesion and premature failure.
Paint types, finishes, and tools comparison
One clear decision you’ll make is what paint and finish suit your beach mural—acrylics, latex, or specialty mural paints each behave differently on drywall, plaster, brick, concrete, or wood, so pick the type that bonds well to your prepared surface and resists moisture and UV where needed. Choose satin for washable waves, matte for soft skies, gloss for highlights.
| Paint | Finish | Best use |
|---|---|---|
| Acrylic | Satin | Durable details |
| Latex | Matte | Large background |
| Mural | Gloss | Vibrant accents |
Safety, ventilation, and protective gear
Choosing the right paint and finish matters, but you’ll also need to protect yourself and your space before you paint.
Open windows, run fans, or use a respirator for solvent fumes. Wear gloves, goggles, and old clothes or a disposable suit.
Lay drop cloths and tape edges. Keep a fire extinguisher nearby and store solvents in sealed containers away from heat.
Design and Planning
Before you pick up a brush, you’ll decide on a style—realistic, impressionistic, silhouette, or minimalist—and the mood you want with a sunset, midday, or overcast palette.
Measure the wall and make a scale sketch or grid so proportions stay correct.
Then choose your transfer method—grid, projector, or freehand—and plan the order you’ll paint.
Choosing a style: realistic, impressionistic, silhouette, or minimalist
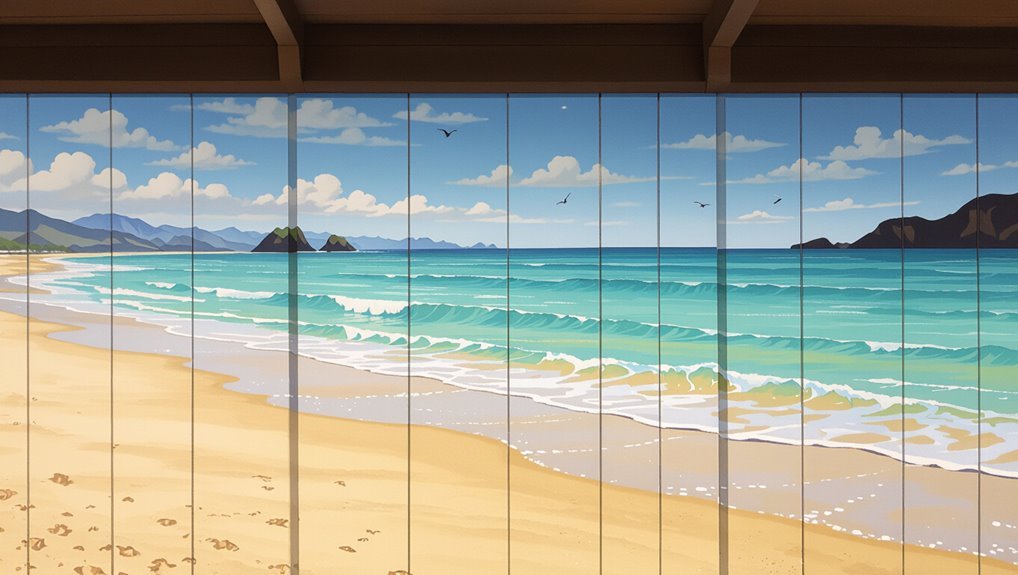
Which mood do you want your wall to set—detailed and immersive or simple and striking?
Choose realistic if you want texture, depth, and fine detail; go impressionistic for loose brushwork and movement; pick silhouette for bold shapes and strong contrast; opt minimalist to emphasize negative space and calm.
Consider room scale, viewing distance, and your skill level when deciding.
Selecting a color palette and mood (sunset, midday, overcast)
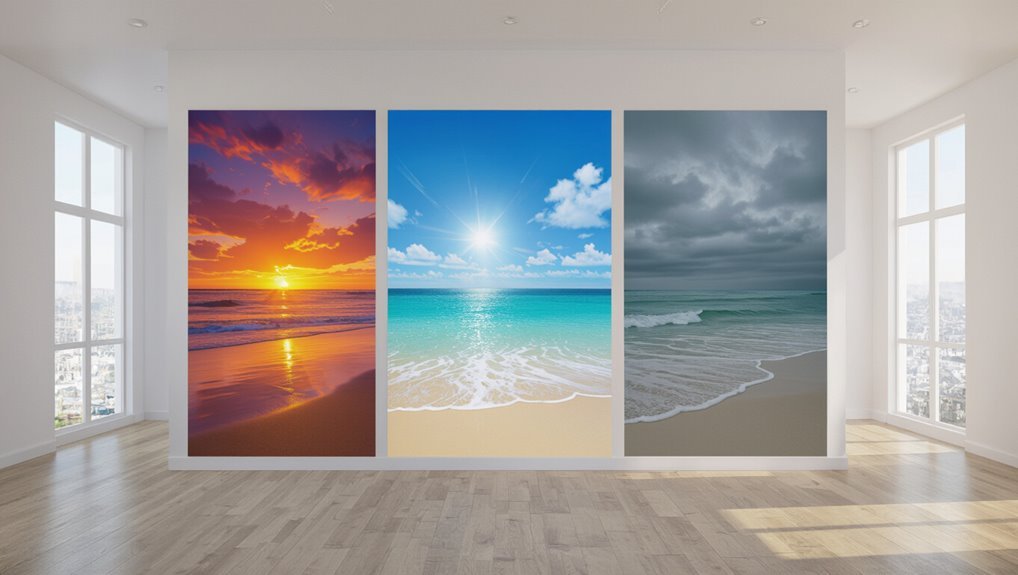
Now that you’ve settled on a style, decide what time of day and mood you want the wall to convey—sunset, bright midday, or soft overcast—and let that guide your palette.
For sunset choose warm oranges, magentas, and deep purples with softened highlights.
Midday needs crisp blues, sandy neutrals, and bright whites.
Overcast favors muted blues, grays, and desaturated tans for calm, diffused light.
Measuring the wall and creating a scale sketch or grid
Once you’ve chosen your scene and palette, measure the wall’s height and width in at least three places to account for irregularities. Then transfer those dimensions to paper at a convenient scale (for example, 1 inch = 1 foot) and sketch the major elements—horizon line, shoreline, focal points—so you can plot composition and calculate proportions before you start painting.
Then divide your sketch into a simple grid to track placement, note key measurements for each cell, and annotate elevations or obstacles so your final layout fits the wall precisely.
Transferring the design: grid method, projector, or freehand
You’ve got a solid sketch—next choose how you’ll transfer it: grid, projector, or freehand—each has trade-offs in accuracy, speed, and equipment.
Use the grid for precise scaling: draw matching squares on wall and sketch, then copy block by block.
Use a projector for fast, exact outlines but mind brightness and surface texture.
Freehand suits confident painters seeking organic results.
Step-by-Step: Painting a Beach Scene
Start by prepping the wall—clean, patch, and prime—so your paint adheres smoothly.
Then block in the big color areas for sky, ocean, and sand, establish depth with gradients and a clear horizon, and add midground elements like waves and rocks.
Finish with foreground details such as footprints, driftwood, and beach grass to bring the scene to life.
Step 1 Prep the wall (cleaning, patching, priming)
Preparation makes the rest of the mural go smoothly, so clean, patch, and prime the wall before you bring out colors.
Remove dust, grease, and flaking paint with detergent and a scrub brush. Fill holes and sand smooth; wipe away residue.
Apply a quality primer suited to your surface; let it dry fully. A flat, sealed base guarantees paint adheres and colors stay true.
Step 2 Block in large color areas: sky, ocean, sand
Lay in the big shapes first so you can see your composition take form: block the sky, ocean, and sand with broad, even strokes using large brushes or rollers.
Work wet into wet where colors meet to avoid hard edges, keep paint thin for smooth coverage, and step back often to check balance.
Mask trim and furniture to protect finishes.
Step 3 Create depth: gradients, horizon line, and perspective
Once you’ve blocked in the sky, ocean, and sand, begin building depth by softening shifts with gentle gradients, locating a clear horizon line, and suggesting perspective through scale and overlap.
Blend cooler, lighter tones near the horizon; warm, darker tones foreground. Reduce detail and contrast with distance, and size objects progressively smaller.
Use overlapping shapes and converging lines to guide the eye inward.
Step 4 Add midground elements: waves, shoreline, rocks
Bring the midground to life by painting waves, the shoreline, and any rocks that anchor the scene; these elements connect your foreground sand to the distant ocean and give the mural movement and interest.
Sketch gentle wave shapes, vary tones for foam and wet sand, and layer translucent blues for depth.
Use dry brushing for texture and darker edges to define rocks and tidal contours.
Step 5 Paint foreground details: footprints, driftwood, beach grass
Now that your midground has rhythm and depth, focus on the foreground to give viewers something to wander toward.
Sketch light, irregular footprints leading toward the water, vary size and depth.
Add a broken driftwood silhouette with grain lines and subtle shadow.
Plant tufts of beach grass with curved strokes, angling blades for wind.
Keep contrasts clear and edges varied.
Step 6 Highlighting and textures: dry brushing, glazing, stippling
Lift your brush and refine the surface with highlights and texture—these final touches will sell the light, movement, and tactile feel of sand, foam, and grass.
Use dry brushing for subtle sand grain, stippling for bubbly foam and coarse dunes, and glazing to deepen color and unify tones.
Work sparingly, layer gradually, and step back often to judge balance and contrast.
Step 7 Finishing touches: birds, boats, sun reflections
Add the small details that give the scene life—birds in flight, a distant boat, and shimmering sun reflections on the water—and place them with intent so they read naturally from a distance.
Use simple silhouettes for birds, a tiny hull and mast for boats, and thin horizontal strokes of diluted white or pale yellow for reflections.
Step back often and tweak contrast.
Step 8 Sealant and maintenance: clear coats and cleaning tips
With the scene complete, protect your work by applying a clear coat that suits the paint type and location—outdoor latex needs a UV-stable exterior varnish, while indoor acrylics take a water-based polyurethane or acrylic sealer.
Apply thin, even coats, sanding lightly between layers.
For maintenance, dust gently, spot-clean with mild soap and a soft cloth, and recoat every few years if fading or wear appears.
Techniques and Tools Explained
Now you’ll learn the specific brush strokes and tool choices that make water, sky, and sand convincing.
You’ll try sponges, rags, and palette knives to add texture, and I’ll show simple color mixes for believable sea and sky.
Finally, you’ll master smooth gradients and soft edges without needing a spray gun.
Brush techniques for water, sky, and sand
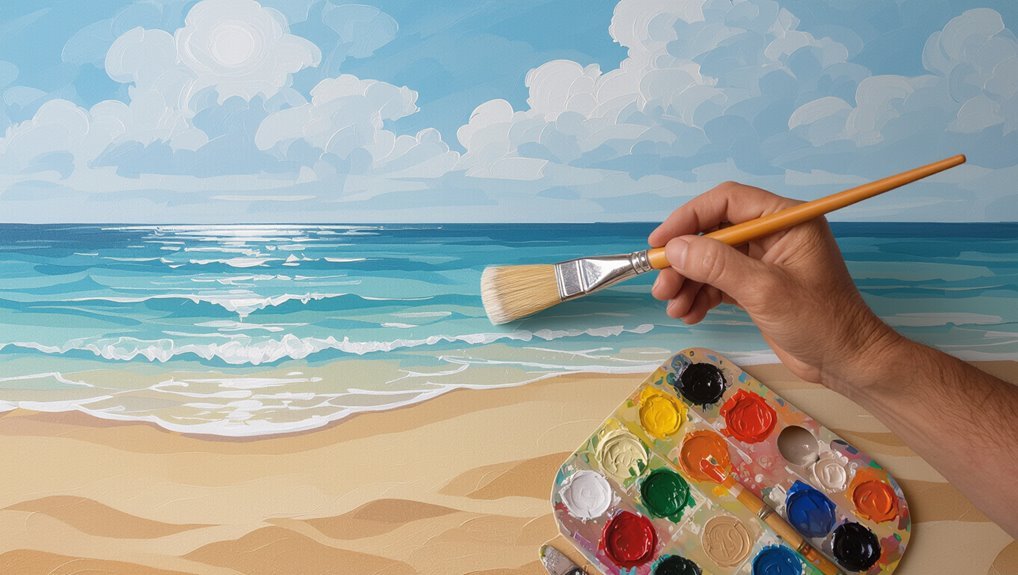
Start by choosing three brushes that match the broad strokes you’ll need: a large flat for the sky and broad water washes, a medium filbert for shaping waves and dunes, and a small round for details and highlights.
Use long, horizontal strokes for smooth sky gradients, gentle back-and-forth motions for water reflections, and light, stippled or curved strokes to suggest sand texture and tiny shells or foam.
Using sponges, rags, and palette knives for texture
Reach for a sponge, rag, or palette knife when you want to build tactile interest quickly—each tool leaves distinct marks you can control to mimic foam, wet sand, or wind-swept texture.
Dab a natural sponge for mottled sea foam, drag a crumpled rag for subtle streaks, and use a palette knife to scrape bangs of wet sand or highlight wave crests with controlled pressure and direction.
Mixing believable sea and sky colors (tips and sample mixes)
After you’ve built texture with sponges, rags, and palette knives, you’ll want color that matches those tactile marks—otherwise the surface looks disconnected.
Mix coastal blues with tiny amounts of burnt sienna for depth, add zinc white for haze, and use phthalo green for sea variety.
Try these starter mixes:
- Pale haze: titanium white + small ultramarine
- Deep sea: ultramarine + phthalo green + burnt umber
- Surf foam: titanium white + a touch of cadmium yellow
- Warm sky: titanium white + a hint of cadmium red
Working with gradients and soft edges without a spray gun
When you want soft, seamless changes without a spray gun, rely on brushes, sponges, and dragging tools to blend wet edges while the paint’s still tacky; work in small sections, feathering outward with a clean, dry brush or a soft sponge to avoid hard lines and lift excess pigment as you go.
Use glazing, thin washes, stippling, and a fan brush for subtle shifts and texture.
Common Mistakes and How to Fix Them
You’ll spot common problems like flat-looking water, a crooked horizon, or overworked details as you paint, and you can fix each with targeted corrections.
Learn quick tricks for adding depth to waves, resetting the horizon line and perspective, and knowing when to simplify brushwork so the scene reads naturally.
Also keep a brush and damp cloth handy to repair drips, even out coverage, and stop paint bleed before it dries.
Mistake: Flat-looking water corrective techniques
A painted ocean can look lifeless if you rely on a single flat wash of blue; to bring water to life you need depth, movement, and reflections.
Layer darker tones toward the horizon, add mid-tone variations for currents, and glaze lighter hues for translucence.
Use crisp, irregular highlights to indicate ripples and soft blending for distant calm.
Vary brushstrokes to suggest motion.
Mistake: Incorrect horizon placement and perspective fixes
If you place the horizon too high or too low, your beach scene will feel off-balance and the perspective will read wrong; correct horizon placement anchors scale and depth so viewers instantly understand distance.
Stand back, mark eye level, and align shoreline, waves, and object sizes to that line. Use vanishing points for piers or paths, and tweak until proportions look natural.
Mistake: Overworked details when to stop and simplify
Once you’ve got the horizon and perspective right, resist the urge to keep adding tiny highlights and texture; overworking a beach scene will deaden its light and flatten depth.
Step back often, squint to judge values, and remove unnecessary marks. Simplify shapes, limit your palette, and trust implied detail.
Stop when the composition reads from a distance and the mood feels intact.
Repairing drips, uneven coverage, and paint bleed
Usually you’ll spot drips, thin patches, or paint bleeding through masking before the whole mural’s dry, so deal with them early to keep the beach crisp and luminous.
Gently sand drips, feather edges, and wipe dust. Recoat thin areas with thin layers, letting each dry.
Remove bleed by scraping soft paint, re-taping, and touching up clean edges with a fine brush.
Tips, Best Practices, and Time-Saving Shortcuts
Start by planning templates and reusable stencils so you can repeat shapes quickly and keep edges crisp.
Follow a clear layering order and let each layer dry enough to avoid smudges, and prioritize splurges on quality brushes while using budget-friendly paint brands where color depth isn’t critical.
Know when a pro’s help will save time or money—call one for complex perspectives, large-scale jobs, or tricky repairs.
Planning templates and reusable stencils
Good templates and reusable stencils save hours and keep your beach mural consistent from palm fronds to waves.
You’ll trace repeatable shapes, test scale on paper first, and cut durable templates from mylar or thick cardstock. Store labeled pieces for future projects and protect edges for crisp lines.
- Traceable palm frond templates
- Wave and foam stencils
- Seagull silhouette cutouts
- Sun and cloud masks
Layering order and drying time optimization
Because layers build depth and prevent smudges, plan your sequence so background washes and large shapes dry before you add midground details, highlights, or crisp stencil edges.
Work top-to-bottom, back-to-front: sky, distant water, sand, then foreground.
Use fast-drying acrylics, thin coats, and a hairdryer on low to speed curing.
Wait fully between layers to avoid lifting or muddying colors.
Budget-friendly material swaps and where to splurge
Anyone can cut costs without sacrificing results by choosing where to save and where to splurge: pick affordable brushes and student-grade acrylics for broad washes and underpainting, but invest in one or two high-quality synthetic-flat brushes for crisp edges, a lightfast mid- to high-grade paint for your focal colors, and a good primer to guarantee longevity.
Use budget palettes, repurpose rollers, cheap masking tape, and seal with a mid-grade varnish.
When to call a professional vs. DIY
Wondering whether to tackle the beach mural yourself or hire a pro?
If you’re confident with brushes, comfortable on ladders, and working on a small to medium wall, DIY saves money and lets you personalize details.
Call a professional for large-scale work, complex textures, electrical obstacles, or tight deadlines—pros deliver speed, durability, and flawless finishes when skill, safety, or time are priorities.
Project Variations and Inspiration
You can choose a small accent wall or go big with a full-room mural depending on space, budget, and how immersive you want the scene to be.
For kid-friendly versions, you’ll simplify shapes, use washable paints, and add playful elements. You can swap in seasonal or holiday motifs like string lights, pumpkins, or tropical ornaments for quick updates.
Look at quick before-and-after examples to see how small changes—trim color, added silhouettes, or a themed vignette—make a big impact.
Small accent wall vs. full-room mural considerations
Whether you’re craving a subtle seaside accent or a full-immersion mural, deciding between a small accent wall and a room-spanning scene shapes your time, budget, and design choices—so weigh scale, sightlines, and how often you’ll want to change the look.
Choose an accent wall for focal impact, lower cost, and easier updates; pick a full-room mural for immersive atmosphere, cohesive flow, and higher commitment.
Kid-friendly beach murals and easy adaptations
If you picked an accent wall or a full-room mural, adapting the design for a child’s room is simple and fun.
Use softer colors, rounded shapes, and larger, simple elements like oversized shells, smiling sun, and friendly whales.
Keep paint non-toxic, add washable finishes, and incorporate interactive elements—chalkboard sand strip or magnetic boats—so the mural grows with your child.
Seasonal and holiday-themed beach variations
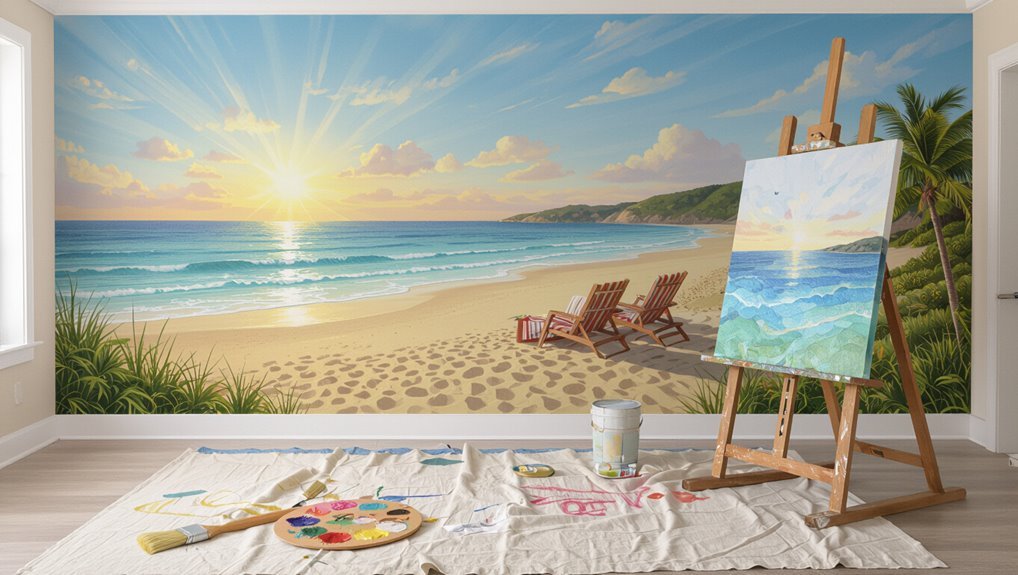
When the seasons turn or holidays roll around, tweak your beach mural’s palette and accents to match—cool blues and frosty whites for winter with string lights tucked into painted dunes; pastel eggs and tiny umbrellas for spring; vibrant sunbursts and Fourth of July bunting for summer; and warm, leafy tones with pumpkin-shaped beach balls for fall.
You can swap props, add themed silhouettes, and change lighting for mood.
Case examples: quick before-and-after scenarios
Pick three quick before-and-after examples to spark ideas:
a small nursery wall that transforms from plain beige to a gentle pastel shoreline with stenciled seagulls;
a cramped apartment alcove that opens up into a panoramic sunset with layered silhouettes and hidden fairy lights;
and a backyard fence upgraded from weathered planks to a playful tide-pool scene with painted stones and real shells mounted for texture.
You’ll follow simple steps, choose limited palettes, swap brushes for texture tools where needed, and finish with protective sealer so each project endures.
FAQ Common Questions About Painting Beach Scenes
You’ll find quick answers to common concerns like how long a mural takes, which paints hold up in humid rooms, and whether spray or airbrush techniques work for ocean textures.
You’ll also get tips on sealing your work against fading and moisture, and simple methods for scaling a small reference up to a large wall.
If you have a specific room or photo, mention it and we’ll tailor the advice.
How long does it take to paint a beach mural?
How long it takes to paint a beach mural depends on the mural’s size, detail, and your experience level.
Small, simple scenes might take a few hours to a day. Medium murals often require one to three days.
Large or highly detailed pieces can take several days to a week.
Factor in sketching, layering, drying time, and breaks for realistic planning.
What paint is best for bathrooms or humid rooms near water?
Because bathroom walls see constant moisture and occasional splashes, you should use paints formulated for high-humidity areas: choose 100% acrylic latex or mold-resistant bathroom paint with a satin or semi-gloss finish.
These resist mildew, clean easily, and hold up to steam.
Prime with a mildew-resistant primer, guarantee good ventilation, and allow proper curing between coats for durable, vibrant beach scenes.
Can I use spray paint or airbrush for ocean effects?
If you want to add soft gradients, misty horizons, or delicate spray textures for waves and sea foam, spray paint and airbrushes can be very effective tools.
Use low-pressure airbrushes for control, practice on scrap surfaces, mask edges for crisp lines, and layer transparent tones for depth.
Work in a ventilated area, wear a respirator, and clean equipment promptly to maintain performance.
How do I protect the mural from fading or moisture?
Start by sealing the wall with a high-quality primer and UV-resistant acrylic or latex paints so your colors stay vibrant.
Then add a clear UV-blocking varnish or satin/polyurethane topcoat to protect against sunlight and moisture.
Also guarantee proper surface prep, use mildew-resistant products in humid areas, allow full curing between coats, and touch up damaged sections promptly to prevent peeling and color loss.
How do I scale a small reference photo to a large wall?
Want your small photo to look proportional on a big wall? Use a grid method: divide the photo into equal squares, enlarge the same grid on the wall with chalk or pencil, and transfer key points square by square.
Alternatively, use a projector for direct tracing or print a tiled poster.
Step back often, adjust proportions, and refine lines before painting.
Materials Checklist and Quick Reference
You’ll find a compact checklist of essential supplies to get started—paints, brushes, rollers, tape, primer, and drop cloths—plus tips on budget-friendly options.
Then we’ll cover optional advanced tools like texture combs, airbrushes, and projection setups, with a few recommended brands to contemplate.
Keep this section handy as a quick reference before you shop or set up your workspace.
Essential supplies for beginners
A compact kit of the right tools makes painting a beach mural easier and more enjoyable, so gather paints, brushes, rollers, primer, drop cloths, painter’s tape, sandpaper, a palette or mixing tray, rags, a ladder or step stool, and basic safety gear before you begin.
You’ll want reliable basics, measured supplies, and a simple plan to finish confidently.
- Neutral primer
- Two brush sizes
- Roller + tray
- Drop cloth and tape
Optional advanced tools and recommended brands
If you’re ready to upgrade beyond basics, consider a few advanced tools that save time and improve results: an angled sash brush for crisp edges, a trim roller for smooth large areas, a foam brush set for textures, a cordless paint sprayer for fast coverage, and a small detail liner for fine highlights.
- Purdy angled sash brush
- Wooster trim roller
- Krylon foam brush set
- Wagner cordless sprayer
