How to Paint a Beadboard Ceiling Without Drips or Missed Spots
You can paint a beadboard ceiling cleanly by prepping surfaces, priming stained or bare wood, and working row by row with a sash brush for grooves and a 9″ nap roller for flats. Use thin, quick-drying coats to avoid runs, keep a wet edge, and spot-check with bright light for missed bits. Sand and touch up between coats, clean tools immediately, and don’t rush; follow this method and you’ll get even coverage—keep going to pick up tips on tools, timing, and fixes.
Quick Step-by-Step: Paint a Beadboard Ceiling
Start by clearing the room and protecting floors and fixtures with drop cloths and painter’s tape so you can work without interruptions.
Next, sand and clean the beadboard, fill gaps, prime evenly, then roll thin coats along grooves and brush edges.
Choose beadboard colors that enhance ceiling aesthetics, let each coat dry, lightly sand between coats, and inspect for missed spots before final touch-ups.
How Painting Beadboard Fixes Common Room Problems
When you paint beadboard, you’re not just changing color—you’re solving visual and practical problems at once.
You’ll boost room aesthetic and ceiling enhancement, increasing visual appeal and light reflection to alter space perception.
Painting adds architectural interest and supports design cohesion, letting color impact focal points.
You’ll hide imperfections, unify finishes, and make the ceiling feel intentional rather than neglected.
Choose a Paint Finish That Resists Ceiling Drips
Pick a low-sheen, durable finish so your beadboard stays attractive without highlighting imperfections.
Choose a formula with stain-blocking properties to prevent tannin or water marks from seeping through.
Prefer quick-drying paints so you can spot and smooth any drips before they set.
Low-Sheen Durability
Because beadboard ceilings get more attention than walls, you’ll want a low-sheen paint that hides imperfections and won’t show drip marks, runs, or flashiness under overhead light.
Choose a formula emphasizing low sheen advantages and durability benefits so brush strokes level smoothly and tiny drips blend.
You’ll get a forgiving, long-lasting finish that resists wear while keeping the ceiling visually even.
Stain-Blocking Properties
If you’ve ever had water stains or paint drips show through a fresh coat, choose a ceiling paint with proven stain-blocking properties so those blemishes stay sealed and invisible.
Pick a primer-paint system labeled for stain resistance, test on a small area, and follow precise application techniques.
Roll evenly along beadboard grooves, back-brush where needed, and inspect under good light to guarantee coverage.
Quick Drying Time
When you’re painting a beadboard ceiling, choose a fast-drying finish so drips have less time to sag or spread before you can smooth them out. Pick a quick drying formula, work in ideal airflow, and inspect panels as you go to catch runs while tacky.
| Tip | Action |
|---|---|
| Finish | Use fast-dry |
| Ventilation | Open windows |
| Technique | Thin coats |
| Check | Touch up runs immediately |
Pick the Right Paint Type for Beadboard Ceilings
Choosing the right paint for beadboard ceilings will make the difference between a long-lasting, attractive finish and one that chips, yellows, or highlights every imperfection.
You should choose acrylic latex for durability and easy cleanup, satin or semi-gloss to hide beadboard textures, and primer for tricky spots.
Pick what matches light and humidity to avoid regret.
- Confidence
- Pride
- Relief
Essential Tools for Neat Ceiling Painting
To get a crisp finish on beadboard, you’ll need the right brushes and rollers that fit the grooves and handle trim work.
You should also use reliable prep tools—drop cloths, painter’s tape, a good putty knife, and a sanding block—to protect surfaces and smooth imperfections.
With those tools ready, you’ll work faster and produce a neater, more professional result.
Right Brushes And Rollers
A few well-picked brushes and a quality roller will make painting a beadboard ceiling faster and neater, so you won’t fight drips or miss grooves.
Choose brush types for trim and grooves, and match roller sizes to panel width for even coverage. Feel confident, not overwhelmed.
- Precision sash brush — control
- Angled brush — clean edges
- 9″ nap roller — smooth finish
Reliable Prep And Masking
Now that your brushes and roller are picked, prep and masking keep paint off fixtures and define crisp lines.
You’ll use masking tape and protective sheeting, focus on surface prep and dust removal, and prioritize primer application for paint adhesion.
Seal edges with edge sealing techniques, guarantee corner coverage, and inspect taped seams.
That careful prep prevents drips and missed spots.
Inspect Beadboard for Damage Before You Start
Before you pick up a brush, walk the room and scan the beadboard for cracks, loose boards, water stains, or peeling paint so you know exactly what needs repair.
Use an inspection checklist to note damage types and prioritize fixes. Don’t ignore soft spots or mold.
- Worry—water stains mean leaks.
- Frustration—loose boards need fastening.
- Relief—minor cracks are easy to fill.
Clean Beadboard So Paint Will Stick
Once you’ve repaired damage, cleaning the beadboard will help paint adhere and give a smooth finish.
You’ll perform surface inspection, remove dust with vacuuming and tack cloths, and choose gentle cleaning solutions for grime. Proper cleaning techniques improve adhesive properties and boost paint adhesion.
After thorough dust removal and drying, proceed with primer application to lock in a uniform base before painting.
When and Why to Sand Beadboard First
If your beadboard has gloss, rough spots, or old paint that’s peeling, lightly sanding it first gives you a better surface for primer and paint to bite into.
You’ll use gentle sanding techniques during beadboard preparation to dull shine and remove loose flakes without damaging grooves.
You’ll feel confident starting primer afterward.
- Relief
- Control
- Pride
How to Fill Gaps and Gouges in Seams
Start by evaluating how deep and widespread the gaps or gouges are so you know what repair method to use.
Pick a filler suited to the damage and your beadboard material—wood filler for deep gouges, caulk for narrow seam gaps.
Once filled, let it cure, then smooth and sand the seam flush with the surrounding board before priming and painting.
Assess Damage Extent
Begin by closely inspecting every seam and panel junction with good light—use a flashlight or headlamp to spot hairline cracks, gaps, and any gouges that could telegraph through paint.
You’ll perform a damage assessment during ceiling inspection to prioritize repairs. Note depth, length, and surrounding rot or loose material to decide scope.
- Fear (worry)
- Relief (control)
- Pride (finish)
Choose Proper Filler
When you’re filling gaps and gouges in beadboard seams, pick a filler that matches the size of the void and the ceiling material—use lightweight spackling or polyester-based wood filler for hairline cracks and small dents, and a flexible paintable caulk or joint compound for wider gaps and seams prone to movement. Choose filler types for effective gap sealing.
| Issue | Recommended filler |
|---|---|
| Hairline cracks | Lightweight spackling |
| Small dents | Polyester wood filler |
| Wide gaps | Paintable caulk/joint compound |
| Movement-prone seams | Flexible caulk/joint compound |
Smooth And Sand Seam
After you’ve applied filler to gaps and gouges, let it dry fully and then smooth it flush with the beadboard using a flexible putty knife; focus on seam preparation and proper sanding techniques to prevent ridges.
Then gently sand with fine-grit paper until seamless and clean. Evoke confidence:
- Relief — flawless joins calm you.
- Pride — smooth seams show craft.
- Joy — your ceiling looks finished.
Pick the Right Primer for Bare or Painted Beadboard
Choosing the right primer is essential because it determines adhesion, stain blocking, and the final look whether your beadboard is bare wood or already painted.
You’ll choose primer types based on substrate: oil-based or shellac for knots/stains, latex for painted or sealed surfaces.
Focus on surface preparation—clean, sand, and degloss—so the primer bonds properly and paint covers evenly without extra coats.
Mask and Protect Trim, Lights, and Vents
Now that the primer’s down and the surface is prepped, protect the surrounding trim, light fixtures, and vents so your paint job stays clean and professional.
Use masking techniques, careful tape application, and edge sealing to prevent paint overspray on trim protection, light fixtures, and vent covers. Emphasize surface preparation to avoid touch-ups.
- Cover vulnerable areas.
- Seal edges tightly.
- Check fixtures.
Safe Ladder and Scaffolding Setup
Before you start painting, make sure you position your ladder on firm, level ground and lock the spreaders so it won’t shift.
If you’re using scaffolding, set the base on a stable, even surface and use base plates or adjustable feet to prevent rocking.
Check that both ladder and scaffolding are rated for your weight plus tools and keep three points of contact when climbing.
Proper Ladder Placement
Place your ladder on firm, level ground and angle it so the base sits about one-quarter of its working length from the wall—this 75-degree stance keeps you stable while you climb and paint.
Check ladder stability, ladder types, proper height, reachability concerns, weight distribution, workspace clearance and secure footing before starting.
- Relief: safe positioning so you can focus.
- Confidence: steady balance.
- Calm: controlled, secure work.
Stable Scaffolding Base
A level, secure base is essential when you set up scaffolding or a ladder—so confirm the ground can support the weight and that all feet are sitting flat and locked.
Check for soft soil, slopes, or debris, use base plates or adjustable legs, and anchor or tie off the scaffold.
Prioritize scaffold stability and basic safety measures before painting overhead.
How to Mix and Thin Paint for Ceilings
When you’re preparing paint for a beadboard ceiling, getting the consistency right matters as much as color—too thick and you’ll see brush marks and lap lines; too thin and you’ll get poor coverage and drips.
Balance mixing ratios and thinning techniques, consider primer selection, brush types, roller options, drying times, application methods, surface preparation, and stain resistance.
- Calm
- Confident
- Proud
Load Your Brush and Roller to Avoid Runs
Load your brush and roller with just enough paint so you can cover a few boards without overloading—too much paint causes runs, too little forces repeated strokes. Use proper brush loading and roller techniques: monitor paint viscosity, control application speed, vary brush angles, and adjust roller pressure for stroke consistency and paint absorption.
| Tip | Focus | Result |
|---|---|---|
| Dip shallow | Brush loading | No blobs |
| Roll evenly | Roller pressure | Smooth coat |
| Watch flow | Paint viscosity | Fewer runs |
| Pace work | Application speed | Even finish |
| Angle brush | Brush angles | Clean edges |
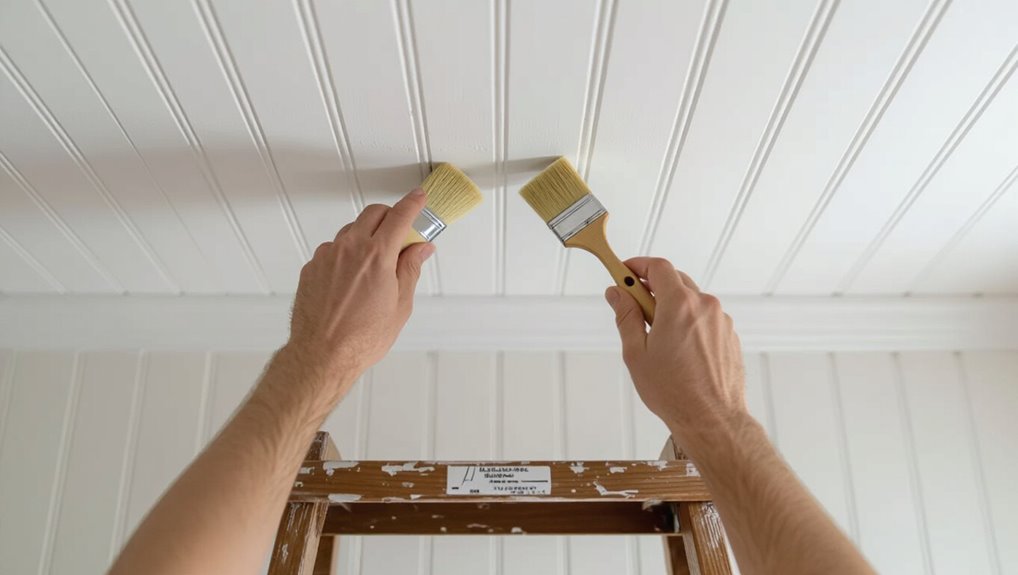
Brush Techniques for Beadboard Grooves
Start by choosing a small, angled sash brush that fits the groove and lets you paint with control; you’ll get into the beadboard channels without smearing the adjacent rails.
Use a steady brush angle for smooth groove filling, feathering edges and wiping excess.
Stay patient and follow the bead patterns.
- Relief
- Pride
- Calm
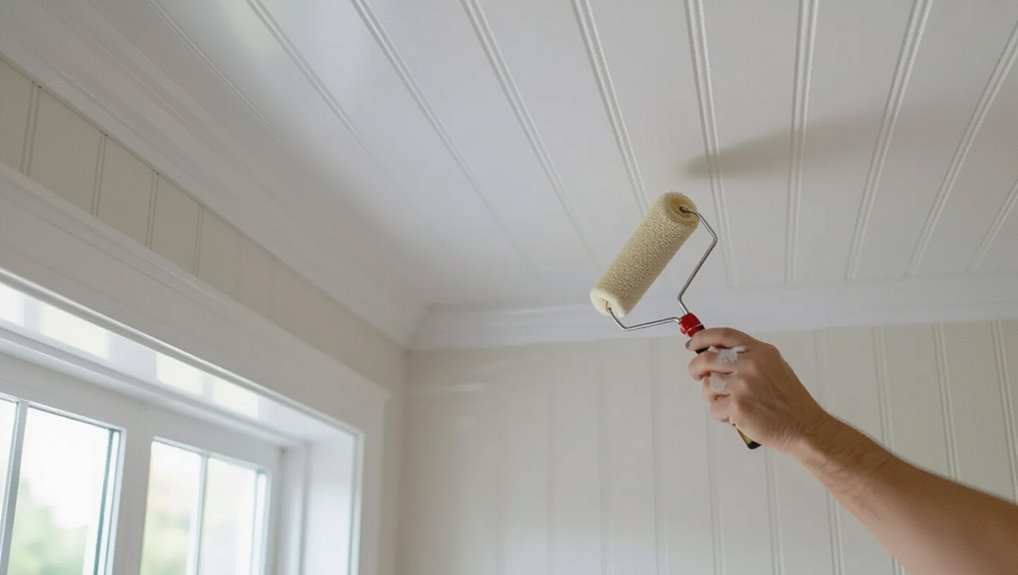
Roll Panels Evenly Without Missing Grooves

Grab a small-nap roller and an angled trim roller so you’ve got the right tools for even coverage.
Move the roller along each groove line, keeping strokes parallel to the beadboard to push paint into the creases.
Check from a low angle as you go so you don’t miss any grooves.
Tools For Even Coverage
When you want smooth, even coverage on beadboard, pick tools that let you paint both the flat panels and the grooves without extra passes.
Choose gear that supports your coverage techniques and precise paint application so you avoid backtracking and drips.
- Angled sash brush — confident control, satisfying lines.
- Mini-roller with shim — fast, joyful uniformity.
- Trim pad — calm, exact groove finish.
Work Along Groove Lines
After you’ve picked the right brush and roller, work along each beadboard groove in steady strokes so paint settles into the channels instead of pooling on the flats.
Keep groove alignment consistent by following panel seams and using the bead as a guide.
Roll panels evenly, reload the roller often, and touch grooves with a brush tip.
This paint technique prevents missed spots and drips.
Work in Sections to Prevent Lap Marks
Divide the ceiling into manageable sections and paint each one while the previous is still wet to avoid lap marks.
You’ll control section timing and keep paint application consistent so edges blend. Move steadily, watching wet edges, and adjust speed if coating thins.
- Feel calm as seams vanish
- Notice pride in smooth coverage
- Enjoy the finished, uniform ceiling
Best Stroke Patterns for Ceilings
Start with long, steady strokes that follow the beadboard grooves so you lay paint evenly and avoid build-up in the channels.
Maintain consistent brush angles, switching to a slight tilt at edges for smooth coverage. Use overlapping passes—half the previous stroke—to blend seams.
Try ceiling techniques that pair a quality brush with light pressure; keep strokes parallel to boards for a uniform finish.
Stop Paint Pooling in Beads and Recesses
When you work the paint into beadboard, keep the load light and move steadily along each groove so paint doesn’t pool in the recesses; tipping the brush slightly and dragging off excess on the board before touching a channel helps control build-up.
Use beadboard techniques and mindful paint application to keep lines crisp and avoid runs.
Use beadboard techniques and careful paint application to keep lines crisp and prevent runs.
- Calm: steady hands
- Pride: neat beads
- Relief: no drips
When to Use a Sprayer vs. Brush-and-Roller?
Decide whether speed and a smooth, even coat matter more than control—use a sprayer when you want fast coverage and to reach tight grooves.
Pick a brush-and-roller combo when you need precision along edges, can manage drips, or are working in a small space.
I’ll compare where each method shines so you can choose the right approach.
When To Sprayer Works Best
Wondering whether to pull out a sprayer or stick with a brush-and-roller? You’ll choose a sprayer when speed, even coverage, and access win.
Balance sprayer advantages with sprayer limitations, learn sprayer techniques and sprayer settings, and prioritize sprayer safety and sprayer maintenance.
Consider sprayer types and sprayer vs. roller trade-offs.
- Relief
- Confidence
- Pride
When Brush-And-Roller Win
If your room has tight corners, delicate fixtures, or you’re working on a small DIY budget, reach for a brush and roller instead of a sprayer.
You’ll control edges with precise brush techniques, cut into grooves, and follow with a consistent roller application for flat panels.
Clean-up is simpler, overspray isn’t a worry, and touchups stay easy for a flawless beadboard ceiling.
Paint Around Fixtures and Vents Cleanly
When you paint around fixtures and vents, work slowly and use the right small tools so you get clean lines without splattering hardware.
You’ll do fixture preparation and vent masking first, tape edges, remove covers, and use an angled brush for tight gaps.
Stay patient to avoid smears and drips.
Take your time—patience prevents smears and drips, giving crisp, professional-looking edges every time.
- Relief
- Pride
- Calm
How Many Coats for Full Coverage?
Most beadboard ceilings need two coats for solid, even coverage, though you might apply a third in high-contrast situations or over dark stains. You’ll focus on consistent paint application and inspection for coverage assurance. Work methodically row by row, checking grooves and edges. Recoat if thin spots show.
| Coat | Purpose |
|---|---|
| 1st | Base |
| 2nd | Finish |
| 3rd | Touch-up |
Proper Drying Times to Avoid Tacky Spots
Check the paint manufacturer’s recommended drying time and follow it closely so you don’t trap tacky spots under a new coat.
Remember that temperature, humidity, and airflow all affect drying, so adjust your schedule on humid or cool days.
Apply thin, even coats and only recoat after the specified interval to guarantee each layer fully cures.
Paint Manufacturer Recommended Time
Because paint manufacturers test their products under specific conditions, you should follow their recommended drying times exactly to prevent tacky spots and uneven finishes.
Trust the manufacturer guidelines for paint drying; they’ll tell you when it’s safe to recoat and when to wait.
Follow these steps to protect your beadboard ceiling emotionally and practically:
- Wait the full time.
- Resist touching.
- Note the label.
Environmental Drying Conditions
If humidity is high or temperatures are low, paint will take much longer to dry and you’re more likely to end up with tacky spots.
So control the room conditions before you start. Monitor humidity control and temperature regulation throughout drying.
Use dehumidifiers or heaters to keep conditions within the paint’s recommended range, ventilate gently, and pause work if condensation or cool drafts appear to prevent tackiness.
Thin Coats And Recoat Intervals
Controlling humidity and temperature helps, but you also need to apply thin, even coats and respect recommended recoat intervals to prevent tacky spots.
Use thin layer techniques so each coat dries uniformly. Follow drying intervals on the paint label and test tack before recoating. You’ll avoid runs and uneven texture.
- Pride
- Relief
- Confidence
Spot-Check and Fix Missed Areas Before Cure
Once the paint is still tacky but not fully cured, walk the room with a bright light or flashlight held at an angle to reveal missed drips, thin spots, and unpainted grooves. Use spot check techniques to spot missed areas, gently touch up with a small brush or roller.
| Area | Issue | Tool |
|---|---|---|
| Groove | Thin | Brush |
| Panel | Missed areas | Mini-roller |
| Seam | Drip risk | Sponge |
| Edge | Thin | Brush |
Fix Runs and Drips After They Form
When a run or drip appears on your beadboard, don’t panic—catch it while the paint’s still soft so you can fix it cleanly. You’ll smooth and blend, preserving texture and finish while thinking about drip control and run prevention for next strokes.
When a paint run appears on beadboard, act while it’s soft—lift, smooth, feather, then repaint thinly.
- Gently lift excess with a damp brush—don’t scrape.
- Smooth with light strokes.
- Feather edges and repaint thinly.
Final Sanding and Touch-Up Tips for a Pro Finish
Finish strong by sanding and touching up carefully—this is where a painted beadboard ceiling goes from good to professional.
For final preparation, walk the room under bright light, use fine-grit sanding techniques to smooth brush marks and seams, then vacuum dust.
Spot-prime bare areas, feather in new paint with a small brush, and inspect for uniform sheen before calling the job complete.
Clean Brushes, Rollers, and Sprayers After the Job
As soon as you’re done, rinse brushes, rollers, and sprayers thoroughly to keep paint from drying and ruining the tools.
Use warm water for latex or the appropriate solvent for oil-based products, then work bristles and roller nap until water runs clear.
Store everything dry and upright in a dust-free place so it’s ready for your next project.
Rinse Immediately After Use
Right after you set the brush down, rinse it — and do the same for rollers and sprayer parts — to prevent paint from drying and ruining the tools.
You’ll rinse brushes and clean rollers thoroughly, flushing until water runs clear. Quick action saves time and money; don’t let latex or oil set.
- Relief: tools saved
- Pride: neat work
- Ease: next project ready
Store Tools Properly
Once your brushes, rollers, and sprayer parts are thoroughly rinsed, give them one last clean and shape before storing so they’ll be ready for the next job.
Shake or spin out excess water, reshape bristles, and let components dry fully.
Use labeled containers and wall racks for tool organization.
Choose airtight tubs or hanging storage solutions to protect tools from dust and deformation.
Maintenance to Keep Painted Beadboard Fresh
1 simple routine will keep your painted beadboard looking sharp: wipe it down monthly, address scuffs immediately, and touch up chips as they appear.
For ceiling maintenance and paint longevity, stay proactive so the room feels cared for and peaceful.
- Notice small flaws — feel proud fixing them.
- Use gentle cleaner — avoid panic.
- Keep touch-up paint handy — relax.
Common Mistakes That Cause Drips or Missed Spots
If you rush or overload your brush or roller, you’ll wind up with drips and missed spots that ruin the smooth look of a beadboard ceiling.
You should work in small sections, thin coats, and keep a wet edge. Skipping primer, using low-quality tools, or neglecting grooves causes problems.
Follow drip prevention techniques and missed spots solutions: steady pressure, proper loading, and inspecting in good light.
Estimate Time and Materials: And When to Call a Pro
Before you start, take a realistic inventory of time and supplies so the job doesn’t stall halfway through: Plan for prep, drying, and touch-ups.
Make a clear cost estimation and know when to seek professional advice.
- You’ll feel relief when materials and hours match reality.
- You’ll dread delays avoided by honest assessment.
- You’ll gain confidence calling a pro if scope overwhelms you.
Frequently Asked Questions
Can I Paint Beadboard Ceilings Outdoors or in an Attached Garage?
Yes — you can paint beadboard outdoors or in an attached garage. Breezy, bright beginnings bring better bonds: you’ll monitor outdoor conditions, guarantee garage ventilation, use exterior or semi‑gloss paint, and protect against moisture and dust.
Will Beadboard Crack or Warp if Painted Over Moisture-Prone Areas?
Yes—you’ll face moisture effects: beadboard can warp or crack in damp areas if it’s untreated. You should use moisture-resistant materials and proper sealing to address durability concerns, and you’ll prevent damage with ventilation and priming.
Can I Use Washable or Mildew-Resistant Paint in Bathrooms Without Ventilation?
Yes — you can, but don’t expect miracles: washable benefits help cleanup and mildew resistance slows growth, yet without ventilation moisture lingers, so you’ll need dehumidifiers, regular cleaning, and prompt repairs to keep mold at bay.
How Do I Match New Paint to Aged or Yellowed Existing Beadboard?
You’ll color match by cleaning the beadboard, testing paint samples on hidden spots, aging them with light coats or tea staining, and tweaking tint until the new paint visually blends with the yellowed finish under room lighting.
Is It Okay to Prime Just the Damaged Spots Instead of the Entire Ceiling?
Like patchwork on a quilt, you can spot prime damaged areas, but you’ll get better results priming the whole ceiling for consistent adhesion and sheen; spot priming helps ceiling preparation but isn’t a complete substitute.