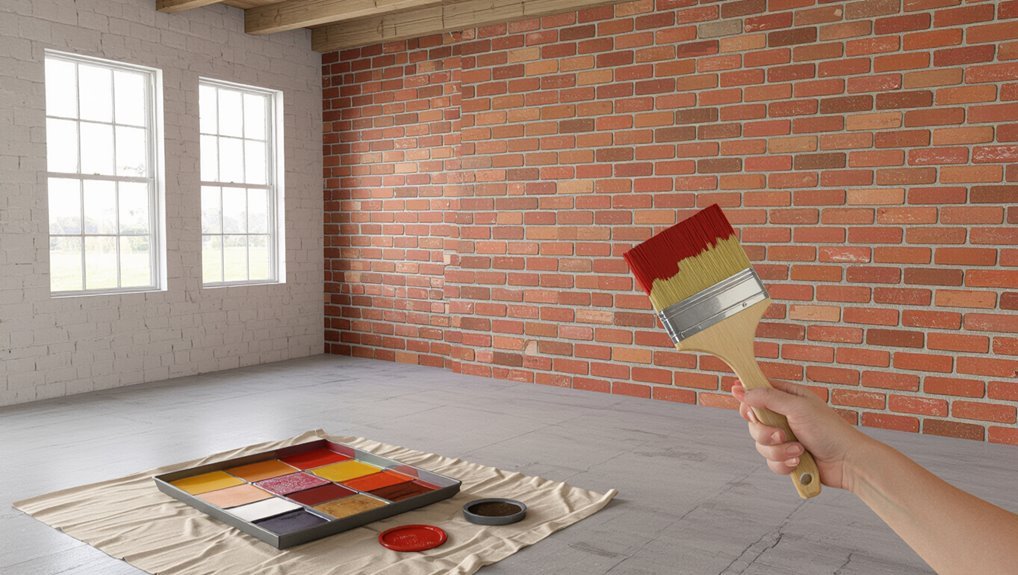
How to Paint a Brick Wall Effect for Industrial Interior Style
You can fake an industrial brick wall quickly by prepping the surface, priming for adhesion, and blocking out staggered brick shapes with a base coat. Layer warm reds and sootier accents with rollers, sponges, and dry‑brushing for depth, then paint contrasting mortar lines with a putty knife or stiff brush. Lightly distress with washes or chipping for age, then seal with a breathable matte or satin clear coat—keep going and you’ll pick up tips for patterning, troubleshooting, and finishes.
Quick Faux‑Brick How‑To: One‑Hour Overview
Grab your brush and tape — you can fake a convincing brick wall in about an hour.
You’ll block out brick shapes, use quick color mixing to get warm reds and sootier accents, and apply mortar tones.
Work in small sections, employ texture layering for realistic edges, and step back often to balance contrast.
Work in small sections, layer textures for believable edges, and step back frequently to balance contrast.
Finish with a light glaze for cohesion and subtle aging.
Step‑By‑Step Process Overview
Now that you’ve sketched the basic layout and blocked in color, you’ll move through the painting in a steady, repeatable sequence: prep the surface, lay a base coat, map out brick shapes with tape or a stencil, apply midtones and highlights for depth, add mortar lines, texture the edges, and finish with a unifying glaze.
Follow this concise rhythm:
- Prep and base coat
- Tape/stencil layout
- Color mixing and midtones
- Texture layering and glaze
Pick Your Look: Crisp Loft or Weathered Factory
Want a clean, modern loft or a rough, weathered factory vibe?
Decide whether you prefer crisp loft aesthetics—sharp lines, uniform brick tones, minimal distress—or authentic factory vibes with chipped paint, uneven mortar, and layered stains.
Prefer a crisp loft—sharp lines and uniform brick—or a weathered factory with chipped paint, uneven mortar, and layered stains
Choose colors, distress levels, and sealers to match.
Test a small panel to confirm the contrast, texture, and overall mood before committing to the whole wall.
Check Wall Type: Drywall, Plaster, or Existing Brick
Before you pick paints or stencils, identify what you’re working with—drywall, plaster, or existing brick—because each surface needs different prep and products.
Do a quick wall assessment to note drywall texture, plaster finish, or exposed masonry so you choose primers and tools right.
- Drywall texture: sand and prime
- Plaster finish: repair cracks first
- Existing brick: clean and seal
- Tools: brushes, rollers, sponges
Measure and Map the Wall Area You’ll Transform
Start by measuring the full wall height and width with a tape measure. Then sketch a simple to-scale outline on paper or in a phone note so you can plot bricks, outlets, and trim accurately.
Mark window, door, and outlet positions, then divide the outline into brick rows and courses to scale. This map helps you plan an even brick wall layout that suits industrial design.
Choose Base Paint: Primer and Background Color
Before you start painting, make sure you’ve cleaned, sanded, and repaired the wall so the base coats will stick.
Choose a primer suited to your surface—masonry, latex, or stain-blocking—so you get even adhesion and coverage.
Pick a background color that complements the brick tones you want, since it will show through the mortar and affect the final look.
Surface Preparation Steps
If you want your faux brick to look authentic and last, pick the right primer and background color—primer seals and evens the surface while the background sets the mortar tones that peek through the faux bricks.
Do a surface inspection, use cleaning techniques, sanding methods, and tackle crack repairs to guarantee wall preparation and consistent wall texture for ideal primer application and paint adhesion.
- Clean surfaces
- Sand uneven spots
- Fill cracks
- Final wipe-down
Primer Type Selection
Because the primer and background color set the whole tone for your faux brick, pick products that match your wall material and the look you want: acrylic primers work well on drywall and previously painted surfaces, oil-based or bonding primers suit glossy or tricky substrates, and tinted primers can save time by laying in the mortar hue that will peek through the bricks.
Choose based on primer benefits and plan primer application for adhesion and even coverage.
Background Color Choice
When you pick your base paint, think of it as the mortar and shadow that’ll define every brick—choose a color that complements your final brick shades and hides any imperfections on the wall.
Use color psychology to set mood and test contrasting shades for depth.
- Pick a neutral primer.
- Sample under real light.
- Consider warm or cool undertones.
- Guarantee good coverage.
Select Brick Paint Colors for Realistic Variation
Although you want a cohesive look, choose a palette of three to five related shades so the wall reads as real brick instead of flat paint.
Use color psychology to pick warm reds, cool greys, or muted ochres that suit mood and light.
Layer tones with sponges and dry-brushing to mimic brick textures, varying intensity for authentic depth without overworking the surface.
Pick Grout and Mortar Colors That Match Your Vision
Think of mortar as the frame that sets off your faux bricks—you’ll want a color that supports the brick tones without stealing focus.
Think of mortar as the frame for faux bricks—choose a color that enhances, not overpowers, the brick tones.
Choose grout color selection and mortar finish options to match style and contrast. Consider:
- Neutral gray for subtle depth
- Warm tan for vintage warmth
- Bright white for crisp contrast
- Dark charcoal for industrial drama
Test samples before committing.
Tools You Need: Brushes, Rollers, Sponges, and Trowels
Gear matters: to fake brick convincingly you’ll want a small, firm brush for detail, a wide brush or roller for base coats, textured sponges for aging and mottling, and a trowel or margin float for working grout lines and mortar texture.
You’ll use brush techniques for edges and highlights, weigh roller choices for finish, employ sponge applications for depth, and apply trowel uses for realistic mortar.
Specialty Tools: Brick Stencils, Masking Tape, and Edgers
Pick a stencil that matches the brick size and pattern you want so your finish looks intentional.
Use high-quality masking tape and proper taping techniques to get crisp mortar lines without paint bleed.
Finish edges and add subtle texture with edgers to make the wall read like real brick.
Choosing The Right Stencil
Looking for the right stencil will make or break your brick effect—choose one with crisp, evenly spaced openings and a material that lies flat against the wall so paint won’t bleed under the edges; pair it with low-tack masking tape and a foam edger or stencil brush to control paint build-up and get sharp mortar lines.
- Check stencil materials and stencil durability.
- Plan stencil sizing and stencil placement.
- Practice stencil alignment and stencil techniques.
- Keep stencil cleaning and try stencil layering.
Tape Techniques For Clean Lines
Once you’ve settled on a stencil and practiced alignment, use masking tape and edgers to lock in crisp mortar lines and prevent paint bleed. Choose tape types for surface and removal ease, press edges firmly for line precision, and remove tape while paint’s tacky. Stay steady, work in small sections, and retape as needed.
| Tool | Tip |
|---|---|
| Masking tape | Press edges |
| Stencil | Align carefully |
| Edger | Hold steady |
Using Edgers For Texture
Bring edgers into play to add subtle texture and depth where a roller or brush can’t mimic natural brick edges.
You’ll refine edges and blend surfaces with precise edger techniques and tool selection for texture variations.
Focus on paint layering and color mixing to achieve surface blending while keeping clean edges.
Use careful paint application for realistic brick relief.
- Edger techniques
- Tool selection
- Paint layering
- Surface blending
Choose Finish: Matte vs Eggshell vs Satin
Because the finish you pick affects both the look and durability of your faux brick, you’ll want to weigh matte, eggshell, and satin before you start painting. You’ll choose based on sheen, cleanability, and the texture options you used. Consider paint finishes that hide imperfections (matte), balance sheen and washability (eggshell), or add slight gloss for easy cleaning (satin).
| Finish | Best for |
|---|---|
| Matte | Hiding texture |
| Eggshell | Balanced look |
| Satin | Easy cleaning |
| Choice tip | Match style and use |
Prep the Surface: Cleaning, Sanding, and Repairing Cracks
Now that you’ve picked the finish, prep the surface so your faux brick looks crisp and lasts. Use proper cleaning methods, sand rough spots, and handle crack repair before painting.
Now that you’ve chosen the finish, prep thoroughly—clean, sand glossy spots, repair cracks, and dry before painting.
- Remove dust and grease with a mild detergent.
- Sand glossy areas smooth with fine grit.
- Fill and level cracks with a flexible filler.
- Wipe surface clean and let it fully dry before continuing.
Prime for Adhesion: When and What Primer to Use
If your surface is clean and sound, prime it next to guarantee paint adhesion and even coverage; pick a primer formulated for your substrate—masonry, drywall, or previously painted surfaces—and for the paint type you’ll use (latex or oil).
You’ll enjoy primer benefits like uniform absorbency and stain blocking.
For primer application, roll or brush evenly, follow drying times, and spot-sand glossy areas before painting.
Mark Your Grid: How to Lay Out Brick Courses Accurately
A straight, well-measured grid is the backbone of a convincing brick effect, so measure and mark your courses before you touch any paint.
You’ll control grid alignment and consistent brick spacing by planning carefully. Use these steps:
- Measure wall height and draw level guidelines.
- Mark horizontal courses at consistent intervals.
- Check vertical alignment with a plumb line.
- Adjust marks before painting.
Decide Brick Size and Joint Spacing for Proper Proportion
Think about scale relative to the room so the brick pattern doesn’t overwhelm or get lost on your wall.
Use standard brick dimensions as a starting point, then adjust length and height to suit your space and style.
Remember that joint width changes the overall look—wider joints read larger and narrower joints look more refined.
Scale Relative To Room
Start by matching brick size and mortar joints to the room’s scale so the faux wall reads as believable instead of toy-like.
Consider scale considerations with room proportions and wall height; align bricks to furniture arrangement and light sources to keep color balance and texture contrast right, avoiding overpowering visual weight.
- Measure sightlines
- Test mockups
- Adjust joint width
- Observe lighting
Standard Brick Dimensions
Bricks come in a few common sizes, and choosing one that matches your room keeps the faux wall convincing instead of distracting.
Pick standard brick styles—modular, utility or king—so proportions fit furniture and sightlines. Measure brick height and length, then plan courses to align with trims.
Consider brick wall textures when choosing paint and tooling so the finish feels authentic and balanced.
Joint Width Impact
One key decision is how wide to make the mortar joints, because joint width changes the perceived size and rhythm of your faux bricks and can make a wall read as delicate or bulky.
Choose joint styles and joint colors to suit scale. Consider:
- Narrow joints for refined, modern looks
- Wide joints for rustic, bold scale
- Contrasting colors to emphasize pattern
- Subtle tones to blend materials
Masking Techniques for Crisp Grout Lines
Masking the grout lines correctly is the key to getting sharp, realistic seams—you’ll want to lay down consistent, snug tape lines before you paint to prevent bleed and uneven edges.
Use painter’s tape or masking tape for line precision, press edges with a grout brush for clean edges, plan color contrast, and remove tape removal slowly after tack dries.
These masking techniques guarantee crisp grout.
Paint the Background Base Coat Evenly
Start by picking a primer suited to your surface so the paint bonds and colors read true.
Use a quality brush or roller and work in smooth, even strokes to avoid lap marks.
Keep a wet edge and check for thin spots before the primer fully dries.
Choose The Right Primer
Pick a primer formulated for masonry or for porous surfaces so your base coat goes on smoothly and the brick effect lasts.
Choose primer types that suit drywall, cement, or old paint. Focus on proper primer application to seal and improve adhesion.
- Assess surface porosity
- Pick oil or latex as needed
- Stir thoroughly before use
- Follow manufacturer drying times
Apply Smooth, Even Strokes
Lay your brush or roller flat and work in long, even strokes so the background base coat goes on smoothly and without streaks.
You’ll focus on consistent paint application, overlapping each pass slightly and maintaining a wet edge.
Use controlled stroke techniques, moderate pressure, and steady speed.
Check for drips, backroll any thin spots, and let the base dry before masking for brick detailing.
Layer the First Brick Color With Roller and Brush
Load your roller with the mixed brick color and roll it over the wall in even, overlapping strokes.
Use roller application for broad coverage, then refine edges with brush techniques. Work section by section, keeping a wet edge.
- Start top-left and move right
- Light pressure near corners
- Blend seams with the brush
- Check for drips and smooth them immediately
Add Second and Third Brick Tones for Depth
Once you’ve covered the wall with the base brick color, bring in your second and third tones to create variation and depth: you’ll dab and feather mid and darker hues onto random bricks, focusing on mortar edges and centers to suggest age.
Use subtle color layering techniques to avoid hard lines, mixing tones for believable brick texture variations and a cohesive industrial look.
Use Sponges and Rags to Create Texture
Grab a natural sea sponge or a lint-free rag and start stippling and dabbing the paint to build subtle brick texture; the irregular pores and folds will break up flat areas and mimic the pits and wear of real masonry.
Use a natural sea sponge or lint-free rag to stipple paint, building subtle, worn brick texture with varied porosity.
- Use sponge techniques for varied porosity and soft shifts.
- Try rag application for streaked, worn looks.
- Vary pressure to control texture.
- Layer lightly, stepping back to evaluate.
Dry‑Brushing Techniques for Subtle Highlights
After you’ve built texture with sponges and rags, use dry‑brushing to lift out subtle highlights and define the raised areas of your faux bricks. Work with a nearly‑dry brush, light pressure, and short strokes; test on scrap. Practice dry brushing techniques to create soft contrast without glazing.
| Tool | Effect |
|---|---|
| Stiff brush | Crisp highlights |
| Fan brush | Soft streaks |
| Dry rag | Blend edges |
| Test patch | Adjust intensity |
Age Bricks Naturally With Scumbling and Glazing
When you want bricks to read as weathered and lived‑in, scumbling and glazing add depth and subtle grime without obscuring texture.
You’ll layer thin washes, drag dry brushes, and soften edges to suggest age. Use scumbling techniques and glazing methods sparingly to avoid overworking the wall.
Layer thin washes, drag with a dry brush, and gently soften edges—use scumbles and glazes sparingly to imply age.
- Thin paint washes
- Drag with dry brush
- Soft blended edges
- Spot glaze buildup
Create Mortar Lines Manually With a Putty Knife or Brush
If you want crisp, authentic mortar lines that read like real brickwork, use a putty knife or stiff brush to apply a contrasting joint color directly over the dried base coat; scrape or drag the tool with steady pressure to carve clean edges and remove excess before it skins over.
You’ll control mortar texture techniques through manual application methods, varying pressure and angle for realistic depth and irregularity.
Use a Stencil or Tape for Perfect Grout Bands
Pick a stencil or painter’s tape that matches the width and pattern you want, since the right tool makes consistent grout bands much easier.
Mask the surrounding bricks carefully and press edges down firmly to prevent bleed-through.
Then use a steady hand and even paint pressure to lay down uniform grout lines.
Choose The Right Stencil
One straightforward way to get crisp, consistent grout lines is to use a stencil or painter’s tape designed for brick patterns, so you can replicate the mortar joints without freehand guessing.
You’ll choose stencil materials and stencil sizes based on brick scale and surface. Consider:
- Flexible plastic for curved surfaces
- Rigid mylar for sharp edges
- Multiple sizes for variation
- Reusable options for economy
Prep And Mask Carefully
Start by cleaning and drying the wall thoroughly. Then measure and mark your brick layout so your stencil or tape lines sit perfectly level and evenly spaced.
Mask grout bands with high‑quality tape or a reusable stencil, pressing edges to prevent bleed. Work in small sections, remove tape while paint’s tacky, and plan color layering and texture blending for realistic depth.
Paint Consistent Grout Lines
When you’re ready to define the mortar, use a stencil or high‑adhesion painter’s tape to lay crisp, even grout bands that stay straight across the wall.
You’ll control grout color selection and grout application techniques by following steps:
- Measure and mark horizontal guides.
- Apply stencil or tape firmly.
- Use a small brush or roller for even application.
- Remove tape slowly for sharp edges.
Distressing Techniques: Chipping, Fading, and Efflorescence
If you want your painted brick to read as genuinely aged, focus on three distressing techniques—chipping, fading, and simulating efflorescence—that work together to break up uniform color and texture.
You’ll use chipping techniques to expose base tones, fading effects with diluted washes for subtle wear, and efflorescence treatment with powdered pigments.
Combine weathered finishes, color variation, and texture layering for believable aged brick.
Add Soot and Grime for Industrial Authenticity
Although you don’t need to overdo it, adding soot and grime will instantly sell an industrial look—focus your darker tones where smoke, exhaust, and hands would naturally contact the brick, then feather them outward for soft buildup.
Lightly add soot where smoke and hands touch, feathering outward for a natural industrial patina.
- Use light soot application with a dry brush for subtle marks.
- Layer grime texture near vents and ledges.
- Apply aging techniques sparingly to avoid overwork.
- Follow authenticity tips for industrial details and believable wear.
Blend Edges to Avoid a Painted‑On Look
Adding soot and grime sets the mood, but you’ll undermine that realism if the paint edges read as obvious brushstrokes.
You should use subtle blending techniques and gentle edge feathering with a dry brush or sponge, softening shifts between brick and mortar.
Work quickly while paint’s wet, step back often, and vary pressure to avoid uniform lines so the wall reads weathered, not painted-on.
Correct Common Texture Mistakes on the Fly
If you spot a texture mishap, you can fix it quickly with spot‑blending techniques that match surrounding tones and brushwork.
For uneven texture, feather in light layers or stipple with a damp sponge until the surface reads consistently.
Finish with quick edge cleanup to crisp mortar lines and erase any painted‑on halos.
Spot-Blending Techniques
Spot-blending lets you correct texture flaws quickly without repainting whole sections, and you’ll use it whenever roller stipple, missed fibers, or uneven mortar lines show up after your first pass.
Use targeted touch-ups and feathering for seamless texture enhancement.
Try these spot blending techniques:
- Dab with matching paint
- Feather edges with a damp sponge
- Recreate nearby stipple
- Blend pressure, not paint concentration
Fixing Uneven Texture
Those quick spot fixes help, but sometimes you’ll still end up with patches that feel too heavy, too smooth, or ridged compared to the rest of the wall.
Do a surface assessment, then use targeted repair techniques: feather edges, add light paint layering, or retexture with matching tools.
Focus on texture blending and texture consistency for texture uniformity, then finalize with precise finishing touches after proper wall preparation.
Quick Edge Cleanup
When you spot a ragged seam or paint overlap along a brick edge, act fast to keep the effect clean:
Use precise edge techniques and simple cleanup strategies to preserve the illusion and save time.
- Wipe excess with a damp cloth immediately
- Feather edges with a dry brush
- Reapply tiny amounts of base color
- Use a toothpick for tiny gaps
When to Step Back: Judging Realism and Contrast
How far should you stand back to judge the realism and contrast of your brick effect? Step three to ten feet, squint, and evaluate realism techniques and contrast adjustments—make sure mortar lines read natural and highlights aren’t flat. Use this quick check:
| View Distance | What to Look For |
|---|---|
| 3 ft | Detail, texture |
| 10 ft | Overall balance, depth |
Seal Your Faux Brick: Clear Coats and Breathable Sealers
Now that the paint’s dry, you’ll want to pick the right clear coat—matte, satin, or gloss—to lock in color and texture.
For exterior or moisture-prone areas, choose a breathable masonry sealer so trapped moisture can escape without lifting the finish.
Apply according to the product directions, recoat as recommended, and inspect annually for wear.
Clear Coating Options
Choosing the right clear coat will protect your faux brick finish and keep colors vivid without trapping moisture; pick between durable clear coats for high-traffic areas and breathable sealers for exterior or masonry substrates.
Use clear coat benefits and proper application techniques to seal. Consider:
- Water-based polyurethane for indoor durability
- Matte vs gloss finish choices
- Spray vs brush application
- Quick-dry formulas for fast turnarounds
Breathable Masonry Sealers
If your faux brick sits on exterior masonry or any surface that needs to breathe, pick a breathable masonry sealer so moisture can escape without ruining the paint or causing efflorescence; these sealers let vapor pass while protecting against water, dirt, and UV so your finish lasts. You’ll value breathable sealers for moisture protection, air circulation, paint compatibility, surface adhesion, weather resistance, application techniques, long term durability.
| Feature | Benefit |
|---|---|
| Breathability | Air circulation |
| Water Repel | Moisture protection |
| Adhesion | Surface adhesion |
| UV Stable | Weather resistance |
Application And Maintenance
When your faux brick is fully dry and the surface is clean, seal it with a clear coat or breathable masonry sealer to lock in color and protect against weather and wear; choose a product rated for exterior masonry and follow the manufacturer’s instructions for coverage, drying times, and number of coats.
- Paint longevity and color retention benefit from proper sealing.
- Surface durability and weather resistance improve.
- Cleaning techniques fit maintenance schedule.
- Touch up methods and repair strategies keep finish fresh.
Finish Options: Matte Seal for a Raw Concrete Feel
To get that industrial, raw‑concrete look, seal your painted brick with a matte finish that soaks into the surface without adding shine.
You’ll preserve subtle concrete texture, mute color, and reduce glare while keeping the tactile, weathered appearance.
Apply a thin, even coat with a low‑nap roller or sprayer, test first, and allow full cure before light use.
Protecting the Wall: High‑Traffic and Moisture Considerations
When you finish the brick effect, pick a sealant suited to the traffic level and exposure—water‑based polyurethanes work well for indoor walls while tougher solvent‑based options suit heavy wear.
Consider moisture barrier methods like primer with a vapor‑check or a clear masonry sealer for damp areas.
Finally, choose durable surface finishes (satin or semi‑gloss) to resist scuffs and make cleaning easier.
Sealant Selection Guide
Pick a sealant that matches the wall’s exposure: high-traffic areas need a tougher, abrasion-resistant finish, while moisture-prone surfaces call for a water-repellent, breathable product that prevents trapped damp.
Choose based on sealant types and durability factors, consider application methods, finish options, environmental considerations, and follow maintenance tips:
- Acrylic vs. polyurethane
- Breathable vs. water-repellent
- Spray, roller, brush
- Matte, satin, gloss
Moisture Barrier Methods
Although brick naturally breathes, you’ll still need a clear moisture barrier strategy to protect painted finishes in high-traffic or damp areas; prioritize moisture control by installing vapor barriers behind drywall or using breathable membrane systems on masonry.
Choose barrier methods that allow vapor diffusion, combine with humidity management via ventilation or dehumidifiers, and apply targeted sealing techniques around joints and penetrations to prevent trapped moisture.
Durable Surface Finishes
Controlling moisture behind the wall helps, but you also need surface finishes that stand up to wear and repel water in active spaces.
Choose durable coatings and proper material selection to guarantee surface longevity and finish durability. Apply protective layers with careful application techniques, and follow maintenance tips for weather resistance.
- Pick tough primers and sealers
- Use abrasion-resistant topcoats
- Follow correct application techniques
- Schedule simple maintenance checks
Lighting Tips to Show Texture and Shadow
When you light a faux brick wall, aim for oblique angles that exaggerate the mortar lines and surface irregularities so the texture reads clearly from a distance.
Side-lighting or low, raking light casts the shadows that turn flat paint into believable relief. Use light direction to create texture contrast and shadow play, mixing ambient lighting with natural illumination and artificial sources to enhance color depth and highlight effects.
Styling a Faux‑Brick Wall: Metal, Wood, and Concrete Pairings
Good lighting makes the brick texture pop, but your material choices determine the room’s character—metal brings an industrial edge, wood warms the palette, and concrete reinforces a modern, minimalist vibe.
Good lighting reveals brick’s depth; metal sharpens, wood softens, and concrete anchors a modern, minimalist mood.
- Use metal accents with industrial furnishings for contrast.
- Layer wood textures for cozy balance.
- Add concrete finishes near wall decor for cohesion.
- Focus on color coordination, lighting effects, and smart furniture pairing.
Color Palettes That Suit Industrial Brick Walls
Palette choice shapes how your industrial brick wall reads in the room, so pick hues that either amplify its raw edges or soften them.
You’ll explore industrial color schemes: warm neutrals and muted tones create grounding backdrops, while bold accents or vintage hues add character.
Combine monochromatic palettes with contrasting textures and modern finishes to balance grit and refinement for a cohesive, intentional look.
Where to Place a Faux‑Brick Feature Wall
Think about using a faux‑brick as an accent wall to anchor your living room seating or TV area.
You can also make a bold first impression by placing it in the entryway.
In narrow spaces, a hallway feature wall adds texture without overwhelming the room.
Accent Wall In Living Room
When choosing where to place a faux‑brick accent wall in your living room, pick a surface that naturally draws the eye—behind the sofa, around the fireplace, or the wall facing the room’s main entrance are all strong candidates.
Consider design trends, accent colors, furniture placement, lighting options, wall decor, texture contrast, space optimization, artistic touches, and color schemes:
- Behind sofa for focal impact
- Surround fireplace for warmth
- Opposite entry to welcome guests
- Flank TV to balance layout
Entryway Or Hallway Feature
Entryways and narrow halls make excellent spots for a faux-brick feature because they immediately set the tone as guests arrive; place it on the wall opposite the door or along the longest run to draw the eye.
Pair with focused entryway lighting, a slim console, and minimalist hallway decor to keep the space functional while showcasing texture without overwhelming traffic flow.
Painting Existing Brick vs. Creating Faux Brick on Drywall
Although painting real brick and simulating brick on drywall both aim for that textured, classic look, they call for different prep, materials, and techniques.
Painting real brick or simulating it on drywall both achieve that classic textured look, but require different prep and techniques.
You’ll weigh real brick versus faux brick across pros cons like aesthetic appeal, cost comparison, installation techniques, maintenance needs, design flexibility, durability factors, and texture options.
- Real brick: durable, less flexible
- Faux brick: design flexibility
- Prep: cleaning vs priming
- Maintenance: sealing vs patching
Budget Breakdown: Low‑Cost to Premium Approaches
You’ll weigh materials cost comparison to see what paints, primers, and tools fit your budget.
Decide whether labor vs DIY makes sense—doing it yourself saves money but a pro can speed the job and improve the finish.
Finally, consider finishing upgrade options like sealers or faux-mortar detail that raise the look (and the price).
Materials Cost Comparison
Start by deciding how much you want to spend, because the materials you pick will drive most of the project cost—from a basic kit that still looks great to premium products that last longer and need less touch‑up.
Compare paint finishes and get a clear cost breakdown so you know tradeoffs.
- Basic paint kit
- Mid-range brands
- Specialty faux‑brick tools
- Top‑grade primers and sealers
Labor vs DIY
If you’re handy and have time, doing the faux brick yourself can cut labor costs drastically compared with hiring a pro.
Balance cost considerations against project complexity and your skill level: simple stenciling lowers expenses, detailed relief demands pros.
Estimate time investment honestly.
Choose DIY for budget and aesthetic preferences; hire for consistency and long term durability when quality and speed matter.
Finishing Upgrade Options
One clear way to think about finishing upgrades is to group them by budget—low, mid, and premium—so you can match materials and techniques to your goals and wallet.
Choose texture finishes, color variations, and wall treatments that suit your aesthetic choices while balancing paint durability and maintenance strategies.
- Low: basic paint and sealant
- Mid: textured glaze
- Premium: veneer panels
- Pro: professional seal coating
Time Estimates for a DIY Weekend Project
Because you’ll be working in stages—prepping, painting the base, adding mortar lines, and sealing—the whole brick-effect project typically fits into a single weekend, assuming you set aside about 6–10 hours across two days.
With solid time management and project planning, split tasks: prep and base coat day one, detailing and sealing day two.
Build breaks and drying time into your schedule.
Printable Tools & Materials Checklist
Now’s the time to get your printable tools and materials checklist ready so you’ll have everything on hand.
You’ll find sections for essential tools, paints and finishes, and safety and prep supplies to cover the whole job.
Print it out and check items off as you gather them.
Essential Tools Checklist
Before you start, gather every tool and material on this checklist so you won’t interrupt your work to hunt for supplies.
You’ll need basics to execute paint types and create convincing brick patterns. Keep everything ready, labeled, and within reach.
- Drop cloths, painter’s tape, masks
- Rollers, brushes, sponges
- Ruler, level, chalk line
- Bucket, mixing sticks, scraper
Paints And Finishes
1 essential set of paints and finishes will make your brick-wall effect look authentic and last—pick them before you start so you won’t pause mid-project.
Choose paint types for base and faux mortar, weigh finish options and sheen levels, and plan color choices.
Test texture effects and layering techniques, select application methods suited to surfaces, and confirm durability factors to guarantee a lasting industrial look.
Safety And Prep Supplies
Gathering the right safety gear and prep supplies will keep you protected and make the brick-effect finish go on cleanly and last.
You’ll want a concise checklist before starting.
- Gloves, goggles, and respirator for safety gear
- Drop cloths and masking tape as prep materials
- Sandpaper and spackling for surface repair
- Quality brushes, rollers, and a paint tray
Troubleshooting: Peeling Paint, Uneven Color, and Seams
If your brick finish starts peeling, looks blotchy, or shows visible seams, don’t panic—you can fix most problems with the right prep and technique.
Address peeling solutions by scraping and sanding, then prime for paint adhesion.
Use feathered color blending and thin glazes to even tone, apply seam fixes with texture correction paste, and sand lightly before repainting for a seamless industrial look.
Maintenance and Cleaning Tips for Painted Brick
Keeping your painted brick looking sharp only takes a few regular steps: wipe away dust and cobwebs with a soft brush or vacuum, rinse gently with a garden hose or low-pressure washer, and spot-clean stains with a mild detergent and soft scrub brush.
- Check finishes monthly
- Follow a simple maintenance schedule
- Use gentle cleaning methods only
- Touch up chips promptly to prevent larger repairs
When to Call a Pro: Complex Walls or Commercial Installs
Once routine cleaning and small touch-ups aren’t enough, you should consider bringing in a pro—especially for complex walls or commercial projects where scale, access, and codes matter.
You’ll benefit from pro installation, design consultation, and expert advice on wall complexity, material sourcing, and installation techniques.
Pros manage project budget and time constraints and deliver a consistent professional finish for commercial projects and tricky interiors.
Quick Inspiration: Five Faux‑Brick Variations to Try Next
Try one of these five faux‑brick variations to refresh your space without a full renovation.
You’ll tap faux brick history and DIY inspiration while exploring color psychology and texture techniques for industrial aesthetics.
- Distressed whitewash for soft contrast
- Exposed red with mortar accents
- Monochrome charcoal for drama
- Mixed-tone reclaimed look for warmth
Frequently Asked Questions
Can Faux Brick Be Applied Over Wallpaper Without Removing It First?
Yes — you can apply faux brick over wallpaper if it’s well-adhered and smooth. You’ll guarantee wallpaper compatibility by cleaning, sanding glossy surfaces, priming, and using adhesives formulated for faux brick application so it bonds securely and lasts.
Will Painted Faux Brick Affect Home Resale Value?
A bold faux brick can signal character, but it can help or hurt resale—thoughtful investment considerations and awareness of buyer preferences matter; you’ll preserve value by choosing neutral tones, removable techniques, and documenting reversible work.
Can You Install Faux Brick on a Ceiling or Archway?
Yes—you can install faux brick on a ceiling or archway; with proper faux brick installation, secure lightweight panels, reinforce framing where needed, and plan your ceiling design to manage weight, seams, and finishing for a seamless, durable result.
Are There Voc‑Free Paints That Still Achieve Realistic Brick Texture?
You absolutely can—there are VOC‑free paints that mimic brick texture, and they’re nothing short of miraculous. You’ll use textured finishes and eco friendly options, combine primers and graining tools, and achieve realistic, durable results.
How Do Radiant Heating or Underfloor Systems Affect Wall Paint Adhesion?
Radiant heating can speed curing and expand substrates, so you’ll test paint preparation and surface compatibility first; you’ll insulate or use heat-tolerant primers, guarantee moisture control, and choose flexible paints rated for thermal cycling.
Conclusion
You’ve got the map and the tools—now make that wall sing like a well-worn ledger in an old factory. Take your time choosing texture and tone, prep the surface properly, and follow the steps so your faux brick looks deliberate, not accidental. Patch problems early, clean gently, and call a pro for tricky substrates or big commercial jobs. With a little care, your industrial wall will age like character, not neglect.