How to Paint a Ceiling Like a Pro: Expert Techniques
You’ll get a pro-looking ceiling by prepping thoroughly, fixing cracks, and priming patched or stained areas; remove fixtures and mask edges, then use a roller with an extension and an angled brush for clean lines. Choose flat paint to hide flaws or washable for durability, match primer to the surface and stains, and keep a wet edge while rolling to avoid lap marks. Follow safety steps and drying times, and keep going to learn exact tools, quantities, and tricks.
Goal: A Professional-Looking Ceiling in 4 Steps
Start by picturing the finished ceiling: smooth, even, and free of drips.
You’ll follow four clear steps: surface preparation, select paint finishes that suit ceiling textures and room ambiance, consider color psychology and light reflection, maintain tools for consistent application, and adapt for ceiling heights and accessibility solutions.
Stay aware of current design trends to achieve a professional result.
Which Ceiling Types Change Your Approach
Although most ceilings look similar at a glance, the material and profile you’re dealing with—flat drywall, textured popcorn, beadboard, exposed beams, or plaster with cracks—will change your prep, paint choice, and application method.
You’ll adjust for ceiling textures, consider paint finishes and lighting effects, match color selection to room dimensions and ceiling height, follow maintenance tips, and track design trends.
Choosing Ceiling Paint: Flat vs. Washable
Wondering whether to choose flat or washable ceiling paint? You’ll pick flat for hiding imperfections—it gives a smooth ceiling finish and minimizes glare.
Choose washable when you need durability in high-traffic rooms or kitchens; its higher paint sheen resists stains and cleans easily.
Balance appearance and maintenance: bedrooms and living rooms suit flat, while bathrooms and kids’ rooms benefit from washable.
Primer for Ceilings: Which to Use and Why
Before you start painting, pick the right primer—latex for most clean, drywall ceilings, oil or shellac for stains and smoke, and bonding primers for slick surfaces.
Use stain-blocking primers when there are water marks or tannin bleed, and a white-tint primer if you’re switching from dark to light.
Apply one even coat with a roller, cutting in edges first, and allow full cure before the topcoat.
Best Primer Types
When you’re choosing a primer for a ceiling, pick one that matches the surface and the problem you’re solving—stains, texture, or new drywall—because the right primer makes paint go on smoother and last longer.
Consider primer types for different ceiling materials, weigh coverage comparison and primer application ease, prioritize stain blocking and moisture resistance, and balance color selection with finish durability.
When To Use
You’ve picked the right primer type—now decide when to actually apply it. Use primer to guarantee adhesion, control stains, and improve ceiling aesthetics before topcoat work.
Consider conditions, surface porosity, and color change. Follow painting techniques for best results.
- New drywall
- Stained areas
- Strong color shifts
- High-humidity rooms
- Textured surfaces
Application Tips
Start by setting up a clean, well-lit workspace and pick a primer suited to the ceiling’s condition—stain-blocking for spots, high-build for texture, or a standard drywall primer for fresh surfaces.
For surface preparation, mask edges, practice edge cutting, then use roller methods for even paint application.
Combine brush strokes for corners, try spray techniques for smooth ceiling finishes, and test texture techniques first.
How Much Primer and Paint You’ll Need
Start by measuring your ceiling’s length and width to calculate the total square footage.
Then compare that area to the coverage listed on your primer and paint cans to see how many gallons you’ll need.
Don’t forget to account for texture, number of coats, and any waste when estimating.
Calculating Ceiling Area
Before you pick up a roller, measure the ceiling so you know exactly how much primer and paint to buy.
Use ceiling dimensions and simple area calculation to plan. Multiply length × width for rectangles; add shapes for irregular rooms.
Checklist:
- Measure room length
- Measure room width
- Note alcoves or soffits
- Calculate total square footage
- Round up for waste and windows/doors adjustments
Primer And Paint Coverage
Once you’ve calculated the ceiling area, figure out how much primer and paint you’ll actually need by checking each product’s coverage rate and accounting for the ceiling’s texture and number of coats. Choose primer types for stain blocking and surface adhesion; match paint consistency to application techniques, color selection, finish durability, moisture resistance, ceiling preparation, and drying times.
| Product | Coverage | Coats |
|---|---|---|
| Primer | 350 ft²/gal | 1–2 |
| Paint | 400 ft²/gal | 1–2 |
| Sealer | 300 ft²/gal | 1 |
Essential Tools Pros Use for Ceilings
Tools make the job faster and cleaner, and knowing which ones pros rely on will save you time and headaches when painting a ceiling.
You’ll match tools to ceiling textures, paint finishes, and color choices, follow preparation steps, application techniques, tool recommendations, maintenance tips, and project timelines.
- Roller with extension
- Angled brush
- Drop cloths
- Paint tray and liner
- Pole sander
Safety Gear and Ladder Setup for Overhead Work
Before you start, make sure you’ve got the right protective gear—goggles, a mask, and a drop cloth—to keep paint and dust off your skin and lungs.
Set your ladder on firm, level ground and lock it securely so you’re steady while reaching the ceiling.
Work methodically, keeping three points of contact and moving the ladder instead of overstretching to prevent falls.
Proper Protective Gear
Good safety starts with the right gear and a steady ladder—you’re protecting your head, eyes, lungs, and balance while working overhead.
Wear protective masks and safety goggles, use drop cloths, and put on gloves; follow ventilation tips and basic ladder safety.
- Protective masks
- Safety goggles
- Drop cloths
- Gloves
- Ventilation tips and ladder safety
Stable Ladder Placement
1 steady ladder set on firm ground makes overhead painting safer and more comfortable.
Position it beneath your work, lock spreaders, and level feet on stable ground.
Check ladder stability before climbing, remove slippery debris, and keep tools in a belt or tray to avoid shifting weight.
Prioritize ladder safety: never overreach, face the ladder, and have a spotter if possible.
Safe Working Techniques
When you’re working overhead, wear a hard hat or bump cap, safety glasses, a dust mask or respirator, and non-slip shoes so you’re protected from falling debris, paint drips, and fumes.
Keep ladder safety and workspace organization top of mind.
- Check ceiling height and ladder angle
- Plan ventilation needs and lighting considerations
- Use proper tool selection and protective coverings
- Prep surface preparation and test paint consistency
- Confirm color selection before final coats
Quick Room Prep: Cover, Move, and Protect
Start by clearing as much out of the room as you can and moving remaining furniture to the center. Then cover it with drop cloths or plastic sheeting to protect against paint splatter and dust.
Use ceiling preparation techniques like taping edges and removing light fixtures. Secure floors with rosin paper, label covered items, and apply room protection strategies so cleanup’s fast and paint stays where it belongs.
Fixing Cracks, Seams, and Joint Compound
Before you paint, you’ll want to prep any cracks by widening them slightly, cleaning out debris, and applying a quality filler so the repair bonds well.
When you use joint compound, feather the edges thinly and smooth them with a wide knife so changes disappear under primer.
Take your time on these steps—good prep keeps seams from telegraphing through the finish.
Prep Cracks Properly
If you spot hairline cracks, gaps at seams, or dried joint compound, tackle them now so your ceiling paint lays smooth and lasts longer.
You’ll do a quick crack assessment, choose repair materials, and prepare edges before painting.
- Widen and clean cracks
- Remove loose compound
- Apply patching compound
- Sand smooth after drying
- Prime repaired areas
Feather Joint Compound
When you feather joint compound, you’re blending repairs into the surrounding ceiling so seams and patches disappear under paint.
Apply a thin, tapered edge with a wide drywall knife, smoothing from the center out and wiping excess off the blade as you go.
Use feather application techniques: thin passes, light pressure, and overlapping strokes.
Follow feathering tips—sand lightly, dust off, and prime before painting.
Treating Stains, Water Damage, and Mildew
Stains, water damage, and mildew can ruin a fresh paint job, so you’ll want to address them thoroughly before painting.
You’ll perform surface preparation, use stain removal and mildew treatment, apply cleaning solutions, and follow drying techniques to prevent recurrence.
- Identify source of water damage
- Clean mildew with proper solution
- Treat stains with primer
- Repair damaged drywall
- Confirm full drying before paint
Painting Popcorn and Textured Ceilings Safely
After you’ve handled stains, mildew, and repairs, take extra care with popcorn and other textured ceilings because their loose texture and hidden voids demand different prep and painting techniques.
Wear goggles, a respirator, and drop cloths; test for asbestos if home is pre-1980s.
Use a thick-nap roller, avoid overworking texture, and consider ceiling texture options before painting.
Follow strict safety precautions.
Remove Texture or Repaint It : How to Decide
If you want a cleaner, more modern ceiling you’ll need to decide whether to remove the texture or simply repaint it, and that choice hinges on condition, cost, and your tolerance for disruption.
You’ll weigh texture removal vs repainting by evaluating damage, doing a cost analysis, and planning ceiling repair and long term maintenance.
- aesthetic considerations
- material choices
- texture removal
- ceiling repair
- cost analysis
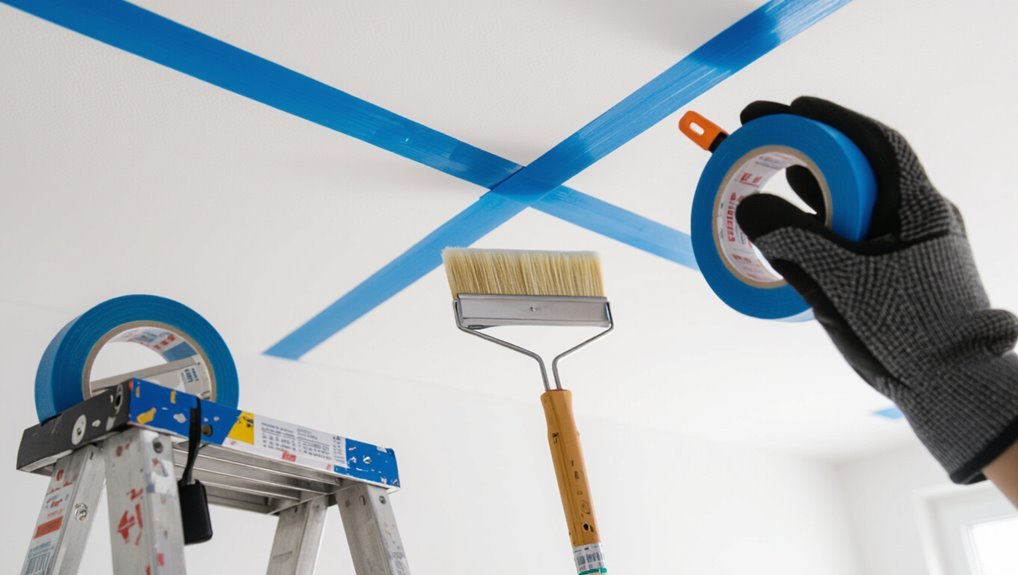
Masking Trim, Baseboards, and Recessed Lights
Before you start rolling, mask the trim and baseboards with painter’s tape so you get clean, sharp edges.
Cover recessed lights with plastic and tape or use foam protectors to keep paint out of the fixtures.
Taking these simple steps saves time on touch-ups and protects your hardware.
Protecting Trim Edges
Masking trim, baseboards, and recessed lights protects your clean lines and saves you hours of touch-up work, so take the time to do it right.
You’ll focus on edge sealing and trim protection to keep crisp lines.
Follow these steps:
- Clean and dry surfaces
- Apply painter’s tape tightly
- Use low-tack tape on finished trim
- Press edges firmly
- Remove tape at an angle promptly
Safeguarding Recessed Fixtures
Start by shutting off power to the recessed fixtures and letting the bulbs cool, then cover the cans and trim with crumpled paper or painter’s drop cloths secured with low-tack tape so paint won’t seep in or stick to the metal. Use fixture protection techniques, tape baseboards, and label circuits for recessed fixture safety.
| Task | Material | Tip |
|---|---|---|
| Cover cans | Paper/cloth | Low-tack tape |
| Tape edges | Painter’s tape | Press firmly |
| Label power | Tape/marker | Confirm off |
Best Rollers and Nap Lengths for Ceilings
When you want a smooth, even ceiling with minimal splatter, choosing the right roller and nap length matters—pick too short and you’ll miss texture, pick too long and you’ll leave roller marks and excess paint.
Choose roller types and nap thickness based on ceiling textures and paint finishes; focus on application techniques and coverage rates.
- Smooth ceilings: 1/4″–3/8″
- Light orange peel: 3/8″
- Stippled: 1/2″
- Textured: 3/4″
- High nap for porous surfaces
Load and Use an Extension Pole Correctly
Attach the roller frame securely to the extension pole, then thread the pole into the frame’s connector until the locking mechanism clicks so the head won’t wobble while you paint.
Load the roller evenly, extend the pole to a comfortable, safe proper height, and use steady extension pole techniques.
Paint with controlled strokes, retract to check coverage, and avoid overreaching to maintain balance and finish quality.
Cut a Clean Edge Where Wall Meets Ceiling
Start by prepping the wall and ceiling junction—clean off dust, repair any gaps, and let primer dry so paint adheres.
Apply painter’s tape in a straight line to protect the wall, pressing the edge down firmly.
Then cut in with a good-quality angled brush, keeping steady pressure for a crisp seam before rolling the rest.
Prep The Surface
Before you roll any paint, cut a crisp line where the wall meets the ceiling so the finished job looks sharp and professional.
You’ll use surface preparation techniques and ceiling repair essentials to prep seams, fill cracks, and sand smooth. Then clean dust and degrease. Finally, prime patched areas so paint adheres evenly.
- Inspect for cracks
- Fill holes
- Sand seams
- Clean surface
- Spot prime
Use Painter’s Tape
One clean strip of painter’s tape applied along the wall-ceiling junction makes cutting a crisp edge much easier, so press the tape down firmly and roll it to guarantee good adhesion. You’ll plan tape application, smooth bubbles, and protect trim. Remove tape while paint’s tacky for neat lines—timing matters for clean tape removal.
| Prep | Press | Smooth |
|---|---|---|
| Align | Roll | Check |
| Remove | Wait | Inspect |
Cut In With Brush
After you remove the tape or if you skipped it, grab a high-quality angled sash brush and load it with a thin ribbon of paint—too much will drip and too little won’t cover.
You’ll use brush selection and brush techniques for precision application at wall intersections and cutting edges, ensuring clean lines.
- steady wrist
- thin ribbon
- feather strokes
- corner strategies
- blend overlap
Edger Tool vs. Brush: Pros and Cons
While edger tools speed up straight lines and cut down on overlap, brushes give you finer control in tight corners and around fixtures.
You’ll weigh edger tool benefits like edge precision, tool durability, and user comfort against brush advantages: superior paint control, better corner access, and less splatter with practice.
Choose based on room layout, fixture density, and your steady hand.
Roll Like a Pro : Avoid Lap Marks
Keep a wet edge as you work so each new pass blends into the last and you don’t get visible seams.
Overlap each stroke lightly and feather the roller to smooth shifts without reloading too much paint.
If you stay consistent with pressure and speed, you’ll eliminate lap marks and get an even finish.
Maintain a Wet Edge
Start by planning short, overlapping strokes so each new pass blends into the still-wet paint—this is how you prevent lap marks and get a smooth, uniform finish.
You’ll use wet edge techniques, maintaining moisture and consistent pressure.
Tips:
- Keep a loaded roller
- Work in small sections
- Match drying times
- Re-roll edges lightly
- Avoid stopping mid-panel
Overlap With Light Strokes
Roll in short, light passes so each new stroke slightly overlaps the last, letting the paint feather out instead of building ridges.
You’ll keep a consistent sheen by using light strokes and steady pressure, blending wet edges as you go.
Move methodically across the ceiling, reload the roller often, and check from different angles to spot and smooth any lap marks immediately.
How Many Coats You Really Need (And Why)
When you’re deciding how many coats to apply, think about coverage, color change, and the ceiling’s surface—each determines whether one coat will cut it or if you’ll need two (or sometimes three).
Consider paint absorption and ceiling texture; inspect for stains or deep color. Decide based on finish uniformity:
- Primer use
- Original color depth
- Paint quality
- Texture complexity
- Light exposure
Drying Times, Temperature, and Humidity Tips
Although paint can look dry to the touch within an hour, you’ll need to wait longer before recoating or exposing the ceiling to humidity or temperature swings; cure time depends on the paint type, room conditions, and how thickly you applied it.
You should monitor drying conditions: control humidity effects and moisture levels, maintain recommended temperature ranges, and optimize drying influence to achieve ideal conditions for each coat.
Working With High and Vaulted Ceilings
If you’re tackling high or vaulted ceilings, plan for extra safety, reach, and lighting before you open the paint can.
You’ll need the right gear and approach for high ceiling techniques and vaulted ceiling tips.
- Use an adjustable scaffold
- Wear fall protection
- Choose extension poles
- Add bright, portable lighting
- Work in small, manageable sections
Painting Ceilings With Crown Molding Present
Having the right gear for high ceilings also pays off when you’re working around crown molding, since the edges demand steady hands and controlled reach.
Use angled brushes and an edger to cut in cleanly, employ painter’s tape sparingly, and master crown molding techniques for uniform lines.
Choose compatible ceiling paint finishes, roll with a thin nap, and inspect seams for touch-ups.
Paint Around Fans and Light Fixtures Safely
Before you start, turn off the power at the breaker so you don’t risk a shock while you work.
Remove light fixtures and fan blades when you can, or tightly cover them with plastic and painter’s tape if they stay in place.
Then cut in carefully around the edges with a steady hand or angled brush to keep paint off the hardware.
Turn Off Power
When you cut power at the breaker, you reduce the risk of shocks, accidental motor starts, and burned-out bulbs while painting around fans and light fixtures.
You should confirm safety measures and label power sources. Follow these steps before painting:
- Turn off circuit at breaker
- Test fixture with noncontact tester
- Inform others in house
- Tape breaker switch off
- Keep ladder away from live wiring
Remove Or Protect Fixtures
Remove or shield fixtures so paint doesn’t gum up moving parts or stain shades and bulbs.
Before painting, turn power off and decide whether fixture removal is feasible; unscrew and label parts, then store safely.
If leaving fixtures, use taped plastic, painter’s tape, and secure covers for fixture protection.
For fans, immobilize blades and wrap motor housings to prevent drips and dust contamination.
Cut In Carefully
Start by outlining a narrow band of paint where the ceiling meets fixtures and trim so you can work confidently and avoid drips.
You’ll use precise cutting techniques and steady brush selection to guarantee edge precision.
Practice technique practice before tackling fixtures, and control paint application to prevent splatters.
- Mask edges
- Use angled brush
- Steady hand
- Slow strokes
- Inspect edges
Painting Over Glossy or Semi-Gloss Ceilings
Because glossy and semi-gloss finishes resist new paint, you’ll need to scuff and prime the surface before rolling on a fresh coat.
For glossy ceiling preparation, sand lightly with fine-grit paper, clean dust, then apply bonding primer.
Use semi gloss paint techniques like thin, even coats and a nap roller suited for smooth surfaces.
Let each coat dry fully for best adhesion.
Choose Ceiling Color to Brighten or Enlarge Rooms
When you want a room to feel brighter or more spacious, the ceiling color plays a big role—lighter hues reflect light and visually lift the room, while slightly cooler or warmer tones can change perceived depth.
You’ll use ceiling lightening to enhance room perception. Consider:
- Pure white for maximum reflectivity
- Soft off-white for warmth
- Pale blue to recede
- Warm cream to cozy
- Match trim subtly
Using Tinted Primers for Better Coverage
If your ceiling has stains, strong previous colors, or you’ve chosen a deep new shade, tinting the primer will cut down on coats and hide imperfections more effectively than plain white primer.
You’ll see tinted primer benefits in fewer topcoats and smoother color.
Use targeted application techniques: brush edges first, cut in small sections, then roll consistent passes, letting the primer dry fully before painting.
Fast Workflow: Cut, Roll, Maintain a Wet Edge
Now that your tinted primer’s dry, start with a fast, consistent workflow: cut in a few feet of ceiling along the walls with a steady angled brush, then immediately follow with the roller, keeping your passes overlapping to preserve a wet edge.
Use cutting techniques and rolling methods for wet edge maintenance and an efficient workflow:
- Load brush and roller properly
- Work in 3–4 foot sections
- Maintain even pressure
- Overlap each pass
- Monitor paint sheen to judge edge
Prevent Drips and Splatter on Floors and Furniture
Before you start rolling, lay down full-coverage drop cloths or plastic sheeting so every inch of flooring is protected.
Move or completely wrap furniture with breathable covers and secure them with painter’s tape so nothing gets splattered.
Keep a small brush and a rag handy to catch and wipe any stray drips as you work.
Protect Flooring Thoroughly
1 simple step you shouldn’t skip is covering the floor and any nearby furniture completely so paint drips and splatter don’t ruin them.
You should use durable flooring protection and keep edges taped.
Follow these quick tips:
- Lay drop cloths overlapping
- Tape seams tight
- Use plastic sheeting for spills
- Protect high-traffic paths
- Remove debris before painting
Shield Furniture Completely
Start by moving smaller pieces out of the room and covering remaining furniture with breathable drop cloths or heavy plastic, taping the edges securely so paint won’t seep underneath. You’ll secure larger items with surface shields and weighted fabric, label vulnerable spots, and keep paths clear. Prioritize furniture protection and inspect coverings periodically for gaps.
| Item | Action |
|---|---|
| Sofa | Drape, tape |
| Table | Wrap, weight |
| Electronics | Remove, cover |
Fix Common Ceiling Paint Mistakes on the Spot
Many common ceiling paint mistakes can be fixed quickly if you catch them early, and knowing the right quick fixes will save you time and frustration.
You’ll handle common errors with instant fixes, touch up techniques, emergency solutions for paint mishaps, and quick remedies.
Use these steps:
- Blot drips immediately
- Feather edges with brush
- Sand glossy spots
- Recoat thin areas
- Clean roller lines
When to Call a Pro: Structural, Asbestos, Mold
If you suspect structural damage, asbestos, or mold, don’t try to handle it yourself—call a licensed professional who can assess safety risks and prescribe the right remediation. You’ll need asbestos testing, mold assessment, and evaluation of structural issues. Seek professional consultation immediately to protect health and property.
| Fear | Safety | Relief |
|---|---|---|
| Shock | Assessment | Repair |
| Risk | Testing | Calm |
Cost-Saving Tips Without Losing Finish Quality
Once you’ve ruled out safety hazards and called in pros for serious issues, you can focus on cutting costs without sacrificing a professional-looking ceiling.
Use budget friendly techniques and invest in quality materials where it matters to save time and avoid rework.
- Buy primer-smart bundles
- Rent a pole sander
- Use angled brushes for edges
- Patch small defects yourself
- Shop seasonal paint sales
Low‑VOC and Eco-Friendly Ceiling Paint Options
While you want a durable, smooth finish, choosing low‑VOC or eco‑friendly ceiling paint lets you cut odors and health risks without compromising performance.
You’ll evaluate low VOC options and eco friendly paints by checking sustainable materials, air quality labels, and environmental impact.
Consider color selection, finish types, health benefits, application methods, and concise product comparisons to pick the best ceiling paint.
Cleaning Brushes, Rollers, and Reusable Tools
When you finish a coat, clean brushes promptly to remove paint before it hardens and damages the bristles.
For rollers, rinse thoroughly and spin or squeeze out excess water so they keep their nap and shape.
Store all reusable tools dry and protected so they’re ready for your next ceiling job.
Proper Brush Cleaning
Start cleaning your brushes, rollers, and reusable tools right after you finish painting to keep them in good shape and ready for the next job.
Use brush soap or appropriate cleaning solvents, practice proper rinsing, follow a maintenance schedule, use drying techniques, and guarantee tool storage.
- Flush bristles thoroughly
- Remove excess paint first
- Use solvent for oil-based paints
- Comb bristles flat
- Store upright
Roller Maintenance Steps
Tackle roller maintenance right away to keep nap even and prevent dried paint from ruining the cover. Rinse with warm water, use mild soap, spin out excess, and reshape before rollering or storing. For roller cleaning and roller storage follow quick steps:
| Step | Action |
|---|---|
| 1 | Rinse |
| 2 | Soap |
| 3 | Spin |
| 4 | Reshape |
| 5 | Store |
Storing Leftover Paint and Labeling Tips
If you plan to keep leftover ceiling paint, seal the can tightly and store it upside down in a cool, dry place to prevent air from drying out the edges and creating a skin.
Use smart paint storage, precise paint labeling, and simple paint organization to boost paint longevity.
Consider:
- color coding
- note container types
- record date
- list room/finish
- cap with plastic wrap
Inspect Checklist: What to Look for After Painting
Once your paint’s stored and labeled, check the ceiling carefully before you put furniture back or call the job done.
Inspect color consistency and drying uniformity under varied lighting effects.
Verify paint sheen and texture matching across panels.
Confirm edge precision at walls and fixtures, note ceiling height impacts, and assess stain treatment.
Plan touch up techniques and evaluate brush selection for final corrections.
Make a Small Ceiling Look Taller With Paint Tricks
Because low ceilings can make a room feel cramped, you can use paint strategies to create the illusion of height without remodeling.
Choose ceiling color and paint finishes to favor light reflections. Use illusion techniques and color gradients to alter room proportions.
Try these visual tricks:
- pale ceiling
- glossy trims
- vertical lines on walls
- lighter crown band
- subtle gradient upward
Tips for Basement and Industrial Ceilings
When you’re tackling a basement or industrial ceiling, pick products and techniques that handle moisture, rough textures, and exposed systems while still giving a clean, finished look. Choose basement colors and industrial finishes that mask ceiling textures, improve lighting effects, and aid moisture control. Consider acoustic tiles, prioritize air quality, and add ventilation solutions.
| Mood | Result |
|---|---|
| Calm | Safe |
| Bold | Raw |
| Warm | Inviting |
| Clean | Fresh |
Best Months and Weather to Paint a Ceiling
After you’ve picked products and addressed moisture and ventilation in basements or industrial spaces, pick the right time to paint for the best results.
You’ll want ideal temperature and controlled humidity levels; consider seasonal advantages and gentle weather conditions. Plan when drying’s efficient and odors disperse.
- spring mildness
- autumn lower heat
- avoid freezing
- avoid heavy rain
- ventilate during warmer days
Common Pro Mistakes : And How to Avoid Them
Although pros know the basics, they still slip up on predictable things that cost time and finish quality, and you can avoid them by watching for a few common traps.
Watch for common oversights: poor edge cutting, inadequate masking, and rushing between coats.
Control paint application—maintain consistent roller pressure, load, and wet edges.
Pause to inspect lighting and fix drips before they dry.
Final Quality Checklist for a Contractor Finish
Because the final impression hinges on details, run a focused checklist that nails coverage, edges, texture, and cleanup before you call the job done.
You’ll handle final touches and quality assurance via a quick visual inspection and drying assessment to confirm color consistency, surface smoothness, texture uniformity, edge sharpness, finish sheen, and light reflection.
- Check overall coverage
- Inspect edge sharpness
- Assess texture uniformity
- Verify finish sheen
- Confirm drying assessment
Frequently Asked Questions
Can I Paint a Ceiling Without Removing Heavy Crown Molding?
Yes — you can paint a ceiling without removing heavy crown molding. Use crown molding techniques like careful cutting-in, painter’s tape, and angled brushes. Follow ceiling painting tips: work in small sections, keep wet edges, and protect trim.
How Do I Handle Lead Paint Testing or Certification?
Think of lead paint like a storm you’ll steer through: you’ll use EPA-approved testing methods, follow safety precautions, and, if disturbed, hire certified contractors to meet certification requirements and protect occupants from lead paint hazards.
Will Ceiling Paint Reduce Noise or Improve Acoustics?
Ceiling paint won’t provide significant acoustic benefits; you’ll get minimal sound absorption from standard paint. For real noise reduction, you’ll need acoustic panels, thick coatings, or specialized products designed specifically for sound absorption and damping.
How Long Before I Can Rehang Artwork or Shelves?
Within 24–48 hours you can lightly rehung framed art, but wait 72 hours to a week for heavier shelves; dry time varies with paint and surface preparation, so touch-test and confirm full cure before loading weight.
Can I Use a Sprayer in a Furnished, Occupied Home?
Yes — you can, but you’ll need strict safety precautions and masking techniques: ventilate well, cover furniture, wear respirator and eye protection, patch HVAC, use low-overspray nozzle, test spray pattern, and keep occupants out during application.
Conclusion
You’ve tackled texture, tapped the right tools, and turned tedious tasks into tidy triumphs—now take a last look. Check edges, correct coverage, and confirm consistent color and clean lines. Keep calm if touch-ups are needed; careful corrections create crisp, contractor-caliber ceilings. Celebrate your craftsmanship, but stay cautious: avoid early cleaning or heavy light until paint’s fully cured. With steady strokes, smart supplies, and sharp standards, you’ll achieve a professional, picture-perfect finish.