How to Paint a Cement Block Wall: Full Beginner Guide
You can transform a dull cement block wall into a durable, attractive surface by cleaning, repairing, priming, and painting with masonry-grade products. Start by inspecting for cracks, efflorescence, and moisture, then pressure wash or scrub, patch defects, and let it fully dry. Use a breathable masonry primer and exterior masonry paint, apply with thick-nap rollers and brushes or a sprayer, and plan for two to three coats. Keep maintenance and low-VOC options in mind as you proceed to learn more.
Who This Guide Is For and What It Covers
Whether you’re tackling a weekend DIY or renovating a commercial space, this guide helps you paint cement block walls efficiently and with a professional finish.
You’ll get practical painting techniques, prep steps, and product choices tailored to varied surfaces.
It’s for homeowners, renters, and contractors wanting clear guidance on durability, coverage, and improving wall aesthetics without assuming advanced skills or prior masonry experience.
Can You Paint a Cement Block Wall?
Yes — you can paint a cement block wall, and doing so can improve appearance, add protection, and make cleaning easier.
You’ll choose suitable paint types for masonry, plan surface preparation to remove dust and efflorescence, and consider color selection for light reflection.
Address adhesion issues with primer, follow application best practices, and use maintenance tips to prolong the finish.
Quick Project Checklist to Start Painting
Start by gathering the essentials: masonry primer, exterior masonry paint, a stiff brush or power washer for cleaning, a mask and goggles, patching mortar or masonry filler, sandpaper or a grinder for rough spots, quality rollers and extension poles, and drop cloths or plastic sheeting to protect surrounding areas.
- Choose color selection samples and test swatches.
- Pack replacement brushes and tape.
- Prepare safety gear.
- Plan brush techniques and roller sequence.
- Schedule curing and cleanup.
Inspecting a Cement Block Wall Before Painting
Before you grab paint, walk the wall and check for any structural damage like cracks or crumbling mortar that need repair.
You’ll also want to look for moisture issues—stains, efflorescence, or damp spots—that can ruin a finish if unresolved.
Finally, test surface cleanliness by scrubbing a small area to see if dirt, grease, or loose material comes off.
Check For Structural Damage
How can you tell if a cement block wall is sound enough to paint? You’ll check structural integrity and note needed repair techniques.
Look for cracks, spalling, bulges, loose mortar, and shifting blocks. Address visible issues before painting.
Use professional repair techniques for major problems; minor cracks can be patched.
If uncertain, consult a structural pro to confirm safety and durability.
Look For Moisture Issues
If you see efflorescence, damp patches, peeling paint, or a musty smell, your cement block wall has moisture issues that need fixing before you paint.
You should perform moisture detection with a probe or meter, trace leaks, and address drainage or vapor barriers.
Once dry, apply appropriate sealing methods—masonry sealers or waterproof coatings—to stop recurrence before priming and painting.
Test Surface Cleanliness
Ready to paint? You should test surface cleanliness before priming.
Use simple checks and cleaning techniques to guarantee proper surface preparation.
- Wipe a 1 ft² area with a damp cloth
- Scrub stubborn stains with a mild detergent
- Rinse and let dry fully
- Tape a strip of painter’s tape to test adhesion
- Inspect for efflorescence or remaining dirt
Identifying Moisture and Efflorescence on Block
Before you paint, look for white powdery deposits on the block—that’s efflorescence and it can stop paint from sticking.
Check for damp spots or darkened areas that feel cool or wet to the touch, since ongoing moisture will cause peeling.
If you’re unsure, wipe a suspected area with a damp cloth, let it dry, and perform a simple salt test (tape a damp paper towel to the spot and check for residue after 24–48 hours).
Recognizing White Powder
A chalky white powder on a cement block isn’t paint wear—it’s likely efflorescence, a sign that moisture’s been moving through the block and depositing salts on the surface.
You should spot it early and address white powder causes to avoid paint failure; focus on efflorescence prevention steps.
- Powdery, crumbly residue
- Salt streaks after rain
- Pale, flaky patches
- Surface fading
- Easy brush removal
Detecting Damp Spots
How can you tell if moisture’s still in the blocks? Use visual cues, touch, and simple tests. Try damp detection methods and moisture measurement tools to confirm. Note salt crusts separately.
| Sign | Check | Action |
|---|---|---|
| Dark patches | Touch | Ventilate |
| Musty odor | Measure | Dry |
Performing Simple Salt Test
Salt testing helps you quickly tell whether the white powder on your blocks is harmless efflorescence or a sign of ongoing moisture.
You’ll do a salt test for moisture detection: wipe, tape, wait, inspect. If salts reappear, address leaks before painting.
- Clean area
- Apply clear tape
- Leave 24–48 hours
- Inspect for salt residue
- Decide remediation or paint
Fixing Hairline Cracks in Cement Block
Because hairline cracks let moisture and dirt settle into the block, you’ll want to address them before painting.
Clean the crack, remove loose particles, then apply a masonry-grade filler or epoxy for hairline crack repair.
Clean out the crack, remove debris, then fill with masonry-grade filler or epoxy for hairline repair.
Smooth it flush, let it cure, and sand lightly.
Seal with a breathable masonry primer.
Regular cement block maintenance prevents recurrence and guarantees a lasting paint finish.
Repairing Large Cracks and Structural Gaps
Before you paint, inspect large cracks to determine if they’re cosmetic or structural so you know what repairs are required.
If the crack is deep or the block is shifting, you’ll need to stabilize the area before proceeding.
Once it’s sound, pack the gap tightly with a compatible mortar mix to restore strength and a smooth surface for painting.
Assess Crack Severity
Anyone can spot small surface hairline cracks, but large cracks and structural gaps need a careful assessment before you pick up a trowel or filler.
You’ll do a crack assessment to judge repair scope; look for severity indicators like width, length, displacement, moisture, and pattern.
- Measure width
- Trace length
- Check displacement
- Test for damp
- Note repeating pattern
Fill With Mortar
If your crack assessment shows wide, deep, or shifting gaps, you’ll need to fill them with mortar to restore strength and keep water out.
Mix per manufacturer ratios, using mortar mixing tools for consistent texture.
Dampen the cavity, pack mortar firmly, and use proper application techniques—trowel, layering, and tooling joints—to eliminate voids.
Cure as directed before priming and painting.
Patching Holes and Mortar Joint Defects
Patching holes and repairing mortar joint defects keeps your cement block wall sound and prevents paint from failing later, so tackle any damage before you prime.
Use proper patching techniques and choose mortar selection suited to block and climate. Prepare, dampen, and apply repair mortar; tool joints smooth.
Use the right patching methods and mortar for your block and climate; dampen, apply, and tool smooth.
Follow these steps:
- Remove loose debris
- Match mortar mix
- Fill holes firmly
- Tool joints flush
- Cure before priming
Cleaning Cement Block: Pressure Wash vs. Scrub
Before you paint, you’ll need to choose between pressure washing and hand scrubbing to remove dirt, mildew, and efflorescence.
Pressure washing clears large areas fast but can damage mortar if the pressure’s too high, while hand scrubbing gives you control for stubborn spots and delicate joints.
I’ll walk you through proper pressure settings, nozzle choices, and effective scrubbing techniques so you can pick the right method.
Pressure Washing Pros And Cons
When deciding between pressure washing and scrubbing a cement block wall, you’ll want to weigh speed and effectiveness against potential surface damage and water use.
You’ll get fast cleaning but must consider pressure washing benefits and pressure washing risks. Use caution, test an inconspicuous area, and protect nearby plants.
- Faster cleaning
- Deep pore removal
- Potential surface etching
- High water use
- Risk to mortar joints
Hand Scrubbing Techniques
Grab a stiff-bristled brush and a bucket of mild detergent — hand scrubbing gives you precise control over dirt, efflorescence, and mildew without risking mortar or etching the block the way high-pressure washers can.
You’ll work small sections, scrub grout lines, rinse thoroughly, and repeat stubborn spots. Hand scrubbing is essential surface preparation when pressure washing isn’t safe or feasible.
Removing Mold, Mildew, and Efflorescence Safely
Although damp concrete invites mold, mildew, and efflorescence, you can remove them safely with the right cleaners, tools, and protective gear.
Use PPE, scrub, and treat sources. Focus on mold prevention and proper efflorescence treatment.
- Wear gloves, goggles, mask
- Use trisodium phosphate or mildew cleaner
- Scrub with stiff brush
- Rinse thoroughly
- Dry and seal surface
How Long to Wait After Cleaning to Paint?
After cleaning and letting the wall dry, you’ll need to wait until the concrete is fully dry before painting—typically 24 to 72 hours depending on temperature, humidity, and how wet the surface was.
Check moisture with a meter or tape a plastic square overnight.
Your chosen cleaning techniques and current drying conditions determine timing; don’t paint until no condensation or dampness appears.
Preparing Block: Sanding, Wire-Brushing, Etching
Before you paint, make sure the block is clean—sweep, wash, and let it dry so dirt and loose paint won’t interfere.
Use a stiff wire brush or coarse sandpaper to roughen smooth areas and remove stubborn residue.
If the surface still feels glazed, prepare and apply an acid etch per the manufacturer’s instructions to improve paint adhesion.
Surface Cleaning First
Start by cleaning the block so paint will adhere properly: remove loose mortar, efflorescence, dirt, and any peeling paint with a stiff wire brush, sandpaper or a masonry grinder where needed.
Use proper cleaning techniques and surface preparation steps before priming.
- Sweep and brush loose debris
- Pressure-wash stubborn grime
- Apply muriatic etch cautiously
- Rinse thoroughly
- Let dry completely
Roughening With Wirebrush
One good pass with a stiff wire brush or 80–120 grit sanding block will knock down smooth, glazed surfaces and give primer something to bite into.
Use controlled wire brush techniques, working small areas and following block contours.
Remove dust with a shop vacuum or stiff broom.
Aim for even surface texturing without overworking mortar joints, so primer adheres uniformly and paint lasts.
Acid Etch Preparation
If your block still feels slick after sanding and wire-brushing, you’ll need to etch it to open the pores and guarantee primer bonds properly.
Use safe acid etching techniques and thorough surface preparation.
Steps:
- Wear PPE (gloves, goggles)
- Wet the wall
- Apply diluted muriatic acid
- Agitate with brush
- Rinse thoroughly and neutralize
Masking and Protecting Nearby Surfaces
Before you open a can of paint, cover everything you don’t want stained: trim, windows, floors, and nearby furniture.
Use quality masking tape for clean edges and plastic sheeting or drop cloths for surface protection. Secure coverings with tape, crease around corners, and remove tape while paint is tacky to avoid peeling.
Check vents and hardware, and keep walkways clear.
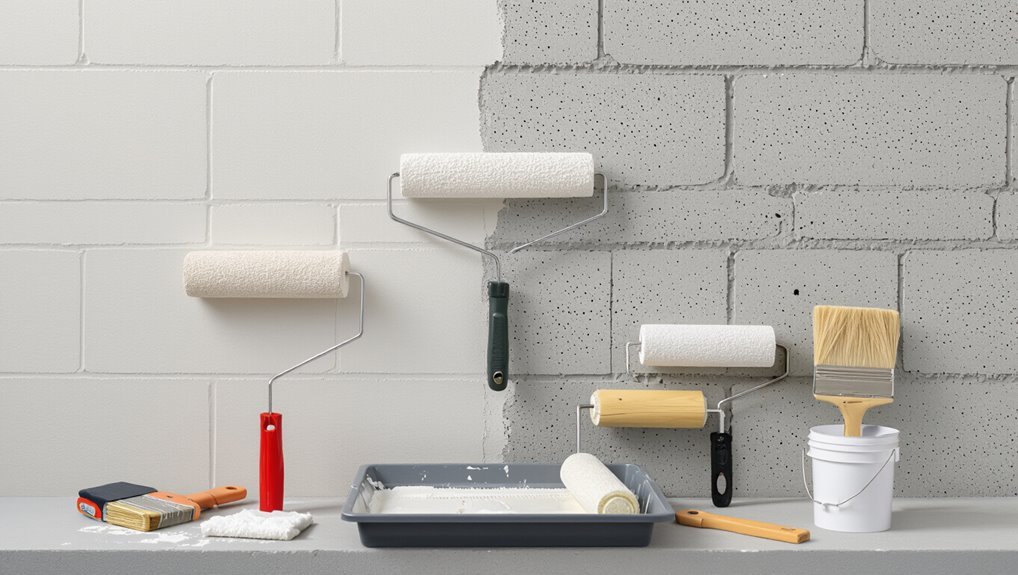
Tools and Supplies for Painting Cement Block
Now that nearby surfaces are protected, gather the right tools and supplies so the job goes smoothly and lasts.
You’ll need quality items for paint types selection and thorough surface preparation.
- Masonry primer and exterior acrylic paint
- Stiff brushes and 3/4″ nap roller
- Paint tray and extension pole
- Mild detergent and patching compound
- Wire brush and masonry sealer
Safety Gear and Ventilation Tips for Concrete
Wear proper safety gear and keep the area well-ventilated to protect yourself from dust, chemical fumes, and paint particles when working with concrete.
Always wear a respirator, goggles, gloves, and coveralls.
Always wear a respirator, goggles, gloves, and coveralls to protect against dust, fumes, and splashes.
Follow basic safety precautions: limit exposure time, keep bystanders away, and clean spills promptly.
Use ventilation techniques like open windows, box fans, and exhaust fans to direct fumes outside.
Choosing Paint Types for Cement Block Walls
With safety measures in place, you can focus on selecting the right paint for your cement block wall.
Consider surface texture, exposure, and desired paint finishes to balance appearance and color durability. Choose breathable, masonry-specific options and primers for adhesion.
Follow maintenance plans to preserve color.
- sheen level
- UV resistance
- moisture control
- primer compatibility
- application method
Masonry Paint vs. Latex: Which to Use?
Wondering whether masonry paint or latex is better for your cement block wall?
You’ll pick masonry paint when you need breathable, weather-resistant coating — masonry paint benefits include mineral adhesion and mildew resistance.
Choose latex for easier application, quicker cleanup, and flexible finish; its latex paint durability handles mild movement and UV exposure.
Match choice to exposure and maintenance needs.
How to Choose Primer for Concrete Block
How do you pick the right primer for a concrete block wall?
You should match primer types to surface compatibility, prepping for porous, damp, or painted blocks.
Choose bonding, masonry, or waterproofing primers as needed.
Consider VOCs and dry time.
- Bonding primer
- Masonry primer
- Waterproofing primer
- Stain-blocking primer
- Acrylic/latex primer
How to Prime a Cement Block Wall Step-by-Step
Now that you’ve picked the right primer for your block—bonding, masonry, waterproofing, or stain-blocking—prepare to prime the wall in a few clear steps. You’ll clean, repair, and wet the surface, then apply primer with a roller and brush for pores and joints. Good primer selection and priming techniques guarantee adhesion and durability.
| Step | Action |
|---|---|
| 1 | Clean & repair |
| 2 | Wet & mask |
| 3 | Roll & brush |
Tips for Painting Textured vs. Smooth Block
When you’re prepping textured block, you’ll need to clean and brush out crevices more thoroughly than with smooth block to guarantee primer and paint adhere.
For textured surfaces use a thick-nap roller or brush and apply paint more generously to fill pores, while smooth block takes thinner coats and a short-nap roller for a uniform finish.
Adjust drying times and inspect for missed spots on textured areas before applying a final coat.
Surface Preparation Differences
Textured and smooth cement block surfaces demand different prep steps, so you’ll tailor cleaning, patching, and priming to the block’s profile.
Focus on surface cleaning and recognize texture differences before you start.
- Scrub textured faces with a stiff brush
- Use milder washing on smooth blocks
- Fill large voids in textured blocks
- Sand and feather patch smooth surfaces
- Apply appropriate primer to each type
Paint Application Techniques
1 simple change in technique can make a big difference: paint application for smooth block focuses on even, thin coats while textured block needs thicker coverage and brushing into crevices.
You’ll use roller methods for flat faces and targeted brush techniques for mortar joints. Work wet edge to wet edge and backroll textured areas for uniform finish.
| Surface | Best tool |
|---|---|
| Smooth | Roller |
| Textured | Brush |
| Joints | Nylon brush |
Roller, Brush, or Sprayer: Best Application Method
Choosing between a roller, brush, or sprayer comes down to the wall’s texture, the paint you’re using, and how fast you want the job done.
You’ll pick an application method based on coverage, control, and desired paint finishes.
Consider each tool’s pros:
- Roller: good for cinder texture
- Brush: detail and edges
- Sprayer: fastest coverage
- Hybrid: combo approach
- Cleanup time
Using an Airless Sprayer on Cement Block Walls
Before you start, you’ll flush and strain the hose and tip, check pressure settings, and pick a coarse nozzle to handle masonry texture.
Hold the gun perpendicular to the wall, keep a consistent 12–18 inch distance, and use steady, overlapping passes to avoid streaks or heavy buildup.
Move at a smooth pace and adjust pressure or tip size if the coverage looks too thin or starts to spatter.
Preparing The Sprayer
Set up your airless sprayer on a flat surface, then check the hose, tip, and filters for wear or clogs so you don’t get uneven coverage on the block wall.
You’ll perform basic sprayer maintenance and set sprayer settings for paint viscosity. Prepare materials and test spray.
- Flush with thinner
- Inspect seals
- Replace worn tip
- Adjust pressure
- Test on scrap
Spray Technique Tips
Now that your sprayer’s prepped and tested, you’ll want to focus on technique to get even coverage on the block’s rough surface.
Hold the gun 10–12 inches away, move steadily, and overlap each pass 50%.
Vary spray patterns for corners and cavities, and adjust nozzle selection for thicker masonry paint.
Keep a consistent speed and angle to avoid runs and thin spots.
Achieving Even Coverage on Porous Block
Because cement block soaks up paint unevenly, you’ll need to treat the surface to get a consistent finish; that means sealing or priming and applying paint in thin, overlapping passes so pores don’t gobble up coats in some spots and leave others thin.
Use even application techniques and thorough block surface preparation:
Prep thoroughly and apply paint evenly—prime, roll, and use thin overlapping coats for a consistent masonry finish.
- Clean and repair cracks
- Apply masonry primer
- Use roller then brush for edges
- Thin coats, overlap strokes
- Inspect and touch up missed pores
How Many Paint Coats Do You Need?
After sealing and priming the block and applying your first thin coats, you’ll want to know how many total coats will give a durable, even finish.
Generally, plan two to three coats: one coat to build adhesion after primer, a second for uniform paint finish, and a third only if coverage or color layering requires it.
Adjust based on texture and desired opacity.
Drying Times and Ideal Curing Conditions
You’ll get the best results when you paint in a mild, controlled environment—aim for about 50–85°F (10–29°C).
Keep humidity moderate (ideally 40–60%) so the paint can dry evenly without trapping moisture.
Expect surface drying in a few hours but allow the full cure time recommended by the manufacturer—usually several days to a week—before subjecting the wall to heavy use.
Ideal Temperature Range
When painting a cement block wall, aim for steady temperatures between 50°F and 85°F (10°C–29°C) so paint can dry and cure properly; extremes slow drying, weaken adhesion, and can trap moisture in the masonry.
You should monitor the ideal temperature and adjust timing. Consider:
- Paint in stable daytime heat
- Avoid freezing nights
- Don’t paint in intense midday sun
- Use fans if cool
- Schedule around forecasts
Recommended Humidity Levels
Although humidity doesn’t get as much attention as temperature, it directly affects drying times and final adhesion.
You should aim for relative humidity between about 40% and 60% while paint dries and cures on a cement block wall.
Use dehumidifiers or fans for humidity control, monitor levels with a hygrometer, and practice moisture management to prevent blistering, poor adhesion, or extended tackiness.
Paint Cure Timeframes
Humidity control sets the stage for how fast paint will dry and fully cure on a cement block wall, but you also need to understand specific timeframes and conditions for different paint types.
You’ll manage paint curing with good wall preparation and temperature control. Follow these points:
- Latex: touch dry 1 hour, recoat 4–6 hours
- Acrylic: full cure 7 days
- Oil: recoat 24 hours
- Masonry: cure 3–7 days
- High humidity: extends cure times
Cutting In and Painting Clean Edges
Before you roll the main field, take time to cut in the edges so your paint lines stay crisp and professional-looking.
Use proper cutting techniques and steady handwork with edge tools like angled brushes and small rollers. Work in manageable sections, keep a wet edge, and remove drips promptly.
Tape isn’t always needed if you control brush pressure and maintain consistent strokes.
How to Paint Mortar Joints for a Uniform Look
When you want a uniform look, paint the mortar joints separately from the block faces so the texture and color stay consistent.
Use a stiff brush or narrow roller and work in short, overlapping strokes to push paint into the recessed joints without overloading the blocks.
Use mortar joint techniques focused on achieving uniformity:
- Choose matching paint and sheen
- Clean and prime joints first
- Work top to bottom
- Keep brush strokes consistent
- Feather edges into block faces
Decorative Finishes: Washes, Faux Textures, and Glazes
You can soften a block wall with a color wash to let the texture show through while tinting the surface.
For more drama, try faux texture methods like sponging, rag-rolling, or stippling to mimic stone or stucco.
Finish with a glaze to unify the effect and control the sheen.
Color Wash Techniques
Color washing adds a translucent, layered look to cement block walls that softens the surface and highlights texture.
You’ll learn color wash benefits and simple color wash application to refresh walls without heavy coverage.
Try these quick tips:
- Dilute paint for glaze-like translucence
- Work in small sections
- Use a dry brush technique
- Blend edges immediately
- Seal with a matte clear coat
Faux Texture Methods
Faux texture methods give cement block walls depth and personality by mimicking materials like stone, plaster, or aged brick without costly materials or demolition.
You’ll use faux finishes and simple texture techniques—sponges, rags, trowels, or stippling brushes—to layer base coats, glazes, and highlights.
Practice on scrap block, work in sections, and seal the result to protect color and tactile detail.
Painting Exterior Block: Weather and Timing Tips
Because exterior block soaks up moisture and reacts to temperature swings, pick a window of dry, mild weather before you start painting.
Consider weather conditions and timing considerations to guarantee adhesion and cure. Plan prep and coats around forecasted calm days.
Check temperature ranges, humidity, wind, and sun exposure.
- Low humidity
- Moderate temperature
- No rain for 48 hours
- Light wind
- Shade during drying
Painting Basement and Garage Block: Moisture Solutions
Before you paint basement or garage block, you should assess where moisture is coming from—cracks, groundwater, or condensation—and fix leaks first.
Improve ventilation and control humidity with fans, dehumidifiers, or vents to keep surfaces dry.
Finally, use a breathable waterproofing coating designed for masonry to block water while letting trapped moisture escape.
Assess Moisture Sources
When you’re tackling paint for a basement or garage block wall, start by identifying where moisture’s coming from so you don’t just cover up a recurring problem.
You’ll inspect, test, and plan fixes—think moisture barriers and humidity control.
Check these common culprits:
- Cracks in blocks
- Poor exterior grading
- Leaky gutters/downspouts
- Sump pump issues
- Rising damp at floor junction
Improve Basement Ventilation
If your basement or garage stays damp, improving ventilation cuts humidity, prevents mold, and helps paint adhere and last. Use ventilation methods like exhaust fans, vents, and dehumidifiers to boost air circulation. Position fans to move air across walls, run them during damp spells, and keep vents clear. Small changes protect paint and block walls.
| Method | Benefit |
|---|---|
| Exhaust fan | Removes moist air |
| Vents | Passive airflow |
| Dehumidifier | Lowers humidity |
| Window fan | Cross-ventilation |
| Floor vents | Baseline circulation |
Apply Waterproofing Coatings
Seal your block walls with a waterproofing coating to stop moisture from penetrating and to give paint a sound surface to bond to.
You’ll choose appropriate waterproofing techniques and sealing products, prep surfaces, and apply evenly.
Follow these steps:
- Clean and dry blocks
- Repair cracks
- Apply primer if labeled
- Roll on waterproofing
- Inspect and touch up
Color Selection for Interior and Exterior Block Walls
Color matters more than you might think: it can make a block wall feel warm and inviting or stark and utilitarian.
You’ll use color psychology to choose hues that suit mood and function. For exteriors, follow current exterior trends but prioritize durability.
Pick appropriate paint finishes for texture and exposure, and consider maintenance tips like easy-clean pigments and touch-up strategies to keep surfaces looking fresh.
Estimating Paint Quantity for Irregular Block Walls
Irregular block walls demand more paint than smooth surfaces, so you’ll need to measure carefully and account for wasted coverage around mortar joints, pits, and sealed patches.
Use a paint calculator and note surface texture when estimating.
Steps:
- Measure wall area
- Estimate extra 15–30% for texture
- Count sealed or patched zones
- Check manufacturer coverage
- Round up to nearest gallon
Budgeting Time and Cost for the Project
When you budget time and cost for painting a cement block wall, break the job into clear tasks—prep, priming, painting, and cleanup—so you can assign realistic hours and expenses to each step.
List materials, tools, and labor, noting budget considerations for sealers and brushes. Estimate time allocation per task, add contingency (10–20%), and total the schedule and cost for a clear plan.
Common Beginner Mistakes and How to Avoid Them
Although painting a cement block wall looks straightforward, beginners often stumble on a few predictable mistakes that cost time and money, so it helps to know them up front.
- Watch for common pitfalls like preparation errors and cleaning oversights.
- Choose proper paint selection for masonry.
- Fix surface issues before painting.
- Avoid application mistakes and equipment misuse.
- Mind drying concerns by controlling humidity and temperature.
Troubleshooting Adhesion, Peeling, and Blisters
If your paint’s peeling, blistering, or refusing to stick, don’t assume the wall or product is to blame — start by checking for moisture, dirty or chalky surfaces, and improper primer or paint choices.
Diagnose adhesion problems: test with tape, probe blisters, and measure moisture.
Fix by cleaning, etching, using masonry primer, and allowing full drying.
For blister prevention, control humidity and apply compatible coatings.
When to Recoat, Strip, or Reseal Painted Block
Because paint condition and exposure vary, you’ll want to recoat, strip, or reseal cement block only after you assess adhesion, surface damage, and moisture levels.
Decide based on paint lifespan and surface preparation quality.
Consider:
- recoat timing: minor wear
- stripping paint: severe failure
- resealing options: moisture barriers
- maintenance tips: inspections schedule
- when to call pros
Maintenance: Cleaning and Touch-Ups Over Time
Regular cleaning and prompt touch-ups will keep a painted cement block wall looking sharp and extend the coating’s life.
You should use gentle cleaning techniques—soft brush, mild detergent, rinse—and spot-prime any bare patches before repainting.
Inspect annually for stains, mildew, or chips; address problems quickly to preserve paint longevity.
Keep supplies handy and document colors for seamless future repairs.
Eco-Friendly and Low-VOC Paint Options for Block
Keeping your wall clean and touched up also gives you a chance to choose kinder paints when it’s time to repaint.
Keeping walls clean and freshly touched-up is the perfect moment to switch to gentler, eco-friendly paint options.
You can pick eco friendly paints and low voc options that still adhere to block and resist moisture.
Consider:
- Water-based masonry paints
- Zero-VOC latex
- Mineral and lime washes
- Recycled-content primers
- Breathable, mildew-resistant coatings
Hiring a Pro vs. DIY: Decision Checklist
Wondering whether to tackle the block wall yourself or hire a pro? Weigh time, budget, and skill: pros bring professional experiences, tools, and speed but cost more.
DIY saves money and gives control but involves DIY challenges like surface prep, uneven blocks, and cleanup.
If you value warranty and flawless finish, hire a pro; if you’re handy and patient, DIY can work.
Frequently Asked Questions
Can You Paint Over Graffiti on a Cement Block Wall Safely?
Yes — you can paint over graffiti on a cement block wall safely if you use proper graffiti removal prep, choose durable paint types like masonry acrylic or elastomeric, and wear PPE while cleaning, priming, and applying paint.
Will Painting Block Walls Improve Home Resale Value?
Yes — painting block walls can boost your home’s resale value by enhancing curb appeal and home aesthetic; choose durable finishes, and pick color choices that complement neighborhood trends and interior flow to attract more buyers.
How Do Painted Block Walls Affect Insulation or Thermal Performance?
You’ll barely notice huge changes, but painted block walls can slightly improve thermal efficiency depending on insulation types added; paint durability and moisture barriers matter, since quality coatings reduce dampness and help maintained insulation performance.
Can You Attach Shelves or Fixtures to Painted Cement Block?
Yes — you can attach shelves and fixtures to painted cement block; you’ll use proper shelf mounting anchors, masonry screws, or epoxy to guarantee fixture stability, predrill into mortar or block face, and tighten carefully for secure holds.
Are There Warranty or Building Code Issues for Painted Exterior Block?
Think of painted block like a new coat of armor—yes, you might void warranty concerns if coatings trap moisture, and you must follow local building codes for finishes, penetrations, and moisture control to stay compliant.
Conclusion
You’ve got what you need to turn a rough, dull block wall into a clean, durable surface that fits your space and budget. Follow the checklist, deal with moisture and efflorescence first, and pick the right primer and paint (or a pro) for long-lasting results. Think of the work as gardening for your home: a little prep and care now yields a healthier, more beautiful structure you’ll enjoy for years.