How to Paint a Chevron Pattern on a Wall Step by Step
You can paint a chevron wall yourself by prepping, measuring, taping, and painting in careful steps. Clean and prime the surface, find the center, mark a grid for evenly spaced peaks, and apply painter’s tape along your pencil lines. Seal tape edges, paint thin coats, and remove tape at a 45° angle while paint is tacky. Touch up any bleeds with a fine brush. Keep going and you’ll get full step-by-step tips, timing, and troubleshooting to finish like a pro.
Quick Answer Can You Paint a Chevron Pattern on a Wall and How Long It Takes
Yes — you can paint a chevron wall yourself by measuring and marking the pattern, taping the lines, cutting in, and rolling the paint; expect about 1–2 hours for prep, 1–3 hours per coat, plus drying time.
If you’re comfortable with straight lines and have patience for careful taping, DIY saves money; hire a pro if your wall is large, has many obstacles, or you need a flawless, fast result.
Plan for a weekend project for most rooms, or a single day if a pro handles it.
Short summary of the process and estimated time per step
You can paint a chevron wall by prepping, measuring and marking the pattern, taping, priming/painting base color, painting the chevrons, removing tape, and touching up.
For how to paint a chevron pattern on a wall:
- prep and measure 1–2 hours,
- taping 1–2 hours,
- base coat 1–2 hours including drying,
- painting chevrons 2–4 hours,
- remove tape and touch up 30–60 minutes.
When to hire a pro vs. DIY
After you’ve sketched the layout and estimated the time for each step, decide whether this is a project you want to tackle yourself or hand off to a pro.
If you’re confident with measurements, cutting tape, and steady painting, DIY saves money and gives control.
Hire a pro if walls are large, pattern accuracy matters, you lack time, or you want flawless, fast results.
What Is a Chevron Pattern and Why Choose It
A chevron pattern is a repeating V-shaped stripe that creates a bold, directional graphic on your wall.
You’ll notice how scale and rhythm—wide versus narrow chevrons and contrasting or metallic paints—can change a room’s energy and perceived size.
Choosing the right variation lets you tailor the look for bedrooms, hallways, or living areas.
Definition and visual characteristics
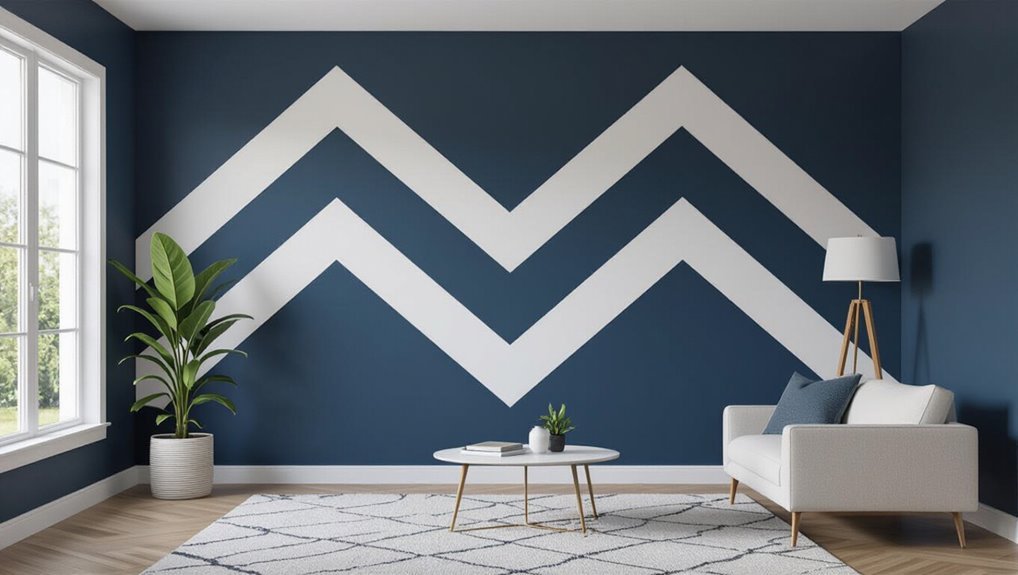
Chevron is a V-shaped zigzag motif made of repeating inverted and upright angles that creates a rhythmic, directional look on a wall—you’ll recognize it by its sharp points and continuous chevrons that guide the eye across the surface.
You can vary stripe width, color contrast, and angle to achieve crisp, geometric clarity or softer, painterly effects that emphasize movement and structure.
Design impact: scale, rhythm, and room types
When you scale chevrons up, they dramatize a room; when you shrink them, they create a subtle texture that reads almost like wallpaper.
Choose larger repeats for bold focal walls or small repeats for calm, cozy spaces.
Rhythm guides movement—vertical chevrons elongate, horizontal ones widen.
Match scale and rhythm to room function: lively patterns suit social areas, restrained ones fit bedrooms and studies.
Common variations (wide vs. narrow chevrons, colors, metallics)
You can tweak chevron scale, color, and finish to change a pattern’s personality—wide chevrons read bold and graphic, while narrow ones feel delicate and textured.
Choose high-contrast colors for drama, muted tones for subtlety, or tonal variations for depth.
Add metallics—gold, silver, or bronze—for glamour or accents.
Consider matte versus glossy finishes to control reflectivity and mood.
Materials, Tools, and Prep Checklist
Before you tape off chevrons, you’ll want the right paints and finishes—pick a durable eggshell or semi-gloss for easy cleaning and a quality primer for any stains or raw drywall.
Gather essential tools like a level, painter’s tape, a good brush and roller, a measuring tape, and optional extras such as a laser level or a paint edger.
Prep the wall by cleaning, sanding, and priming as needed, and set up safety and workspace with drop cloths, proper ventilation, and the correct tape for crisp lines.
Paint and finish recommendations
A clear plan and the right supplies make the difference between a sloppy stripe and a crisp chevron; gather quality paint, painter’s tape, brushes/rollers, a level or laser, drop cloths, and sanding/priming materials before you start.
Choose washable, low-VOC eggshell or satin for durability. Seal edges with thin coats and light sanding between layers.
- Use primer
- Thin coats
- Topcoat choice
Necessary tools and optional extras

Gathering the right tools makes the chevron job faster and cleaner, so assemble quality paints, painter’s tape, a reliable level or laser, rollers and angled brushes, drop cloths, sandpaper, primer, and a small trim brush before you mark your pattern.
You’ll also want:
- Measuring tape and pencil
- High-grade masking tape or chevron stencil
- Small roller for touch-ups and a microfibre cloth
Surface preparation: cleaning, sanding, priming
Since a smooth, clean surface makes your chevron lines crisp and durable, start by wiping the wall with a damp microfibre cloth or mild detergent solution to remove dust, grease, and cobwebs.
Let it dry, sand any rough spots or glossy paint with fine-grit sandpaper, and then apply primer to bare plaster, patched areas, or highly porous surfaces so your tape adheres and colors stay true.
After priming, fill holes, sand smooth, and wipe again.
Safety and workspace setup (drop cloths, ventilation, tape types)
Before you start taping and painting, set up a safe, well-ventilated workspace with drop cloths, proper lighting, and the right tape so you can work cleanly and comfortably.
Lay heavy-duty drop cloths and secure edges. Open windows or use a fan for ventilation.
Choose painter’s or low-tack masking tape for clean lines; test adhesion on a hidden spot.
Keep a respirator and gloves nearby.
Planning Your Chevron Design
Start by measuring your wall and doing the simple math to determine how wide each chevron stripe needs to be so the pattern fits evenly.
Pick a color palette and contrast level that suits the room—high contrast for a bold statement or subtle tones for texture without overpowering.
Decide whether you’ll make a paper guide or use stencils for precision, or if you’re steady enough to paint the pattern freehand.
Measuring the wall and calculating stripe width (mathematical overview)
Measure your wall height and width accurately, then convert those figures to the same unit (inches or centimeters) so you can calculate stripe dimensions without confusion. Decide chevron peak spacing, divide wall width by number of chevrons to get stripe pair width, then split for individual stripe widths. Use precise math and mark centerlines before taping.
| Wall width | Chevron count | Stripe pair |
|---|---|---|
| 1200 mm | 8 | 150 mm |
| 2000 mm | 10 | 200 mm |
Choosing color palette and contrast level

Want bold impact or a subtle backdrop? You’ll pick colors that set mood and readability.
Consider contrast, room size, and lighting. Choose palettes that coordinate with furnishings and trim.
- High contrast: dramatic, energizing.
- Low contrast: soft, cohesive.
- Accent strategy: one bold stripe with neutral companions for balance.
Creating a guide template or using stencils vs. freehand
While you can go freehand if you’re confident with a steady brush, most people get cleaner, repeatable chevrons by using a guide template or stencil.
Templates let you mark precise angles and spacing once, then reproduce them quickly, while stencils save time and guarantee uniformity across large walls.
Choose templates for flexibility—stencils for speed—practice on scrap before committing to the wall.
Step-by-Step Painting Process
Now you’ll move from planning to action with a clear, step-by-step painting process.
First you’ll mark the centerline and layout grid, then measure and map each chevron angle and point before applying painter’s tape.
Finish by cutting and sealing tape corners for crisp lines and priming taped areas or touching up the base coat as needed.
Step 1 Marking the centerline and layout grid
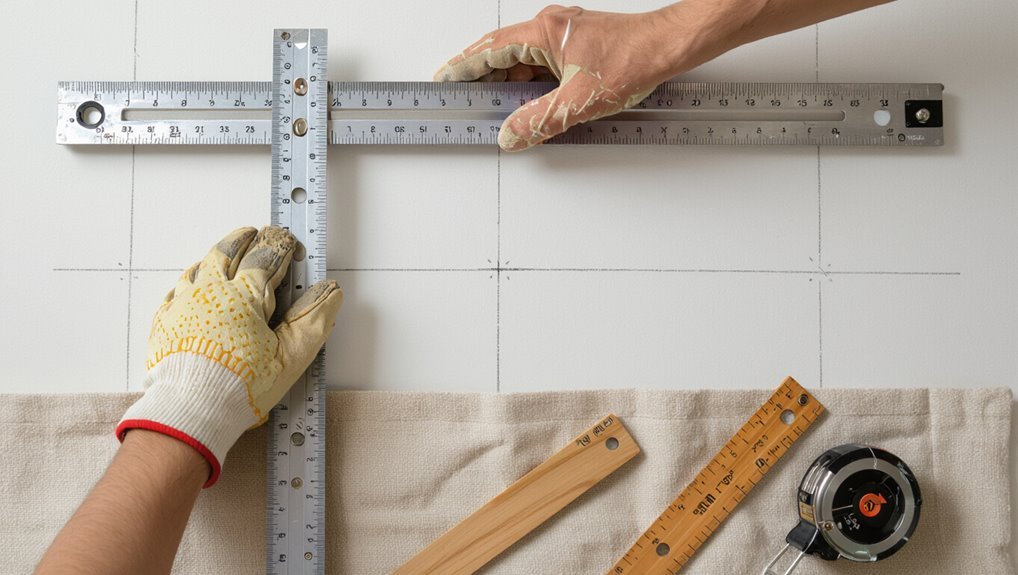
Start by finding and marking the exact vertical center of the wall so your chevrons sit perfectly symmetrical. Measure the wall width at three heights (top, middle, bottom), average the measurements, and snap a chalk line down that center point.
From that line, use a level and straightedge to lay a grid of horizontal guidelines at your chosen stripe heights, lightly pencil-marking intersections for accurate taping.
Step 2 Measuring and mapping chevron angles and points
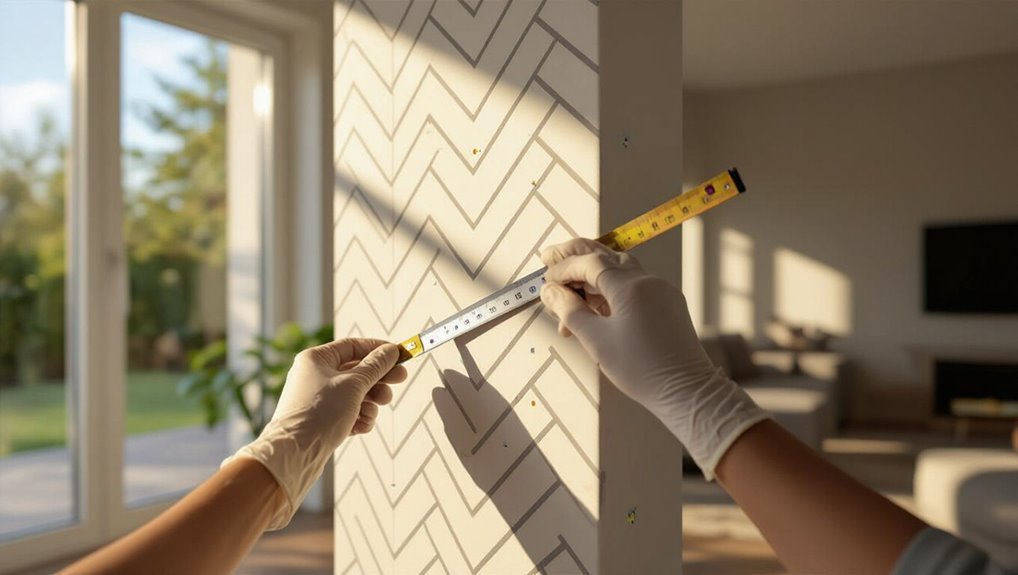
With your centerline and grid in place, measure and mark each chevron point so every V aligns perfectly—measure from the centerline to each designated peak and valley, transfer those distances across the grid, and pencil the tip locations at each horizontal guideline; this gives you precise anchor points to snap straight chalk or pencil lines for the angled edges before taping.
Then verify symmetry, adjust any uneven marks, and label peaks.
Step 3 Applying painter’s tape for precise chevrons
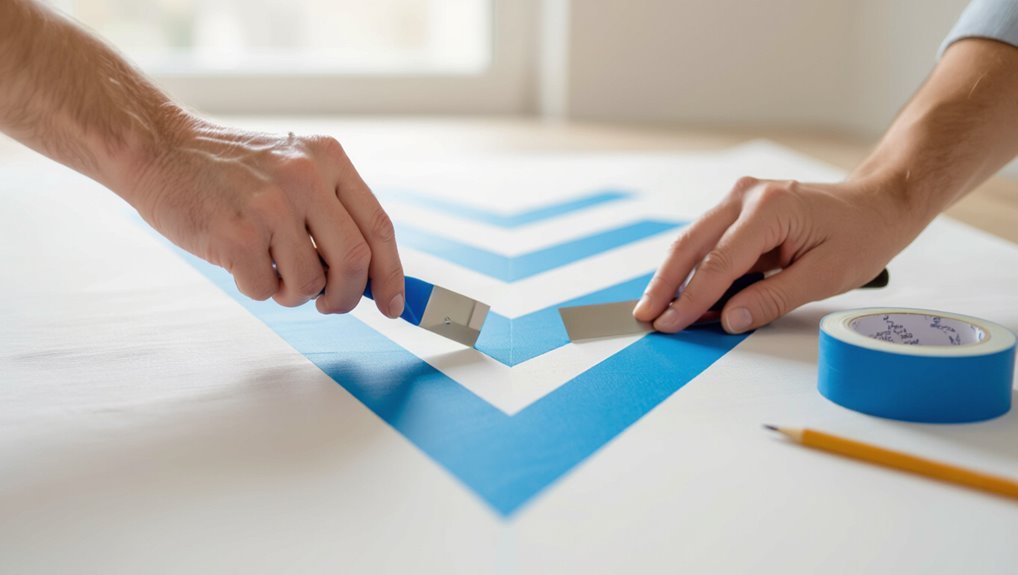
Having verified your pencil marks and labeled each peak, it’s time to apply painter’s tape so the chevrons will have crisp, clean edges.
Align tape along one side of each pencil line, pressing firmly to prevent bleed. Overlap tape at joins, keep strips straight and taut, and use a level as needed.
Leave exposed areas ready for paint.
Step 4 Cutting tape corners and sealing edges for crisp lines
Trim the tape corners carefully so each chevron peak stays sharp: use a sharp utility knife to cut a small V or angled slit where two tape strips meet, removing the excess so the tape lies flush at the corner.
Press tape edges firmly with a plastic scraper or credit card, then seal seams with a thin layer of clear caulk or diluted paint to prevent bleed before painting.
Step 5 Priming taped areas or using base coat touch-ups
Start by priming the taped areas or touching up the base coat so your chevron lines stay crisp and colors cover evenly.
Use a small brush or roller to apply a thin primer or matching base color along tape edges, sealing gaps.
Let it dry fully, then inspect for missed spots.
Correct any flaws before removing or proceeding to paint the pattern.
Step 6 Painting the first color coats and drying times
With the taped edges sealed and any base-coat flaws fixed, you can begin applying the first color coats for your chevron pattern.
Roll or brush thin, even layers to avoid drips. Respect drying times between coats so lines stay crisp.
- Apply thin first coat.
- Wait recommended dry time.
- Inspect for coverage, then recoat.
Step 7 Removing tape correctly and touch-up technique

1. Peel tape slowly at a 45° angle while paint’s still slightly tacky to prevent cracking.
If edges lift, use a sharp utility knife to score along the line before removing.
For small bleeds, touch up with a fine artist’s brush and matching color, feathering outward.
Clean edges by removing stray specks and let repaired areas dry fully before proceeding.
Step 8 Painting alternating chevrons and final topcoat
Begin painting every other chevron by loading a small roller or angled brush with your chosen color and working from the top down.
Keep a steady hand and consistent pressure so each stripe stays even. Let paint dry fully, remove remaining tape, inspect edges for touch-ups, then apply a thin, even topcoat or clear sealant to protect finish and unify sheen for a professional look.
Troubleshooting Common Problems and Fixes
If paint bleeds under the tape, your lines blur, and you’ll need quick fixes to seal edges and touch up.
If chevrons look uneven or misaligned, you can correct placement and trim stray points without redoing the whole wall.
You’ll also learn how to smooth brushstrokes, roller marks, texture inconsistencies, and fix overlaps or jagged points with minimal repainting.
Bleeding paint under tape causes and fixes
Bleeding paint under the tape is one of the most common annoyances when stenciling or taping a chevron pattern.
It usually happens because the tape wasn’t sealed, the paint was too runny, or you painted too heavy a coat.
Press tape edges firmly, use high-quality painter’s tape, apply thin coats, let each dry, and seal edges with a clear basecoat or same-color paint before your contrast color.
Uneven chevrons or misaligned pattern how to correct
When your chevrons look uneven or the pattern drifts off, take a breath and assess where the misalignment starts so you can fix it without repainting the whole wall.
Realign your stencil or tape from that reference point, measure and mark corrected angles with a level, then retape precisely.
Touch up small sections with an angled brush, feathering edges to match existing lines.
Brushstrokes, roller marks, and texture inconsistencies
After you’ve corrected misaligned chevrons, inspect the surface for paint texture issues that can undermine the crisp pattern.
Smooth brushstrokes by sanding lightly with fine-grit paper, then wipe dust.
Blend roller marks by back-rolling while paint’s wet and use a uniform nap roller.
For slight inconsistencies, feather edges with a damp brush; avoid heavy repainting unless texture remains obvious.
Fixing paint overlaps and jagged points without repainting whole wall
Tackle overlaps and jagged points by isolating each flaw and correcting it with minimal disruption—lightly sand raised ridges, feather mismatched edges with a damp brush, and use a fine artist’s brush to pull paint into clean, crisp chevrons without redoing the whole wall.
Match paint sheen, blot excess with a damp cloth, then touch edges with thin coats, letting each dry fully before evaluating.
Best Practices and Professional Tips
Before you start, pick the right tape and sealing method so edges stay crisp and paint won’t bleed.
Think about whether you’re doing an accent wall or a full-room pattern, how to scale the chevrons for low or tall ceilings, and when to paint each section for best drying and touch-ups.
Finally, plan a simple maintenance routine and cleaning tips so your chevrons stay sharp for years.
Tape types, edge sealing methods, and timing tips
When you’re laying out your chevrons, choosing the right tape and sealing its edges is as important as your paint color—use a high-quality painter’s tape (blue or green) for crisp lines, apply it to clean, dry walls, and press the edges down firmly with a plastic card or putty knife so paint can’t bleed underneath.
Remove tape after paint’s tacky, not fully dry; use caulk for imperfect seams.
Working with accent walls vs. full-room patterns
If you’re undecided between an accent wall and a full-room chevron, think about scale, visual impact, and how much time you want to invest: an accent wall gives a bold focal point with less effort and fewer pattern-match seams, while a full-room pattern creates immersive movement but demands more planning, precise layout, and extra masking to keep lines consistent across corners and ceilings.
Choose accent for simplicity; go full-room for drama.
How to scale a chevron pattern for small or tall ceilings
Because room proportions change how chevrons read, you’ll want to adjust stripe width, angle, and repeat to suit low or tall ceilings so the pattern feels balanced rather than cramped or overwhelming.
For low ceilings, use narrower, steeper chevrons to draw the eye upward.
For tall ceilings, widen chevrons and shallow the angle to prevent a stretched, sparse look; test with paper templates.
Maintenance and cleaning advice for painted chevrons
Once your chevrons sit right for the room, you’ll want a simple care routine to keep the pattern crisp and vibrant.
Dust weekly with a soft microfiber cloth or vacuum with a brush attachment.
Spot-clean stains promptly using mild soap and water, testing an inconspicuous area first.
Avoid harsh chemicals and abrasive sponges.
Touch up chips with matching paint and a small artist brush.
Alternatives and Comparisons
When choosing a look, you’ll want to compare chevron to herringbone and simple stripes to see which rhythm and scale suit your space.
Think about the finish and effort too—stencils or decals speed things up and give uniform results, while hand-taped paint lets you customize line weight and color shifts.
We’ll weigh the visual impact, time, and skill required for each option so you can pick the best fit.
Chevron vs. Herringbone vs. Stripes
If you’re choosing between chevron, herringbone, and simple stripes, focus on the visual effect you want: chevron creates sharp V-shaped continuity, herringbone offers a staggered, woven look, and stripes give you clean, linear repetition that’s easiest to execute. Choose chevron for drama, herringbone for texture, stripes for simplicity.
| Pattern | Look | Difficulty |
|---|---|---|
| Chevron | Bold V | Medium |
| Herringbone | Woven | High |
| Stripes | Linear | Low |
Stencil/decals vs. hand-taped paint pros and cons
While stencils and decals give you fast, consistent repeats, hand-taping lets you control every line and tweak the pattern as you go.
You’ll weigh speed versus precision: stencils save time but can look repetitive; hand-taping requires patience but yields custom angles.
Consider:
- Speed: stencils
- Precision: hand-tape
- Cost: decals cheaper, tape reusable but labor-intensive
Cost, Time, and Difficulty Estimates
Expect to spend on paint, primer, tape, and brushes or rollers, with optional costs if you rent tools or hire a pro for precision.
Your time will vary—a single accent wall with a simple chevron can take a half-day to a day, while large or multi-color patterns may take several days including drying and touch-ups.
Difficulty rises with wall size and pattern complexity, so plan materials and time accordingly or budget for professional help if you want a quicker, flawless result.
Typical cost breakdown (materials, tools, optional pro help)
Before you start taping and painting, get a clear picture of what you’ll spend: materials like paint, primer, and tape usually make up the bulk of the cost, basic tools add a modest amount, and hiring a pro can multiply the price considerably. Estimate: paint $30–$70, tape/primer $10–$40, tools $20–$60, pro $200–$800.
| Item | Typical cost |
|---|---|
| Materials | $40–$110 |
| Pro help | $200–$800 |
Time estimates by wall size and complexity
Now that you’ve got a handle on costs, let’s look at how long the job will take.
Small accent wall (under 8 ft): 3–5 hours for taping and two coats.
Standard room wall (8–12 ft): 6–10 hours across two days.
Large or high ceilings, complex chevrons, or textured surfaces: 1–2 full days.
Allow extra time for drying and touch-ups.
FAQ
Got questions? You’ll find quick answers on measuring tape placement for a perfectly symmetrical chevron, when removable wallpaper or decals make a good alternative, and which paint finishes (matte, eggshell, satin) hold up best.
You’ll also learn tips for keeping lines crisp around outlets and trim and whether curved or irregular chevrons work on textured walls.
How do I calculate tape placement for a perfectly symmetrical chevron?
Want your chevron perfectly centered and even? Measure wall width and mark the center.
Decide chevron peak width and count of V’s, then divide half-width by number of half-Vs to get spacing.
From center, mark equal points left and right, snap chalk lines for angles using a protractor or angle finder, and apply painter’s tape along those lines, checking symmetry as you go.
Can I use removable wallpaper or decals instead of painting?
Curious whether removable wallpaper or decals can replace paint for a chevron wall? Yes—you can.
Wallpaper and decals speed installation, reduce mess, and let you test patterns or colors temporarily. Choose high-quality, repositionable products and guarantee a smooth, clean wall for proper adhesion.
Remember seams and pattern alignment matter; removable options suit renters or anyone wanting an easier, less permanent chevron.
What paint finishes work best for chevrons (matte, eggshell, satin)?
If you liked the convenience of removable wallpaper or decals, paint still gives you more control over sheen and durability for a chevron wall.
Choose matte to hide wall imperfections and keep bold stripes subtle; eggshell offers a soft, washable finish for moderate-traffic rooms; satin adds slight sheen, stands up to cleaning, and enhances contrast.
Pick based on wear and desired contrast.
How do I preserve crisp lines when painting around outlets and trim?
Because outlets and trim create tight edges, take a few extra steps before you paint to keep your chevron lines crisp: turn power off, remove outlet covers, and mask trim with high-quality painter’s tape.
Use a thin-angled brush for edging, press tape firmly, and seal tape edges with the base color before applying chevron paint.
Remove tape while paint’s tacky for sharp lines.
Is it possible to do curved or irregular chevrons on textured walls?
Yes — you can create curved or irregular chevrons on textured walls, but you’ll need to adapt your approach and accept some natural variation in the edges.
Use flexible painter’s tape or a chalk line to mark curves, then cut tape with a sharp blade.
Apply paint with a foam roller or brush in thin layers, peel tape while slightly damp, and touch up any rough edges.
Project Checklist and Final Walkthrough
Before you start, run through a quick pre-paint checklist to confirm primer, tape, drop cloths, and clean walls are ready.
After the paint’s dry, inspect the chevrons for missed spots, bleed-through, or uneven edges and note any touch-ups.
Finish by fixing small flaws, removing tape carefully, and giving the wall a final wipe-down.
Pre-paint checklist before starting
1 clear walkthrough keeps your chevron project on track: check that the room is clean and dry, furniture is moved or covered, the wall is patched and sanded, painter’s tape and a level are ready, and you’ve got enough primer, paint, and clean brushes or rollers to finish without interruption.
Confirm measurements, mark your layout lightly, test paint colors, and keep rags, a tray, and drop cloths handy.
Post-paint inspection and touch-up checklist
Once the paint has dried, take a systematic walkaround to inspect your chevron wall for missed spots, uneven edges, drips, or tape bleed; bring a bright light and a step stool so you can see and reach every stripe.
- Spot-fill missed areas and smooth edges with a small brush.
- Sand tiny drips and recoat thinly.
- Remove tape slowly, touch crisp lines, clean edges, and step back to confirm uniformity.