
How to Paint a Exterior Door: Durable Finish Techniques
You can get a long-lasting, weatherproof finish by prepping, priming, and painting your exterior door with the right materials and technique. Remove hardware, clean and sand the surface, fix any gouges or rust, then apply a primer suited to wood, metal, or fiberglass. Use an angled brush for edges and a foam roller or HVLP sprayer for panels, sanding between thin coats. Choose exterior acrylic or alkyd paint and a UV-resistant topcoat—keep going to learn specific tips and troubleshooting.
Who Should Paint an Exterior Door & What This Guide Covers
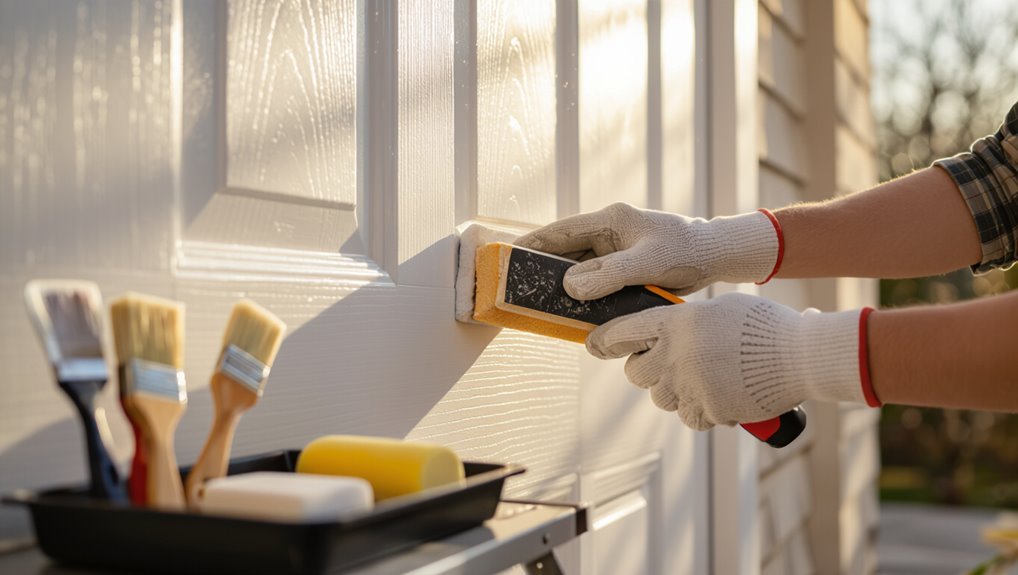
Whether you’re a DIY homeowner wanting to refresh curb appeal or a contractor prepping for clients, you can handle painting an exterior door with the right tools and prep.
This guide shows who should tackle the job, safety basics, materials, and smart painting techniques to achieve lasting protection.
You’ll learn how choices affect door aesthetics and durability so you can plan confidently.
Quick 5-Step Door Painting Workflow
Start by prepping the surface: clean, sand, and fill any gaps so paint will stick.
Apply primer and seal edges to prevent moisture and guarantee even coverage.
Finish with smooth brush strokes and allow proper drying between coats for a professional result.
Surface Preparation Steps
Before you pick up a brush, take five focused steps to prepare the door so the paint adheres smoothly and lasts longer.
You’ll use proven cleaning techniques and sanding methods to guarantee a durable bond.
Then:
- Remove hardware and mask glass
- Clean with degreaser, rinse, dry
- Sand high-sheen spots, feather edges
- Wipe with tack cloth, inspect for defects
Priming And Sealing
1. You’ll apply priming techniques that match door material, brushing thin coats and sanding between layers. Choose sealing options—polyurethane for durability or exterior-grade acrylic for UV resistance. Let each coat dry fully.
| Step | Purpose |
|---|---|
| Prime | Adhesion |
| Sand | Smooth |
| Seal | Protection |
| Dry | Cure |
Smooth Brush And Dry
Work the brush with steady, overlapping strokes so paint lays down evenly and you avoid drips; keep the bristles angled slightly forward and reload only when the brush shows a thin, glossy film rather than heavy clumps.
You’ll get a smooth application by mastering brush technique and timing drying between coats.
- Follow grain or panel lines
- Light pressure, long pulls
- Tip for edges first
- Check for drips
Quick Checklist: Tools & Materials
Before you start, gather the right tools and materials so the job goes smoothly.
You’ll need items like sandpaper, a scraper, brushes or a roller, drop cloths, painter’s tape, and the proper exterior paint and primer.
Having these supplies on hand saves time and prevents frustrating interruptions.
Tools You’ll Need
You’ll need a compact set of tools and materials to get a smooth, durable finish: quality exterior paint, primer, a couple of brushes (angled sash brush for edges and a 2–2.5″ brush for panels), a small foam roller with a tray, medium-grit sandpaper and sanding block, painter’s tape, a screwdriver or drill for hardware removal, drop cloths, a tack cloth, exterior caulk and a caulking gun, plus safety gear like gloves and eye protection.
- Brush types for trim and panels
- Roller for flat areas
- Sanding and prep tools
- Tape and protection
Choose tools based on paint types and door styles to match technique and durability.
Materials And Supplies
A compact, well-chosen set of materials will make painting your exterior door faster and give a longer-lasting finish.
Gather high-quality brushes, foam rollers, drop cloth, sandpaper (120–220), tack cloth, primer, and your selected paint types (acrylic latex or oil-based).
Include exterior finishes like satin or semi-gloss for durability, plus caulk, rust-resistant hardware covers, and gloves for a clean, efficient job.
How to Pick the Right Paint for Exterior Doors
Wondering which paint will stand up to weather, look great, and last? You’ll weigh paint types and color selection for durability and curb appeal.
Choose finish and formulation based on exposure, maintenance, and door material.
- High-quality exterior acrylic latex for flexibility
- Alkyd for smooth, hard finish
- Semi-gloss or gloss for cleaning ease
- Test swatches in sunlight before finalizing
Why Primer Matters and Which Primer to Use
Because primer creates a stable base, it prevents stains and tannin bleed-through, improves adhesion, and guarantees your topcoat wears evenly over time.
You’ll see primer benefits immediately: better coverage, corrosion resistance on metal, and sealing on bare wood.
Choose primer types by substrate—oil-based for tannin-rich woods, bonding primers for glossy surfaces, and water-based for quick recoat and low odor.
Choosing Sheen: Gloss, Semi-Gloss, or Satin for Doors
When you pick a sheen for your exterior door, consider how durable the finish needs to be and how much wear it’ll take.
Higher gloss and semi-gloss resist scuffs and are easier to clean, while satin hides minor scratches and fingerprints better.
Also remember that glossier sheens will make surface flaws more visible, so prep matters if you want a smooth look.
Finish Durability Comparison
Although all three sheens protect your door, they do so differently, and choosing the right one means balancing appearance with durability.
You want finish longevity and strong weather resistance; gloss resists scuffs, semi-gloss balances shine and toughness, satin hides minor marks while shedding water.
Consider:
- Gloss: maximum durability, high sheen
- Semi-gloss: versatile, durable
- Satin: subtle, weather-tolerant
Choice depends on exposure and taste.
Surface Imperfection Visibility
Besides durability and weather resistance, you’ll also want to think about how each sheen shows flaws—high-gloss finishes highlight every bump, brush stroke, and sanding mark.
Semi-gloss makes most imperfections noticeable but less dramatic, and satin hides minor surface flaws while still reflecting some light.
Choose satin if your door has uneven surface texture; pick gloss only with meticulous prep and careful paint application.
Best Paints by Door Material: Wood, Metal, Fiberglass
Different door materials need different paints to look great and hold up — wood soaks up and shows brush marks, metal demands rust protection, and fiberglass benefits from flexible, adhesion-friendly formulas.
- Choose wood finishes for warmth; consider texture options and maintenance tips.
- Use metal treatments with rust inhibitors for paint longevity.
- Pick fiberglass coatings that balance adhesion and color selection.
- Factor environmental factors when selecting products.
Weather & Timing: When to Paint an Exterior Door
When planning to paint your exterior door, pick a day with steady temperatures between about 50°F and 85°F and low humidity so the paint adheres and dries evenly.
Check local weather conditions for rain, wind, or temperature swings, and schedule during calm mornings or late afternoons.
Aim for ideal temperatures throughout drying time, avoiding direct midday heat or overnight chills that can ruin the finish.
Stay Safe: PPE and Workspace Setup
Before you start painting, make sure you’ve got the right PPE—gloves, a respirator or mask, and eye protection—to keep fumes and particles off your skin and out of your lungs.
Keep the area well ventilated and control dust by laying drop cloths and using a fan or open windows.
Work in a clean, organized, well-lit space so tools are easy to find and you can see your progress clearly.
Personal Protective Equipment
1 simple rule: protect yourself.
You’ll wear safety gear and protective eyewear while painting; choose durable gloves, a respirator rated for paints, and a long-sleeve shirt.
Keep gear clean and replaced when worn. Follow label instructions for solvents and primers.
- Nitrile gloves
- Respirator mask (P100/organic vapor)
- Protective eyewear
- Long-sleeve cover-up
Ventilation And Dust Control
Because paint fumes and sanding dust can build up fast, set up strong ventilation and dust control before you start work.
You’ll position fans to pull air outward, open windows, and use exhaust or box fans as ventilation methods.
Wear a respirator, seal off nearby rooms, and use tack cloths and a shop-vac with HEPA filter for dust prevention to keep the area safe.
Organized, Well-Lit Workspace
Good ventilation and dust control are only part of the safety picture; you’ll also want an organized, well-lit workspace to keep tools, PPE, and materials within easy reach and clearly visible.
Maintain workspace organization and respect lighting importance to reduce mistakes and hazards.
- Clear workbench
- Designated PPE station
- Task lighting at eye level
- Cord management and labeled containers
How to Remove a Door for Easier Painting
Removing your exterior door makes painting faster, cleaner, and gives you better access to edges and hardware. You’ll prepare by labeling hinge positions, removing pins, and setting the door on sawhorses. Prioritize Door removal and Painting safety: wear gloves, eye protection, and work with a helper for heavy doors.
| Step | Tool | Tip |
|---|---|---|
| 1 | Pin punch | Label |
| 2 | Screwdriver | Support |
| 3 | Sawhorses | Protect |
| 4 | Tape | Mask |
| 5 | Helper | Lift |
When to Keep the Door on Hinges and How to Secure It
If you decide not to take the door off the hinges, keep it stable and protected so you can paint cleanly and safely.
You’ll maintain door stability and guarantee hinge security by anchoring, supporting, and protecting edges.
Use these simple steps:
- Prop a padded block under the door
- Tighten hinge screws
- Cover threshold and nearby trim
- Work from top to bottom
How to Remove and Protect Door Hardware
Start by taking off the lockset and strike plate so you can paint clean edges and avoid getting finish in moving parts.
Remove knobs, deadbolts, hinges; label hardware types and bag screws to keep sets together.
Use painter’s tape, plastic bags, or masking film as protective measures for fixed pieces.
Store removed parts in a safe, dry place until reinstallation.
Surface Prep for Wood Doors: Cleaning, Sanding, Repairs
Before you sand, clean the door thoroughly to remove dirt, grease, and mildew so the surface profile is accurate.
Use sandpaper to smooth the finish and feather edges where old paint meets bare wood.
Fill gouges and cracks with an appropriate wood filler, sand smooth, and wipe away dust before priming.
Clean Thoroughly Before Sanding
Wipe down the door and frame with a stiff brush and a solution of mild detergent to remove dirt, cobwebs, and loose paint—this’ll let you see the real surface you’ll be working on.
Use appropriate cleaning products, rinse, and dry fully before sanding.
Visual checklist:
- Sticky residues removed
- Mold or mildew treated
- Hardware cleaned or masked
- Paint flakes scraped away
Smooth and Feather Edges
Smooth rough spots and feather any remaining paint edges so your new finish lays down evenly and hides changes. You’ll use light sanding, a soft block, and targeted feathering techniques for seamless edge blending. Work with the grain, wipe dust, and check shifts by touch so paint won’t highlight imperfections.
| Step | Tool | Tip |
|---|---|---|
| 1 | Sandpaper | Light grit |
| 2 | Block | Even pressure |
| 3 | Cloth | Wipe dust |
| 4 | Brush | Blend |
| 5 | Inspect | Touch test |
Repair Gouges And Cracks
Repair gouges and cracks so your door looks and performs like new. You’ll clean the area, sand edges, apply quality crack filler or wood filler for gouge repair, then sand smooth and prime.
Follow this simple sequence:
- Clean debris and dust
- Sand to solid wood
- Fill with crack filler or wood filler
- Sand, prime, then paint
Surface Prep for Metal Doors: Rust Treatment & Priming
Rust spots on a metal door need prompt attention to keep paint from peeling and corrosion from spreading. You’ll do a rust inspection, sand to bare metal, apply a rust converter, then prime with a metal-prep primer. Follow with proper drying.
| Step | Action |
|---|---|
| 1 | Rust inspection |
| 2 | Sanding |
| 3 | Rust converter |
| 4 | Metal primer |
Surface Prep for Fiberglass Doors: Cleaning & De‑Glossing
Before you paint a fiberglass door, clean it thoroughly and de-gloss the finish so the new paint will adhere.
Use gentle cleaning techniques, rinse, and let dry. Sand or use chemical de glossing methods where needed. Then wipe with solvent and tack cloth.
- Mild detergent and water
- Nonabrasive pad for grime
- Fine-grit sanding for sheen
- Solvent wipe before priming
How to Fill Holes, Cracks, and Gouges on a Door
Before you start filling, assess the damage carefully so you know whether you’re dealing with surface cracks, deeper gouges, or old nail holes.
Choose a filler that matches the door material—wood filler for solid wood, epoxy or exterior-grade synthetic filler for fiberglass or large repairs.
Apply the filler, let it cure fully, then sand smooth before priming and painting.
Assess Damage Carefully
When you’re prepping a door, take a systematic look for holes, cracks, and gouges so you know exactly what needs fixing and whether the damage is cosmetic or structural.
You’ll perform damage assessment during a thorough door inspection, noting weather exposure, rot, and loose trim to choose repair techniques.
Check visually and by touch, document locations, and prioritize structural issues.
- surface chips
- split seams
- punctures
- frame gaps
Use Appropriate Fillers
Now that you’ve mapped out chips, splits, and gaps, pick the right filler for each problem so repairs hold up and stay invisible once painted.
Choose filler types—epoxy for structural gouges, wood filler for shallow holes, exterior-grade caulk for hairline cracks.
Follow recommended application techniques: clean, sand, apply in layers, cure fully, sand flush, and prime before painting for a seamless, durable finish.
How to Sand Properly Without Damaging Details
If you want crisp, professional-looking results, sand carefully around moldings and raised panels so you remove old finish without softening edges or obliterating carved details.
Use fine grit and light pressure, proper sanding techniques, and focus on detail preservation. Protect profiles and work with the grain.
Use fine grit and light pressure; sand with the grain to protect profiles and preserve carved detail.
- Small sanding block
- Flexible foam pad
- Sanding sponge
- Precision scraper
How to Dust and Degrease So Paint Will Adhere
Before you paint, wipe the door with a soft brush or cloth to remove loose dust and cobwebs.
Then use a countertop-safe solvent or degreaser on a lint-free rag to remove oils and grime that’ll keep paint from sticking.
Let the surface dry fully before priming or painting.
Remove Loose Dust
Start by wiping the door with a dry microfiber cloth to lift loose dust and cobwebs. Then follow with a mild degreaser to remove oils and road grime so paint will stick evenly.
You’ll focus on dust removal and surface cleaning before sanding.
Tips:
- Work top to bottom
- Use overlapping strokes
- Flip or clean cloth often
- Check grooves and edges for residue
Degrease With Solvent
Grab a solvent-based degreaser and work methodically across the door, wiping until oils, fingerprints, and road grime are gone so paint will bond properly.
Use appropriate solvent types—mineral spirits for oil-based finishes, denatured alcohol for lacquers, or a water-based cleaner for sensitive surfaces.
Apply degreasing techniques: small sections, clean cloths, and final rinse with fresh solvent to guarantee a contaminant-free surface.
Choosing Brushes, Rollers & Sprayers
Choosing the right tools—brushes for detail, rollers for flat panels, and sprayers for smooth, fast coverage—makes painting an exterior door quicker and gives a cleaner finish.
You’ll choose brush types for trim, roller options for panels, learn sprayer techniques for even coats, and follow handling tips to avoid drips.
- angled sash brush
- foam roller
- HVLP sprayer
- lint-free cloth
How to Cut In Door Edges and Panels Cleanly
Before you lay a roller to the flat panels, cut in the edges and recessed areas with a steady hand so the final finish looks crisp and professional.
Use a sash brush for tight corners, load it lightly, and pull smooth strokes.
Practice cutting techniques on scrap wood, maintain edge control by painting toward painted areas, and wipe excess paint from the brush between passes.
Roller Technique for Smooth, Drip-Free Coverage
Once the edges and recessed areas are cleanly cut in, move on to rolling the flat panels to blend brush marks and create an even film.
Use roller techniques for a smooth application:
- Light pressure, even passes
- Overlap each stroke slightly
- Reload sparingly to avoid drips
- Roll toward wet edges for uniform sheen
Work quickly but steadily to prevent lap marks.
Spraying a Door: Setup, Technique & Pros/Cons
Spraying a door can cut your painting time dramatically and give a factory-smooth finish, but it also demands the right setup and careful technique to avoid runs, overspray, and uneven coverage.
You’ll prep thoroughly, mask nearby surfaces, choose a compatible sprayer and tip, and practice consistent passes.
Learn spray techniques, control atomization and distance, and follow strict equipment maintenance to guarantee reliable results.
How Many Coats You Need and Correct Dry Times
How many coats you need depends on the door material, the type of paint or finish, and the look you want—typically two thin, even coats of exterior paint or three for stain-blocking primers and high-build finishes.
You’ll monitor coats count and drying times to avoid tackiness. Consider:
- Bare wood: primer + 2 topcoats
- Previously painted: 2 coats
- Dark to light color: extra coat
- High-gloss: longer drying times
How to Avoid Drips, Brush Strokes, and Orange Peel
After you’ve applied the right number of coats and allowed proper drying, focus on surface quality so the finish looks professional.
Use drip prevention techniques: load your brush evenly, work thin coats, and tip off runs immediately.
Prevent drips by loading the brush evenly, applying thin coats, and tipping off any runs right away.
For brush stroke remedies, sand lightly between coats with fine grit and use a high-quality brush or foam applicator.
Keep temps moderate and humidity low to avoid orange peel.
How to Achieve Crisp Lines and Clean Hardware Openings
To get sharp edges, tape off trim and panels with painter’s tape before you start.
Cover doorknobs, hinges, and the lockset with plastic or masking paper so paint won’t get into the openings.
Remove excess tape slowly after the paint’s tacky to keep lines crisp.
Tape Off Edges
Before you paint, mask off edges and hardware so you get crisp lines and no stray drips on glass, brick, or metal.
Choose tape types for edge preparation and press firmly along seams. Work methodically, removing tape while paint’s tacky.
Use:
- Low-tack painter’s tape
- Thin trim tape for grooves
- Plastic sheeting for panes
- Cardboard shields for nearby masonry
Protect Hardware Openings
When you’re getting ready to paint the door, cover and seal every hardware opening—like the knob, deadbolt, hinges, and mail slot—so paint stays off moving parts and your lines stay sharp.
Use painter’s tape, masking film, or foam plugs for hardware protection.
Remove or loosen fixtures for cleaner edges, label screws during installation tips, and test operation before final coats.
When and How to Use Glazing or Faux Finishes on Doors
Although glazing and faux finishes take extra steps, they let you add depth and character that paint alone can’t achieve.
You’ll choose glazing techniques or faux finishes for antique, rustic, or high-contrast looks. Practice on scrap, work in thin layers, and wipe or blend quickly.
Consider subtlety for curb appeal.
- Layered glaze
- Ragging
- Faux woodgrain
- Venetian plaster
How to Seal and Weatherproof the Painted Door
After glazing or faux work dries, you’ll want to protect that finish and the door itself from moisture, sun, and daily wear. Choose weatherproofing options like polyurethane or exterior varnish, and use sealing techniques on edges and thresholds to block drafts and rot.
| Area | Treatment |
|---|---|
| Face | Topcoat |
| Edges | Sealant |
| Bottom | Threshold |
| Frame | Caulk |
Reinstalling Hardware and Adjusting for Smooth Operation
Gather your hardware and a few basic tools, then reinstall the knob, deadbolt, hinges, and strike plates so the door operates smoothly.
Check door alignment and hardware compatibility as you go, tightening screws and shimming hinges. Test latch engagement and smooth swing, adjusting mortises or strikes if needed.
- Tighten screws incrementally
- Shim misaligned hinges
- File strike plate
- Test lock action
How to Maintain Your Painted Door Year-Round
If you want your freshly painted exterior door to look good and function well year-round, perform simple seasonal upkeep: clean it with mild soap and water, inspect seals and weatherstripping, touch up chips or scratches promptly, and lubricate moving parts.
Use proven door cleaning techniques, check hinges and thresholds during seasonal inspections, wipe away debris, reseal exposed edges as needed, and stay proactive to prevent bigger issues.
Quick Repair Tips for Chips, Scratches, and Peeling
When you spot a chip, scratch, or peeling paint, act quickly to prevent moisture and rust from spreading and to keep your door looking sharp. Small fixes often take only minutes and a few basic tools.
When you see chips or peeling paint, act fast—small repairs stop rust and restore your door’s look.
Use chipping solutions and scratch repair basics, apply peeling fixes, and follow touch up techniques with color matching.
Maintenance tips:
- Sand edges
- Clean area
- Prime small spots
- Feather paint into surrounding finish
Cost & Time Estimates: DIY vs Hiring a Pro (Ranges)
Deciding whether to tackle painting your exterior door yourself or hire a pro comes down to your budget, skill level, and schedule:
DIY saves labor costs but takes more of your time, while a contractor adds expense but speeds the job and guarantees a polished finish.
For a clear budget breakdown, expect DIY materials $30–$150, pros $150–$600;
time considerations: DIY 4–10 hours, pro 1–3 hours.
Common Mistakes to Avoid When Painting Exterior Doors
Budget and time considerations help you choose who paints the door, but execution determines how long the finish will last — and that’s where common mistakes can wreck the result.
Budget and timing guide who paints, but proper execution — not shortcuts — makes the finish last.
You should avoid shortcuts that harm longevity. Watch for:
- Skipping proper prep like cleaning and sanding
- Poor color selection or wrong sheen
- Ignoring door styles and hardware fit
- Painting in unsuitable weather
Troubleshooting: Fix Paint Adhesion, Blistering, and Fading
Spotting peeling, blistering, or faded paint early lets you address the root cause before more damage occurs.
Do a thorough surface inspection to identify adhesion issues or blistering problems. Remove loose paint, sand glossy areas, clean and prime bare wood, and choose UV-resistant topcoats for fading solutions.
Repaint under proper temperature and humidity to prevent recurrence.
Frequently Asked Questions
Can I Paint a Door That Opens Into a Home With the Latch Engaged?
Yes — you can paint with the latch engaged, but you’ll risk sticking and damage; use door latch safety measures, prop the door slightly, apply indoor painting tips like thin coats and good ventilation, and test operation before finishing.
Will Lead Paint Be an Issue on Very Old Exterior Doors?
Yes — about 3.6 million U.S. homes still contain lead paint, so you should do lead testing first. You’ll take safety precautions, wear PPE, avoid sanding, and follow removal or encapsulation guidance to protect occupants.
How Do I Match Paint Color When Replacing Only One Door?
You’ll start by taking a paint chip or small door sample to a store for color matching, test paint samples on the new door, let them dry, compare in different light, and tweak formula until you’re satisfied.
Can I Paint a Door With Insulated Core or Energy-Efficient Features?
Yes — you can paint an insulated door; think of it as dressing a body in armor. You’ll use insulated door painting methods and energy efficient coatings, ensuring primers and paints suit the core material and manufacturer’s instructions.
How Long Before I Can Hang Seasonal Decorations on the Painted Door?
You should wait at least 24–48 hours for initial drying time and 7 days for full cure before hanging seasonal decorations; that seasonal timing helps prevent dents, adhesive failure, or paint transfer, ensuring long-lasting, attractive results.
Conclusion
You’ve got the know-how to give your exterior door a long-lasting, attractive makeover without turning it into a weekend drama. With the right paint, primer, and prep, you’ll sidestep common missteps and keep your door looking polite and purposeful through weather and wear. Take your time on repairs, follow the workflow, and don’t be shy about calling in a pro if the job feels ambitious—you’ll save frustration and preserve curb appeal.
