How to Paint a Foundation Wall the Right Way and Make It Last
You can paint a foundation wall if it’s dry and structurally sound; start by fixing leaks, cracks, and drainage, then clean and profile the surface for primer. Use an alkali‑resistant masonry primer and a breathable masonry paint or elastomeric coating suited to your climate. Paint on mild, dry days, allow full drying between coats, and inspect yearly for touchups. Follow these steps and tips, and the rest of the guide will show you how to get lasting results.
Quick Answer Can You Paint a Foundation Wall and How to Make It Last
Yes—you can paint a foundation wall if it’s structurally sound and dry: clean, repair cracks, apply a masonry primer, then use a breathable masonry paint for best results.
Expect a properly prepped and painted wall to last 5–10 years depending on exposure and moisture conditions.
If you’ve got active leaks, significant cracks, or persistent moisture, you’ll need repairs or waterproofing before painting.
Short summary of steps and expected longevity
1 quick summary: you can paint a foundation wall, and if you follow the right prep and materials steps it can last a decade or more.
Clean, repair cracks, etch or prime, use masonry primer and breathable elastomeric or masonry paint, and apply two coats.
Allow proper cure times and maintain drainage.
Follow how to paint a foundation wall for lasting results.
When painting a foundation wall is appropriate vs. when to repair or waterproof instead
A painted foundation wall can look good and last a decade or more when you prep and use the right materials, but painting isn’t always the right fix.
Paint is appropriate for clean, dry, structurally sound masonry to improve appearance and resist mild moisture.
Don’t paint if you have cracks, active leaks, efflorescence, or hydrostatic pressure—repair or professional waterproofing is needed first.
Basic Understanding What Is a Foundation Wall and Why Paint It
A foundation wall is the structural barrier—often poured concrete, concrete block, or other masonry—that supports your home and resists ground pressure.
You’ll paint it mainly to add a protective layer that helps control moisture, resist surface wear, and improve appearance.
Remember paint won’t fix structural cracks, hydrostatic pressure, or salt/moisture migration, so those issues need professional repair before you coat the wall.
Purpose and common materials (concrete, block, poured, masonry)
Think of your foundation wall as the home’s hidden shield: it supports the structure, keeps out moisture, and provides a surface you can protect or beautify by painting.
Foundations come in poured concrete, concrete block, and masonry stone or brick. Each material has different porosity and surface texture, so you’ll choose primers, sealers, and paint formulated for that substrate to guarantee adhesion and durability.
Benefits of painting: protection, moisture control, aesthetics
Since foundation materials vary in porosity and texture, you’ll want to contemplate how painting helps more than just look nice: it protects the surface, controls moisture, and improves curb appeal.
Painting seals pores to reduce water intrusion, resists surface staining and efflorescence, and makes inspection easier.
A proper masonry or breathable masonry paint preserves material longevity while giving your home a cleaner, more finished appearance.
Limitations: structural issues, hydrostatic pressure, salt/moisture migration
Although painting can protect and beautify foundation walls, it won’t fix structural problems or stop water driven by hydrostatic pressure, and it can’t prevent damage from salts that migrate through masonry.
You should inspect for cracks, bowing, or drainage failures and repair them first.
Use breathable coatings if salts or moisture migrate, and address exterior grading, drainage, or professional waterproofing when pressure or deterioration is present.
How to Prepare a Foundation Wall for Painting
Before you paint a foundation wall, you’ll inspect the surface for cracks, spalls, and failing mortar so you know what needs repair.
Next you’ll clean with pressure washing or appropriate chemical treatments, remove efflorescence, and fix moisture issues by correcting grading, gutters, or drainage.
Finally you’ll profile or etch the surface and apply a suitable masonry primer to guarantee the paint bonds and lasts.
Step 1 Inspect and assess condition
1. You start by closely inspecting the foundation, noting moisture, efflorescence, delamination, biological growth, and surface contamination.
Record observations and photos. Check for drainage problems and nearby grading issues. Decide if areas need cleaning or professional evaluation.
- moisture stains
- white powder (efflorescence)
- peeling paint
- algae/mold
- soil against wall
Step 2 Repairs before painting: cracks, spalls, mortar joints
Now that you’ve inspected the wall and identified moisture, efflorescence, peeling paint, or soil contact, address structural and surface damage so the paint will stick and last.
You’ll repair before cleaning: remove loose material, fill cracks, patch spalls, and repoint joints.
Consider:
- Wire brush loose mortar and debris
- Use hydraulic cement for active leaks
- Epoxy or masonry filler for hairline cracks
- Trowel patch spalls smooth
- Repoint with matching mortar
Step 3 Clean the surface: pressure washing, chemical cleaners, efflorescence removal

Start by removing dirt, loose paint, and salts so the sealer and paint can bond properly.
Use a pressure washer on low‑to‑medium pressure to avoid damage, rinse thoroughly, and let the wall dry.
Treat stubborn stains and efflorescence with a masonry cleaner or diluted muriatic solution following label directions and safety gear.
Scrub, rinse, and inspect before sealing and painting.
Step 4 Address moisture sources: grading, gutters, drainage, exterior waterproofing
After cleaning, check for anything outside that keeps moisture against the foundation—paint will fail if water keeps soaking or pooling at the wall.
Regrade soil to slope away, extend downspouts, repair gutters and splash blocks, fix leaks, and install drains or exterior waterproofing where needed.
Remove plants too close to the wall.
Dry, diverted foundations hold paint and prevent recurring damage.
Step 5 Surface profiling and priming: etching, masonry primer selection
Prepare the surface so the primer can bond: roughen smooth concrete or masonry with an acid etch or mechanical abrasion, then remove all dust and residue before priming.
Choose a masonry or concrete-specific primer—alkali-resistant, penetrating, and compatible with your substrate.
Apply according to temperature and moisture limits, saturating porous areas but avoiding puddles.
Allow full cure before painting.
Step 6 Choosing the right paint and coatings for foundation walls
With the primer fully cured and the surface sound, it’s time to pick paints and coatings that will protect against moisture, alkali bleed, and freeze–thaw stresses common to foundations. Choose breathable masonry paints, elastomeric coatings for cracks, or waterproofing sealers. Match product to substrate and climate, apply per instructions, and inspect yearly.
| Type | Use | Benefit |
|---|---|---|
| Masonry paint | Above-grade | Breathable |
| Elastomeric | Cracked areas | Flexes |
| Sealer | Below-grade | Waterproof |
Painting Application Process
Now you’ll move into the painting application process, starting with a tools-and-materials checklist so you’ve got brushes, rollers, sprayer, mask, and the right masonry paint.
Check weather and timing so you’re painting in mild, dry conditions, then mix and test the paint on a small area to confirm color and adhesion.
Use appropriate application techniques—brush for edges, roll for flats, sprayer for large areas—and plan the number of coats, drying times, and curing before finishing.
Step 1 Tools and materials checklist
Start by gathering the right tools and materials so you won’t stop mid-job: a masonry primer and exterior masonry paint, a stiff-bristle brush or wire brush for cleaning, a pressure washer or garden hose with a nozzle, filler or patching compound for cracks, a putty knife, rollers with a 3/4″–1″ nap and extension pole, angled sash brushes for edges, painter’s tape, drop cloths or plastic sheeting, sandpaper, a masonry-compatible sealer (if required), gloves, safety glasses, and a respirator for dusty conditions.
- Stiff brush or pressure washer
- Primer and masonry paint
- Patch compound and putty knife
- Rollers, extension pole, sash brushes
- Protective gear and drop cloths
Step 2 Weather and timing considerations
Because paint cures best in steady conditions, pick a stretch of dry days with temperatures within the paint maker’s recommended range and low humidity so the primer and topcoat can set evenly.
Plan to start in the morning after dew evaporates, avoid painting near storms or extreme heat, and allow full drying times between coats.
Adjust schedule for shaded or north-facing walls.
Step 3 Mixing and testing paint on a small area
Mix the primer and topcoat thoroughly and test a small patch before you tackle the whole wall.
Stir each can to uniform color and consistency, then apply a discreet test square.
Let it dry fully, check adhesion, color, and texture, and inspect for efflorescence or seepage.
If results satisfy you, proceed; if not, adjust mix, primer choice, or surface prep and retest.
Step 4 Application techniques: brush, roll, masonry sprayer
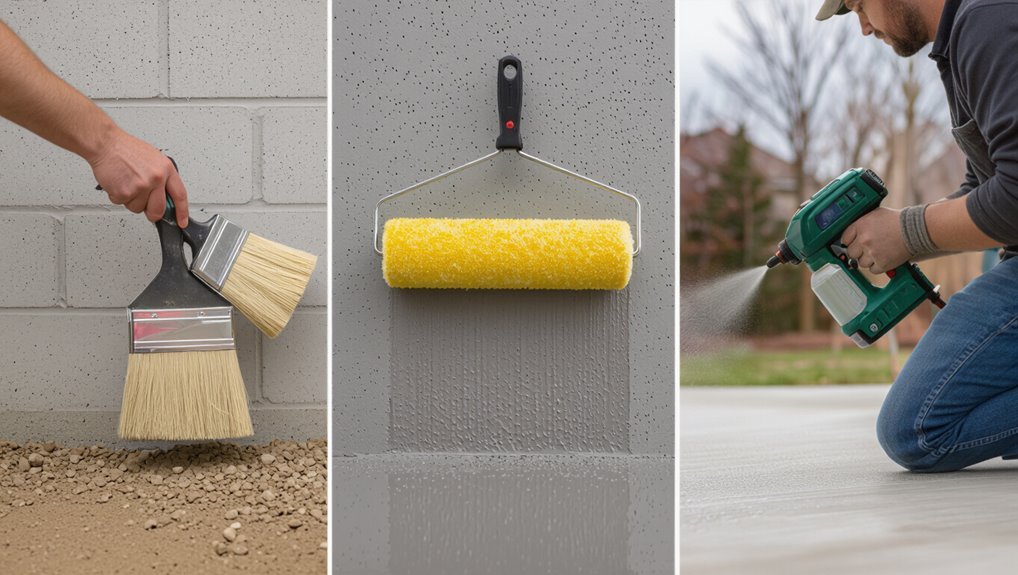
Now that your primer and test patch passed, choose the right application method for the job:
Brush for edges and tight spots, a roller for broad flat sections, and a masonry sprayer when you need speed and even coverage over rough or textured concrete.
Work from top to bottom, keep wet edges, use a nap suited to texture, and maintain consistent pressure for uniform finish.
Step 5 Number of coats, drying times, and curing
1 coat rarely does the job on concrete—plan for at least two thin coats for proper coverage and durability, allowing each to dry per the paint manufacturer’s recommended times before recoating so you avoid lifting or uneven finish.
Check surface temperature and humidity; colder or humid conditions extend drying and curing.
Full cure can take days to weeks—wait before heavy contact or sealing for best longevity.
Step 6 Post-paint inspection and touch-ups
After the coats have dried, walk the foundation and inspect every section under good light for missed spots, drips, thin coverage, or texture inconsistencies.
Mark flaws, feather edges, and sand rough areas. Spot-prime bare patches, apply matching paint with a small brush or roller, blend edges, and recheck after drying.
Clean tools and note any areas to monitor for future maintenance.
Choosing Products Paints, Primers, Sealers, and Waterproofing
You’ll want to weigh acrylic masonry paints, elastomeric coatings, and masonry stains based on flexibility, coverage, and appearance.
Compare breathable versus non-breathable systems—breathable lets moisture escape but may be less waterproof, while non-breathable blocks moisture but can trap vapor.
Also pick primers and additives for efflorescence or high-moisture walls and consider exterior waterproofing membranes or drainage boards when hydrostatic pressure or persistent seepage is an issue.
Acrylic masonry paints vs. elastomeric coatings vs. masonry stains
Choosing the right finish for your foundation matters because acrylic masonry paints, elastomeric coatings, and masonry stains each protect and look different. You’ll pick acrylic for color and easy maintenance, elastomeric for heavy crack-bridging and thick protection, or a stain to highlight texture without film. Compare visually:
| Feature | Impression |
|---|---|
| Color options | Bold |
| Texture | Natural |
| Durability | Variable |
| Flexibility | Variable |
Breathable vs. non-breathable coatings: pros and cons
While breathable and non-breathable coatings both aim to protect your foundation, they work very differently:
Breathable coatings let moisture vapor escape, reducing trapped damp and efflorescence risk, and suit older or moisture-prone masonry.
Non-breathable coatings block water penetration and can waterproof better externally but may trap vapor, risking blistering or spalling if underlying moisture’s present.
Choose based on wall condition and drainage.
Recommended primers and additives for efflorescence or high-moisture walls
Because efflorescence and persistent moisture demand targeted treatment, pick primers and additives that block salts, promote adhesion, and tolerate vapor movement.
Use masonry-specific alkali-resistant primers, silane/siloxane sealers for salt inhibition, and breathable acrylic or elastomeric primers where movement occurs.
Add penetrating bonding agents for smooth or powdery concrete, and choose mildew-resistant, moisture-tolerant formulations rated for below-grade conditions.
When to use exterior waterproofing membranes or drainage boards
If you’ve treated efflorescence and used moisture-tolerant primers but still see persistent dampness or hydrostatic pressure, it’s time to contemplate exterior waterproofing membranes or drainage boards.
You should choose membranes when water penetration is continuous or pressure builds behind the wall.
Use drainage boards to channel water away and protect membranes.
Hire pros for excavation, proper grading, and reliable installation to guarantee longevity.
Common Mistakes and How to Avoid Them
Don’t paint over damp or unprepared surfaces—you’ll trap moisture and cause peeling or mold.
Make sure you use a breathable masonry paint and the right primer for your substrate, and address drainage and grading so water isn’t forced against the wall.
Also, time the job for dry, mild weather to avoid adhesion failures and rework.
Painting over damp or unprepared surfaces
When you paint over damp or unprepared foundation walls, the finish won’t adhere properly and moisture can cause peeling, blistering, or mold growth.
Don’t rush: test for dampness, fix leaks, and let walls dry thoroughly.
Clean and remove loose material, efflorescence, and mildew.
Prime with a masonry-appropriate primer and repair cracks before painting to guarantee long-lasting adhesion and a stable finish.
Using non-breathable paint on moisture-prone masonry
Because masonry ever holds some moisture, using non-breathable paint on damp or moisture-prone foundation walls traps that moisture and forces it to migrate through the coating, leading to peeling, blistering, efflorescence, and accelerated deterioration.
Choose breathable masonry paints or mineral-based coatings, guarantee surfaces are as dry as possible, and test small areas first.
Ventilate and follow manufacturer moisture limits to prevent failure.
Ignoring drainage and grading issues
If you skip fixing grading and drainage before painting, water will keep soaking the foundation and undermine any coating you apply.
Check slope, downspouts, gutters, and soil compaction so runoff moves away. Repair low spots, extend downspouts, and install swales or French drains where needed.
Do this before painting so your finish won’t blister, flake, or trap destructive moisture.
Skipping primer or using wrong product for substrate
Fixing drainage and grading won’t help much if you paint directly onto bare masonry or a sealed surface with the wrong product—coatings need the right primer and formulation to stick and breathe.
You should identify substrate (concrete, block, previously painted, or sealed), use a compatible masonry or bonding primer, and choose breathable, masonry-rated paint.
Test adhesion and follow manufacturer prep instructions for lasting results.
Poor timing and weather-related failures
When you paint a foundation wall at the wrong time—during wet weather, extreme heat, or when temperatures drop at night—you’ll invite adhesion problems, blistering, and slow curing that shorten the coating’s life.
Check forecasts, paint when surfaces are dry and temperatures are steady, and avoid direct midday sun or freezing nights.
Use products rated for expected conditions and allow full cure before exposure.
Best Practices to Maximize Longevity
To keep your painted foundation lasting, set a routine inspection and maintenance schedule and check seasonally for freeze/thaw damage and clogged gutters or downspouts.
Watch for signs like efflorescence, peeling, or moisture intrusion and log changes so you can spot worsening issues early.
Recoat when wear is minor, but consult a professional if you find persistent moisture problems or widespread deterioration.
Routine inspection and maintenance schedule
Although you mightn’t notice small changes day to day, regular inspections are what catch developing problems before they escalate; set a clear schedule for checking your foundation wall at least twice a year and after major storms.
You should:
- Look for paint cracks or peeling.
- Check for new moisture stains.
- Inspect sealant and caulk lines.
- Note hairline foundation cracks.
- Record and photograph issues for repairs.
Seasonal care: freeze/thaw protection, gutter and downspout maintenance
Because seasonal cycles put extra stress on your foundation, proactive freeze/thaw protection and well-maintained gutters and downspouts are essential to prevent water intrusion and paint failure.
Clear debris, extend downspouts away from the wall, and slope soil to drain. Seal cracks and insulate exposed pipes.
Before winter, check fasteners and add splash blocks so melting snow won’t saturate painted masonry.
Long-term monitoring for efflorescence, peeling, and moisture intrusion
When you inspect your foundation regularly, you’ll spot early signs of efflorescence, peeling, or moisture intrusion before they become costly problems.
Check painted surfaces, joints, and interior walls seasonally; note white deposits, bubbling, flaking, or damp patches.
Photograph and log changes, measure moisture with a meter, clear nearby grading issues, and address minor repairs promptly to prevent larger deterioration.
When to recoat vs. when to consult a professional
Regular inspections tell you whether a simple recoat will suffice or if the problem needs a pro’s expertise.
If paint shows minor chalking or fading, clean and recoat with breathable masonry paint.
If you find cracking, persistent moisture, efflorescence, or peeling below the surface, call a professional to diagnose waterproofing, structural issues, or improper prep before repainting to avoid recurring failures.
Comparison: DIY vs. Hiring a Pro
You can handle prepping, patching small cracks, and applying primer and paint yourself if the wall is dry and accessible.
Call a pro if you spot structural cracks, active water intrusion, mold, or need major repairs that require permits.
When deciding, weigh typical costs (materials vs. labor), the time you’ll invest, and the contractor’s warranty and experience.
Tasks suitable for most DIYers
Start by tackling prep and painting steps you can confidently do yourself: cleaning the wall, repairing small cracks, applying primer, and rolling on paint. You’ll save money and learn techniques.
Typical DIY tasks include:
- Pressure washing surface dirt
- Scraping loose paint
- Filling hairline cracks with caulk
- Priming bare areas
- Applying two finish coats evenly
Red flags that warrant professional assessment or contracting
While many foundation painting tasks are straightforward, some signs mean you should call a pro instead of tackling them yourself.
You should get an expert when issues suggest structural, moisture, or safety concerns. Look for:
- Large horizontal or stair-step cracks
- Active water seepage or efflorescence
- Bulging, bowed, or crumbling walls
- Hidden mold behind coatings
- Complex drainage or grading problems
Typical cost factors and time estimates
Having a pro evaluate major issues will affect what you pay and how long the job takes, so it’s worth comparing DIY costs and time against hiring a contractor. You’ll save on labor but spend more time; pros charge for expertise, equipment, and warranty. Factor prep, repairs, materials, access, and drying times when budgeting.
| Item | Typical impact |
|---|---|
| Prep | Time/cost |
| Repairs | Cost |
| Materials | Cost |
| Labor | Time/cost |
| Weather | Time |
Case Examples and Quick Scenarios
You’ll look at three quick scenarios: new poured concrete, older masonry or block with efflorescence, and a below-grade wall that keeps getting wet.
For each case you’ll see the prep steps, the right products, and common pitfalls to avoid.
The lessons learned will help you decide what you can tackle yourself and when to call in a pro.
Scenario A New poured concrete foundation
If your foundation was recently poured, start by letting the concrete cure fully—usually at least 28 days.
Then inspect for form oil, dust, or laitance that can prevent paint adhesion. Clean with a pressure washer or scrub with alkaline cleaner, rinse thoroughly, etch if needed, and allow to dry.
Prime with a masonry or bonding primer, then apply breathable acrylic masonry paint for durability.
Scenario B Older masonry/block foundation with efflorescence
When old block walls show white, powdery efflorescence, you should tackle both the staining and the underlying moisture that caused it; otherwise paint won’t stick and the salts will keep coming back.
Scrub deposits with a stiff brush and mild muriatic solution, rinse thoroughly, let dry, repair cracked mortar, apply a breathable masonry primer and paint designed for salt-laden substrates to prevent recurrence.
Scenario C Below-grade wall with recurring moisture
Because below-grade walls sit against damp soil, recurring moisture problems need solutions that address both water entry and indoor humidity; otherwise paint and coatings will fail quickly.
You’ll diagnose sources: exterior drainage, damaged waterproofing, rising damp, or indoor condensation.
Fix exterior grading, apply proper waterproof membranes, install a perimeter drain or dehumidifier, repair interior plaster, then use vapor-permeable masonry paint designed for damp conditions.
Lessons learned from each scenario
Though each foundation problem looks different, you’ll find the same practical lessons repeat: diagnose fully before you paint, fix the moisture source first, choose materials that match the wall’s condition, and test a small area before committing.
Apply those rules: prioritize repairs, pick breathable coatings for damp walls, use rust inhibitors on metal, and document outcomes so you repeat what worked and avoid past mistakes.
FAQ Foundation Wall Painting (5 Common Questions)
You’ll often wonder whether you can paint an interior basement foundation wall and how long the results will last.
You’ll also need to know how to stop efflorescence before painting, whether an elastomeric coating is a durable fix, and what signs mean painting won’t solve the problem.
Let’s answer these five common questions so you can pick the right approach.
Can I paint a basement foundation wall on the interior?
Wondering if you can paint your basement foundation wall on the interior? You can, but prep is essential: clean, repair cracks, and make sure the wall’s dry and free of efflorescence.
Use a masonry primer and breathable masonry paint or masonry-specific elastomeric coating. Avoid trapping moisture; address any water entry or high humidity first.
Proper prep and materials prevent peeling and mold.
How long will painted foundation walls last?
How long your painted foundation walls last depends mainly on prep, paint type, and moisture control.
With proper cleaning, patching, a masonry primer, and a quality breathable masonry or elastomeric paint, expect 5–15 years.
Exterior walls face shorter lifespans if exposed to water or freeze cycles.
Regular inspections and touch-ups extend life; ignore moisture issues and paint will fail much sooner.
How do I stop efflorescence before painting?
If salts are seeping through your foundation, stop them before painting by cutting off their source and removing existing deposits.
Fix exterior drainage, patch cracks, and apply a proper cleaning and desalting treatment so paint will adhere and last.
After repairs, scrub with a masonry cleaner or diluted muriatic solution, rinse thoroughly, let dry, then test for recurring efflorescence before priming and painting.
Is elastomeric coating a good long-term solution?
Stopping efflorescence and fixing leaks first will give any coating the best chance to perform.
Elastomeric can be a good long-term option if your foundation is sound, moisture sources are resolved, and you use a breathable, high-quality product applied per instructions.
It resists hairline cracks and sheds water, but it isn’t a cure-all for active leaks or structural issues.
What signs indicate painting won’t solve the problem?
When you see persistent damp patches, recurring efflorescence, active water seepage, or wide structural cracks, painting alone won’t fix the problem.
You should address moisture sources, drainage, or structural repair first. Consult a contractor or waterproofing specialist, and don’t waste paint covering symptoms.
Once repairs stop movement and moisture, repainting or coating will be effective and long-lasting.
Quick Reference Checklist Before You Paint
Before you start painting, run through this quick checklist to make certain the job goes smoothly:
- Repair cracks, spalling, and active leaks
- Remove efflorescence and loose paint
- Confirm surface is dry and clean
- Check drainage, gutters, and grading
- Select masonry primer and breathable exterior paint
Follow this list, and you’ll avoid common failures while prepping the foundation for a lasting finish.