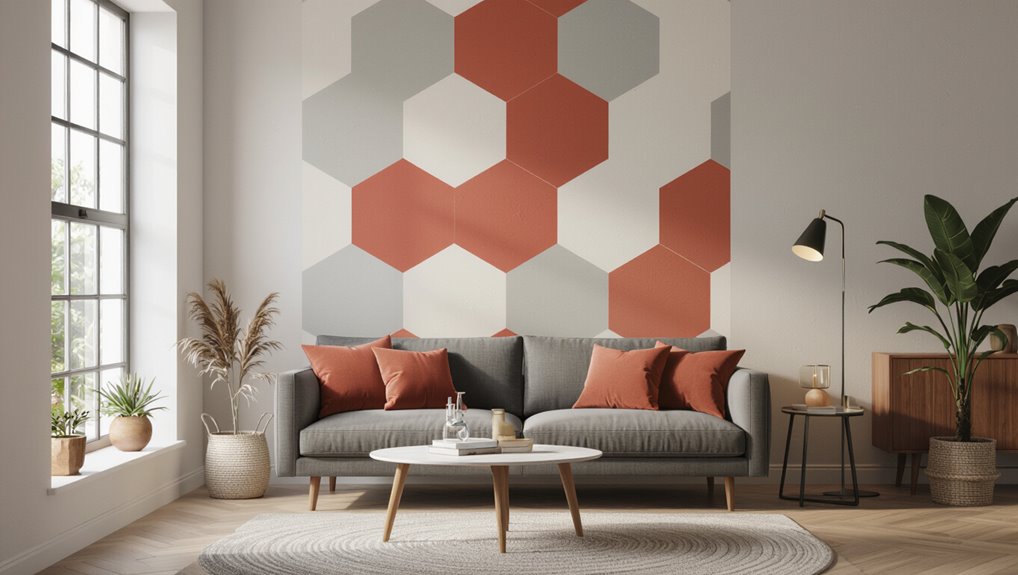
How to Paint a Geometric Wall for a Modern Look
You can give any room a modern edge by painting crisp geometric shapes on a single accent wall—pick a visible wall like behind the bed or TV, choose a dominant base color plus two contrasting accents, and test swatches in different light. Measure and map a proportional grid, use quality painter’s tape or stencils, prime and apply thin coats for sharp edges, and seal tape edges to prevent bleeding. Keep furniture and lighting in mind, and keep going to learn techniques and tips.
Choose the Right Geometric Style for Your Room
Wondering which geometric pattern will suit your room best? You’ll pick a geometric styles direction based on scale, color contrast, and existing room aesthetics.
Try bold, large shapes for minimal spaces or fine, repeating motifs for cozy corners.
Consider furniture lines and traffic flow so the pattern enhances, not fights, the space. Test swatches before committing.
Which Walls Work Best for a Geometric Feature Wall
Pick a single accent wall—behind your bed, the fireplace, or the TV—so the geometric pattern becomes a focal point.
Think about room size: bold, large-scale shapes suit roomy spaces, while smaller, tighter patterns work better in compact rooms.
If you’re unsure, choose the wall most visible when you enter the room to maximize impact.
Accent Wall Candidates
One clear rule for choosing an accent wall is to pick a surface that naturally draws the eye—like the wall behind your bed, the fireplace wall, or the one you face when you enter the room—because a geometric design works best where it becomes a focal point without competing with busy sightlines.
Choose walls that reinforce room themes, use geometric patterns and shape variation for visual balance, apply color psychology to maintain modern aesthetics, and guarantee design coherence with adjacent surfaces.
Room Size Considerations
Room size changes how a geometric feature wall reads: in small rooms, choose a single short wall or the wall behind a bed to keep patterns from overwhelming the space; in larger rooms, you can place geometry on a long wall, a fireplace wall, or a wall you face on entry to create a dramatic focal point without cluttering sightlines.
Consider room dimensions and layout impact when picking scale, color, and placement.
Pick Paint Colors That Create Depth and Contrast
Start by choosing a dominant base color that anchors the whole design and sets the mood.
Then add a couple of accent shades to highlight shapes and guide the eye across the pattern.
Finally, use lighter and darker tones to create convincing light and shadow so your wall reads with real depth and contrast.
Choose A Dominant Base
Pick a dominant base color that sets the mood and anchors your geometric scheme—you’ll use it to create depth and make accent shapes pop.
Choose a base tone that’s versatile and slightly muted so contrast reads cleanly.
Consider these tips:
- Test swatches in different light
- Match undertones to trim
- Use matte for texture
- Pick a dominant color family
- Balance with surrounding decor
Add Accent Shades
Add two or three accent shades that create contrast and depth against your dominant base so shapes read clearly and the wall feels intentional.
Choose hues using color psychology to evoke mood—cool for calm, warm for energy—and plan accent placement to balance composition.
Test swatches, keep saturation varied, and limit accents so geometric forms pop without overwhelming the room’s palette.
Use Light And Shadow
A single spotlight or the angle of midday sun can change how your shapes read, so choose paint colors that mimic light and shadow to give your geometric wall real depth and contrast.
Use shadow techniques and subtle light reflections to sculpt forms; follow practical tips:
- Pick a dominant mid-tone
- Add a lighter highlight
- Place a darker shadow
- Blend edges sparingly
- Test in actual light
Plan Color Placement for Visual Flow
How will the colors guide a viewer’s eye across the wall? You’ll use color psychology to place focal hues where you want attention and softer tones to recede, creating visual harmony.
Alternate contrast and calm areas so sightlines flow naturally from one shape to another. Plan shifts, balance warm and cool clusters, and test small swatches to confirm movement before committing.
Tools, Tape, and Supplies for Sharp Geometric Lines
Start with the right kit: quality painter’s tape, a level or laser, a few angled brushes, a small foam roller, a sharp hobby knife, and drop cloths will get you crisp edges and clean changes.
Choose tape types for crisp lines and test paint brands for coverage.
Essentials:
- Painter’s tape
- Angled brushes
- Foam roller
- Hobby knife
- Drop cloths
Measure and Map Your Design on the Wall
Now that your tools are laid out, measure and map the design onto the wall before you touch any paint. Use a level, tape measure, pencil, and other design tools to mark key points.
Record wall dimensions and transfer proportions directly with light pencil lines. Double-check diagonals and corner alignments so your geometric shapes stay crisp when you tape and paint.
Create a Proportional Grid for Repeatable Patterns
A proportional grid gives you a reliable framework for repeating shapes across any wall, so measure once and scale consistently. You’ll use grid scaling to map units and guarantee pattern repetition stays true.
Set up a tape-measured grid, mark reference points, and keep lines light so paint covers them.
- measure corners
- choose unit size
- draw faint lines
- double-check proportions
- label axes
Use Templates and Stencils to Simplify Complex Shapes
Pick durable stencils that won’t warp after a few uses so your shapes stay consistent.
Position templates precisely using a level and temporary tape to keep each repeat aligned.
Tape the edges and use light, controlled strokes to blend paint at the seams for crisp, seamless joins.
Choose Durable Stencils
Stencils save time and keep lines crisp when you’re tackling geometric patterns, so choose ones made from sturdy, reusable materials like mylar or thick plastic that won’t warp with paint or handling.
You’ll want durable materials and varied stencil patterns; consider options that hold edges and clean easily.
- Mylar sheets
- Thick plastic
- Reusable kits
- Edge-sealing tips
- Clean with mild soap
Position Templates Precisely
When you’re ready to transfer your design, align each template carefully so patterns flow seamlessly across the wall. Tape the edges, check levels with a laser or bubble level, and mark registration points to keep repeats consistent.
Use rigid template materials for crisp lines, or flexible mylar for curves. Prioritize precise template positioning, secure edges, and verify alignment before painting to avoid misregistration.
Blend Edges Seamlessly
Now that your templates are locked in and aligned, focus on blending edges so your shapes look crisp and continuous.
Use edge blending techniques and subtle color gradient methods to avoid harsh lines.
Follow these steps:
- Dab paint sparsely on a sponge
- Feather edges with a dry brush
- Remove stencil slowly
- Touch up with a liner brush
- Step back and adjust light
Design a Minimalist Single-Shape Focal Wall
One bold shape can transform a room, giving you a clean focal point without cluttering the space; pick a geometric form—circle, triangle, or oversized rectangle—that echoes the room’s lines and scale, choose a high-contrast or tonal color depending on how dramatic you want the effect, and position the shape so it balances furniture and sightlines rather than competing with them.
| Tip | Purpose |
|---|---|
| Pick scale | Match room size |
| Limit color | Maintain minimalist patterns |
| Center or offset | Optimize focal point |
| Use crisp edges | Keep modern look |
Create Bold Multi-Shape Compositions
Start by sketching overlapping shape layouts on paper or with painter’s tape so you can see how forms interact.
Keep an eye on balance by varying color intensity and scale—larger shapes can carry bolder hues while smaller ones use softer tones.
Adjust placement until the composition feels anchored and visually even.
Plan Overlapping Shape Layouts
Because overlapping shapes give your wall depth and movement, sketch a few compositional options before you tape or paint. Aim for a mix of large grounding forms and smaller accents that intersect at varied angles and transparencies.
Use overlapping patterns and solid layout strategies to guide placement. Try these ideas:
- Start with a dominant anchor shape
- Layer mid-size forms
- Add small highlights
- Vary angles
- Test transparency levels
Balance Color And Scale
When you balance color and scale, you create compositions that read clearly from across the room and hold interest up close; pick a dominant hue and large shape to anchor the design, then counter it with smaller, brighter accents so the eye moves around the wall.
Use color harmony to set mood, vary scale for visual balance, and test from different distances to refine contrast.
Adapt Designs for Textured or Imperfect Walls
If your wall has texture or minor imperfections, tweak your geometric design so shapes play with those features instead of fighting them.
Use textured techniques to highlight ridges and mask imperfect surfaces. Consider:
- Embrace irregular edges
- Choose larger shapes
- Layer colors for depth
- Use matte finishes to hide flaws
- Tape carefully around bumps
Child- and Pet-Safe Paints for High-Traffic Rooms
Since kids and pets spend time on floors and walls, pick paints that prioritize low toxins, durability, and easy cleaning.
Choose low VOC paints with washable, scrubbable finishes and mildew resistance.
Opt for low‑VOC paints with washable, scrub‑resistant finishes and built‑in mildew protection for healthier, lasting surfaces.
Look for eco friendly options certified by reputable labels and choose durable sheens like satin or washable eggshell.
Test small areas for stain-release, and ventilate well while painting to minimize fumes.
Estimate Paint Quantity and Project Budget
Now that you’ve picked low-toxicity, washable paints that stand up to kids and pets, estimate how much paint you’ll actually need and what the project will cost.
Calculate paint coverage per can, add 10–15% for mistakes, and list budget considerations.
- Measure wall area
- Note coats needed
- Check paint coverage on label
- Add tape and tools cost
- Include contingency fund
How Long a Geometric Paint Project Usually Takes
When you factor in measuring, taping, base coats, stenciling or masking, and drying time, a typical small-to-medium geometric wall takes about a day or two to finish.
Larger or more intricate designs can stretch to a weekend or several evenings. For accurate time estimation, break the project timeline into prepping, painting sessions, and curing intervals so you can schedule and avoid rushed mistakes.
Prep the Wall for Paint and Tape
Start by clearing the area and giving the wall a quick inspection for dents, nail holes, or peeling paint so you won’t trap imperfections under new paint and tape.
Then prep the wall surface and choose compatible paint types. Tape carefully and press edges.
Useful steps:
- Clean surface
- Fill holes
- Sand smooth
- Choose tape grade
- Test a small patch
Priming and Base Coats for Geometric Walls
A good primer lets your geometric design sit on a uniform, sealed surface, so you’ll get truer colors and cleaner tape lines; pick a primer compatible with both your wall material and the paint she’ll wear, and apply it evenly with a roller or sprayer for consistent coverage.
After priming, choose a neutral base aligned with color theory and geometric trends to support pattern repetition, paint finish, and design inspiration.
Masking Techniques to Prevent Bleed-Through
Start by choosing high-quality painter’s tape designed for clean lines so your geometry stays crisp.
Press the tape down firmly and run a putty knife or your fingernail along the edges to seal them completely.
For extra protection, apply a thin wash of the base color along the tape edge to lock in the seal before adding the new color.
Choose High-Quality Tape
1 key decision that determines crisp lines is the tape you pick, so choose high-quality painter’s tape designed for clean removal and strong edge adhesion.
You’ll learn tape types and proper tape application to avoid bleed-through. Follow these quick tips:
- Pick low-adhesive for delicate surfaces
- Use medium for painted walls
- Press edges firmly
- Replace old tape
- Remove slowly at 45°
Seal Edges Thoroughly
Because even the best tape can let pigment seep underneath, you’ll need to seal the edges before you paint to guarantee crisp, bleed-free lines.
Press tape firmly, burnish with a plastic card or edge tools, and apply a thin coat of the base color to lock seams.
For contrasting paint types, wait to cure fully before removing tape for sharp geometry.
Apply Paint for Crisp, Professional Edges
Now that your tape and primer are set, apply paint in thin, even coats so edges stay sharp and don’t bleed.
Use reliable paint edge techniques and crisp line methods to maintain precision.
- Work from taped edge outward
- Load brush lightly
- Feather strokes away from tape
- Let each coat dry fully
- Remove tape at a 45° angle slowly
Rollers vs. Brushes: When to Use Each
Sometimes a brush gives you the control you need for edges and details, while a roller covers large areas faster—so choose a brush for crisp lines and tight corners, and a roller for broad, even coverage on flat sections.
You’ll use brush advantages for precision and trimming, and roller techniques for smooth, consistent layers.
Combine both: cut in with a brush, then roll to blend.
Remove Tape Without Ruining Paint Edges
If you peel painter’s tape slowly and at a low angle as soon as the paint feels dry to the touch, you’ll keep those sharp, clean edges you worked for.
Use careful tape removal techniques for paint edge preservation. Follow these steps:
- Score the tape edge with a utility knife
- Pull back slowly at 45°
- Warm stubborn tape slightly
- Remove before full cure
- Clean residue gently
Touch Up Mistakes and Smooth Transitions
After you remove the tape and admire those clean lines, you’ll probably spot tiny blemishes or uneven joins where colors meet — that’s normal and fixable.
For mistake correction, gently feather edges with a small brush, blend adjacent tones, and scrape stray paint.
Use blending techniques like glazing or thin layering to soften seams.
Step back frequently and work in natural light for consistent results.
Finishes: Matte, Eggshell, Satin, and Gloss
Now that your shapes are crisply edged, it’s time to pick a finish—matte, eggshell, satin, or gloss—each has distinct sheen, cleaning needs, and durability.
Think about where the wall lives: high-traffic kitchens and kid rooms benefit from tougher, wipeable sheens while bedrooms and living rooms often suit softer, low-sheen looks.
Your choice will affect how the colors read, how often you’ll need to touch up, and how the design wears over time.
Finish Characteristics Compared
Finish choice affects how your geometric wall looks and performs: matte hides imperfections and mutes color.
Eggshell gives a soft, velvety sheen that’s easy to clean.
Satin offers a smooth, slightly shiny surface that highlights crisp edges, and gloss delivers the brightest, most reflective finish that makes shapes pop but reveals flaws.
- finish types and finish sheen
- durability comparison and texture options
- application methods for crisp lines
- maintenance tips per sheen
- choose based on style and upkeep needs
Best Uses By Room
Where will each sheen work best in your home?
Choose matte for a bedroom sanctuary and living room to absorb light and feel cozy.
Eggshell suits a dining elegance and hallway interest with soft sheen.
Satin adds kitchen chic and easy-to-clean entryway impact.
Gloss highlights trim in a playful nursery or boosts office focus on accent shapes, creating crisp geometric definition.
Maintenance And Durability
Because each sheen responds differently to wear and cleaning, pick the finish that matches how much traffic and scrubbing your geometric wall will see.
You’ll balance paint longevity and wall protection by choosing matte for low-traffic, eggshell for moderate, satin for washable areas, and gloss for trim or high-cleaning spots.
- Matte: minimal sheen
- Eggshell: subtle durability
- Satin: easy cleaning
- Gloss: maximum protection
- Prep: prime and clean
How Lighting Changes Your Geometric Wall’s Look
How does lighting change the way your geometric wall reads? You’ll notice lighting effects reshape depth and contrast; color temperature shifts mood and perceived hue. Position spotlights to highlight facets, use ambient light for softness, and try dimmers to adjust drama.
| Source | Effect | Tip |
|---|---|---|
| Warm bulbs | Coziness | Pair with warm paints |
| Cool LEDs | Crispness | Use for contrasts |
| Spotlights | Depth | Angle for shadows |
Temporary Geometric Walls for Renters
Want a bold geometric statement without risking your deposit? You can use temporary materials and renter friendly options for striking, low-risk walls.
Prioritize wall protection, easy removal, and paint alternatives to respect budget constraints while maximizing visual impact and color psychology. Follow quick installation tips and enjoy design flexibility.
- Removable tape shapes
- Peel-and-stick decals
- Temporary panels
- Fabric coverings
- Command-friendly stencils
Small-Space Geometric Ideas That Don’t Overwhelm
If you liked the renter-friendly options above, you can use the same removable tools to create geometric designs that feel roomy rather than crowded. Focus on small patterns, soft contrasts, and playful angles to keep scale modest. Use a single accent wall, limit colors, and keep negative space.
| Tip | Effect |
|---|---|
| Single color | Calms room |
| Thin tape | Subtle lines |
| Corner accents | Add depth |
| Muted tones | Open feel |
Scale a Geometric Pattern Across Multiple Rooms
When you scale a geometric pattern across rooms, keep the proportions consistent so the design reads as a cohesive whole.
Measure and mark key reference points so shapes align as they pass through doorways.
Plan changes at thresholds to keep patterns continuous without awkward breaks.
Maintain Pattern Proportions
Although rooms vary in size and sightlines, you can keep a geometric motif feeling cohesive by scaling its elements proportionally; use pattern scaling and clear proportion guidelines to match scale across spaces.
Adjust repeat size to room scale, keep focal balance, and test sightlines.
- Choose a base repeat
- Scale by wall height
- Maintain line weight
- Preserve negative space
- Test with samples
Transition Across Doorways
Because doorways act as visual seams between rooms, you’ll want a clear plan for carrying your geometric pattern through them so the design reads as intentional rather than interrupted.
Measure and align key pattern lines at jambs, sketch guides, and match scale across rooms. Use coordinated doorway designs and subtle color shifts to bridge differing palettes, keeping rhythm consistent for a cohesive, modern flow.
Coordinate Furniture and Decor With Your Wall
Think of your geometric wall as the room’s centerpiece and let it guide the scale, color, and placement of furniture and decor.
Treat your geometric wall as the room’s focal point, letting its scale and color steer furniture and decor choices.
You’ll use furniture arrangement and decor harmony to balance bold shapes without clutter.
Consider these steps:
- Anchor seating with a neutral sofa
- Echo wall hues in pillows
- Choose simple, angular furniture
- Position art to complement lines
- Limit accessories for clarity
Common Beginner Mistakes and How to Avoid Them
Ever wondered what trips people up when painting geometric walls? You’ll face common pitfalls like poor prep, crooked lines, and bad color choices. Use color selection tips, test swatches, quality tape, and patience. Practice angles on cardboard, clean surfaces, and measure twice. Stay calm and correct edges with a small brush.
| Mistake | Cause | Fix |
|---|---|---|
| Uneven lines | Rushing | Tape, measure |
| Bleed | Low-quality tape | Seal edges |
When to Call a Pro for Complex or Large Projects
If your geometric wall design covers a large area, involves intricate shapes, or must match precise architectural lines, call a pro—you’re buying speed, accuracy, and a guarantee against costly mistakes.
For large, intricate geometric walls that demand perfect lines and speed, hire a pro to ensure accuracy and avoid costly errors.
You should hire a professional painter when project complexity, tight time requirements, limited skill levels, or design assistance needs outweigh budget constraints.
- scale management
- precision masking
- efficient scheduling
- color matching
- warranty reassurance
Frequently Asked Questions
Can Geometric Paint Patterns Be Applied Directly Over Wallpaper?
You can, but you shouldn’t unless wallpaper textures are smooth and securely adhered; otherwise they’ll telegraph. You’ll prep by sanding or priming, test paint adhesion, then apply crisp geometric patterns with high‑quality paint and sharp tape.
Will Humidity or Temperature Affect Paint Adhesion on Geometric Edges?
Yes — humidity effects and temperature considerations matter: studies show paint failure doubles above 70% humidity, so you’ll avoid edge lifting by painting within recommended temperature ranges, using dehumidifiers and slow-dry formulas for crisp geometric edges.
Can Metallic or Textured Paints Be Used in Geometric Designs?
Yes—you can use metallic finishes and textured effects in geometric designs; just test adhesion, use appropriate primers, apply sparingly for contrast, mask crisp edges carefully, and seal with compatible clear coat to preserve sheen and texture.
How Do I Remove Existing Paint Without Damaging Drywall for a New Design?
About 70% of homeowners tackle paint updates themselves; you should start with gentle paint removal techniques—use heat gun or chemical strippers carefully, sand lightly, then perform drywall repair for holes and skim with joint compound before repainting.
Are There Eco-Friendly Low-Voc Tape Alternatives for Crisp Lines?
Yes — you can use eco friendly options like low‑tack paper masking, biodegradable washi tape, and reusable silicone edge guards; combine tape techniques with gentle sealing and pressing to get crisp lines while cutting VOC exposure and waste.
Conclusion
You’re about to transform one boring wall into a showstopper that makes guests gasp and your plants feel starstruck. Trust your plan—pick bold geometry, tape like a pro, and balance colors so the room hums instead of yells. Expect small oopses (they’re part of the charm), touch them up, and keep furniture simple so the wall wears the spotlight. If it becomes a geometric monster you can’t tame, call a pro and reclaim your sanity.