How to Paint a Marble Wall for a Luxury Faux Finish
You can transform a plain wall into luxe faux marble by priming, laying two even base coats, then glazing layered tones for depth. Use sponges, rags, and soft brushes to feather and blend; add confident veins with a fine liner and soften them with a damp sponge. Build highlights, lowlights, and tiny mineral flecks for realism, then seal with a durable topcoat. Take your time—if you want a step-by-step guide and troubleshooting tips, keep going.
Quick Project Overview: What You’ll Accomplish
In this quick project you’ll transform a plain wall into a convincing marble finish using basic tools and accessible paint techniques.
You’ll layer base tones, glaze veins, and blend edges to mimic natural stone. You’ll learn to balance color psychology for mood, manage texture contrast for realism, and finish with a protective topcoat so the wall reads luxe without costly materials.
Who Should DIY a Faux Marble Wall (And Who Shouldn’t)
You should tackle a faux marble wall only if you’ve got steady hands and some experience with brushes and glazes, since the effect depends on controlled technique.
Be honest about the time and patience required—rushing will show in the final look.
If you’re short on skill, time, or want a flawless result, hire a pro.
Skill Level Required
Skill level matters: if you’ve got steady hands, patience for layering glazes, and some experience with paint techniques like sponging and veining, you can tackle a faux marble wall yourself.
Use beginner techniques first, then try advanced methods as you gain confidence.
- You enjoy hands-on detail work
- You’ve practiced faux finishes
- You can follow layered steps
- You accept occasional touch-ups
Time And Patience
Although the process can be rewarding, a faux marble wall takes more time and patience than a simple repaint—so only tackle it if you can commit to slow, careful layering, frequent stepping back to evaluate progress, and doing touch-ups as the glazes cure. You’ll need steady focus on color choices and application techniques; expect multiple sessions and controlled drying.
| Task | Expectation |
|---|---|
| Layers | Several passes |
| Review | Step back often |
| Touch-ups | As glazes cure |
When To Hire Pros
If you’re short on time, nervous about intricate glazing, or want a flawless finish for a high-traffic or high-value surface, call a pro—faux marble demands control, experience, and the right tools.
You should hire pros when project complexity, tight time constraints, or long term maintenance needs outweigh DIY savings. Consider budget considerations and your aesthetic vision.
- Limited skill
- High visibility
- Complex veining
- Ongoing upkeep
Project Timeline and Key Outcomes
1–2 days is a realistic timeline for preparing and priming the marble surface, followed by another day for painting and a final day for sealing and cleanup.
You’ll know the project’s successful when the finish looks even, adhesion holds without peeling, and the marble’s veining shows through where planned.
Your project timeline lists steps and durations; key outcomes include durability, uniform finish, and accurate veining.
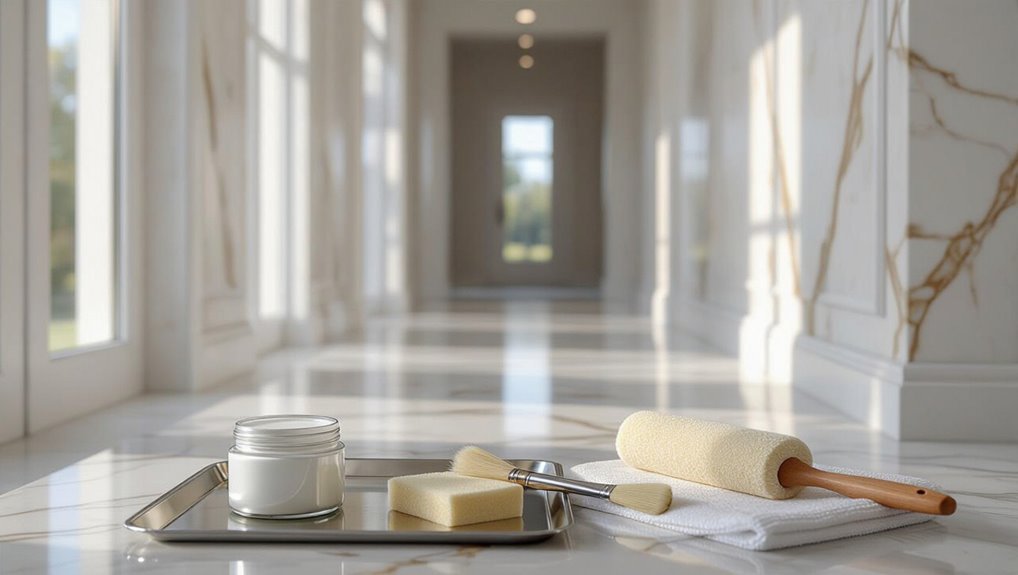
Materials You Need for a Faux Marble Wall
With the timeline and outcomes in mind, you’ll want to gather the right materials before you start so the job goes smoothly and the finish lasts.
Choose items that support Color selection, Surface preparation, Glaze mixing, Texture creation, Application techniques, and Finish options.
Gather tools that cover color, prep, glazing, texture, application, and finishing for a lasting result.
- Primer and base paint
- Multiple glaze tones
- Sponges and rags
- Sealant and topcoat
Tools and Brushes for Marble Veining
To create believable marble veining, you’ll want a small, flexible toolkit: a few fine liner brushes for hair-thin veins, a flat or filbert brush for broader strokes and blending, a fan brush or toothbrush for subtle texture, and a mahl stick or steadying tool to keep lines controlled.
Choose brush types for varied line weight, practice application techniques on scrap, and clean brushes promptly.
How to Choose Paint Finishes for Marble Realism
Because the sheen and layering you choose determine how convincing your faux marble will look, pick finishes that mimic the stone’s natural depth and subtle gloss.
Select finishes and layer glazes to recreate marble’s depth and subtle, natural sheen.
Choose paint finish options and apply marble texture techniques to build dimension. Consider:
- Satin for soft sheen and blendability
- Semi-gloss for polished highlights
- Matte for aged, honed looks
- Glaze layers to enhance depth
Picking Base and Veining Colors for Marble Styles
Start by choosing a dominant base tone that sets the overall mood of the marble.
Decide how bold or subtle you want the veins to be so they either stand out or blend in with the base.
Make sure your color choices coordinate with the room’s existing palette for a cohesive look.
Choose Dominant Base Tone
Color choice sets the mood for your marble wall, so pick a dominant base tone that complements the room’s light and furnishings while letting veins stand out.
Use color psychology and aim for tone harmony to match style and scale.
- Test large swatches
- Match warm or cool light
- Coordinate with fabrics
- Consider maintenance and aging
Select Vein Contrast Level
When you pick vein contrast, decide how bold you want the pattern to read from across the room: high-contrast veins create drama and graphic movement, medium contrast gives a natural, lived-in look, and low contrast produces a subtle, refined backdrop.
Choose base and veining hues that respect vein patterns and guarantee color harmony; test small swatches under room lighting to confirm balance before committing.
Coordinate With Room Palette
Although the marble should feel like part of the room, you’ll want to intentionally pick a base and vein palette that supports your existing finishes and lighting.
Use color theory and room synergy to choose tones that enhance mood and scale.
- Match warm or cool undertones
- Pick contrast level for realism
- Sample under different lights
- Coordinate with hardware and fabrics
Estimating Paint and Glaze Quantities
Start by measuring the wall area and calculating coverage so you know exactly how much paint and glaze to buy.
Measure your wall area and calculate coverage so you buy exactly the right amount of paint and glaze.
Multiply square footage by manufacturer coverage to determine paint quantity, allowing 10–20% extra for waste.
Decide your glaze ratio (glaze to extender or base) based on translucency desired.
Buy sample sizes first, then scale up for full coats and touch-ups.
Repairing Cracks, Seams, and Texture Issues
Before you glaze or roll on base coats, fix any cracks, seams, or uneven texture so the marble finish sits on a smooth, stable surface.
You’ll handle crack filling, seam reinforcement, and texture smoothing as part of wall preparation.
Use:
- Patch compound for hairline cracks
- Mesh tape for seams
- Sand to blend repairs
- Feather edges for seamless glazing
Prepare Drywall, Plaster, or Existing Paint for Glazing
When your substrate—drywall, plaster, or existing paint—is clean and stable, the glaze will adhere and the marble effect will look professional; so remove loose paint, dust, grease, and any chalky residue, repair surface defects, and guarantee a uniform porosity with light sanding or a primer as needed. You’ll follow drywall preparation steps and assess existing paint for adhesion before glazing.
| Task | Tool |
|---|---|
| Remove dust | Vacuum/cloth |
| Degrease | Cleaner |
| Sand | Fine sandpaper |
| Repair | Joint compound |
| Inspect | Adhesion tester |
Prime the Wall for Even Glaze Absorption
Before you glaze, clean the wall thoroughly to remove dust, grease, and sanding residue so the primer can bond properly.
Use a high-quality, stain-blocking primer formulated for your substrate and let it dry fully.
That even primer coat will guarantee the glaze absorbs consistently and gives a smooth, marble-like finish.
Clean Surface Thoroughly
Start by wiping the wall with a damp microfiber cloth to remove dust and loose particles. Then degrease any spots with a trisodium phosphate (TSP) solution or a mild household cleaner; this guarantees the glaze will adhere evenly.
Use proper surface prep and cleaning techniques to secure adhesion and longevity.
- Remove dust and cobwebs
- Degrease stains
- Rinse thoroughly
- Let dry completely
Apply High-Quality Primer
Now that the wall is clean and dry, prime it to guarantee the glaze soaks in evenly and the marble effect looks smooth.
Choose a primer after a quick primer types comparison—latex for breathability, oil-based for stain blocking, or bonding primer for slick surfaces.
Use consistent primer application techniques: roller for coverage, brush for edges, and light sanding between coats for a uniform, receptive base.
Step‑by‑Step Marble Base Coat
1 careful base coat makes the rest of your faux marble come alive. You’ll establish marble texture and sealing with precise paint techniques.
Apply two thin, even coats; sand lightly between coats; use a high‑quality roller; inspect for uniformity.
Apply two thin, even coats, sanding lightly between layers; use a quality roller and inspect for a uniform finish.
- Use a neutral base color
- Thin paint for smooth flow
- Maintain wet edges
- Let full cure before veining
Mix Translucent Glazes for Layered Depth
When you mix translucent glazes, aim for thin, buildable layers that let the base coat peek through and create real depth; a good rule is roughly one part paint to three parts glazing medium, adjusted by eye for translucency.
You’ll practice glaze mixing, thinning pigments until they’re sheer, then apply controlled strokes.
Focus on subtle color layering, blending edges and wiping excess for a natural, luminous finish.
Build Layered Tones to Mimic Marble Strata
As you build layered tones, work from the deepest hues to the lightest so each thin glaze reads as a distinct stratum.
You’ll layer translucent washes, letting each dry slightly to keep edges defined. Focus on tonal shifts to suggest marble strata without heavy strokes.
- Start with base depth
- Add mid glazes
- Lift to reveal
- Finish with soft highlights
Practical Veining Techniques for Natural Veins
If you want veins that read as natural, start by observing real marble patterns and translate those rhythms to your wall with thin, confident lines and varied pressure; this will keep veins from looking mechanical.
Use a fine brush, mix slightly translucent pigment, and layer sparingly.
Practice natural vein techniques on samples, vary line width and opacity, and step back frequently to guarantee realistic finishes.
Feathering, Dabbing, and Crosshatching for Texture
You’ll use feathered layering to build soft, translucent depth that mimics real marble.
Then add crosshatch strokes and gentle dabbing to introduce fine texture and subtle mineral variation.
Work in thin layers and step back often so the effects read naturally.
Feathered Layering Technique
Begin by building your base with thin, translucent washes. Then layer feathering, dabbing, and crosshatching to create the soft veins and subtle texture that make marble convincing.
You’ll use feathered application and precise layering techniques to control depth. Practice light strokes, blend edges, and vary pressure.
- Soft directional strokes
- Light blending
- Controlled pressure
- Subtle contrast
Crosshatch And Dab Texture
When you move into crosshatching and dabbing, switch to a small, semi-dry brush and work with short, purposeful strokes to build textured veins and mineral flecks.
Feathering softens the edges while dabs add speckled variation, and together they create the irregular, natural look of real marble.
Use crosshatch techniques in layered directions, then apply controlled dab texture for depth, blending sparingly to keep contrast.
Add Secondary Veins and Hairline Crazing
Once the main veins are in place, add thinner secondary veins and hairline crazing to give the surface realistic depth and texture.
You’ll use secondary color techniques and subtle texture variations to mimic natural fissures. Work with a fine brush and light glaze, keep lines irregular, and avoid heavy strokes.
- use quick, varied pressure
- mix muted tones
- feather edges
- let glazes dry between layers
Soften Veins: When and How to Blend
You’ll want to soften veins when they look too harsh or disrupt the marble’s natural flow.
Use a dry brush, fan brush, or a slightly damp sponge to gently drag and feather pigment until the line blends.
Practice subtle strokes and step back often so you don’t overwork the effect.
When To Soften Veins
Wondering whether to soften veins on your marble wall? You’ll soften veins when realism needs subtlety: high-contrast areas, busy patterns, or shifting zones.
Use softening techniques and gentle blending methods sparingly to keep character. Consider these cues:
- Harsh, obvious veins
- Areas near focal points
- Overly busy sections
- Where light highlights clash
Soften to balance, not erase.
Techniques For Blending
If a vein feels too stark after placement, you’ll want to blend it so the marble reads natural and cohesive.
Use soft brushes, damp sponges, or feathery stippling to lift edges, employing glazing layers to adjust depth.
Practice subtle blending techniques to maintain color harmony; wipe or soften immediately, step back often, and stop when veins integrate without losing their organic flow.
Create Highlights and Lowlights for Sheen
To give your faux marble the depth and sheen of real stone, add targeted highlights and lowlights that catch and reflect light.
Add targeted highlights and lowlights to give faux marble the depth and reflective sheen of real stone.
You’ll use highlight techniques and lowlight enhancements to create sheen variations and color contrast. Apply glazes sparingly, feather edges, and blend with soft brushes to mimic polished veining.
- Use thin glaze layers
- Feather edges
- Vary sheen subtly
- Contrast subtly
Simulate Pitting, Fossils, and Mineral Flecks
Introduce small surface imperfections and embedded specks to give your faux marble a believable geological history.
Use pitting techniques with a stiff brush or sponge to dab tiny depressions. Add fossil effects by stippling subtle shell shapes, and flick fine paint for mineral flecks.
Balance texture variations across the surface so the wall reads naturally aged without overwhelming veins or color.
Polishing, Waxing, and Topcoat Options
Once your pitting and fleck work has dried and you’re satisfied with the surface character, decide how glossy or matte you want the final look and choose a compatible topcoat.
Use gentle polish techniques, test wax application, and select topcoat types for desired sheen and finish durability.
- Burnish for sheen
- Soft wax for warmth
- Satin polyurethane
- High-gloss lacquer
Protect Painted Marble in High‑Traffic Areas
To keep painted marble looking good where people pass often, you’ll want to seal it with a durable topcoat rated for high traffic.
Place floor‑grade protective mats in doorways and along common paths to reduce wear and scuffs.
Finally, schedule regular gentle cleaning to remove grit and maintain the finish without damaging the coating.
Seal With Durable Topcoat
Seal the painted marble with a durable, water‑resistant topcoat so your work stands up to foot traffic, spills, and regular cleaning.
Choose topcoat types for sheen and protection, weigh durability options, and apply thin, even coats. Let cure fully before use.
- Water‑based polyurethane
- Acrylic sealer
- Epoxy clearcoat
- Marine varnish
Use Floor-Grade Protective Mats
Although painted marble can look durable, high‑traffic areas still need extra protection, so lay down floor‑grade protective mats where people walk most.
You’ll prevent scuffs and abrasions by positioning mats at entrances, under furniture, and along corridors.
Choose nonabrasive, breathable materials that won’t trap moisture.
This simple floor protection step preserves finish integrity and maintains surface safety without altering your faux marble look.
Schedule Regular Gentle Cleaning
Protective mats will cut down on wear, but you’ll still need a regular gentle cleaning routine to keep painted marble looking fresh in high‑traffic spots.
Use gentle tools, mild pH‑neutral cleaner, and consistent cleaning frequency. Follow simple steps:
- Sweep daily with soft broom
- Damp mop weekly with gentle cloth
- Spot clean spills immediately
- Reapply sealer per schedule to protect finish
Match Marble Pattern Across Corners and Walls
When you carry a veining pattern across corners and adjoining walls, think of it as continuing a visual line—your goal is to make the eye travel smoothly rather than stop at an edge.
You’ll plan matching patterns by sketching veins across plans, align key veins before painting, and use corner techniques like soft feathering and light overlap so shifts read as one continuous marble surface rather than separate panels.
Work Around Windows, Doors, and Trim Without Seams
When you’re painting marble around windows, doors, and trim, precise masking is your best friend to keep lines sharp.
Use low-tack tape and fine-cut edges, then feather your paint out slightly to blend the marble veins into the trim for a seamless look.
Work in small sections so you can adjust tones and edges before the paint skins over.
Precision Masking Techniques
Masking precisely around windows, doors, and trim takes a steady hand and the right materials, so prep the edges with low-tack painter’s tape, a flexible trim edging, and a clean putty knife to press tape into tight seams.
You’ll use masking tape for edge precision and protect surfaces.
Tips:
- Clean and dry surfaces first
- Score tape edges firmly
- Use flexible edging for curves
- Remove tape warm
Seamless Edge Blending
If you want your marble wall to look professional, blend paint edges around windows, doors, and trim so they disappear into the finish; that means feathering, color-matching, and careful tool choice.
Use color theory to select adjacent hues, then employ soft brushes, dry brushes, or sponges for subtle shifts.
Practice blending techniques on scrap, work wet-on-wet, and step back often to judge seamless results.
Drying Times and Windows by Product Type
Because different paints and sealers cure at different rates, you’ll want to plan both touch-up windows and full recoat times around the specific product you choose.
Consider drying times, product types, window considerations, and environmental factors when scheduling work.
- Waterborne acrylics: fast tack, plan short windows
- Alkyds: longer cure, extend wait
- Epoxies: strict windows
- Sealers: follow label
Common Mistakes and Quick Fixes
If your veining looks patchy, you can soften and blend it with a damp brush or a feathering stroke to match surrounding lines.
For blotchy sheen, lightly scuff the glossy spots and apply a thin, even coat of satin or matte varnish to level the finish.
These quick fixes will help you correct common flaws without starting over.
Uneven Veining Fixes
1 common cause of lopsided veins is inconsistent pressure while dragging your brush or rag, and you can correct it quickly by softening edges and rebalancing contrast.
Use veining techniques and careful color blending to fix mistakes.
Quick steps:
- Feather harsh lines with a damp brush
- Reintroduce subtle veins sparingly
- Match tonal balance across panel
- Step back and assess frequently
Blotchy Sheen Corrections
After you’ve balanced the veins, turn your attention to the finish: blotchy sheen can ruin a convincing marble effect by catching light unevenly.
If patches glint differently, sand lightly, clean dust, then apply a thin, even coat of satin varnish with a high-quality roller.
Use blotchy sheen solutions like leveling additives and follow uneven texture remedies: feather edges, wipe excess, and allow full cure.
Calacatta, Carrara, and Emperador: Style Variations
While they all fall under the marble umbrella, Calacatta, Carrara, and Emperador each bring distinct veins, tones, and moods you’ll want to mimic when painting a faux marble wall.
Balance Calacatta characteristics with Carrara comparison and Emperador elegance, guided by Marble history, Color symbolism, Texture variety, Style preferences, and Design inspirations.
- Bold Calacatta veins
- Soft Carrara graining
- Warm Emperador tones
- Mixing textures
Faux Marble for Cabinets, Furniture, and Accents
Faux marble isn’t just for walls—you can transform cabinets, furniture, and small accents into luxury focal points without the weight or cost of real stone. Use faux marble techniques and careful color blending to scale veins, protect surfaces, and match hardware. Practice on samples, then work in thin layers for realism.
| Piece | Tip |
|---|---|
| Cabinets | Scale veins |
| Tables | Seal well |
| Drawers | Consistent tone |
| Accents | Fine detail |
Budget‑Friendly Alternatives and Where to Splurge
Looking to cut costs without sacrificing a high‑end look? Use budget tips to prioritize where to save and where to splurge.
Invest in key splurge items for tools and finish quality; economize on paint brands and accessories.
- Buy sample pots for trials
- Rent specialty tools
- Use cheaper rollers and brushes
- Prioritize topcoat and sealer quality
Practice Tips: Build Confidence With Sample Boards
Saving on supplies makes sense, but you’ll want low-risk practice before you touch the real wall — and sample boards are the easiest way to get confident without wasting materials.
Use different primers, glazes, and veining techniques on several boards, label mixes, and time drying. Treat them as experiments: refine tools, strokes, and color blends until you build repeatable results and true confidence building.
When to Hire a Pro vs. DIY and Troubleshooting
When should you call in a pro instead of tackling the marble wall yourself? You’ll want professional advice when surfaces are damaged, complex veining is required, time is tight, or permits matter.
DIY challenges include technique, finish matching, surface prep, and repairs. Consider hiring for guarantees or big rooms; DIY to save money and gain experience.
- Damage assessment
- Veining complexity
- Time constraints
- Permit or code issues
Frequently Asked Questions
How Do I Remove Existing Wallpaper Adhesive Before Starting Faux Marble?
You’ll strip wallpaper carefully, using a steamer or scoring tool, then apply wallpaper removal solution or homemade adhesive solutions (vinegar or fabric softener mix), scrub with a sponge, rinse, and let the wall fully dry before priming.
Can Faux Marble Techniques Be Used on Exterior Walls or Masonry?
Yes — but cautiously: you can apply faux marble to exterior masonry, yet exterior durability varies, so you’ll need weatherproof primers, masonry paints, sealers, and proper preparation to guarantee the finish lasts despite sun, rain, and temperature changes.
Are There Eco‑Friendly or Low‑Voc Glaze Alternatives Recommended?
Yes — you can choose eco friendly options: water‑based acrylic glazes and plant‑based or mineral‑derived mediums. You’ll find low VOC glazes labeled APEO‑free or Green Seal certified, giving durable, safer faux marble results.
How Do I Charge or Price Faux Marble Work if Offering It Commercially?
“Measure twice, cut once” — you’ll set rates using pricing strategies: calculate costs, labor, overhead, desired profit, and local market competition; offer tiered packages, hourly or per‑square‑foot options, and adjust with promotions or retainers.
What Maintenance Products Extend the Finish Without Altering Sheen?
Use maintenance techniques like gentle dusting, pH-neutral cleaner, and microfibre cloths; product recommendations include clear acrylic sealer topcoat, matte-conservation wax, and non-abrasive stone cleaner — you’ll preserve finish without altering sheen.
Conclusion
You’ve got the steps, tools, and tricks to transform a plain wall into luxe marble—so go on, make it yours. With patience and practice, veins will evolve from nervous squiggles to elegant streaks; you’ll learn when to DIY and when to call in a pro. Treat mistakes like sketches, not failures, and enjoy the process: the wall you finish will reflect not just marble’s beauty, but your own creative confidence.