How to Paint a Matte Finish That Looks Smooth and Even
You can get a smooth, even matte finish by prepping surfaces thoroughly, repairing imperfections, cleaning, and sanding, then priming with a matte-compatible primer; use a high-quality brush for cutting in and a proper nap roller or sprayer for the field, apply thin, overlapping coats with steady strokes, control temperature and humidity, and avoid overworking the paint to prevent lap marks and sheen variation — follow these steps and tips and you’ll find more techniques and troubleshooting to perfect the result.
How to Paint a Matte Finish That Looks Smooth and Even
Want the quick steps to get a smooth, even matte finish?
Start by prepping the surface, choosing the right paint and tools, and using thin, consistent coats.
Follow with light sanding between coats and a careful final inspection for touch-ups.
Quick Answer Key Steps at a Glance
Start by prepping the surface, choosing the right matte paint, and using the correct tools so your finish dries smooth and even.
Sand, clean, and prime; fill imperfections. Use high-quality matte paint, thin coats, and a good roller or brush.
Maintain wet edges, sand between coats lightly, and apply two to three even coats.
Finish with proper drying and gentle inspection.
Understanding Matte Paint and Why It Can Look Uneven
Matte finish has a flat, non-reflective surface that hides minor imperfections and works well on ceilings, walls, and textured surfaces.
You’ll see unevenness when the surface prep, application technique, or lighting highlights patchy absorption or brush marks.
Pick matte when you want to mask flaws, but choose low-sheen or eggshell for spaces that need more durability or subtle light reflection.
What Is Matte Finish? Characteristics and Uses
A flat, non-reflective paint finish hides surface imperfections better than high-gloss options, but it also absorbs light in a way that can make walls look uneven if the underlying surface or application isn’t consistent.
Matte finishes offer low sheen, good color depth, and a forgiving appearance for minor flaws. You’ll use them in living spaces, ceilings, and textured walls where subtlety and warmth matter.
Common Reasons Matte Paint Appears Uneven or Flat
Because matte paint soaks up light rather than reflecting it, unevenness in the surface, application, or primer shows up more readily. You’ll notice variations in color, texture, or sheen that wouldn’t be as visible with glossier finishes.
Causes include poor surface prep, inconsistent primer, uneven roller pressure, thinning paint too much, or repainting without proper feathering—address these to improve uniformity.
When to Choose Matte vs. Low-Sheen or Eggshell
When you want walls that hide imperfections and read as rich and velvety, choose matte; if you need something easier to clean or slightly more reflective, go with low-sheen or eggshell.
Matte suits bedrooms, low-traffic living rooms, and textured surfaces.
Pick low-sheen or eggshell for kitchens, bathrooms, hallways, or trim where durability, wipeability, and subtle light bounce matter more than concealing flaws.
Materials, Tools, and Paint Selection
Before you start, choose the right matte paint for interior or exterior use and pick a compatible primer that hides imperfections without adding sheen.
Gather the proper brushes, rollers or a sprayer plus accessories like trays, drop cloths, and painter’s tape.
Make a surface-prep checklist—cleaners, sandpaper, patching compound, and tack cloth—so you won’t be caught short.
Recommended Types of Matte Paint (Interior/Exterior)
If you want a truly durable, even-looking matte finish, pick paint formulated for the surface and location—interior flat or eggshell for low-traffic walls, high-quality exterior matte or flat for siding and trim, and specialized masonry or porch-and-floor matte where abrasion or moisture’s a concern. Choose low-VOC options, match sheen to use, and test small areas.
| Type | Best Use | Feature |
|---|---|---|
| Interior Flat | Living rooms | Smooth, hides imperfections |
| Exterior Matte | Siding/Trim | Weather-resistant |
Primer Options for Matte Surfaces
1 key to getting a true matte look is picking the right primer—match it to the surface and paint type so the topcoat adheres, hides imperfections, and stays matte.
Use a high-hide, low-sheen primer for porous drywall, a stain-blocking primer for repairs, and bonding primer for glossy surfaces.
Choose water- or oil-based primer according to your matte paint’s formulation and cure times.
Brushes, Rollers, Sprayers and Accessories
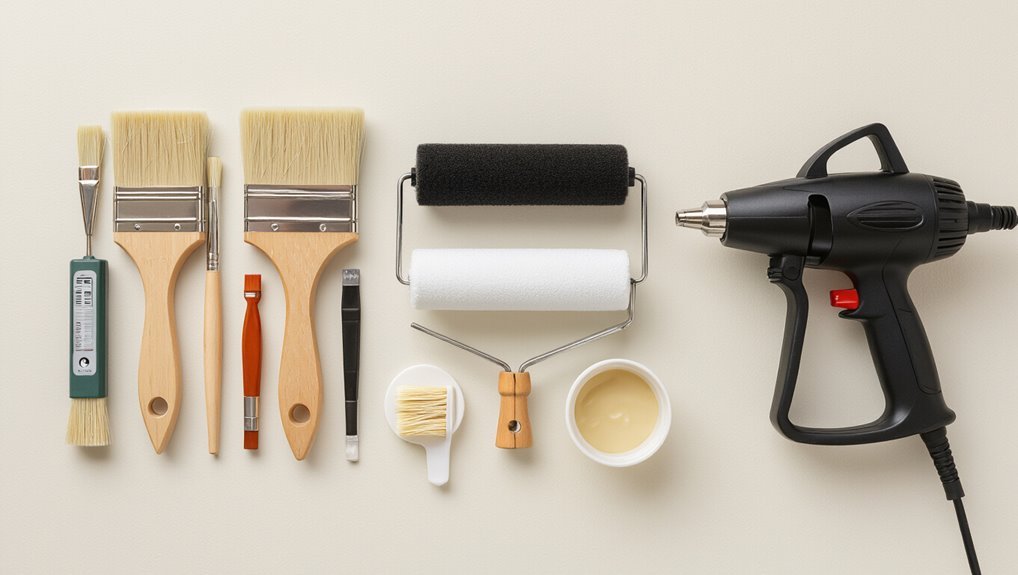
Choosing the right brushes, rollers, sprayers, and accessories makes the difference between a flat, chalky finish and a true matte look; pick tools that match your paint type, surface texture, and room size so you get even coverage without lap marks or overspray.
Use synthetic-bristle brushes for water-based matte paint, low-nap rollers for smooth walls, higher-nap for textured, and an HVLP sprayer for large areas.
Surface Preparation Supplies Checklist
Before you open a can of matte paint, gather the right materials and tools so prep doesn’t slow you down: you’ll need quality cleaners, sandpaper, filler, primer, and the correct paint.
Keep everything handy to work efficiently and avoid imperfections.
- Tack cloths and degreaser
- Various grit sandpaper
- Spackling compound and putty knife
- High-build primer
- Matte paint matched to surface
Surface Preparation Foundation for a Smooth Matte Finish
Before you paint, inspect and repair any holes, cracks, or peeling so the surface is uniform.
Clean thoroughly to remove dirt, grease, and mildew, then sand with the appropriate grits, feathering edges for a seamless shift.
Apply primer where needed—stain-blocking or bonding primers first, then a full coat to guarantee even matte coverage.
Inspecting and Repairing Surface Flaws (holes, cracks, peeling)
Once you’ve cleared the surface, take a careful walk-around to spot holes, cracks, bubbling, or peeling—these flaws will show up more under matte paint and will ruin the finish if you don’t fix them.
Patch holes with spackling or joint compound, sand smooth, and feather edges.
Scrape loose paint, prime bare areas, and fill hairline cracks with flexible filler before sanding and priming for an even base.
Cleaning: Removing Dirt, Grease, and Mildew
Now that surface flaws are patched and sanded, give the area a thorough cleaning so grime doesn’t show through matte paint.
Use a mild detergent or trisodium phosphate solution for grease, rinse well, and tackle mildew with a diluted bleach or vinegar mix.
Scrub with a nonabrasive brush, rinse, and let surfaces dry completely before priming or painting to guarantee adhesion and an even finish.
Sanding: Grits, Techniques, and Feathering Edges
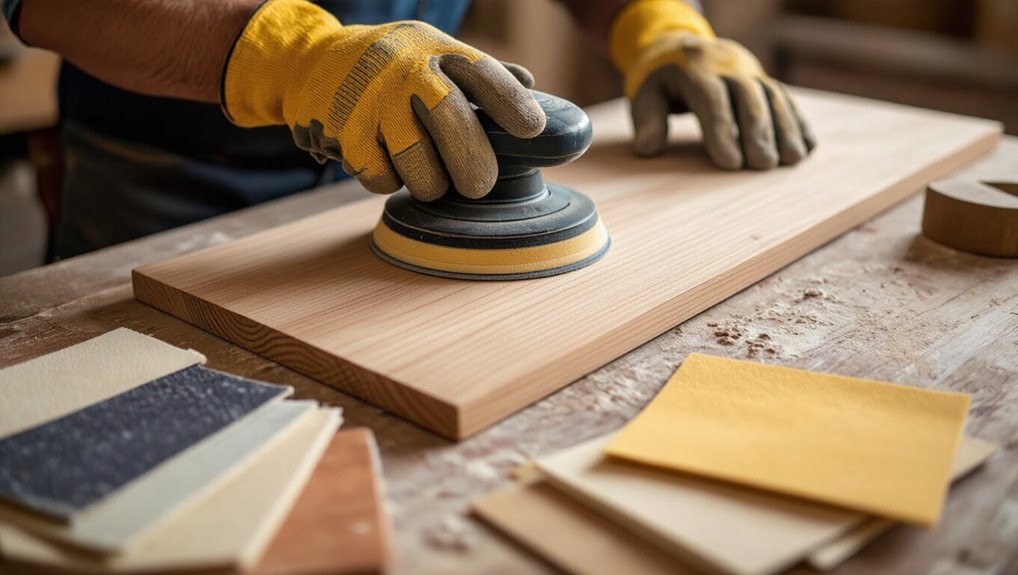
Because matte finishes show texture more readily, sanding becomes the foundation of a smooth result; you’ll want to work progressively through grits to level imperfections, blend patches, and feather edges so paint lays down evenly.
Start coarse to remove high spots, move to finer grits for smoothing, and feather at junctions. Use light, even pressure, keep surfaces dust-free, and inspect by touch.
When and How to Apply Primer for Matte Paint
Primer is the single most important step before applying matte paint because it evens porosity, hides stains, and gives the low-sheen topcoat a uniform base to adhere to.
Choose a high-quality, stain-blocking primer; oil-based for tannin-rich wood, water-based for drywall.
Apply one thin, even coat, sand lightly after drying, clean dust, then apply matte paint for an even, durable finish.
Step-by-Step Painting Process
Now you’ll walk through the painting process step by step, starting with how to set up your space for proper lighting and temperature.
You’ll learn brush cutting-in techniques and rolling methods that control nap, overlap, and speed for even coverage.
Finally, you’ll compare sprayer settings for ultra-smooth results and cover drying times and the number of coats to apply.
Step 1 Setting Up: Environment, Lighting, and Temperature
Good setup makes the difference between a smooth matte finish and a patchy one, so prepare your space before you touch a brush or roller.
Clear dust, repair holes, and clean surfaces. Control temperature (ideally 50–85°F) and humidity, ventilate gently, and use consistent, bright lighting to spot imperfections.
Arrange tools nearby and protect floors and trim for efficient, calm work.
Step 2 Cutting In with Brushes: Angles and Pressure
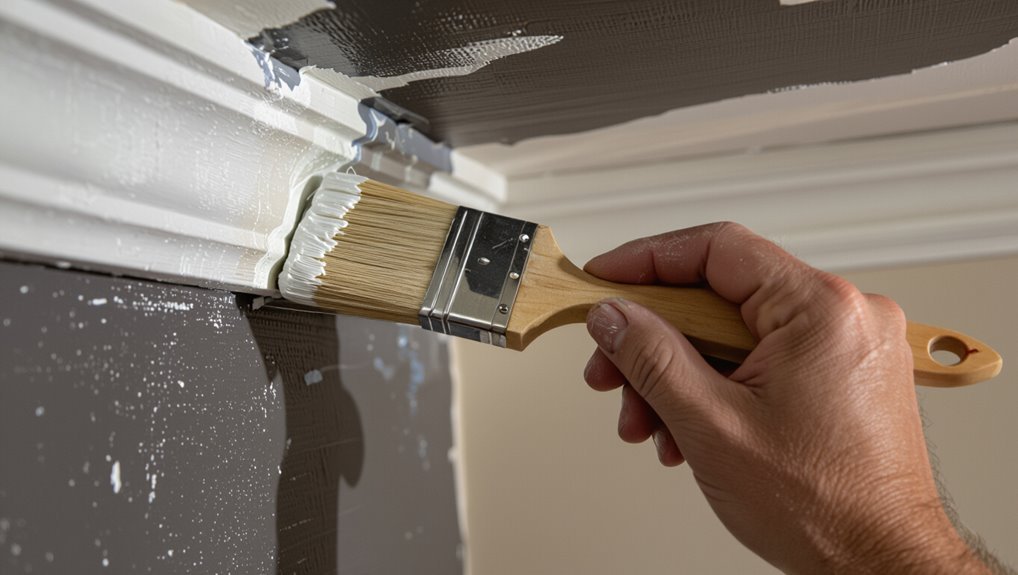
Start by loading a high-quality angled sash brush with a moderate amount of paint—too much causes drips, too little forces repeated strokes—and position the brush so the long bristle edge meets the wall at about a 30–45° angle.
Hold the handle lightly, use short steady strokes, maintain consistent pressure, feather edges into the unpainted area, and clean excess paint from the ferrule to avoid drips.
Step 3 Rolling Technique for Even Coverage: Roller nap, overlap, speed
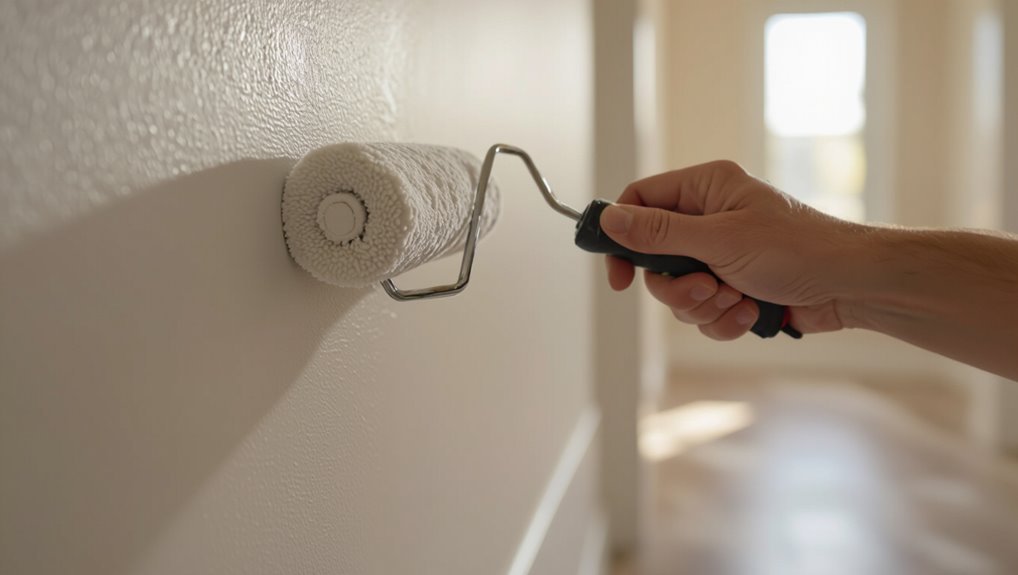
Once your cut lines are neat, switch to a roller to cover large areas quickly and evenly.
Choose a nap suited to surface texture—short for smooth, medium for lightly textured.
Load the roller evenly, roll in a “W” pattern, then fill in with overlapping passes (about 50% overlap).
Maintain steady, moderate speed to avoid splatter and lap marks.
Step 4 Using a Sprayer for Ultra-Smooth Results: Settings and Tips
Although a sprayer takes a bit more setup, it’s the fastest way to get an ultra-smooth matte finish—so prepare for slightly different techniques than rolling: choose the right tip and pressure, thin the paint if required by the manufacturer, and practice consistent passes to avoid runs or heavy spots.
Hold the gun perpendicular, keep a steady distance, overlap passes 50%, and clean filters often.
Step 5 Drying Time Between Coats and How Many Coats to Apply
Timing matters: let the first coat dry fully to the touch before you add another.
Wait the manufacturer’s recommended recoat time—usually 2–4 hours for latex, longer for oil-based—then assess tackiness.
Apply 2–3 thin, even coats for full coverage and depth with matte paint; more coats may hide imperfections but won’t improve sheen.
Guarantee good ventilation and consistent temperature while drying.
Step 6 Light Sanding Between Coats: When and How
After each coat dries to the touch and meets the manufacturer’s recoat time, lightly sand the surface to knock down dust nibs and brush marks so the next coat lays flat and hides imperfections.
Use 220–320 grit sandpaper or a sanding pad, apply minimal pressure, and sand in light, even strokes.
Wipe clean with a tack cloth before recoating to guarantee adhesion.
Troubleshooting Common Problems and How to Fix Them
If you spot visible brush or roller marks, patchy streaks, flashing or sheen variations, or drips and sags, you’ll want to act quickly to diagnose the cause.
I’ll walk you through how to fix each issue—what causes it, how to repair it, and how to prevent it next time.
Use the right tools, proper thinning and drying times, and careful technique to keep a matte finish smooth and even.
Visible Brush or Roller Marks Causes and Fixes
Spot brush or roller marks can ruin the smooth, flat look you want from a matte finish, but you can usually fix them without repainting the whole wall.
Lightly sand glossy ridges with fine-grit sandpaper, wipe dust, then re-roll using a quality nap and thin, even coats.
Maintain a wet edge, use steady pressure, and avoid overworking the paint.
Patchy or Streaky Areas Correction Steps
Even when you’ve smoothed out brush or roller ridges, you might still see patchy or streaky areas where coverage looks thin or uneven. These usually come from inconsistent paint thickness, improper rolling technique, or paint drying too fast.
Touch up by feathering fresh paint into edges, maintain a wet edge, use consistent roller pressure and overload the roller slightly, and apply a thin second coat after proper drying.
Flashing and Sheen Variations Diagnosis and Remedies
When light hits a matte wall unevenly, you’ll notice flashing—patchy differences in sheen that make sections look lighter or darker than surrounding areas—and it usually means application or surface issues rather than the paint itself.
Check for inconsistent primer, varying porosity, or uneven drying.
Feather edges, recoat whole wall with consistent technique, and use conditioner/primer to equalize absorption for uniform sheen.
Drips, Sags, and Runs Prevention and Repair
Drips, sags, and runs happen when paint’s applied too thickly, the surface’s angled, or the coat doesn’t dry evenly, and you can usually catch and fix them before they set.
Prevent them by thinning paint slightly, using lighter, even strokes, and keeping coats thin.
If you see defects, wait until tacky, smooth with a fine brush or sandpaper, then recoat thinly for a uniform matte.
Best Practices and Professional Tips for a Flawless Matte Look
Pay attention to color and lighting so shadows and sheen don’t betray imperfections, and choose hues that mask flaws when needed.
Use additives, extenders, and retarders carefully—follow manufacturer guidelines and test small areas to keep drying and leveling predictable.
Finish with a thorough inspection and a concise touch-up checklist so you catch and correct any issues before calling the job done.
Color and Light Considerations to Minimize Imperfections
Although matte finishes hide brush marks better than gloss, they also reveal surface flaws under certain colors and lighting.
So you’ll want to choose tones and light placement that work with—not against—the finish.
Pick mid-tone, warm neutrals to soften texture; avoid stark whites and darks that exaggerate flaws.
Position diffuse lighting and avoid direct side lighting that casts harsh shadows.
Using Additives, Extenders, and Retarders Safely
If you want to control drying time, flow, and leveling without wrecking that soft, low-sheen look, additives are your friend—but you have to use them wisely.
Start with manufacturer-approved amounts, mix thoroughly, and test on scrap.
Use retarders sparingly in warm conditions, extenders to improve open time, and flow agents to reduce brush marks—avoid overuse to prevent sheen changes or adhesion problems.
Final Inspection and Touch-Up Checklist
1 final inspection will catch the small issues that turn a good matte job into a great one: stand back, view the surface under varied light, and note any runs, orange peel, lap marks, or sheen inconsistencies so you can target touch-ups precisely.
- Check edges and corners for buildup
- Look for texture variations
- Test a small touch-up area first
- Feather repairs to blend
- Clean brushes and recoat sparingly
Comparison: Matte Techniques and Tools That Produce the Smoothest Finish
You’ll want to weigh brush, roller, and sprayer pros and cons side-by-side to pick the method that gives the smoothest matte finish for your project. Compare primer types too, since adhesion and sheen control start before you add color. Use the table below to quickly contrast application tools and common primer choices.
| Tool/Primer | Key Benefit |
|---|---|
| Brush | Precision for trim and touch-ups |
| Roller/Sprayer | Roller = even coverage; Sprayer = ultra-smooth result |
Brush vs. Roller vs. Sprayer Pros and Cons
Choosing between a brush, roller, or sprayer makes a big difference in how smooth your matte finish will look and how much prep and skill the job requires.
Brushes suit trim and touch-ups but show strokes.
Rollers cover walls efficiently—use a low-nap for fewer texture marks.
Sprayers deliver the silkiest result but need masking, thinning, and practice to avoid runs and overspray.
Primer Types Compared for Matte Surfaces
Although primers all seem similar at first glance, the type you pick has a huge effect on how a matte paint lays down and hides imperfections.
Use high-build primers to level uneven surfaces, stain-blocking primers for tannin bleed, and bonding primers on slick materials.
Shellac primers dry fast and seal odors; acrylic primers offer flexibility.
Match primer to substrate for the smoothest, truest matte finish.
Common Mistakes to Avoid
Don’t skip proper prep or primer—you’ll see every imperfection through a matte finish.
Avoid painting in extreme temperature or humidity, overworking the surface, or laying on coats that are too thick.
Also pick the right roller nap and brush, because the wrong tools will ruin your texture.
Skipping Proper Prep or Primer
Start by prepping the surface and applying primer—skipping these steps will cost you a smooth, durable matte finish.
You’ll get blotchy coverage, poor adhesion, and visible imperfections if you paint bare or poorly cleaned surfaces.
Sand, clean, fill holes, and use a suitable primer for porous or glossy substrates.
Primer guarantees even absorption and long-lasting, uniform matte results.
Painting in Poor Conditions (temperature/humidity)
If you paint when temperatures are too low or humidity’s too high, the finish will dry unevenly, trap moisture, and show streaks or blistering.
You should check the forecast and control conditions. Work only within the manufacturer’s recommended temperature and humidity range, use dehumidifiers or heaters if needed, and wait for stable, dry air.
That prevents dull patches, sagging, and adhesion problems.
Overworking the Paint or Applying Too-Thick Coats
Once the air’s right and you’ve avoided moisture issues, you still need to watch how you apply the paint: working it too much or laying on heavy coats will ruin a matte finish.
Don’t overwork edges or keep re-rolling wet areas; that causes sheen variation and lap marks.
Apply thin, even coats, let each cure fully, and resist touching up until fully dry for a uniform matte.
Using the Wrong Roller Nap or Brush
When you grab the wrong roller nap or brush, you’ll see it in the texture and coverage: too-short naps leave streaks and thin spots, while overly long naps trap excess paint and create an uneven, bumpy surface.
Choose a nap matched to your wall texture and the paint sheen, and use a quality brush for edges.
Test on a scrap before committing to full walls.
Maintenance and Long-Term Care for Matte Surfaces
To keep matte walls looking true to their finish, you’ll clean gently with a soft cloth and mild detergent, avoiding abrasive scrubbers or strong solvents that can change the sheen.
For scuffs or stains, spot-clean first and test an inconspicuous area before treating larger patches.
When paint starts to show wear, you’ll recoat or touch up with the same formula and sheen, feathering edges for a seamless repair.
Cleaning Guidelines Without Altering Sheen
Although matte finishes hide imperfections better than gloss, they’re more sensitive to cleaning methods, so you’ll need gentle techniques to avoid changing the sheen.
Use a soft microfiber cloth, mild dish soap diluted in water, and test a hidden spot first. Blot stains—don’t scrub—and rinse with clean water.
Avoid abrasive pads, strong solvents, waxes, or silicone-based products that alter appearance.
When and How to Recoat or Spot-Repair
Cleaning gently helps preserve the matte look, but you’ll still need to know how and when to recoat or spot-repair to keep surfaces looking uniform.
Inspect annually for scuffs or wear. Clean, sand lightly, and feather edges before touching up with the same paint and sheen.
Recoat full walls every 5–7 years or sooner in high-traffic areas to maintain even appearance.
FAQ
Got questions about matte finishes?
You’ll find answers on sanding, coat counts, working with textured walls, fixing uneven coverage, and which finish masks imperfections best.
Read on to clear up those common concerns and decide the right next step.
Will sanding a matte finish make it glossier?
Will sanding a matte finish make it glossier? Sanding smooths surface irregularities, and heavy or fine abrasion can subtly alter light reflection, making matte appear slightly more satin.
If you want to keep true matte, avoid aggressive sanding and use very fine grit only to level flaws.
Test a hidden area first; sealing or clear matte topcoat preserves the flat look.
How many coats of matte paint do I really need?
If you want to keep that flat, non-reflective look after sanding or touch-ups, the number of matte paint coats you apply matters.
Generally, two coats suffice for good coverage and uniformity; however, porous or heavily patched surfaces often need a third.
Let primer cover stains and uneven absorption first, then apply thin, even coats, allowing full drying between layers for a consistent matte finish.
Can I use a matte paint on textured walls and still get smooth results?
Curious whether matte paint can tame textured walls into a smooth-looking finish? You can soften texture visually, but matte won’t physically fill deep grooves.
Use a high-build primer or skim coat to level surface, sand lightly, then apply multiple thin matte coats with a roller made for smooth finishes.
Lighting affects appearance, so check under real room light before declaring it done.
Is it possible to restore uneven matte paint without repainting the whole wall?
Wondering whether you can fix patchy or uneven matte paint without repainting the whole wall? You can often improve small problem areas by spot-sanding to smooth edges, cleaning, feathering primer into repairs, then touching up with matching matte paint using a small roller or brush.
For larger zones, consider blending with a slightly wider roller stroke pattern to avoid obvious seams before deciding on full repainting.
What paint finish hides imperfections best if I can’t get a perfectly smooth matte?
When a perfectly smooth matte isn’t achievable, choose a low-sheen finish that helps hide surface flaws while still minimizing glare.
Eggshell or satin are good options: they mask minor bumps and patchwork better than flat matte, resist scuffs, and clean more easily.
Test samples under your room’s light to balance concealment and subtle sheen before committing to a full paint job.