How to Paint a Popcorn Ceiling: Best YouTube Tutorials and Step-by-Step Tips
You can paint a popcorn ceiling yourself if you prep, protect, and work carefully. First inspect for asbestos and wear an N95, goggles, and coveralls. Clean, spot-repair, and prime with a stain-blocking primer. Use a ¾”–1″ nap roller on an extension pole or a sprayer for larger rooms, working in small overlapping sections to avoid drips. Follow top YouTube tutorials for technique and safety, and keep going to get step‑by‑step tips, tool lists, and troubleshooting.
How to Paint a Popcorn Ceiling Quick Answer and What This Guide Covers
Yes—you can paint a popcorn ceiling, and the job usually takes a few hours to a day depending on room size and prep.
This guide is for DIYers, renters, homeowners, and pros who want clear steps, tools, and timing.
It also explains when repainting is enough and when the texture should be removed before finishing.
Quick Answer Can you paint a popcorn ceiling and how long it takes?
Wondering if you can paint a popcorn ceiling and how long it’ll take? Yes — you can.
Prep (clean, repair, prime) takes a few hours to a day depending on damage.
Painting itself usually takes 2–4 hours for an average room plus drying time between coats.
Watch how to paint a popcorn ceiling youtube demos for technique and tool tips to speed the job.
Who this guide is for (DIYers, renters, homeowners, pros)
Whether you’re tackling this as a weekend DIY, managing a rental with rules, updating your home, or working as a pro, this guide tells you what to expect and which steps to skip or double down on.
You’ll get clear prep and painting methods, renter-friendly shortcuts, homeowner finish tips, and pro-level efficiency and safety notes so you can choose the right approach for your situation.
When to repaint vs. when to remove popcorn texture
If your popcorn ceiling is mostly intact with only discoloration, minor staining, or a few loose bits, repainting usually gives a fast, affordable refresh; if you’re facing widespread damage, flaking texture, multiple water stains, or you want a modern smooth look, removal is the better long-term choice.
Repaint to hide wear, save time, and limit mess; remove for durability, updated style, and to address underlying issues.
Basic Understanding What Is a Popcorn Ceiling and Why Paint It?
A popcorn ceiling is a textured finish made from spray-applied materials popular from the 1950s to the 1980s.
You should know it can sometimes contain asbestos or be weakened and crumbly.
You’ll often paint it to update aesthetics, seal stains, or refresh a room without removing the texture.
Before you start, check for asbestos and assess any loose areas so you don’t spread fibers or make the texture worse.
What a popcorn ceiling is (materials, common eras)
Popcorn ceilings are textured ceiling finishes made from sprayed-on or troweled materials—originally containing asbestos in homes built before the 1980s and later made with safer options like polystyrene or vermiculite—so you’ll often see them in mid-20th-century houses and apartments.
You’ll find variations in texture, thickness, and composition by era; older surfaces may be brittle, newer ones lighter and easier to repair or paint.
Reasons to paint popcorn ceilings (aesthetics, sealing, refresh)
Because textured ceilings tend to trap dust and yellow over time, painting them refreshes the room’s look and makes maintenance easier.
You’ll modernize style, unify color, and hide minor stains or repairs. A fresh coat also seals loose particles, reducing flaking and dusting.
Risks and limitations (asbestos possibility, loose texture)
When you’re planning to paint a textured ceiling, weigh the risks first: check age and test for asbestos before disturbing surfaces; homes built before the 1980s may contain hazardous material.
If texture is loose or crumbling, painting can worsen it. You’ll need stabilization, encapsulation, or professional abatement.
Don’t sand or scrape without proper testing and protective measures; safety comes first.
Safety and Preparation Inspection, Tools, and Materials
Before you start painting, you’ll inspect the ceiling for asbestos and know when to call a pro, then suit up with the right safety gear and protective measures.
Gather the proper tools and materials—rollers or sprayers, high-build primer, paint for textured ceilings, tarps, and masking supplies—and follow a room preparation checklist that covers moving furniture and ensuring ventilation.
Choosing the correct primer and paint for popcorn texture will make the job safer and give you the best finish.
Inspecting for asbestos and when to call a professional
If your home was built before the mid-1980s, you should assume the popcorn ceiling might contain asbestos and take steps to confirm it rather than risk disturbing it yourself.
Don’t sample or sand; that can release fibers. Hire a certified inspector or asbestos contractor to test and, if positive, to abate or encapsulate.
Call a pro immediately for removal or safe containment.
Essential safety gear and protective measures
Start by gearing up with the right personal protective equipment and containment supplies so you don’t breathe dust or track debris through your home.
Wear an N95 respirator, eye protection, and disposable coveralls. Seal vents and doorways with plastic sheeting and tape.
Keep a wet sponge and a HEPA vacuum nearby to manage settled dust.
- N95 respirator
- Safety goggles
- Plastic sheeting with tape
Tools and materials needed (rollers, sprayers, primers, tarps)
You’ll need the right tools and materials to get a clean, even finish on a popcorn ceiling: a high-quality extension pole and a 3/4–1″ nap roller cover for textured surfaces, a ceiling paint specifically formulated for texture, and a good primer if you’re covering stains or switching to a lighter color.
Gather these essentials and consider a sprayer for large areas.
- Roller + extension pole
- Primer + texture paint
- Drop cloths and tarps
Room preparation checklist (furniture, masking, ventilation)
1 clear checklist keeps the job tidy and safe: move furniture to the center or out of the room, cover everything left with drop cloths or plastic sheeting, tape seams and edges with painter’s tape, remove or mask light fixtures and ceiling fans, and open windows or set up fans to guarantee steady ventilation while you work.
- Folded loveseat wrapped in plastic
- Ceiling fixture masked with tape and film
- Box fan venting toward an open window
Choosing the right paint and primer for texture ceilings
With the room prepped and vents running, turn your attention to selecting paint and primer that’ll handle the rough surface of a popcorn ceiling.
Choose a high-quality latex primer designed for textured surfaces to seal and improve adhesion.
Pick a flat or matte interior latex paint to hide imperfections; use a roller with a thick nap and consider stain-blocking primer for water or smoke damage.
Step-by-Step Painting Process
Start by testing a small area to check adhesion and plan repairs.
Then you’ll clean and spot-repair the texture, prime with the appropriate primer, and choose the right roller and extension pole technique for even coverage.
Finally, weigh the pros and cons of a paint sprayer versus a roller to decide which method suits your ceiling and skill level.
Step 1 Test a small area and assess adhesion
Before you commit to painting the whole ceiling, test a small, inconspicuous area to see how well the paint and any primer will stick to the popcorn texture.
Pick a corner, apply your chosen primer or paint with a small brush or roller, let it dry, then check for peeling, bubbling, or color change.
Note adhesion and texture retention before proceeding.
Step 2 Clean the ceiling (dust, cobwebs, stains) and spot-repair
Tackle dust, cobwebs, and stains next so paint will adhere evenly and look clean.
Use a soft-bristle brush or vacuum with a brush attachment to remove loose debris.
Gently wipe greasy or stained spots with a damp sponge and mild detergent, then let dry.
For small damage, press down loose texture and apply a thin joint compound patch; sand smooth before proceeding.
Step 3 Prime the popcorn texture (when and which primer to use)
Now that the ceiling’s clean and any repairs are smoothed, prime the popcorn texture to seal porous areas and improve paint adhesion.
Choose a high-quality, stain-blocking latex primer for water-based paint or an oil-based primer if stains or nicotine persist.
Apply a thin, even coat to avoid clumping.
Let primer fully dry per manufacturer instructions before painting to guarantee uniform finish.
Step 4 Best roller and extension pole technique for even coverage
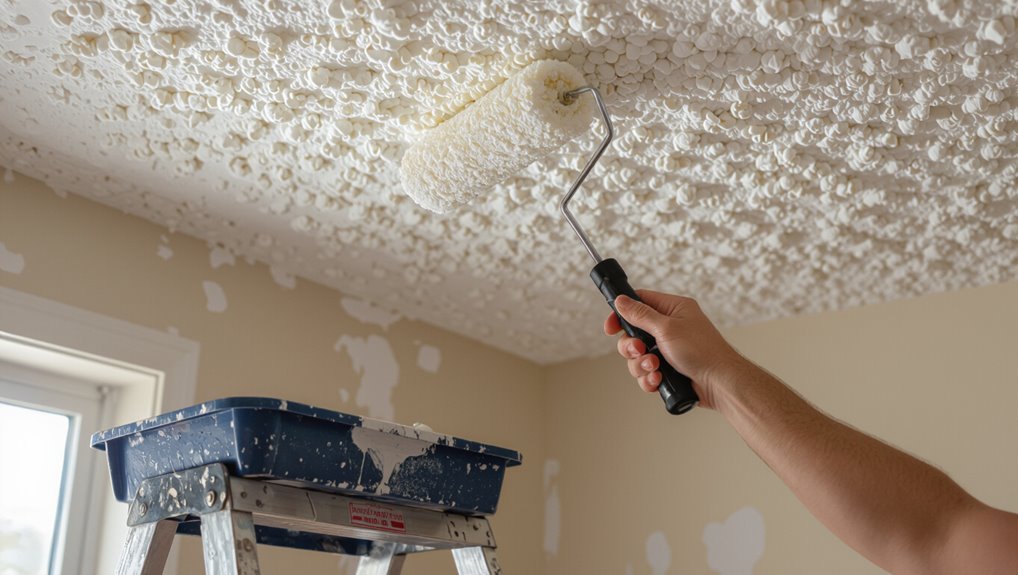
1. Choose a thick-nap roller (¾”–1″ or specialty texture roller) and a sturdy extension pole.
Load the roller evenly, avoid over-saturation, and use light pressure to prevent flattening texture.
Work in 2–3 foot sections with overlapping passes, rolling perpendicular then crosswise for uniform coverage.
Keep a wet edge and check with raking light to catch missed spots.
Step 5 Using a paint sprayer vs. roller: pros and cons
After you’ve mastered rolling technique and coverage, decide whether a sprayer or roller will give you the results you want. You’ll weigh speed, overspray, texture preservation, and cleanup. A sprayer saves time but risks mess; a roller is cleaner and gentler on texture but slower. Choose based on room size, ventilation, and your comfort level.
| Factor | Sprayer vs Roller |
|---|---|
| Speed | Sprayer faster |
| Control | Roller more precise |
| Cleanup | Roller easier |
| Texture | Roller preserves |
Step 6 Applying paint: coat count, drying times, and patterns
Before you start, plan how many coats you’ll need, how long each must dry, and the pattern you’ll follow so you paint efficiently and avoid lap marks.
Generally apply one thin primer coat if needed, then one or two finish coats. Allow recommended drying times between coats (usually 2–4 hours).
Work in consistent overlapping passes across the ceiling, keeping a wet edge.
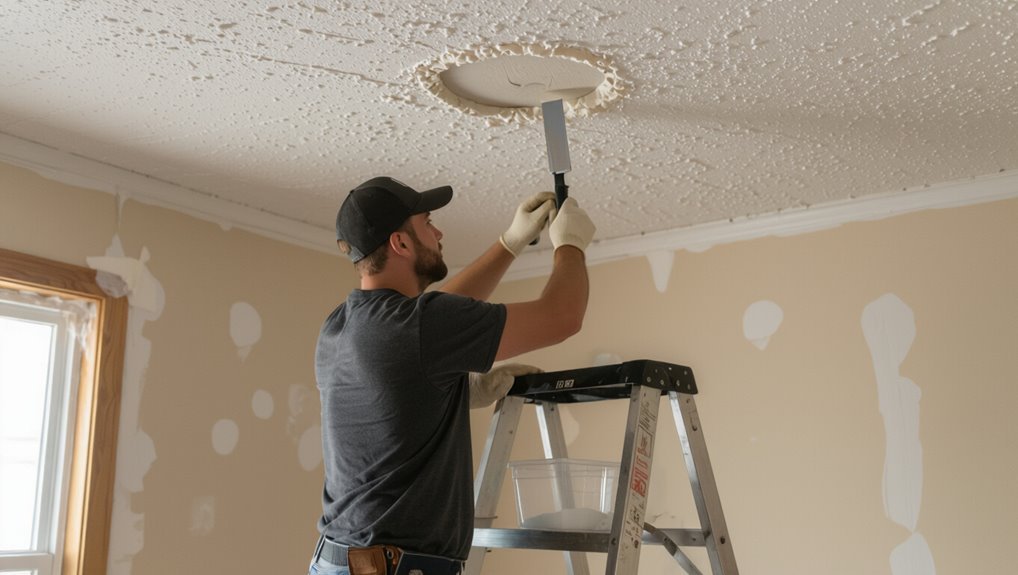
Step 7 Edging and cutting in around fixtures and walls
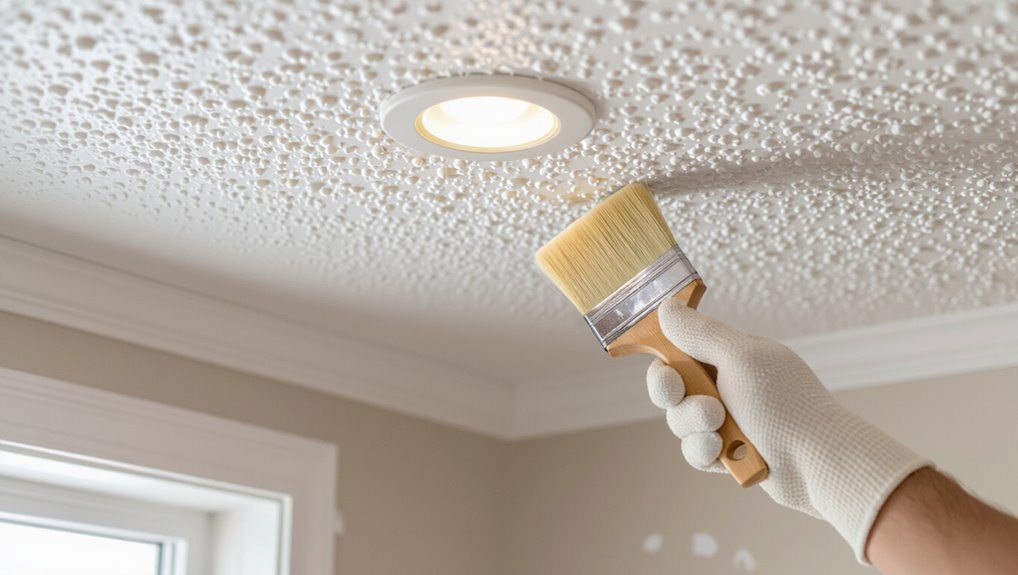
Now focus on edging and cutting in around fixtures and walls—this is where precision matters most to get clean lines and avoid drips.
Use a sharp angled brush and steady, light strokes to paint junctions between popcorn texture and trim, vents, or light fixtures.
Mask hardware and overlapping trim with painter’s tape, feather edges, and wipe excess paint immediately for a neat finish.
Step 8 Final inspection and touch-ups
Once you’ve edged and cleaned up around fixtures, take a systematic look at the whole ceiling to spot thin spots, drips, or missed areas.
Use a bright light or raking light to reveal imperfections. Touch up with a small roller or brush, blending carefully into textured areas.
Let dry, recheck, and apply a second coat only where necessary for uniform coverage.
Best YouTube Tutorials and How to Use Them Effectively
You’ll want to pick tutorials with clear credentials, demonstrated techniques, and good production so you can trust what you’re copying.
I’ll list eight top YouTube videos with one-line reasons to watch each and then show how to follow them safely and tweak methods for your specific ceiling.
Use protective gear, pause and rehearse steps before you try them, and adapt roller types and paint thinners to match your texture and room conditions.
Criteria for selecting quality tutorials (credentials, techniques, production)
When you’re choosing a YouTube tutorial to teach you how to paint a popcorn ceiling, focus on three things: the instructor’s credentials and real-world experience, the techniques they demonstrate (including prep, tools, and safety), and the video’s production quality so you can clearly follow each step.
Check credentials, verify demonstrated methods match manufacturer guidance, confirm clear close-ups and audio, and prefer measured, safety-first instruction.
Top 8 YouTube videos to watch (brief one-line reason each)
Now that you know what to look for in a tutorial, here are eight YouTube videos that actually match those standards—each listed with a one-line reason so you can pick the one that fits your project, skill level, and safety needs.
You’ll get clear technique demos, realistic prep steps, and honest tool comparisons to help you choose confidently.
- Close-up roller technique
- Scaffold and reach tips
- Trim and edge handling
How to follow a tutorial safely and adapt techniques to your ceiling
Start by matching the tutorial’s scope to your ceiling and safety needs—pick videos that show the same texture, ceiling height, and any fixtures you’ll work around.
Then pause and rehearse each step mentally so you can spot where you’ll need to alter technique, tools, or timing before you climb the ladder.
Follow PPE, secure ladders, test paint on a small area, and adapt roller pressure, overlap, and drying time to your conditions.
Comparison Painting vs. Removing Popcorn Ceilings
You’ll want to weigh painting, skim-coating, and full removal side-by-side with a simple pros-and-cons table to compare cost, time, and disruption.
Painting is fastest and cheapest but may only be a temporary fix, while removal or skim-coating costs more up front yet can give a cleaner, longer-lasting ceiling.
I’ll explain when removal makes better long-term sense and how each option impacts budget and schedule.
Pros and cons table: paint vs. remove vs. skim-coat
Deciding whether to paint, remove, or skim-coat a popcorn ceiling comes down to balancing cost, time, mess, and desired finish; each option has clear trade-offs you should weigh before committing.
| Option | Quick take |
|---|---|
| Paint | Fast, low mess, hides flaws but less modern look |
| Remove | Best finish, messy, may reveal repairs |
| Skim-coat | Smooth finish, moderate mess, skilled work needed |
Cost, time, and disruption comparison
Comparing painting and removing a popcorn ceiling comes down to three practical measures: money, time, and how much you’ll have to live with dust and disruption; painting usually wins on cost and convenience while removal wins on long-term appearance.
If you paint, expect lower upfront cost, a day or two for prep and drying, and minimal cleanup.
Removal demands more time, contractors, and heavy cleanup.
When removal is the better long-term choice
Although painting can be quicker and cheaper, removal is the better long-term choice when you want a cleaner, more modern look, higher resale value, and fewer maintenance headaches down the road.
If you plan to stay long-term or sell, removing popcorn eliminates dust traps, simplifies future repairs, and allows smooth finishes.
Expect higher upfront cost and disruption, but enjoy lasting benefits and easier upkeep.
Common Problems and How to Fix Them
As you paint, you’ll run into issues like flaking texture, uneven coverage or shadowing, and accidental drips or over-spray.
I’ll show quick fixes for reinforcing loose popcorn, evening out patchy areas, and preventing or cleaning up drips and overspray.
You’ll also get simple stain-blocking tips so old marks don’t bleed through your new finish.
Problem: Paint flaking or texture shedding solutions
When paint flakes or the popcorn texture sheds, it’s usually because the surface wasn’t properly prepared or the wrong products were used. You’ll want to stop the problem before you repaint.
Remove loose material with a soft brush, vacuum gently, and spot-scrape only damaged areas.
Prime with a bonding primer, let it cure fully, then use a lightweight ceiling paint designed for textured surfaces.
Problem: Uneven coverage or shadowing solutions
If your ceiling looks blotchy or casts odd shadows after painting, it usually means the paint didn’t lay down evenly or the texture’s contours caught different amounts of light.
Fix it by applying thin, consistent coats with a high-nap roller or texture brush, maintain a wet edge, use directional lighting to spot low-coverage areas, and feather edges; let full drying reveal if a second coat’s needed.
Problem: Over-spray, drips, and cleanup tips
One quick mistake—holding the spray too close or loading the roller with excess paint—can leave you staring at drips, over-spray, and a huge cleanup job; prevent this by using light, even passes, keeping the roller barely loaded, and angling your brush away from fixtures.
Work in thin coats, catch drips immediately with a damp sponge, cover floors and vents, use painter’s tape, and ventilate for faster drying.
Problem: Stains showing through stain-blocking strategies
After you’ve controlled drips and over-spray, the next headache can be stains that bleed through your stain-blocking coats.
If stains reappear, remove loose material, clean the area with TSP or a degreaser, let it dry, then apply a quality shellac-based primer—its seal prevents tannin and water stains.
After priming, repaint with your chosen ceiling paint for a lasting finish.
Best Practices, Maintenance, and Preventing Future Issues
To get long-lasting results, follow proven prep and painting techniques and use the right primer and paint for textured ceilings.
You should clean and spot-check the popcorn surface periodically to prevent dirt buildup and address small cracks or stains promptly.
Plan to repaint only when coverage fades or damage appears—typically every 8–12 years for living areas, sooner in humid rooms.
Best practices for long-lasting results
Start by preparing a consistent routine: clean surfaces gently, patch cracks with lightweight compound, and use a high-quality primer before painting so your finish adheres and resists stains and moisture.
Apply two thin coats of quality ceiling paint, allow proper drying time, and ventilate the room to cure the finish fully.
- Use breathable, stain-resistant paint
- Keep humidity controlled
- Inspect yearly for damage
Maintenance tips to keep the ceiling clean and intact
Keeping your newly painted popcorn ceiling looking good over time means regular, gentle care and quick fixes for small issues before they grow.
Dust lightly with a soft-bristle brush or vacuum with a brush attachment.
Blot stains with a damp sponge and mild detergent.
Fix loose texture with adhesive and small touch-up paint.
Control humidity and avoid direct water exposure to prevent peeling.
When to repaint and how often
Although popcorn ceilings don’t need frequent repainting, you’ll know it’s time when faded color, uneven sheen, or small flaking spots appear; aim to repaint every 8–12 years for normal rooms and sooner in high-humidity or high-traffic areas.
Inspect annually, address stains or mold immediately, and use moisture-resistant paint in bathrooms and kitchens.
Prompt touch-ups prevent bigger repairs and preserve texture.
Cost, Time Estimates, and Tool Rental vs. Purchase
You’ll want a quick cost snapshot—materials like primer and paint are usually cheap, while hiring a pro adds labor and prep fees.
Estimate time by room: a small room with brushing/rolling can take a few hours, while spraying or larger rooms can take a day plus prep and cleanup.
Decide whether to rent a sprayer or hire a pro based on room size, your comfort level, and whether rental plus setup is cheaper than labor.
Typical cost breakdown (materials, labor if hiring)
Expect to spend anywhere from $50 to $400 in materials for a typical 12×12 room, while hiring a pro will usually run $200–$800 depending on prep and ceiling condition. You’ll pay for primer, paint, rollers, drop cloths, and patching. Labor raises costs but saves time.
| Item | Typical cost |
|---|---|
| Materials | $50–$400 |
| Labor | $200–$800 |
| Tools (buy/rent) | $20–$150 |
| Contingency | $0–$200 |
Time estimates by room size and method
For a small 8×8 room, plan on about 2–4 hours total if you’re just rolling on one coat after minimal prep;
medium rooms (12×12) typically take 4–8 hours, and larger or high-ceiling spaces can run 8–16+ hours depending on patching and drying time.
Factor in extra time for thorough prep, multiple coats, and cleanup;
textured repairs add 1–3 hours.
When to rent a sprayer or hire a pro
If your ceiling covers a large area, has high or vaulted sections, or you want a factory-smooth finish quickly, rent a sprayer or hire a pro—both cut labor and drying time compared with rolling, but they differ in cost and commitment.
Renting saves money for one job; expect rental plus masking time.
Buying pays off if you’ll use it again.
Pros charge for speed, prep, and cleanup.
FAQ
Before you start, you’ll want answers to a few common questions about safety, appearance, and technique.
Can you paint a popcorn ceiling that may contain asbestos? Will painting make it look smoother? What finish works best?
Also, learn how to handle fixtures and vents and whether dark colors will work on that textured surface.
Can I paint a popcorn ceiling myself if it contains asbestos?
Wondering whether you can paint a popcorn ceiling that contains asbestos? You shouldn’t.
Painting can disturb fibers; testing by a certified lab is essential first. If asbestos is confirmed, hire licensed abatement professionals for containment and remediation.
Only professionals should handle removal or encapsulation; don’t DIY.
Contact local health or environmental agencies for guidance and certified contractor referrals.
Will painting a popcorn ceiling make it look smoother?
Even after addressing asbestos concerns and hiring pros if needed, you’ll probably ask whether painting will make your popcorn ceiling look smoother.
Painting alone won’t greatly reduce texture; it can even emphasize bumps if applied too thickly. To smooth it, you’ll need skim-coating, joint compound, or full removal.
Painting will refresh color and hide stains but won’t eliminate the popcorn texture.
What paint finish is best for popcorn ceilings?
Anyone painting a popcorn ceiling will want a flat or matte finish because it hides texture and imperfections best; these low-sheen paints minimize glare and make bumps less noticeable, while eggshell or satin can highlight the rough surface.
You’ll get the most even look with a quality flat ceiling paint formulated to resist stains and scuffing; use proper primer if staining or repairs exist.
How do I deal with popcorn ceiling around light fixtures and vents?
When you work around light fixtures and vents, take extra care so you don’t damage the fixture or spread dust and old popcorn material into your HVAC or electrical boxes.
Turn power off, remove covers, and mask edges with painter’s tape and plastic.
Use a soft brush or spray-on adhesive for loose texture, repaint carefully, then reinstall fixtures once paint fully dries and power’s restored.
Can I use a dark color on a popcorn ceiling?
Can you use a dark color on a popcorn ceiling? Yes, but think carefully. Dark paint highlights texture and can make the ceiling feel lower.
Use flat or matte finishes to hide imperfections, and test a swatch under different lighting.
Guarantee good coverage with a thick nap roller or sprayer, and consider priming first to prevent heavy absorption and uneven appearance.