How to Paint a Wood Wall for a Smooth Finish
You can get a smooth painted wood wall by sanding to remove rough spots and raised grain, filling gaps and knots, then wiping clean before priming with a bonding primer. Use thin, even coats of latex or oil paint, sanding lightly with fine-grit paper between coats and cross-rolling for consistent coverage. Cut in carefully with a high-quality angled brush and finish with light strokes to avoid buildup. Keep going to learn tips for knots, veneer, and exterior care.
What This Guide Helps You Do
Before you pick up a brush, this guide shows you how to prep, prime, and paint a wood wall so the finish looks professional and lasts.
You’ll learn surface assessment, sanding, stain blocking, and proper primer choice to improve wall aesthetics and guarantee paint durability.
Follow stepwise techniques, tool selection tips, and drying times so your result’s even, long-lasting, and confidently finished.
Quick Start: Weekend Plan for One Smooth Wall
Start by checking the Project Prep Checklist so you’ve cleared, cleaned, and repaired the wall.
Gather the Paint and Tools you’ll need—primer, paint, brushes, rollers, sandpaper, and drop cloths—so nothing slows you down.
Follow the Step-By-Step Execution plan: prime, sand, paint the first coat, let it dry, then finish with a second coat.
Project Prep Checklist
You’ll finish this smooth wood wall in a weekend if you gather the right tools, materials, and a simple timeline up front.
Focus on wood wall preparation and basic painting techniques before you start.
Checklist:
- Clear room and protect floor.
- Clean and sand boards.
- Fill gaps and prime.
- Allow proper drying time; schedule tasks by day.
Paint And Tools
If you want a smooth, durable finish in a weekend, pick paints and tools that match the wood condition and your schedule.
Choose paint types: bonding primer for raw or glossy wood, then a durable latex or oil topcoat.
For tool selection, use a high-quality brush for edges, a small roller for flats, and fine-grit sandpaper for light prep between coats.
Step-By-Step Execution
Begin by clearing the room and setting up your workspace so you can move quickly: remove furniture or cover it with drop cloths, lay down tape along trim and outlets, and arrange your brushes, roller, primer, and topcoat within reach so you won’t waste time hunting for supplies.
Follow this weekend plan:
- Sand, clean, and fill gaps.
- Prime seams and knots.
- Apply thin coats, sanding between.
- Choose technique variations and finish options.
Paint vs. Stain: When to Choose Paint
Wondering whether to paint or stain your wood wall? Choose paint when you want uniform color, enhanced paint durability, and easier touch-ups; pick stain for natural grain and stain advantages like penetrating protection. Consider traffic, style, and maintenance before deciding.
| Factor | Paint | Stain |
|---|---|---|
| Look | Opaque | Transparent |
| Maintenance | Easier | Deeper care |
| Longevity | Surface wear | Penetrates |
Evaluate Your Wall: Raw, Knotty, Painted, or Veneer
Start by inspecting the wood surface for damage, old finishes, or rough spots that need sanding.
Note whether the boards have knots, since knots can bleed through paint and may need a sealer or special primer.
Also check for veneer panels, which require different prep than solid wood before you paint.
Inspect Wood Surface
Before you pick up a brush, closely inspect the wood to determine whether it’s raw, knotty, previously painted, or veneer, since each type needs different prep and products.
Check wood condition and surface defects, then visualize repair steps:
- Scuffs and gouges
- Peeling paint
- Veneer seams
- Bare grain
Decide filler, sanding grit, and primer based on findings.
Identify Knot Presence
Knots are common on wood walls and can bleed tannins or create uneven paint adhesion if you don’t treat them properly.
You’ll inspect knot types—tight, loose, or pin knots—and mark troublesome areas. For loose knots, plan knot removal or secure them with epoxy.
After removal or stabilization, sand and seal knots with a stain-blocking primer so paint adheres evenly and won’t discolor.
Check For Veneer
1 clear way to tell if your wall is veneered is to inspect edges, seams, and any trim—veneers are thin face layers glued to a substrate and often reveal a paper or plywood backing at cut edges or around outlets.
Do a quick veneer inspection, note veneer types, and look for:
- visible glue lines
- paper backing
- repeating grain
- edge gaps
Spot Problems: Gaps, Knots, Raised Grain, Mildew
When you inspect the wall, look for gaps, knot holes, raised grain, and any mildew—each needs a specific fix to keep your paint job smooth and durable.
You’ll tackle gap filling with flexible filler, use knot sealing to block sap and tannins, sand down grain raising between coats, and perform mildew removal with a mild bleach solution.
Make certain surfaces are dry before painting.
Tools and Materials You Need
Now that you’ve fixed gaps and cleaned the surface, you’ll need the right tools and materials to get a durable, professional-looking finish.
Gather essential painting tools like brushes, rollers, drop cloths, and a good-quality sander, plus surface prep supplies such as wood filler, primer, and mildew cleaner.
Finish by choosing the proper paints and topcoats for wood—latex or oil-based primer, your paint of choice, and a protective finish if needed.
Essential Painting Tools
Before you lift a brush, gather the right tools so your paint job goes smoothly and lasts.
You’ll need quality brush types, roller options, trays, and extension poles. Pick angled sash brushes for corners, a 3/8″ nap roller for smooth wood, a sturdy tray, and a telescoping pole.
Follow care tips so brushes and rollers stay reusable.
Surface Preparation Supplies
Preparation starts with the right supplies, and you’ll want a concise kit of tools and materials to get the wood ready for paint. Gather sanders, various grit sandpaper, tack cloths, wood filler, brushes, rollers, and test primers. Focus on sanding techniques and primer selection to guarantee adhesion and smoothness.
| Tool | Purpose | Tip |
|---|---|---|
| Sander | Smooth surface | Use progressing grits |
| Tack cloth | Remove dust | Wipe before priming |
| Filler | Repair defects | Sand after curing |
| Primer samples | Test adhesion | Check compatibility |
| Brushes | Detail work | Use quality bristles |
Paints And Finishes
With the wood prepped and primed, pick paints and finishes that match the room’s wear and look so your work lasts and looks right.
Choose paint types and finish options based on traffic and sheen.
Picture tools and results:
- Satin for halls, subtle shine
- Semi-gloss for trim, durable
- Matte for low-light, hides flaws
- Clear polyurethane for topcoat, protection
Best Cleaners for Wood Walls and How to Use Them
Since dirt, oils, and grime can dull finish and interfere with paint adhesion, choosing the right cleaner is essential—you’ll want products that remove contaminants without harming wood or existing finishes. Use mild detergent, TSP substitute, or mineral spirits depending on soil. Test first. Wipe with damp cloth, let dry.
| Cleaner | Best for |
|---|---|
| Mild detergent | Light dirt |
| TSP substitute | Heavy grease |
| Mineral spirits | Sticky residue |
Remove Old Finishes Safely (Chemical, Heat, Sanding)
Before you start, know the pros and cons of chemical strippers, heat guns, and sanding so you can choose the safest method for your wood.
Wear proper PPE, work in a well-ventilated area, and follow product instructions to avoid fumes, burns, or dust hazards.
I’ll cover chemical stripper safety, safe heat use, and dust-minimizing sanding techniques next.
Chemical Stripper Safety
A few common methods—chemical strippers, heat guns, and sanding—can remove old finishes from wood, but each brings distinct safety risks you’ll need to manage.
When using chemical strippers, limit chemical exposure and wear safety equipment. Follow label instructions, ventilate, and contain waste.
- gloves
- respirator
- goggles
- disposal container
Proper Heat And Sanding
When you use heat guns or sand by hand or with power tools, control the process to avoid burns, fire, and dust hazards.
Use steady heat application, keep the gun moving, and test in a hidden spot.
Wear respirator, eye protection, and gloves.
Choose sanding techniques—start coarse, finish fine—keep dust contained, vacuum frequently, and inspect for smoothness before priming.
Repair Gaps and Seams With Backer Rod and Filler
If gaps or seams in your wood wall are wider than about 1/4 inch, you’ll want to set backer rod into the cavity first and then fill over it to create a stable, paintable surface.
Use backer rod benefits and precise filler application techniques as you:
Use backer rod and careful filler techniques for stable, paint-ready seams every time
- Push rod deep into gap.
- Trim flush.
- Apply filler in layers.
- Sand smooth before priming.
How to Stop Knots and Sap Bleed‑Through
After sealing gaps and smoothing filler, you’ll want to tackle knots and sap that can bleed through paint and ruin a finish.
You should clean knots, let sap dry, then apply a shellac-based knot sealer for reliable knot sealing and sap prevention.
Seal surrounding grain, let cure fully, and prime with a stain-blocking primer before topcoating to guarantee an even, lasting finish.
Sanding Strategy: Grit Progression and Tips
Start with a coarse grit to remove old finish and level imperfections.
Then work up through finer grits to smooth the surface.
You’ll save time and avoid gouges by not skipping too many grit steps.
Finish with a fine grit so the primer and paint adhere evenly.
Start With Coarse Grit
Begin with a coarse-grit sandpaper—usually 80 to 100 grit—to remove old finish, level uneven boards, and open tight grain so subsequent grits cut cleanly.
You’ll use coarse grit and proper sanding techniques to shape the surface. Visualize the process:
- Rough sanding along boards
- Targeting high spots
- Blending seams
- Clearing debris before finer passes
Finish With Fine Grit
Move to finer grits to smooth the surface and remove the scratches left by coarser paper; you’ll typically progress from 120–150 grit up to 220–320 grit depending on how smooth you want the wall and whether you’ll stain or paint. Use consistent pressure, keep the sander moving, and test between passes to refine your fine grit sanding technique.
| Step | Action |
|---|---|
| 1 | Inspect |
| 2 | Sand |
| 3 | Wipe |
What to Sand by Hand vs. Machine
Although power sanders speed up big jobs, you’ll want to sand small details and delicate edges by hand to avoid gouges, tear-out, or removing too much profile from trim and tongue-and-groove seams.
Although power sanders save time, sand corners and delicate trim by hand to prevent gouges and profile loss.
Use hand sanding for corners and raised moulding; use machine sanding for flat, open panels.
Visualize:
- Corner bead
- Tongue seam
- Flat board
- Wide panel
How to Prime Wood for Adhesion and Hide
Before you prime, make sure the wood is clean and degreased so the primer can stick properly.
Light sanding or scuffing will give the surface the tooth it needs for good adhesion.
Then pick a primer formulated for your wood type and desired hide—stain-blocking or bonding primers work best for tricky surfaces.
Surface Cleaning And Degreasing
1. You’ll start wood preparation by removing dust, grease, and residues; use appropriate cleaning solutions and a microfiber cloth so primer bonds evenly.
Follow with a degreaser rinse and let dry fully.
- Pick a mild detergent.
- Use TSP or a biodegradable degreaser.
- Rinse with clean water.
- Dry and inspect for remaining contaminants.
Sanding And Surface Scuffing
Start by sanding the wood lightly to scuff the surface and remove any remaining finish or raised grain so primer can grip evenly; use a 120–150 grit for bare wood and 220 for previously painted or sealed areas, working with the grain and wiping away dust between passes. You’ll apply sanding techniques for consistent surface preparation and check smoothness before priming.
| Tool | Grit | Purpose |
|---|---|---|
| Sandpaper | 120–150 | Bare wood |
| Sandpaper | 220 | Painted/sealed |
| Tack cloth | — | Dust removal |
Choosing Primer Type
While you’ll want a primer that bonds well and hides wood tones, pick the type based on the surface and the paint you’ll use: oil-based or shellac primers seal tannin-rich or knotty wood and block stains, while high-quality acrylic (latex) primers offer easier cleanup, faster dry times, and good adhesion on previously painted or sanded surfaces.
- Knotty pine sealed
- Stain bleeding blocked
- Smooth previously painted
- Raw lumber primed
Choose primer types by surface and match application techniques—brush for knots, roller for flats, thin coats, sand between coats.
Choosing Primer: Oil, Shellac, or Latex
Choosing the right primer—oil, shellac, or latex—makes the rest of your paint job go on smoothly and last longer.
You’ll pick oil for tannin-rich or exterior wood, shellac to block severe stains and odors, and latex for low-VOC indoor surfaces.
Understand primer types and follow proper application techniques: thin, even coats, correct drying times, and light sanding between layers for best adhesion.
Pick Paint: Formulation and Sheen for Hiding Flaws
Pick a paint formulation that fills and levels well—latex with good hide is usually a safe choice for wood.
You’ll want a lower-sheen finish, like eggshell or satin, to minimize glare and mask surface imperfections.
Test a small area to confirm the combo hides flaws without showing brush or roller marks.
Paint Formulation Matters
Because the right paint can hide knots, grain, and small imperfections, you should match formulation and sheen to the surface you’re covering.
Choose paint chemistry and paint additives that enhance leveling and hide.
Picture finish options:
- Satin smoothing over old grain
- Eggshell softening texture
- Primer sealing knots
- High-quality acrylic filling pores
Match binder and additives for durability.
Optimal Sheen Selection
How do you balance durability and flaw-hiding when selecting sheen?
You’ll pick between sheen types—matte, eggshell, satin, semi-gloss—based on room use and surface flaws.
Matte and eggshell hide imperfections best; satin and semi-gloss offer higher sheen durability and easier cleaning.
Prioritize flaw-hiding for textured or imperfect wood, choose higher sheen durability for high-traffic areas, and test samples.
How Color Choice Affects Perceived Texture
When you choose a color for a wood wall, it changes how you see the grain, depth, and roughness.
You’ll use color psychology to guide mood while adjusting texture perception.
Imagine finishes:
- Pale gray softens grain, looks smoother.
- Deep navy hides imperfections, feels dense.
- Warm beige highlights knots, feels cozy.
- Matte white minimizes sheen, reads flat.
Best Brushes & Rollers for Painting Wood Walls
1 essential rule: pick tools that match your wood’s grain and the paint type, because the right brush or roller makes the job faster and the finish cleaner.
Choose natural-bristle brushes for oil/varnish, synthetic for latex; select angled sash brushes for edges.
Match roller nap to texture—short nap for smooth, medium for slight grain.
Compare brush types and roller sizes to optimize coverage and control.
Masking, Protecting Trim, and Prepping the Room
Before you lay a drop cloth or tape a line, clear the room of furniture and fixtures so you can move freely and avoid accidental smudges.
Use masking techniques and trim protection to keep lines crisp.
Prep the room:
- Vacuum dust
- Clean trim
- Apply low-tack tape
- Cover floors
Work methodically, checking tape edges before painting.
Cutting In Edges Cleanly Without Brush Marks
Start by loading your angled sash brush with just enough paint to wet the bristles without dripping.
Then steady your wrist and paint a thin, controlled line along the trim where the wall meets it.
Steady your wrist and run a thin, controlled line where trim meets wall for a crisp finish
Use proper cutting techniques: work in short, continuous strokes, feather the edge, and keep a damp brush.
Prioritize brush selection—high-quality, angled sash brushes reduce visible marks.
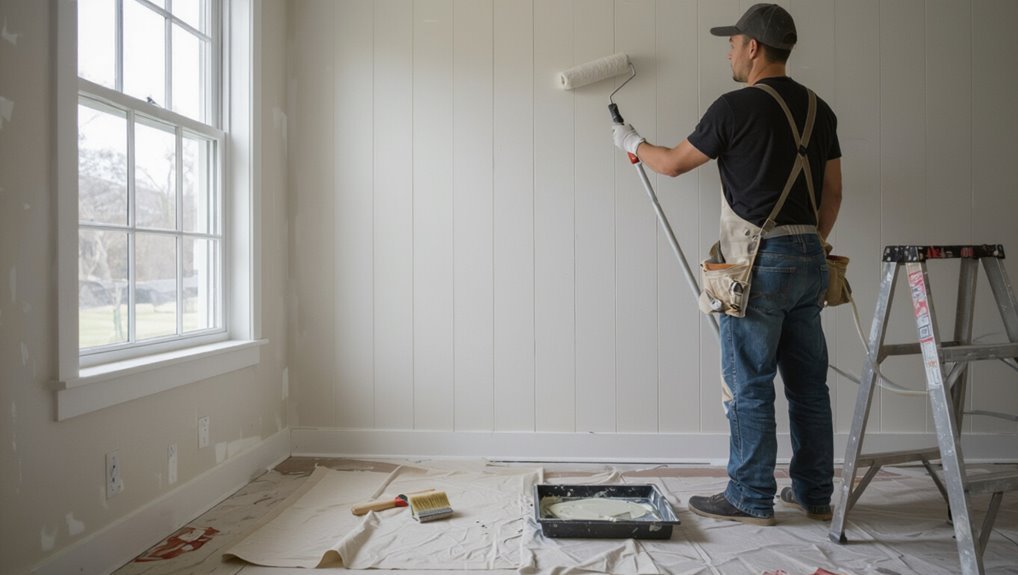
Roller Techniques to Avoid Lap Marks and Buildup
Once your cut-in lines are clean, switch focus to the roller so the rest of the wall blends seamlessly. Loading the roller correctly and maintaining a wet edge will help prevent visible lap marks and uneven buildup.
Use these visual cues and steps for roller techniques and lap mark prevention:
- Choose nap for surface — roller selection.
- Load evenly for paint consistency.
- Cross-roll for even coverage.
- Light finish strokes — avoid paint buildup, smooth application, technique practice.
Achieving an Even Finish With Multiple Coats
When your first coat is dry to the touch, apply subsequent coats promptly and deliberately so each layer levels into the next; keep a consistent overlap, maintain a wet edge, and lightly sand between coats only when necessary to remove imperfections for a smooth, uniform finish.
You’ll work steadily, using thin, even passes for smooth application, building coverage with multiple layers until color and texture are uniform.
When and How to Sand Between Coats
After you’ve applied each coat and it’s dry to the touch, you’ll want to sand selectively between layers to promote adhesion and remove imperfections.
Light sanding helps the next coat lay down smoothly without cutting through the previous layer.
Use Sanding techniques and proper Coat intervals to preserve Surface smoothness and Finish durability:
- Light 220-grit pass
- Remove dust
- Spot-fill flaws
- Final wipe before recoating
Use Paint Conditioners for Smoother Flow
Pick a conditioner that matches your paint type and the finish you want, since oil- and water-based formulas aren’t interchangeable.
Mix the conditioner into your paint at the manufacturer’s recommended ratio to improve flow without thinning too much.
Use brushes or rollers that are compatible with the conditioned paint to keep application even and avoid streaks.
Choose The Right Conditioner
One simple step that makes a big difference is adding the right paint conditioner to improve flow and reduce brush marks.
You’ll pick based on sheen and drying time; read labels for conditioner types and match to your paint. Use proper application techniques to keep finish even.
- Thin for leveling
- Slow for warmth
- Fast for cool days
- Brush-friendly
Mix Properly For Flow
Now that you’ve chosen the right conditioner, mix it in properly to get smooth flow and fewer brush marks.
Measure mixing ratios per the manufacturer, add conditioner slowly while stirring steadily, and avoid over-thinning.
Test flow techniques on a scrap board to confirm leveling and sag resistance.
If needed, adjust slightly and retest until you achieve consistent, smooth application without compromising adhesion or drying time.
Apply With Compatible Tools
Grab tools that match both your paint and the conditioner—brushes, rollers, and spray guns all have specific nap, filament, and tip recommendations that affect flow and finish.
You’ll focus on tool compatibility, paint thickness, and smoothing methods. Maintain tool maintenance and adjust application angles for coverage efficiency.
Visualize:
- Soft-bristle brush types
- Short-nap roller techniques
- Low-pressure spray
- Clean, oiled tips
Paint Tongue‑and‑Groove or Shiplap for Seamless Look
When painting tongue-and-groove or shiplap for a seamless look, start by filling gaps and sanding joints so the boards read as a single, smooth surface. Choose color choice wisely and use application techniques that minimize brush marks. Prime, caulk seams, sand again, then apply thin, even coats. Repeat until coverage is uniform.
| Step | Tool | Tip |
|---|---|---|
| 1 | Caulk | Fill gaps |
| 2 | Sand | Smooth joints |
| 3 | Primer | Seal wood |
| 4 | Brush/roller | Thin coats |
| 5 | Sand | Light between coats |
Painting Beadboard and Paneling Without Highlighting Seams
Start by prepping and filling seams so paint doesn’t settle into gaps and make them stand out.
Then feather your filler into the surrounding wood and sand smooth to erase any ridges.
With those edges blended, your final coats will sit evenly without highlighting panel lines.
Prep And Fill Seams
Before you paint, inspect every seam and groove so you can spot gaps, raised edges, and loose trim that will show through your finish.
You’ll do seam filling and surface leveling to hide flaws.
Then:
- Clear dust and loosened paint
- Push flexible caulk into gaps
- Smooth with a putty knife
- Clean residue before priming
Feather And Sand Edges
Feather the filled seams by scraping the surrounding paint and caulk back to a smooth, tapering edge so new coats blend without a hard ridge; then sand lightly with a fine-grit block or sanding sponge to knock down high spots and produce an even surface that won’t show through your topcoat.
Use a consistent feathering technique, follow sanding tips—clean dust, check junctions, and recoat when smooth.
Spray vs. Brush/Roller: Pros & Setup
Choosing between spraying and using a brush or roller comes down to the look you want, the size of the wall, and how much prep you’re willing to do.
You’ll decide between spray painting for fine, fast coverage and roller application for control.
Imagine:
- Even mist
- Smooth panels
- Roller texture
- Edge control
Set up masks, drop cloths, and ventilation.
Tack Cloths, Vacuuming, and Dust Control
Once you’ve got your spray mask or roller edges in place and dust settled from sanding, control of tiny particles becomes the priority. Use tack cloths, vacuum with brush attachments, and wipe with a damp cloth. These dust removal techniques are essential surface preparation tips to guarantee paint adhesion and a smooth finish.
| Tool | Purpose | Frequency |
|---|---|---|
| Tack cloth | Pick up fine dust | Before painting |
| Vacuum | Remove loose debris | After sanding |
| Damp wipe | Final cleanup | Immediately before paint |
| Sticky roller | Spot pick-up | As needed |
Fix Visible Brush Strokes and Roller Stipple
Smooth out visible brush strokes and roller stipple before the paint fully sets to keep the wall looking professional.
You’ll correct texture using careful brush techniques and proper roller selection. Work swiftly, light pressure, and feather edges.
Correct texture with precise brushwork and the right roller—work quickly, use light pressure, and feather edges for a flawless finish.
Visualize smoothing:
- Light, long strokes
- Cross-hatch blend
- Tip-off finish
- Re-roll with even nap
Check from different angles as paint skins.
Touch Up Spots Without Sheen Differences
If you’re touching up spots, work quickly and blend wet edges into the surrounding paint so the repaired area matches the wall’s sheen.
Use light feathering, thin coats, and the same applicator to avoid texture shifts.
Practice touch up techniques on scrap wood, keep paint at room temperature, and step back often for sheen matching.
Repeat thin layers until invisible.
Drying and Curing Times: When to Rehang Items
Allow at least 24–48 hours before rehanging light items and up to a week for heavier pieces; that gives paint enough time to dry on the surface and begin curing so you won’t leave fingerprints or dent the finish.
Allow 24–48 hours before rehanging light items; wait up to a week for heavier pieces to avoid marks.
Consider curing times and humidity effects when planning:
- Wait 24–48 hours for light frames.
- Test small weight after 3 days.
- Rehang heavy items after 7 days.
- Adjust for high humidity conditions.
Protect Painted Wood Walls From Humidity and Wear
Because painted wood is porous and reacts to moisture, you’ll want to take steps that keep humidity and daily wear from breaking down the finish.
Monitor humidity control with a dehumidifier or venting, avoid direct water exposure, and keep rooms ventilated.
Use durable protective finishes—polyurethane or water-based topcoats—and add felt pads to furniture.
Clean gently to preserve the coating.
Exterior Wood Walls & Siding: Special Considerations
Moving from interior care to exterior surfaces means accounting for weather, sun exposure, and seasonal movement in the wood.
You’ll choose finishes for weather resistance, seal gaps, and prep for longevity.
Consider visual cues:
Look for visual cues like fading, warping, peeling at joints, and mildew in shaded areas.
- Faded paint from sun
- Warping after heavy rain
- Peeling at joints
- Mildew in shaded areas
Follow simple maintenance tips and inspect annually.
Low‑Budget Techniques That Still Look Professional
If you’re on a tight budget, you can still get a clean, professional result by choosing a few high-impact steps—cleaning and sanding well, using quality primer, and investing in a good brush or roller—and skipping expensive extras.
Use budget friendly alternatives like leftover paint mixed for touchups, affordable rollers with tight naps, and homemade tack cloths.
These choices deliver a professional finish without overspending.
Common Mistakes That Make Walls Look Amateur
When you rush preparation or skip key steps, your wood wall will show it—visible brush marks, uneven sheen, and peeling edges all scream amateur.
You’ll spot amateur techniques and common oversights in every corner.
Picture these fails:
- Drippy brush strokes
- Patchy coverage
- Visible nail holes
- Uneven sheen
Pay attention; avoiding these keeps your finish sharp.
Troubleshooting: Quick Causes and Fixes
Because even small prep errors show up after the paint dries, you’ll want quick, targeted fixes so problems don’t ruin your wall. Identify knot issues and treat with shellac primer; sand raised grain, then re-prime. For drips, sand and feather, then retouch. Use correct caulk for gaps.
| Problem | Cause | Fix |
|---|---|---|
| Blotchy | grain problems | Sand, prime |
| Stain | knots | Shellac primer |
| Drip | excess paint | Sand, repaint |
Frequently Asked Questions
How Do I Paint Over Wallpapered Wood Walls Safely?
You’ll remove loose wallpaper, clean and sand the surface, and use a primer to guarantee paint adhesion; if wallpaper’s sound, degloss and prime, then apply paint—wear protective gear and ventilate while you work.
Can I Use Leftover Interior Paint From Another Room?
You can, but don’t mix apples and oranges: check paint compatibility (sheen and base), stir leftover paint thoroughly, test a small patch, and thin or tint as needed so color and adhesion match the wood wall.
How to Paint Around Built‑In Bookshelves Without Removing Them?
You can paint around built‑in bookshelves by doing bookshelf preparation: remove contents, sand edges, and tape trim; use painting techniques like angled brushes, cut‑in first, and a small roller for smooth coverage without removing the shelves.
Will Painting Wood Walls Affect Indoor Air Quality Long‑Term?
Yes, painting wood walls can affect indoor air quality temporarily, but you can minimize impact: use low VOC options, ventilate well during and after painting, run fans and open windows, and avoid painting in poorly sealed spaces.
Can I Apply Decorative Finishes (Glazing, Faux Wood) Over My Paint?
Yes — you can; think of glazing techniques and faux finishes as a costume for your wall. You’ll prep properly, use compatible paints and sealers, test a sample, then glaze or layer faux finishes for durable, striking results.
Conclusion
You’ve got the tools and steps to transform a wood wall into a smooth, professional surface—think of the finished wall like silk draped over the room, hiding every flaw. Tackle prep first, patch and sand thoroughly, prime appropriately, then apply smooth, even coats of paint. Take your time and don’t skip drying or sanding between coats. With patience and the right techniques, your wall will look polished and last for years.