How to Paint Around a Ceiling Fan Without Making a Mess
You can paint around a ceiling fan without making a mess by turning off power, protecting the area, and masking thoroughly. Tape and wrap blades, cover the canopy and light fixtures, and lay drop cloths on the floor. Use a 2–2.5″ angled brush for precise cut-ins and a small foam roller for flats to avoid drips. Work slowly, remove tape at a 45° angle, and wait for paint to dry between coats—keep going for tips on removal, tools, and cleanup.
How to Paint Around a Ceiling Fan Without Making a Mess
You can paint around a ceiling fan cleanly with the right prep and tools, but sometimes removing the fan is the smarter move.
If the fixture is lightweight and easy to detach, take it down to avoid drips and tight corners. If it’s heavy or hardwired in a way you can’t safely remove, tape and cover it well and paint in place.
Choose the option that minimizes mess and keeps you safe.
Quick Answer Can You Paint Around a Ceiling Fan Cleanly?
Wondering if you can paint around a ceiling fan cleanly? Yes — with prep and the right technique you can.
Learn how to paint around a ceiling fan by turning off power, covering blades with plastic, taping edges, and using a brush for tight spots.
Work slowly, use thin coats, and remove tape before paint fully cures for crisp lines and minimal cleanup.
When to Remove the Fan vs. When to Paint In Place
If your fan’s easy to access and its wiring’s straightforward, leave it mounted and paint around it; otherwise remove it for safety and cleaner edges.
Consider these points:
- Remove: complex wiring, heavy fixture, or detailed trim work.
- Paint in place: simple canopy, stable mount, quick touch-ups.
- Budget time: removal adds steps but yields neater results.
Basic Understanding Why Painting Around a Fan Is Tricky
When you paint around a ceiling fan you have to watch for paint splatter, drips, and overspray that can land on blades, light fixtures, and floors.
You also need to account for electrical and safety issues—power should be off and you should avoid getting paint near wiring or switch housings.
Finally, different fan finishes and materials (wood, metal, painted surfaces) can react differently to paint and may need masking or special cleaners.
Paint splatter, drips, and overspray risks
Because the rotating blades and exposed motor toss air in unpredictable directions, painting near a ceiling fan raises a high risk of splatter, drips, and overspray that can land on blades, light fixtures, and nearby furniture.
You’ll get uneven coverage, missed spots, and ruined finishes if paint beads or dries on moving parts. Control airflow, use barriers, and work slowly to minimize mess.
Electrical and safety considerations
Splatter and airborne paint are only part of the problem; electrical and safety issues make painting around a ceiling fan more complicated.
You’ll turn off power at the breaker, test the switch, and secure blades to prevent movement.
Mask exposed wiring and fixture openings, avoid wet paint near terminals, and use a stable ladder.
If unsure, call a licensed electrician before you paint.
Fan finish/materials that require special care
Although painting around a fan might seem straightforward, different finishes and materials demand special care because they react to paint and prep differently.
You’ll treat metal, lacquered wood, plastic, and fabric differently: sand and prime metal, avoid harsh solvents on lacquer, use adhesion primer for plastics, and mask or remove fabric shades.
Test a hidden spot first to prevent damage or peeling.
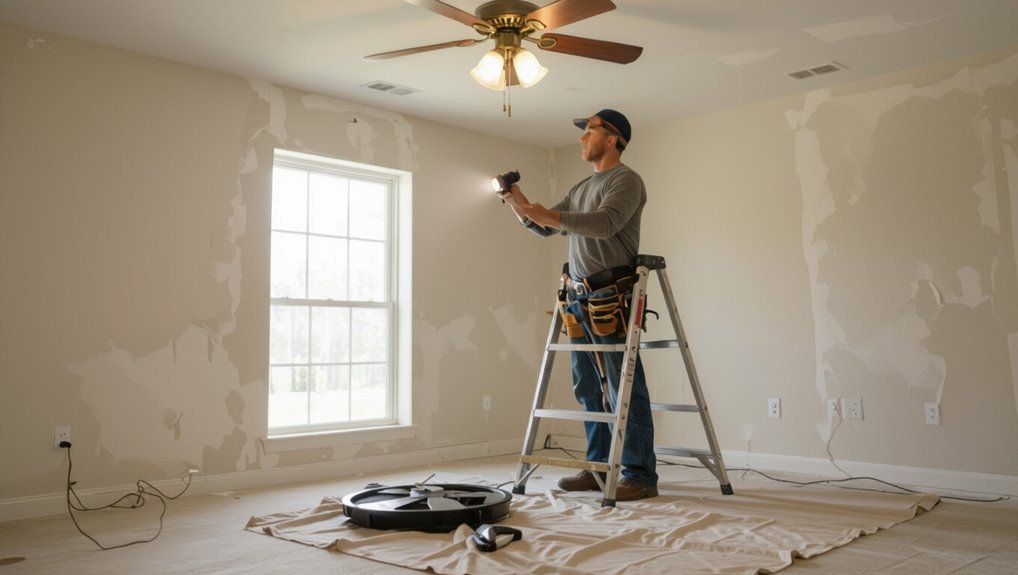
Preparatory Steps Before Painting
Before you start painting around a ceiling fan, gather your tools and materials so nothing slows you down.
Turn off power, use a sturdy ladder, and wear eye protection while you work.
Inspect the fan and ceiling for loose screws, damaged blades, or cracks that need repair before you paint.
Tools and materials checklist
Gather the right tools and materials before you touch a brush so you’ll work efficiently and avoid mid-job delays.
Prepare: drop cloths, painter’s tape, angled brushes, small roller, trim guard, ladder, screwdriver, sandpaper, primer, paint, tray, rags, and gloves.
Don’t forget a vacuum or tack cloth for dust.
- Brushes/rollers
- Protection/cleanup
- Paint/priming supplies
Safety precautions (power off, ladder safety, eye protection)
While you’re getting set up, turn off the fan’s power at the circuit breaker and lock the switch so no one accidentally flips it on; this prevents blades or wiring from moving while you work.
Use a sturdy ladder, position it on level ground, and have a spotter if possible.
Wear safety glasses and a dust mask to protect eyes and lungs from paint and debris.
How to inspect the fan and ceiling for repairs first
Once the room is safe and the power’s off, inspect the fan and ceiling closely to spot any repairs that could interfere with painting.
Check blade alignment, mounting screws, and light fixtures for looseness.
Look for cracks, water stains, or peeling paint on the ceiling.
Fix loose hardware, patch holes, and sand flaking areas.
Only paint after repairs are dry and secure.
Step-by-Step: Paint Around a Ceiling Fan (Paint In Place)
Before you start painting with the fan in place, turn off the power and secure the blades so nothing moves.
Remove or protect light fixtures and bulbs, then clean the blades and surrounding ceiling to guarantee paint adheres.
Finish by carefully masking the blades, canopy, and motor and laying down drop cloths to protect the floor.
Step 1 Turn off power and secure the fan
Cut power and make the fan safe to work around before you pick up a brush.
Turn the circuit breaker off for that room and test the switch to confirm no power.
Secure blades with painter’s tape or wrap them in a drop cloth so they can’t spin or drip onto wet paint.
Keep ladder stable and wear safety glasses.
Step 2 Remove or protect light fixtures and bulbs
With the power off and blades secured, move on to the light fixtures so you don’t risk splatters or broken bulbs.
Remove glass shades and bulbs when possible, labeling parts for reassembly. If fixtures are fixed, cover bulbs and sockets with painter’s tape and a disposable bag or plastic wrap, sealing edges.
Keep removed items on a soft surface until painting’s finished.
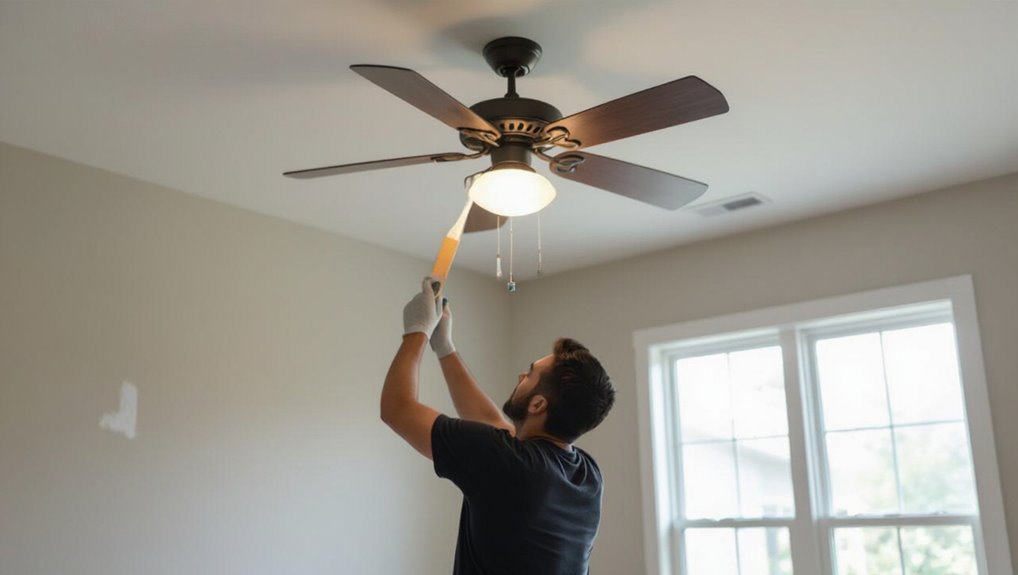
Step 3 Clean fan blades and surrounding ceiling
Wipe down the fan blades and the surrounding ceiling to remove dust, grease, and cobwebs so paint will adhere evenly.
Use a microfiber cloth and mild detergent, rinsing frequently. For stubborn grime, a magic eraser or diluted vinegar works.
Support each blade as you clean to avoid bending.
Let everything dry completely before you move on to masking or painting nearby surfaces.
Step 4 Masking and taping: technique for blades, canopy, and motor
Now that the blades and ceiling are clean and dry, it’s time to carefully mask the fan so paint won’t touch the blades, canopy, or motor.
Cover each blade edge with painter’s tape and thin craft paper. Wrap the canopy with tape and a circular paper collar, and protect the motor with plastic wrap secured by tape.
Press seals tight to prevent bleed-through.
Step 5 Drop cloths and floor protection setup
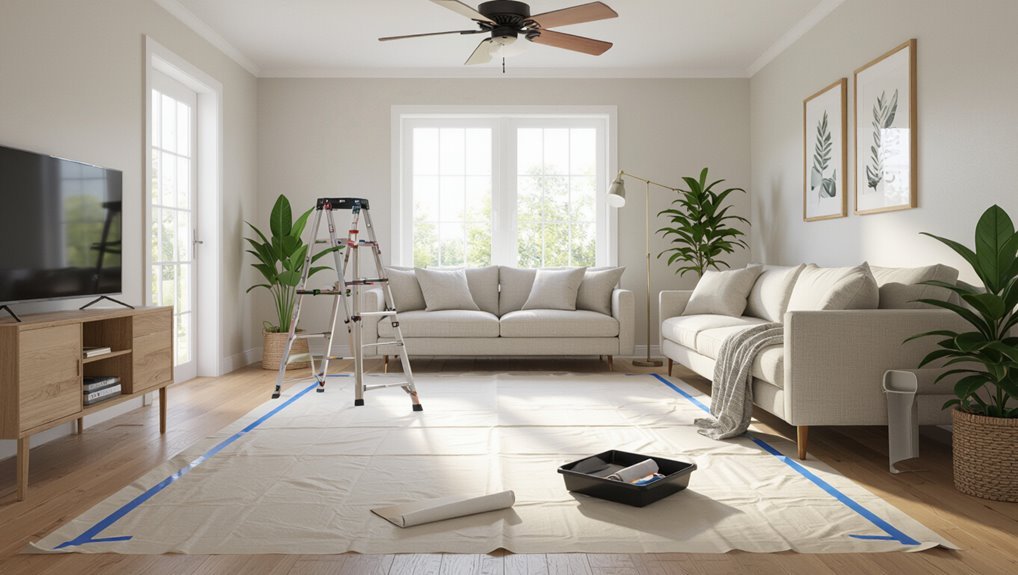
Start by laying out a large drop cloth beneath the fan and extend it at least three feet in every direction to catch paint drips and protect flooring.
Add overlapping cloths for full coverage, secure edges with low-tack tape, and tape seams to prevent paint seeping.
Protect nearby furniture with plastic sheeting, weigh corners, and keep a small broom or vacuum handy for dust and debris before painting.
Step 6 Choosing the right brush/roller and paint for tight areas
Once you’ve protected the floor, choose tools and paint that let you work close to the blades without fuss: pick a 2–2.5-inch angled sash brush for precision, a mini foam roller for flat areas near the motor, and a trim brush for tight corners.
Use low-splatter, satin or eggshell latex for easy touch-ups and quick drying.
Keep tools clean and ready.
Step 7 Cutting in around the fan with steady strokes
With your tools ready and the area taped off, cut in around the fan using steady, confident strokes to keep the paint line crisp.
Anchor your hand against the ceiling, work in short sections, and let the brush tip do the work.
Keep a wet edge, reload the brush sparingly, and clean up drips immediately to maintain a neat, professional-looking finish.
Step 8 Second coat and touch-ups while preserving taped areas
Apply the second coat only after the first is fully dry to the touch; this lets you see missed spots and guarantees proper adhesion.
Keep taped edges intact and work from center outward, using a slim brush for edges and a small roller for flats.
Feather strokes into existing paint, inspect under bright light, and touch up thinly to avoid lap marks while preserving your taped protections.
Step 9 Removing tape and cleanup without smudging
Before the paint fully hardens, peel the tape back slowly at a 45-degree angle to prevent smudging and to reveal clean lines.
Move steadily, keep the edge close to the painted surface, and stop if you see paint lifting so you can press it back down and score the edge with a utility knife.
Wipe blades and housing with a damp cloth, remove debris, and vacuum dust.
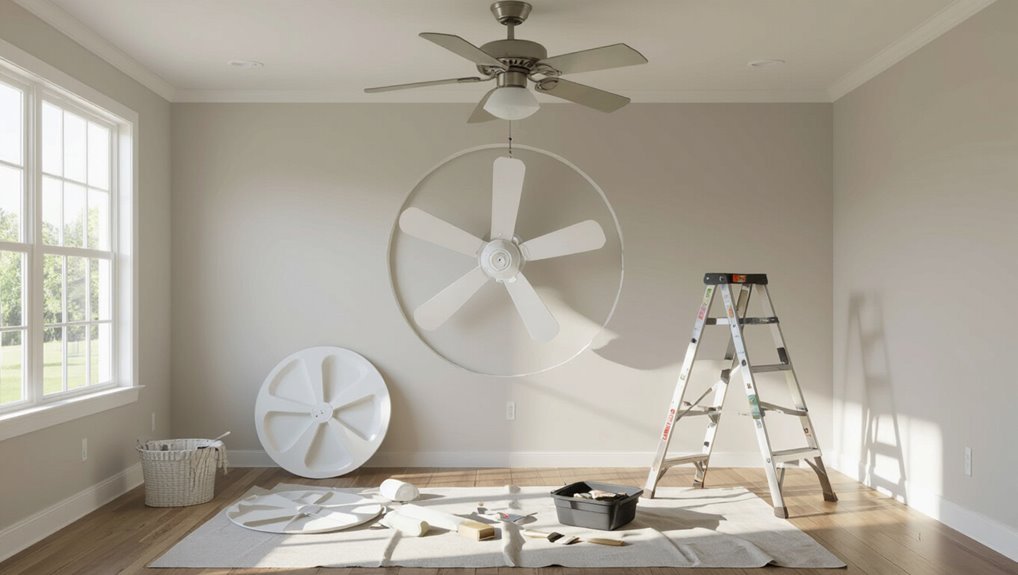
Alternative: Remove the Ceiling Fan Before Painting
If you want a cleaner finish, remove the fan first — it’s worth it when the mount or ceiling needs paint.
Before you take anything down, turn off power, label each wire and screw, and follow a quick checklist so reassembly’s painless.
Removing the unit gives full ceiling access for smoother painting, and careful reinstallation prevents damage or miswiring.
When removal is recommended
While you can often paint with the fan in place, you should remove it when wiring is exposed, the fixture is fragile, or you need full access for a clean finish.
Remove the fan if blades or housing obstruct cutting-in, if paint risks damaging finishes, or if vibration could fling paint.
Removing also prevents accidental electrical contact and gives you unobstructed access for precise edges.
Quick removal checklist and labeling wires
Since you’ve decided to take the fan down, tackle removal methodically so reassembly goes smoothly.
Turn off power, photograph connections, and loosen blades. Label wires with tape and numbers, bag screws and parts, and note canopy position.
- Photograph wiring before disconnecting.
- Label each wire and its terminal.
- Store screws/parts in a labeled bag.
How removing simplifies painting and allows ceiling access
Removing the fan before you paint makes the job faster and neater, and it gives you full access to the ceiling for a seamless finish.
You’ll avoid awkward brushwork around blades, prevent drips on motor housings, and reach tight corners and textured areas easily.
With the fixture out, you can sand, prime, and roll uninterrupted, producing cleaner edges and a professional-looking result.
Reinstallation tips to avoid damage and miswiring
With the fan off the ceiling and paint fully dried, you’ll want to reinstall carefully to prevent damage and miswiring.
Check wiring colors, match connections, and tighten wire nuts.
Reattach mounting bracket securely, lift fan with help, and align canopy before fastening.
Test fan and light on a voltage tester first, then power on.
Inspect for wobble and retorque screws after brief run.
Comparison: Painting In Place vs. Removing Fan
Deciding whether to paint around your ceiling fan or take it down usually comes down to time, skill, and how perfect you want the result to be. You can save time by painting in place but risk touch-ups; removing the fan gives cleaner edges but needs wiring care. Choose based on confidence, tools, and willingness to reinstall.
| Option | Time | Finish |
|---|---|---|
| Paint in place | Quick | Moderate |
| Remove fan | Longer | Cleaner |
| Tools needed | Basic | Electrical/tools |
Common Mistakes and How to Avoid Them
Don’t rush the masking and tape placement—poor sealing causes paint bleed and messy edges.
Use the right painter’s tape and paint for your surface, and avoid overloading your brush or roller to prevent drips.
Also mind electrical safety and wet paint handling so you don’t risk shocks or ruined fixtures.
Rushing masking and tape placement
Rushing the masking and tape placement is one of the fastest ways to end up with paint bleed, uneven edges, or damaged fan finishes, so take a few extra minutes to get it right.
Clean surfaces, press tape edges firmly, and overlap protective sheeting.
Mask blades and hardware individually, checking seams under good light.
Slow, steady prep saves time and touch-ups later.
Using wrong tape or paint that bleeds
If you use the wrong tape or a paint that tends to bleed, you’ll end up with feathered edges and sticky cleanup that undo all your careful prep.
Choose high‑quality painter’s tape rated for your surface and press edges firmly.
Use a stain‑blocking primer with water‑based paints or thin coats rather than heavy ones.
Remove tape at a 45° angle while paint is tacky, not fully cured.
Ignoring electrical safety and wet paint handling
When you tackle painting around a ceiling fan, treat electricity and wet paint with the same care you give cutting tools—turn off power at the breaker, lock the switch, and verify the fixture is dead with a noncontact tester before touching wires or removing blades.
Wear gloves and safety glasses, cover wiring and switch plates, keep paint cans sealed, and wipe spills immediately to prevent electrical hazards and staining.
Overloading brush/roller and causing drips
Overloading your brush or roller makes drips inevitable and turns a neat job into a cleanup marathon.
Don’t soak tools; dip lightly and tap off excess. Work in thin, even coats, keeping a drip tray or rag handy.
If a drip forms, smooth it immediately with gentle strokes. Clean or replace saturated rollers to maintain control and a professional finish.
Best Practices and Pro Tips
You’ll want the right tape, masks, and covers to protect the fan and get clean edges.
Use a good angled brush, a short-nap roller, and a ceiling-grade paint for smooth, even coverage, and learn a steady cut-in technique for crisp lines.
If paint lands on blades or metal, wipe immediately with a damp cloth or use a gentle solvent for small spots to avoid damaging finishes.
Best tapes, mask materials, and protective covers
1 clear, reliable tape and a few purpose-driven covers will save you hours and prevent paint disasters around a ceiling fan.
Use low-tack painter’s tape for edges, breathable fabric drop cloths to protect furniture, and plastic fan blade covers for overspray.
Remove tape within 30–60 minutes of touch dry to avoid peeling.
- Painter’s tape
- Drop cloths
- Blade covers
Recommended brushes, rollers, and paint types for ceiling work
When you tackle ceiling work, choose tools that reduce fatigue and give even coverage: use a 3/8–1/2″ nap roller for smooth to lightly textured ceilings, a long extension pole, and an angled 2–2.5″ sash brush for edges.
Pick flat or matte ceiling paint to hide imperfections and low-splatter formulations. Opt for quality synthetic brushes for latex and high-quality rollers to minimize lint.
Techniques for a professional-looking cut-in
With the right brushes and rollers in hand, start your cut-in by working systematically around the fan mounting plate and down each blade’s base so paint lines stay crisp.
Use a steady hand, short controlled strokes, and keep a damp rag nearby to wipe accidental drips immediately.
Angle the brush for thin edges, reload sparingly, and step back often to check for uniform coverage.
Quick fixes for paint on fan blades or metal parts
Act quickly to remove stray paint from blades or metal parts before it dries, since fresh droplets wipe away far easier than cured paint.
Use a damp microfiber or cotton rag with mild soapy water for latex, or mineral spirits for oil-based stains. Gently lift spots; don’t scrub.
For cured smears, lightly sand and touch up with matching paint or a small permanent marker.
Tools and Products to Consider (Buyer’s Mini-Guide)
Before you start, gather the right supplies: masking tape or protective film, drop cloths or dust sheets, and a selection of brushes, angled edgers, and mini rollers.
Pick a ceiling primer and flat or low-sheen paint suited for your room to guarantee even coverage and stain blocking.
I’ll walk you through pros, cons, and when to use each item so you can finish cleanly and efficiently.
Masking tape and protective film options
Choosing the right masking tape and protective film will save you time and keep paint off fan blades, light fixtures, and motor housings.
You’ll want tapes and films that stick without residue and conform to curves. Consider these options:
- Painter’s tape — low-residue, fan-safe.
- Stretchable plastic film — molds around blades.
- Adhesive-backed foam — seals gaps around fixtures.
Drop cloths and dust sheets comparison
Once your fan’s edges are sealed, protect the rest of the room with the right drop cloths and dust sheets—these keep floors, furniture, and fixtures paint-free and make cleanup faster.
Canvas is durable, reusable, and won’t slip; plastic is cheap and waterproof but can shift and trap paint. Felt-backed options combine grip and absorbency.
Choose size and weight for your room and budget.
Brushes, angled edgers, and mini rollers
Good tools make tight cuts and fast work, and for painting around a ceiling fan you’ll want a small, sharp brush, an angled edger, and a mini roller in easy reach.
Choose a 1–2″ synthetic sash brush for control, a foam-edged angled edger to follow blade bases, and a 4″ high-density mini roller for smooth coverage.
Keep spares for touch-ups.
Paint finish and primer recommendations for ceilings
After you’ve got the right brushes and rollers ready, pick the ceiling paint and primer that’ll give you the best coverage and a clean look.
Use a flat or matte ceiling paint to hide imperfections and minimize glare.
Choose a stain-blocking, high-adhesion primer for patched or smoke-stained areas.
For new drywall, opt for a drywall-specific primer to guarantee uniform sheen and fewer coats.
Troubleshooting: Problems After Painting
After you finish painting, you’ll probably spot paint splatter on the fan blades or light fixtures and want to remove it without damaging the finish.
If you see drips or uneven spots, you’ll need quick fixes like sanding and touch-up before the paint fully cures.
And if tape pulls paint off the ceiling, you’ll learn how to repair the edge cleanly and prevent it next time.
Removing paint splatter from fan blades and fixtures
Spot-cleaning paint splatter from fan blades and fixtures is usually quicker than you think, and doing it promptly prevents dried drips from becoming stubborn stains.
Turn off power, let blades cool, then use a soft cloth dampened with warm soapy water for latex spots.
For oil-based paint, use mineral spirits sparingly on a cloth.
Rinse, dry, and recheck before restoring power.
Dealing with drips and uneven spots
Once you’ve removed splatters from the blades and fixtures, you may still notice drips or uneven coverage on the ceiling near the fan — especially where paint pooled around the mounting or where edges were missed.
Let the area dry fully, sand raised drips lightly with fine grit, vacuum dust, then spot-prime and feather in thin coats of paint until the texture and color match the surrounding ceiling.
What to do if tape pulls paint off the ceiling
If tape pulls paint off the ceiling, don’t panic—you can fix it without repainting the whole area.
Gently sand loose edges, wipe dust with a tack cloth, and apply a thin coat of primer to the exposed spot.
Once dry, feather on matching ceiling paint with a small brush or mini roller.
Remove tape slowly next time at a 45° angle.
FAQs
You’ll find quick answers here to common concerns like whether painter’s tape will harm metal fan parts and how long to wait before turning the fan back on.
We’ll also cover spray-paint safety with a fan in place, tips for painting textured ceilings around a fixture, and whether you can use the same paint for the ceiling and canopy.
If you have a specific situation, mention it and we’ll give tailored guidance.
Can I use painter’s tape on metal fan parts without damage?
Wondering whether painter’s tape will harm metal fan parts?
You can use good-quality painter’s tape on metal if the surface is clean, dry, and free of loose finish.
Apply gently, avoid high-adhesion tapes, and remove within the manufacturer’s recommended window (usually 24–72 hours) by peeling slowly at a low angle.
Test a small hidden spot first to be safe.
How long should I wait before turning the fan back on?
After the paint’s tackiness has fully gone, wait long enough for the coating to cure to avoid gumming up the motor or blades.
Typically that’s 24–48 hours for latex or water-based paints in normal conditions; colder or humid rooms need longer.
Check manufacturer cure times, touch a hidden spot first, and keep the fan off until paint feels dry and no odor or tack remains.
Is spray painting the ceiling safe with a fan in place?
Can you spray-paint a ceiling with the fan still installed? You can, but it’s risky.
Overspray will coat blades, motor housings, and light fixtures, and moving parts can circulate paint mist. If you must, remove blades and mask everything thoroughly, seal the motor and light, and run the fan off.
Better: take the fan down or use a roller and brush to control spray.
How do I paint textured ceilings around a fan?
How do you tackle textured ceilings around a fan without making a bigger mess?
Work in small sections, use a high-quality angled brush to cut close to the canopy, and dab with a stippling brush for texture blending.
Protect blades and motor with sealed plastic.
Remove excess paint immediately and feather edges to match texture.
Let dry before second coat or reassembling.
Can I use the same paint for ceiling and fan canopy?
Wondering whether you can use the same paint for both the ceiling and the fan canopy? You can, but check finish and adhesion.
Use a flat or matte ceiling paint for a uniform look, but metal or plastic canopies often need primer and a mid-sheen enamel for durability.
Test compatibility on a scrap, sand glossy surfaces, and use heat- and oil-resistant paint near motor vents to avoid issues.