How to Paint Bubble Wrap for Creative Art Projects and Fun Prints
You can turn bubble wrap into an easy stamp by trimming a sheet, applying thinned acrylic or tempera with a roller or brush, then pressing bubble-side-down onto paper or fabric for textured prints. Use small bubbles for fine detail and large bubbles for bold graphics, secure edges to avoid shifting, and layer colors or masks for depth. Rinse and reuse wraps when possible to cut waste, and keep heavier paper for crisper results—keep going to pick up tips, templates, and troubleshooting.
How to Paint Bubble Wrap for Creative Art Projects and Fun Prints
Yes—you can paint bubble wrap and use it to create bold, repeatable prints and textured effects.
This guide is for beginners, teachers, parents, and anyone who wants an easy, low-cost printing technique.
Quick Answer Can you paint bubble wrap and use it for prints?
Curious how bubble wrap can become a simple stamp for prints? You can paint bubble wrap and use it for prints easily.
Learn how to paint bubble wrap with acrylic or tempera, apply thin even coats, then press onto paper or fabric.
Clean bubbles between colors, test on scrap, and experiment with pressure and color blends to get crisp, repeatable patterns.
Who this guide is for and what you’ll be able to make
Now that you know bubble wrap makes a simple, effective stamp, this guide will show who can use these techniques and what you’ll be able to make.
You’ll learn quick, low-cost methods for playful prints, art journaling, classroom projects, and home decor experiments that scale with skill.
- Kid-friendly crafts
- DIY wrapping paper
- Textured fine art
- Mixed-media backgrounds
- Reproducible patterns
Basics What Is Bubble Wrap Printing and Why Use It?
Bubble wrap printing is a simple printmaking technique where you paint the bubbles and press them onto paper or fabric to transfer textured patterns.
You’ll get interesting texture for little cost because bubble wrap is affordable and widely available, and different bubble sizes or bubble-less packing foam give distinct dot sizes and impressions.
Try a few types—small, large, and mesh-backed—to see how each one changes the look of your prints.
What bubble wrap printing is
Think of bubble wrap printing as a simple stamp-making technique: you apply paint to the bubbles and press the textured side onto paper or fabric to leave a repeating pattern.
You’ll roll, dab, or brush paint onto the wrap, then press firmly and lift to reveal rows of circular impressions.
It’s a quick, hands-on way to make layered, graphic marks for backgrounds and motifs.
Benefits of using bubble wrap in art (texture, affordability, accessibility)
After you print a few sheets and see the repeating circles appear, you’ll quickly notice why artists keep reaching for bubble wrap: it gives bold, tactile texture with almost no setup.
You’ll save money, experiment fast, and share techniques easily while achieving unique patterns.
- Affordable materials
- Quick setup and cleanup
- Accessible for all ages
- Encourages experimentation
- Consistent repeatable textures
Types of bubble wrap and how they affect prints
Texture matters: the size, spacing, and shape of the bubbles change how paint transfers, so choosing the right type of bubble wrap lets you control scale, detail, and repeatability in your prints. You’ll pick small bubbles for fine texture, large for bold patterns, perforated for borders, and textured wraps for irregular effects.
| Bubble size | Effect |
|---|---|
| Small | Fine detail |
| Large | Bold marks |
| Perforated | Edges |
| Textured | Irregularities |
| Flat | Subtle wash |
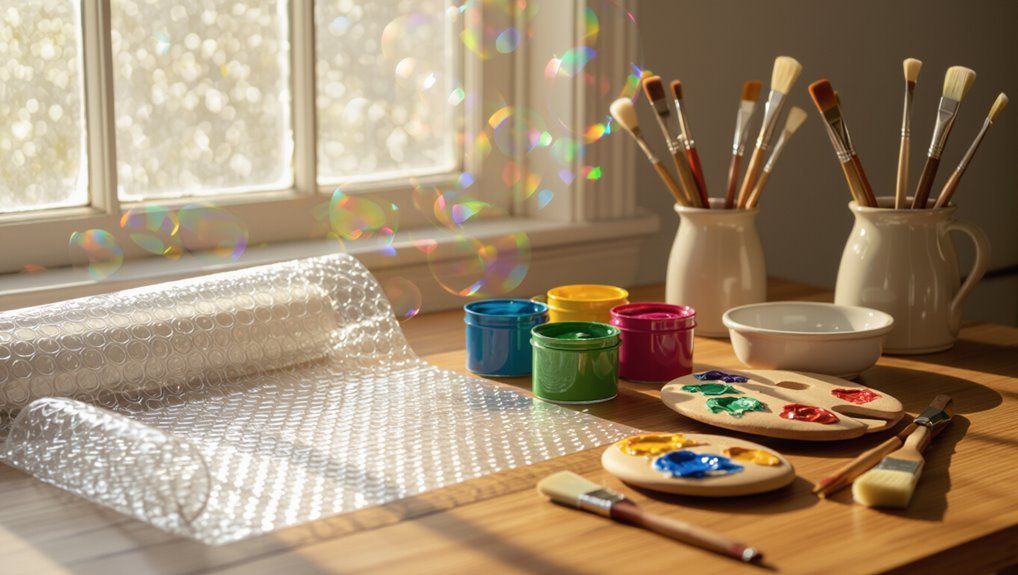
Materials and Tools You’ll Need
You’ll want the right bubble wrap—different bubble sizes and thicknesses give different textures—so pick a few to experiment with.
Choose paints based on surface and effect (acrylics for paper, fabric paint for textiles, tempera for kids, and spray paint for bold coverage) and weigh spray paint’s ventilation needs.
Gather rollers, brushes, palettes, tape, scissors, gloves, and prepare a well-ventilated, protected workspace before you start.
Recommended bubble wrap types and sizes
Pick bubble wrap that matches the scale of your design and the paint detail you want—small bubbles (about 3–6 mm) give fine, consistent dots; medium bubbles (10–12 mm) create bolder patterns; and large bubbles (20 mm+) make pronounced, graphic prints.
Choose softer wrap for texture, firm wrap for crisp edges, and clear vs. opaque for visibility.
- Small (3–6 mm)
- Medium (10–12 mm)
- Large (20+ mm)
- Soft/pliable wrap
- Heavy-duty wrap
Paint types: acrylic, tempera, fabric paint, spray paint pros and cons
Now that you’ve matched bubble-wrap size and firmness to your design, think about paint—its properties will shape your technique and final look. Acrylics dry fast and stay vivid; tempera washes easily and feels playful; fabric paint bonds to cloth; spray gives bold coverage but needs ventilation. Choose by surface, durability, and mood.
| Paint | Feeling |
|---|---|
| Acrylic | Confident |
| Tempera | Playful |
| Fabric/Spray | Bold |
Additional supplies: rollers, brushes, palettes, paper/fabric choices, masking tape, scissors, gloves
Tools make the difference between a muddled print and a crisp, repeatable pattern, so gather rollers, brushes, palettes, and cutting tools before you start.
Choose smooth rollers for even coverage, assorted brushes for detail, plastic palettes for mixing, and paper or fabric suited to your paint.
Keep tape and scissors handy; wear gloves to protect hands.
- Foam roller
- Small round brush
- Palette tray
- Masking tape
- Scissors
Safety and workspace setup
You’ve assembled your brushes, rollers, tape, and cutting tools—now set up a safe, well-organized workspace before you paint.
Clear a flat surface, protect it with drop cloths, establish good ventilation, and keep a waste bin and first-aid kit nearby.
Work with gloves, goggles, and non-slip shoes to avoid spills and accidents.
- Drop cloth or plastic sheeting
- Ventilation or fan
- Gloves and goggles
- Waste bin and wipes
- First-aid kit
Step-by-Step Bubble Wrap Painting and Printing Process
Start by prepping your bubble wrap and work surface so paint doesn’t smear or stick.
Pick and thin your paint to the right consistency, then apply it to the bubbles using a roller, brush, or by stamping.
Press the painted side onto paper or fabric with your hand, roller, or press, lift to reveal the print, and let it dry or cure following the paint’s instructions.
Step 1 Prepare your bubble wrap and surface
Before you apply any paint, lay out a clean, flat workspace and unroll enough bubble wrap to cover your printing area—this helps you work without smudging.
Check bubbles for damage, trim to size, secure edges with tape, and protect the table beneath.
Keep paper or fabric nearby for test prints.
- Inspect bubbles
- Trim edges
- Tape corners
- Protect surface
- Arrange test material
Step 2 Choose and prepare paint (consistency, thinning)
Pick paints that suit your project and thin them to the right consistency so the bubbles transfer cleanly without pooling.
Test small amounts, aiming for a creamy, ink-like flow. Use water for acrylics, medium for oils, or flow enhancers as needed.
Adjust pigment density for opacity and drying time.
- Test first
- Aim for creamy flow
- Thin appropriately
- Control opacity
- Note drying time
Step 3 Apply paint to bubble wrap (techniques: rolling, brushing, stamping)
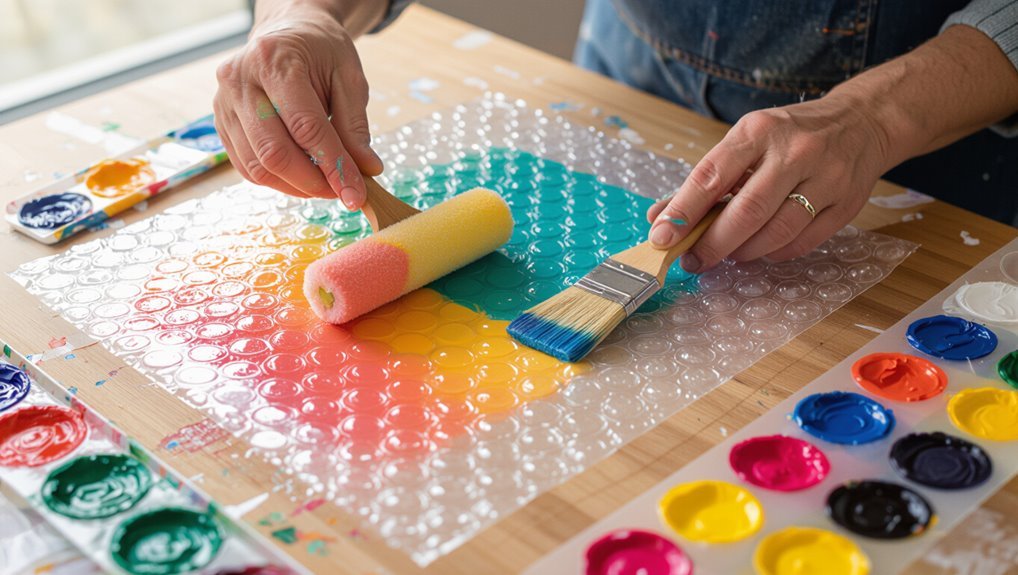
Lay paint onto the bubble side with intention—rolling, brushing, or dabbing each bubble so it holds a thin, even layer rather than pooling in the creases.
Use a foam roller for quick, uniform coverage; a soft brush for controlled edges; or press a loaded brush tip to stamp individual bubbles.
Check for missed spots and reapply sparingly to maintain crisp, defined impressions.
Step 4 Transfer print to paper or fabric (pressure methods: hand-press, roller, press)
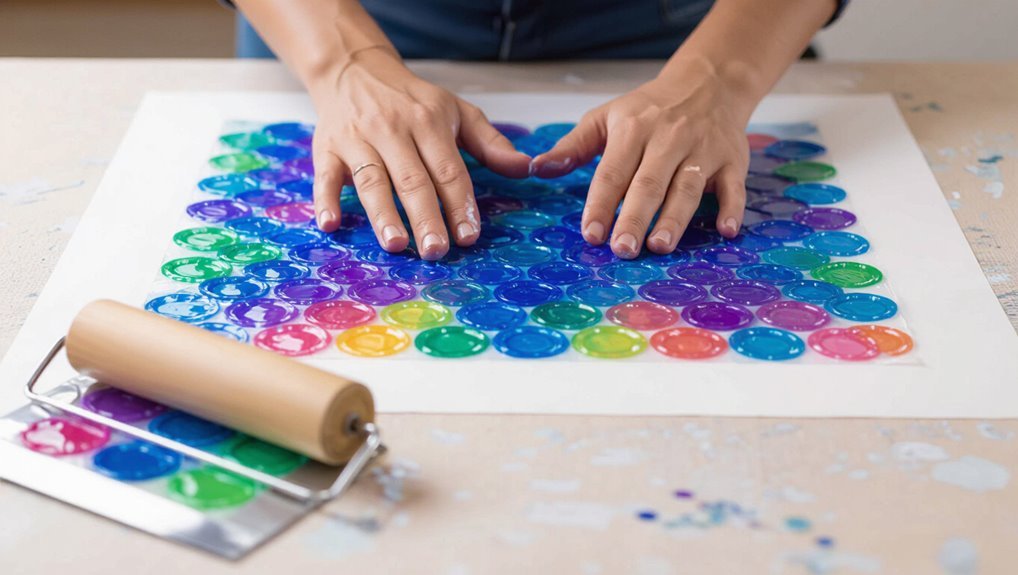
Press the painted bubble wrap onto your paper or fabric with steady, even pressure so each bubble transfers its painted impression cleanly.
Use a hand-press by smoothing with your palm, a brayer or roller for consistent coverage, or a printing press for heavier papers.
Lift carefully after settling to avoid smudges, and reapply pressure where prints look faint for more defined, even impressions.
Step 5 Reveal the print and drying/curing tips
Once you’ve lifted the bubble wrap, set the print flat and take a careful look — the image will often appear more vivid once the paint starts to settle.
Let prints dry undisturbed on a flat, ventilated surface. For faster curing, use a fan or gentle heat (avoid direct sunlight).
Check tackiness after 30–60 minutes; full cure can take 24–48 hours depending on paint thickness.
Step 6 Clean-up and paint removal from bubble wrap for reuse
6. After printing, rinse bubble wrap under lukewarm water to remove excess paint.
Use a soft brush or sponge and gentle soap for stubborn spots, working bubble-side down to avoid popping.
Pat dry with a towel and air-dry completely before storing.
For acrylic, soak briefly; for tempera, rinsing usually suffices.
Store flat in a cool, dry place for reuse.
Creative Techniques and Project Ideas (Listicle + Step Variations)
Now that you’ve got the basics, try layering colors and gradients with multiple prints to build depth and vibrant shifts.
You can combine stencils or tape masks with bubble-wrap prints for crisp negative-space designs, repeat patterns for DIY wallpaper or wrapping paper, or print onto fabric for wearable art.
Mix your prints with collage elements, ink washes, or embossing for rich mixed-media pieces.
Multi-color and gradient prints (layering techniques)
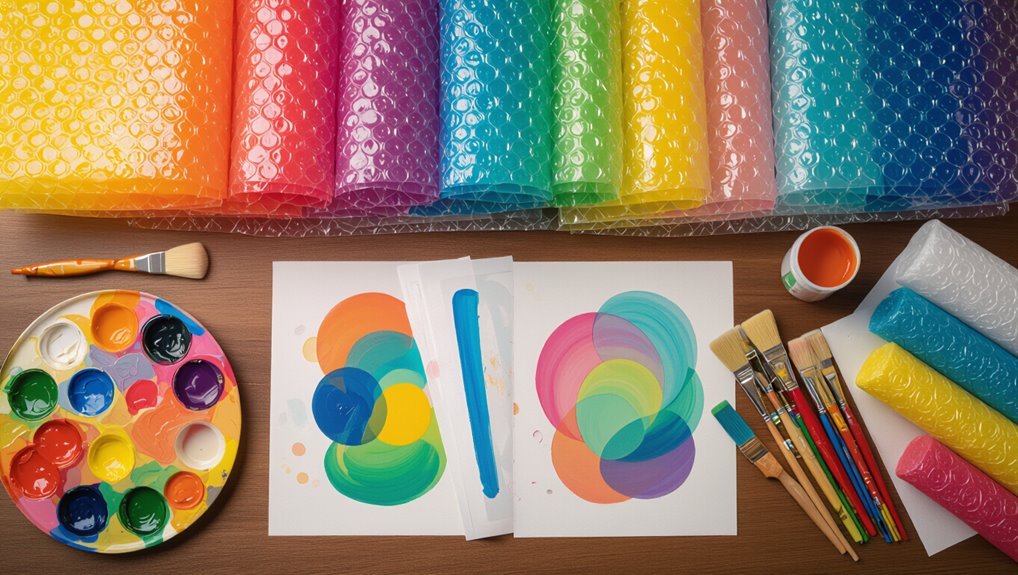
When you layer paints on bubble wrap, you can build rich gradients and striking multi-color prints by planning color order, pressure, and drying time; start with light washes, let them tack, then add denser hues where you want intensity.
Use overlapping edges for smooth blends, vary roller pressure for texture, and dry between layers to prevent muddying.
Experiment with transparent paints and limited palettes.
Creating negative-space and masked designs (stencil + bubble wrap)

If you want crisp shapes and playful contrasts, combine stencils with painted bubble wrap to mask areas and print bold negative-space designs.
Position a stencil on your paper, press painted bubble wrap over or around it, then lift to reveal the unprinted silhouette.
Vary bubble size, paint opacity, and stencil placement for striking interplay between textured dots and clean, blank shapes.
Pattern repeats and tiled prints for wallpaper or wrapping paper
Pattern repeats turn a single painted bubble-wrap print into a seamless sheet you can use for wallpaper or wrapping paper. You’ll get the best results by planning your tile and registration before you start printing.
You’ll align edges, mark registration points, and test a small grid. Repeat consistently, vary colors, and trim carefully for clean seams.
- plan tile size
- mark registration
- test a grid
- keep consistent pressure
- match color repeats
Using bubble wrap for fabric printing and wearable art
Because bubble wrap holds paint well and creates bold, repeatable textures, you can use it to print striking patterns on fabric for clothing, accessories, and wearable art.
You’ll press, lift, and layer to make scarves, tees, tote bags, and patches. Use fabric paint, prewash cloth, and heat-set prints for durability.
- Color-block scarves
- Repeat tee motifs
- Pocket patches
- Stenciled overlays
- Accessory trims
Mixed-media projects: combining bubble-wrap prints with collage, ink, or embossing
Combine bubble-wrap prints with collage, ink, and embossing to build rich, layered pieces that play texture against line and color.
You’ll experiment with surface contrast, register, and scale—overlay prints, machine- or hand-emboss, and add inked linework or torn paper shapes.
Try these combinations:
- Monochrome bubble-print with metallic embossing
- Collage fragments over partial prints
- Ink wash underprints
- Stamped line accents
- Layered translucent papers
Kid-friendly crafts and classroom projects
Those layered bubble-wrap techniques work great for gallery pieces, but they’re also perfect for quick, kid-friendly crafts and classroom projects that put texture and surprise into lessons.
You’ll set simple stations, safe paints, and reusable sheets for easy repeats. Try variations for age and skill.
- Texture cards for storytelling
- Patterned wrapping paper
- Seasonal decorations
- Collaborative murals
- Print-and-cut greeting cards
Troubleshooting Common Problems and Mistakes
If your prints come out blurry or uneven, or paint pools and smudges, you’ll want to adjust your paint consistency and pressure right away.
Keep the bubble wrap taped or clipped down to stop shifting during transfer, and use lighter, even strokes to prevent tears or deformation.
If the wrap does tear, switch to smaller sections or a backing sheet and try again with less paint.
Problem: Blurry or uneven prints causes and fixes
When your bubble-wrap prints come out blurry or patchy, it’s usually because of inconsistent ink coverage, too much pressure, or movement during transfer; check your paint thickness, how firmly and evenly you press, and whether the plastic shifted.
- Use thin, even paint layers
- Test pressure on scrap paper
- Hold wrap steady with tape
- Roll or press uniformly
- Let paint semi-dry before transfer
Problem: Paint pooling or smudging solutions
Blurry or uneven prints often come from too much paint or movement, but paint pooling and smudging have their own fixes you’ll want to apply next.
Use thin, even layers, blot excess with scrap paper, let layers tack before printing, press gently and hold steady, and clean edges between prints to prevent buildup.
- Thin coats
- Blot excess
- Wait to tack
- Gentle press
- Wipe edges
Problem: Bubble wrap shifting during transfer prevention tips
Because bubble wrap can slip as you lift or press, securing it before transfer keeps your print sharp and aligned.
Use simple clamps or tape, work on a flat surface, dab paint sparingly, press evenly with a roller or spoon, and practice a test print to confirm placement.
- Tape edges
- Use low-tack adhesive
- Clamp corners
- Test alignment
- Press steadily
When bubble wrap tears or deforms alternatives and fixes
If your bubble wrap tears or the bubbles deform during printing, don’t toss it—there are quick fixes and workarounds to keep your project moving.
Patch small rips with clear tape over the bubble side, reinforce edges with masking tape, or swap to single bubbles by trimming damaged areas.
Use textured sponges, combs, or stencil sheets as alternative stamp surfaces for consistent prints.
Best Practices and Pro Tips
To get crisp prints, you’ll want to thin or thicken paint until it transfers evenly and test on scrap before committing.
Pick paper or fabric that matches your effect—heavier papers and tightly woven fabrics hold detail better—then label and store used bubble wrap flat or rolled to reuse it safely.
I’ll also point out simple eco-friendly swaps and recycling tips so your projects stay creative and low-waste.
Optimizing paint consistency and application for sharp prints
When you want crisp, well-defined bubble-wrap prints, focus on matching paint viscosity to your application method and bubble size.
Use thinner, fluid inks for small bubbles and slightly thicker acrylics for larger ones. Apply evenly and avoid overloading.
- Test on scrap first
- Roll or dab consistently
- Use foam roller for even spread
- Blot excess paint
- Clean edges before printing
Choosing the right substrate for desired effects (paper weight, fabric types)
Substrate choice shapes how your bubble-wrap prints look and feel, so pick weight and material with your effect in mind: choose heavyweight paper for crisp details, lightweight paper for texture, and cotton fabric for absorbent, soft prints. Test each surface for bleed and durability.
| Substrate | Effect |
|---|---|
| Heavyweight paper | Crisp, detailed |
| Light paper/canvas | Textured, softer |
Reusing and storing painted bubble wrap responsibly
Although painted bubble wrap can look disposable, you can extend its life and cut waste by cleaning, storing, and reusing it thoughtfully.
Wipe excess paint before it dries, let pieces air-dry fully, and label patterns for future projects. Store flat or rolled in a cool, dry place to avoid distortion.
- Rinse promptly with water
- Pat dry, don’t rub
- Flatten under books
- Zip-top storage bags
- Keep away from heat
Eco-friendly alternatives and recycling suggestions
If you want to keep your art eco-friendly, choose alternatives to single-use bubble wrap and plan for responsible disposal from the start.
Use washable fabrics, silicone mats, or corrugated cardboard for textures. When done, recycle clean plastics or drop off at specialized centers.
- Reuse bubble wrap multiple times
- Swap to fabric or silicone
- Compost cardboard scraps
- Rinse and recycle plastics
- Donate usable materials
Comparison: Bubble Wrap Printing vs. Other Texture Printing Methods
When you compare bubble wrap printing to foam rollers, you’ll notice bubble wrap gives more distinct circular textures while rollers create broader, more uniform coverage.
Against stamps and stencils, bubble wrap is quicker for all-over patterns but less precise for detailed motifs.
Choose bubble wrap when you want playful, repeatable texture or a fast background effect rather than exact shapes.
Bubble wrap vs. foam rollers
Because both bubble wrap and foam rollers create repeating textures, choosing between them comes down to the look, scale, and control you want: bubble wrap gives crisp, circular dots and playful irregularities, while foam rollers lay down broader, more uniform coverage for smoother gradients and longer runs. You’ll pick bubble wrap for spotty, textured effects and rollers for even, continuous layers.
| Feature | Bubble Wrap | Foam Roller |
|---|---|---|
| Texture | Crisp dots | Smooth coverage |
| Scale | Small/modular | Large/continuous |
| Control | Irregular | Predictable |
Bubble wrap vs. stamps and stencils
Think of bubble wrap as a quick, playful stamp that makes repeating, imperfect dots. You’ll prefer it when you want texture, spontaneity, and easy coverage, while stamps give crisp, controlled motifs and stencils produce precise shapes. Choose based on desired effect, speed, and cleanup.
| Bubble Wrap | Stamps/Stencils |
|---|---|
| Textured dots | Crisp motifs |
| Fast, playful | Controlled detail |
| Easy cleanup | Reusable patterns |
| Variable pressure | Precise edges |
When to choose bubble wrap for a project
If you want playful, high-contrast texture with minimal setup, bubble wrap is a great pick—its imperfect dots create energy you won’t get from stencils or carved stamps.
Use it when you want quick variation, bold contrast, kid-friendly processes, low cost, or organic patterns.
- Fast results
- Bold textures
- Kid-safe options
- Cheap materials
- Unpredictable variation
Project Templates with Step-by-Step Variants
You can kick off three easy templates: a simple greeting card print with basic materials and quick steps, a large-scale abstract wall art plan with suggested supplies and a step schedule, and a custom fabric tote bag guide that includes painting steps and curing instructions.
Pick the template that fits your project size and gather the listed materials.
Follow the step-by-step variant for the finish you want—flat, layered, or textured—and adjust drying and curing times as noted.
Simple greeting card print materials and quick steps
For quick, colorful greeting cards, gather a few simple materials—bubble wrap, acrylic or tempera paint, cardstock, a brayer or roller, and scrap paper for test prints—and lay them out so you’re ready to work without interruption.
Press painted bubble wrap onto cardstock, lift carefully, repeat with layers or colors, trim, fold, and embellish.
- Bubble wrap
- Paints (acrylic/tempera)
- Cardstock
- Brayer or roller
- Scrap paper
Abstract wall art large-scale print materials and step plan
Start with a clear materials list and a flexible step plan so you can scale bubble-wrap printing up to wall-sized abstract pieces without wasting time or paint.
Plan layout, test color blends on scrap, choose rollers/foam for even coverage, secure bubble wrap to panels, and work in sections for drying.
- Large bubble wrap sheets
- Acrylic/mural paints
- Rollers and squeegees
- Painter’s tape and clips
- Drop cloths and respirator
Custom fabric tote bag step plan and curing instructions
When scaling bubble-wrap printing down to a wearable format, plan a clear step sequence that covers fabric selection, stencil or layout choices, paint consistency, and curing so your tote stays vibrant and washable.
Choose cotton or canvas, prewash, test prints, use fabric medium, press gently, and heat-set following paint instructions for durability.
- Prewash and iron
- Test color on scrap
- Use fabric medium
- Even pressure application
- Heat-set per label
FAQ
You probably have practical questions like whether you can use spray paint on bubble wrap and how to avoid bleed-through on paper.
You’ll want to know if prints are washable on fabric, whether patterns can be repeated for commercial use, and how long paint stays usable before cleaning.
Read on for concise answers and quick tips.
Can I use spray paint on bubble wrap?
Curious whether spray paint will work on bubble wrap? Yes — you can, but test first.
Lay wrap flat, spray several light coats from 8–12 inches to avoid pooling, and let each dry. Use well-ventilated space and wear a mask.
Note sprayed wrap may become stiffer and transfer differently than brushed paint, so check adhesion and print quality before committing to a project.
How do I get clean edges and no bleed-through on paper?
A few simple steps will help you get crisp edges and prevent paint from bleeding through paper when printing with bubble wrap.
Use a low-moisture, high-pigment acrylic or ink, dab excess off, and press evenly.
Tape bubble wrap edges with painter’s tape, place a backing board beneath, and lift gently after a few seconds to avoid smudging or seepage onto the work surface.
Is bubble wrap safe to use on fabric that will be washed?
Wondering whether bubble wrap printing will survive the wash? You can, but choose fabric paint or textile ink and heat-set per manufacturer instructions so prints endure laundering.
Test on scrap fabric first, use thin evenly applied layers, and avoid heavy buildup that flakes.
Wash gently on cool cycles and air-dry when possible. Reapply heat-set after multiple washes if prints fade.
Can I make repeatable patterns for commercial products?
Yes—you can create repeatable bubble-wrap patterns for commercial products, but you’ll need consistent materials, careful registration, and quality control to keep prints uniform.
Use a stable template, mark alignment points, and batch-mix paint for color consistency.
Test stamps on your substrate, document pressure and drying times, and inspect samples regularly.
Scale up only after reliable trial runs and recordkeeping.
How long does paint on bubble wrap last before it must be cleaned?
How long paint lasts on bubble wrap depends on the paint type, how thickly you applied it, and whether the wrap is exposed to handling or sunlight; generally, water-based paints will stay workable on the surface for a few hours to a day, while oil- or acrylic-based paints can remain tacky for a day or more and may need cleaning once they begin to flake, transfer, or clog the bubbles.
You should clean or replace wrap when paint dulls prints, peels, or builds up in bubbles.
Use warm soapy water for water-based paints and solvent or mineral spirits for oil or acrylic, working gently to avoid popping bubbles.
Dry thoroughly before storing to prevent mold or sticking.
Inspiration Gallery and Further Resources
Want next-level ideas? Check the gallery for photo prompts you can try, then follow the linked tutorials, printable templates, and supply sources to recreate or adapt them.
You’ll find step-by-step guides and materials lists to get started right away.
Photo ideas to try next
Looking for fresh ways to use painted bubble wrap? Try macro close-ups capturing texture, staged still lifes with layered prints, and action shots of rolling or stamping paint.
Photograph repeats for pattern studies, dreamy bokeh with backlighting, and color-focused flatlays for social posts. Experiment with black-and-white contrasts and seasonal themes to build a versatile portfolio of bubble-wrap art images.
Links to tutorials, printable templates, and supply sources
Those photo ideas will give you plenty of ways to showcase bubble-wrap prints, and you can strengthen each project with targeted how-to guides, printable templates, and reliable supply links.
Use curated resources to learn techniques, download patterns, and buy quality materials so your prints turn out great.
- Step-by-step tutorial roundup
- Free printable template pack
- Video demonstrations
- Curated supply store links
- Community gallery and inspiration