How to Paint Clouds on a Ceiling With Sponges for a Soft Sky Effect
You can transform a plain ceiling into a soft sky by rolling on a smooth blue base, then sponging layered off‑white clouds with a sea sponge or foam pouncer. Work in zones, dab loosely from a lighter core outward, blend edges with a clean damp sponge or soft brush, and add midtones for depth. Protect the room, practice on cardboard, and let paint cure before touchups. Keep going to learn layout tips, safety, and finishing tweaks.
What You’ll Make and Who It’s For
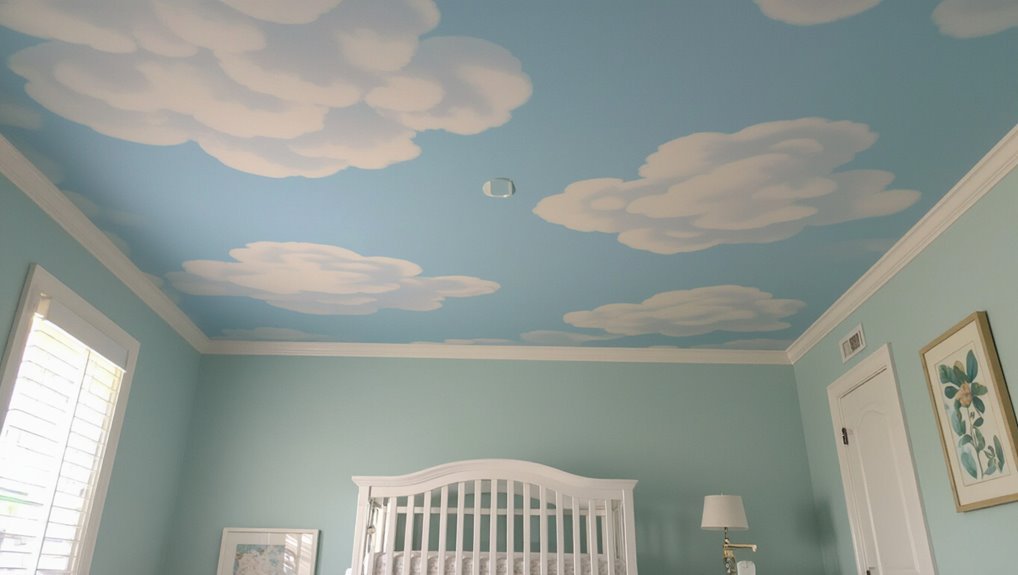
You’ll end up with a soft, realistic sky painted on your ceiling—drifting white clouds against a pale blue backdrop that makes the room feel larger and more peaceful.
You’ll create a calming focal point using sponge cloud painting techniques suited to nurseries, bedrooms, or studios.
You’ll enjoy creative ceiling designs that require minimal skill, low cost, and customizable scale to match your décor and mood.
Quick Overview: Paint Clouds on a Ceiling
Before you start, gather the few simple tools—ceiling paint in a soft sky blue, a lighter white or off-white for clouds, a sea sponge or foam pouncer, painter’s tape, a roller, and drop cloths—so your work goes smoothly.
Use basic cloud painting techniques and gentle sponge application methods to layer soft shapes.
Use simple cloud-painting techniques and a gentle sponge to softly layer airy, natural cloud shapes.
- Prep and base coat
- Sponge and blend
- Refine edges
Why Use Sponges for Soft Clouds
Now that you’ve got your base sky and basic sponge technique down, reach for a sea sponge or foam pouncer because they give the soft, irregular textures that mimic real clouds.
You’ll find sponge benefits in blending edges, controlling paint load, and creating varied opacity. You can layer gently, achieve realistic soft textures, and correct mistakes without harsh lines for a tranquil ceiling sky.
Choosing the Right Ceiling Paint Finish
Pick a flat or matte ceiling paint so your cloud work stays soft and shadow-free. You’ll avoid glare and let sponge textures read naturally.
Choose a flat or matte ceiling paint to keep cloud effects soft, glare-free, and naturally textured.
Consider ceiling paint finishes and subtle sheen effects when choosing durability and touch-up ease.
- Flat/matte: hides imperfections.
- Eggshell: slight sheen, use sparingly.
- Satin/semi-gloss: not recommended for clouds.
Picking Realistic Sky and Cloud Colors
When you choose sky and cloud colors, think about the light in the room and the mood you want to create; cooler, paler blues feel airy and distant, while warmer blues or even a faint teal can read like late-afternoon sky.
Use sky color inspiration from photos or fabric, then pick cloud color palettes that suit contrast and softness.
Test swatches under room lighting before committing.
Mixing Custom Cloud Shades From Base Paints
Start by gathering three base paints—your chosen sky color, pure white, and a soft neutral like beige or gray—because you’ll blend small amounts to control warmth and depth.
- Use basic color theory: cooler mixes recede, warmer highlights advance.
- Do paint mixing in small batches, testing on scrap cardboard.
- Create three tonal families—shadow, mid, highlight—keeping values subtle and cohesive.
Best Sponge Types for Cloud Painting
When you start stenciling clouds, choosing the right sponge makes a big difference: natural sea sponges give irregular, realistic textures, while synthetic foam sponges offer consistent, soft-edged effects.
You’ll also want a blend-and-texture sponge to mix tones and add layered depth. Try a few types on scrap paper to see which one matches the look you’re after.
Natural Sea Sponges
Natural sea sponges give you an organic, irregular texture that’s perfect for painting soft, billowy clouds on a ceiling. You’ll enjoy natural sponge benefits like varied pores and subtle blending; remember simple sponge care to rinse and air-dry.
- Choose medium-density, irregular shapes.
- Tap paint lightly for soft edges.
- Replace when frayed to maintain crisp textures.
Synthetic Foam Sponges
If you liked the organic look you get from sea sponges but want more consistency and control, synthetic foam sponges are the next logical choice for ceiling clouds.
You’ll enjoy predictable textures and improved foam durability, letting you repeat shapes without breakdown.
Choose from sponge varieties with different pore sizes and firmness levels to match your technique, ensuring even application and easy cleaning between sessions.
Blend And Texture Sponges
Reach for blend and texture sponges when you want precise cloud edges and smooth shifts—these specialty foams let you feather, dab, and lift paint with control so your clouds read soft and believable from across a room.
- Natural sea sponge — creates random cloud texture with subtle holes.
- Foam wedge — perfect for feathering and smooth gradients.
- Stipple pad — excellent for controlled sponge techniques and soft highlights.
How Many Sponges and Tools You’ll Need
You’ll only need a handful of sponges and a few basic tools to get professional-looking clouds: pick 3–5 sponge types (natural sea, cellulose, foam, and torn-edge) to vary texture.
Bring a small bucket, mixing sticks, several rags, and a damp sponge for blending.
Match sponge types to paint techniques—stippling, dabbing, and soft blending—to create layered, natural cloud effects.
Extra Tools: Rollers, Trays, Extension Poles
Choose a roller with a medium-nap cover so you’ll get good texture without leaving streaks.
Use a sturdy extension pole and lock it securely to reduce wobble and reach the center of the ceiling safely.
Keep a tray close by for quick reloads so you don’t interrupt your rhythm.
Proper Roller Selection
Picking the right roller, tray, and extension pole will make painting soft, cloud-like textures far easier and more consistent.
- Choose roller types with a 3/8″–1/2″ nap for smooth ceilings so your sponging blends well.
- Pick roller materials like microfiber or woven polyester for even pickup and release.
- Use a shallow tray to control paint depth and avoid overloaded rollers.
Extension Pole Tips
One or two well-chosen extension poles can save your shoulders and give you better control when painting clouds on a ceiling.
Choose poles matching your ceiling height and adjust extension pole height so you reach comfortably without overextending.
Prioritize extension pole stability—lock mechanisms and sturdy threads reduce wobble.
Balance a lightweight pole with a secure grip to maintain even pressure while sponge-stamping clouds.
Prepping a Smooth Ceiling Surface
Start by clearing the room and protecting floors, furniture, and fixtures with drop cloths and tape so you can work without interruptions.
For ceiling preparation and surface smoothing, you’ll inspect for dirt, grease, or peeling texture, then clean with mild detergent.
Follow these steps:
- Wipe and degrease thoroughly.
- Remove loose texture carefully.
- Prime patched areas before painting.
Fixing Cracks and Sanding Primer Spots
Before you start painting clouds, inspect any cracks closely so you know what needs filling.
Use a quality filler or patching compound to repair gaps, then let it dry fully.
Once the primer’s set, sand those spots smooth so your cloud layers go on evenly.
Inspect Cracks Thoroughly
Carefully inspect the entire ceiling for cracks, nail pops, and areas where the primer looks uneven—these flaws will show through soft cloud effects if you don’t address them.
Use steady light and walk the room to spot hairline faults; practice crack detection during your surface inspection so you won’t miss problem areas.
- Scan under angled light
- Mark visible lines
- Recheck after cleaning
Fill And Patch
1. You’ll fill hairline cracks and small holes with lightweight spackle, pressing it firmly for good ceiling preparation. Let it dry fully, then spot-prime repaired areas to improve paint adhesion.
For larger gaps, use joint compound in layers, smoothing each coat. Avoid overfilling; trim excess while slightly damp.
Clean dust before priming so your cloud painting stays flawless.
Sand Primer Smoothly
Smooth the primer with a light, even sanding to knock down ridges and feather the edges of your patched areas so they blend seamlessly with the surrounding ceiling.
You’ll use proper sanding techniques and select primer types suited to drywall. Work gently, wipe dust, and inspect before painting.
- Sand with 120–220 grit.
- Use oil- or water-based primer types.
- Clean dust thoroughly.
Protecting Furniture, Floors, and Fixtures
Before you pick up a brush, move as much furniture out of the room as you can and cover what’s left with drop cloths or plastic sheeting to keep paint splatters and dust off surfaces.
Use furniture covers, secure floor protection with tape, and apply fixture masking to lights, vents, and trim.
Keep rags and a small tray ready to catch stray paint spills immediately.
Safe Ladder and Scaffold Tips
When you’re ready to work up high, set your ladder on firm, level ground and angle it correctly so it won’t wobble.
If you need a scaffold, assemble it per the manufacturer’s instructions and lock all braces and platforms before stepping on.
Always wear appropriate fall protection—a harness, non-slip shoes, and secure tie-offs—so you can focus on painting without risking a fall.
Ladder Placement Basics
Place your ladder or scaffold on firm, level ground and set it so you can reach the work area without overreaching or leaning—your hips should stay between the rails.
Maintain ladder safety and ladder stability by checking feet, locking spreaders, and avoiding slippery spots.
- Inspect feet and locks.
- Angle ladder 4:1.
- Keep tools secured and close.
Scaffold Setup Essentials
Although scaffolds give you a steadier, wider platform than a ladder, you still need to set them up on firm, level ground, lock all braces and guardrails, and inspect planks for cracks or warping before you climb.
Check scaffold height limits, verify base plates or mudsills are secure, and stabilize wheels. Follow scaffold safety labels, keep tools organized, and don’t overload platforms.
Fall Protection Gear
Because working aloft raises your risk, you should wear and use proper fall protection gear every time you climb a ladder or step onto a scaffold.
Follow safety regulations and inspect equipment before use. Practice gear maintenance and secure anchors.
- Use a rated harness and lanyard.
- Stabilize ladders and lock scaffold rails.
- Replace worn gear immediately.
Setting Up a Comfortable Ceiling Paint Station
A sturdy folding table gives you a reliable home for brushes, rollers, trays, and a cup of water while you work on the ceiling; set it within easy reach of your ladder or scaffold so you won’t keep climbing up and down.
Organize drop cloths, clean rags, and a small trash bin.
Keep ceiling preparation notes and paint selection samples nearby, plus good lighting and a comfortable stool.
Marking Zones and a Rough Cloud Layout
Start by dividing the ceiling into three to six workable zones so you can focus on one area at a time without losing scale or getting paint fatigue.
Sketch a loose cloud layout with light pencil marks, noting focal clusters and negative space. Plan shifts between zones so cloud patterns read consistently.
Consider sponge techniques per zone to vary texture and depth.
- Zone edges
- Focal clusters
- Shift notes
Practicing Sponge Strokes Before You Start
Before you start on the ceiling, pick a sponge that matches the scale of your clouds — natural sea sponges give softer textures while synthetic ones are bolder.
Practice on cardboard to test how different strokes and paint loads translate, and tweak the pressure until the edges look right.
Once you’ve settled on motion and firmness, you’ll work more confidently overhead.
Choose The Right Sponge
Pick a soft, natural sponge that holds paint evenly and lets you practice smooth, cloud-like strokes without tearing or leaving harsh edges.
Choose by feeling sponge texture and comparing sponge shapes to match your desired cloud style. Try small variations to control blends.
- Round: soft edges for wispy clouds
- Oval: broader strokes for fluff
- Irregular: varied texture for realism
Test Strokes On Cardboard
Practice your sponge strokes on a scrap piece of cardboard so you can see how pressure, paint load, and angle affect the texture before touching the ceiling.
Try different sponge technique variations and color mixes, note which yields soft edges or defined shapes, and replicate successful cloud patterns.
Keep the cardboard nearby while working so you can quickly compare and adjust your approach before painting the ceiling.
Refine Pressure And Motion
Now that you’ve tested strokes on cardboard, focus on refining the pressure and motion you’ll use on the ceiling.
Practice until your sponge technique feels natural: light dabs, rolling edges, varied angles. Develop pressure control so clouds look soft, not blotchy.
Try these drills:
- Light tapping to blend.
- Gentle rolling for texture.
- Variable pressure sequences to build depth.
Step 1: Apply an Even Sky Base Coat
Start by painting a uniform sky base so your cloud work sits on a smooth, consistent color; use a roller with a long nap for ceiling texture and apply two thin, even coats, letting the first dry completely before the second.
You’ll prep surfaces, cut in edges neatly, and sand imperfections.
Good cloud painting techniques start with this steady foundation; sponge application tips follow afterward.
Step 2: Load the Sponge Correctly (No Drips)
Pick a natural sea sponge with varied texture so your clouds get soft edges and natural pores.
Dip it lightly and blot on a rag until it’s damp but not dripping, so you control the paint amount.
Practice a few test stamps to gauge saturation before working on the ceiling.
Choose The Right Sponge
Before you press the sponge to the ceiling, load it so paint’s evenly distributed but not dripping—squeeze out excess on a paper towel or the tray lip until the surface feels damp, not wet.
- Choose sponge materials that hold paint without saturating—natural or cellulose work well.
- Pick sponge shapes for varied cloud edges: round for puffs, flat for wisps.
- Test on scrap first.
Control Paint Amount
1. You’ll control paint amount by dabbing lightly on a paper towel after loading the sponge. Test spots guarantee proper paint consistency and avoid drips. Use a gentle sponge technique, reloading often with small amounts.
| Tip | Action | Result |
|---|---|---|
| Dab | Paper towel | No drips |
| Test | Small spot | Soft blend |
| Reload | Small amount | Even clouds |
| Clean | Rinse lightly | Longer sponge life |
Step 3: Dab Loose Cores for Soft Cloud Centers
Start by loading a soft, round brush with a slightly diluted mix of your base cloud color.
Then gently dab loose, irregular cores where you want the cloud centers to sit.
Use sponge techniques sparingly to blend edges and suggest varied cloud shapes.
- Dab light cores.
- Vary pressure.
- Feather edges with sponge.
Step 4: Add Midtones for Volume and Depth
Now add midtones to connect your light cores and darker edges, giving each cloud believable volume and depth.
You’ll use subtle cloud layering techniques, tapping diluted mid-gray or soft blue between highlights and shadows.
Work with varied sponge application methods—lighter pressure near highlights, firmer near shadows—to build gradual changes.
Step back often and adjust values until clouds read as three-dimensional without harsh banding.
Step 5: Blend Cloud Edges to Fade Naturally
Once your midtones sit comfortably between highlights and shadows, blend the cloud edges so they feather into the ceiling instead of stopping abruptly; use a clean, slightly damp sponge or a soft dry brush with light, circular dabs to soften hard lines and work outward from the cloud’s core until the change reads natural.
- Use subtle blending techniques to keep edges soft.
- Vary pressure to respect existing cloud shapes.
- Step back often to check shift balance.
Layering Clouds to Avoid a Flat Look
Although you’ve blended the edges, layering is what gives clouds depth, so work in translucent washes and successive highlights to build volume without obscuring previous passes. Use varied opacity, soft sponge lifts, and light-driven highlights. Practice cloud shapes with controlled contrast.
| Layer | Purpose |
|---|---|
| Base wash | Establish tone |
| Mid-layer | Add volume |
| Highlights | Define light |
Painting Varied Cloud Shapes for Interest
When you vary cloud shapes, you’ll keep the ceiling visually engaging and believable; mix soft, billowy forms with sharper, fragmented edges to mimic how real clouds change across the sky.
- Use creative sponge techniques for fluffy centers.
- Dab edges lightly to create fragmented contours.
- Blend sizes and density to show cloud shape variations and depth, keeping composition natural.
Paint Cirrus and Cumulus Clouds on a Ceiling
You’ll want different sponges for cirrus—soft, fine ones for feathery strokes—and chunkier sponges for the fluffy cumulus bases.
Start with thin, wispy layers for cirrus, then build up thicker, textured layers for cumulus, letting each layer dry slightly before adding the next.
Use light pressure and varied motions to keep the textures distinct and natural.
Choosing Sponge Types
Picking the right sponge makes painting cirrus and cumulus clouds easier and guarantees you get the textures you want.
Choose by sponge density and sponge shapes for desired effects. Consider:
- Soft, low-density cellulose for wispy cirrus.
- Firm, coarse sea sponge for fluffy cumulus.
- Small sculpted foam wedges for edges and highlights.
You’ll control texture, paint load, and finish.
Layering Cloud Textures
Now that you’ve matched sponges to cloud types, start building layers to give depth and movement to both cirrus and cumulus forms. Use cloud layering techniques and texture variations: alternate thin wisps for cirrus, fluffier dabs for cumulus, and blend edges subtly. Repeat layers, stepping back to assess balance.
| Layer | Technique |
|---|---|
| 1 | Thin wisps |
| 2 | Soft blend |
| 3 | Fluffy dabs |
| 4 | Edge smudge |
| 5 | Final highlights |
Use Negative Space to Keep the Sky Breathable
While you build soft, fluffy clouds, leave plenty of open sky between them so the ceiling doesn’t feel crowded; negative space lets each cloud read clearly and gives the room a light, airy atmosphere.
Use negative space techniques and breathable design to pace clouds. Follow these steps:
- Space clusters evenly.
- Vary cloud sizes.
- Step back occasionally to check balance.
When to Step Back and Evaluate Progress
How often should you step back to evaluate your cloudwork? You should pause every 10–20 minutes for a quick progress assessment and take longer creative breaks between layers. Step back, view from different angles, and note balance, contrast, and softness. Use this simple checklist:
| Look | Action |
|---|---|
| Distance | Squint to check shapes |
| Color | Adjust opacity |
Fix Streaks, Blobs, and Repeat Patterns
If streaks, blobs, or repeating patterns start to show, stop and address them before adding more detail:
- Lightly mist and dab with a clean sponge using streak removal techniques to blend edges and soften lines.
- For blobs, blot excess paint and use blob correction strategies—rework with gentle circling motions until uniform.
- Vary sponge pressure and rotation to break repeat patterns and restore a natural sky.
Touch Up Clouds After the Paint Dries
Let the paint fully cure—usually 24 to 48 hours—then stand back and scan the ceiling at different angles and light levels to spot areas that need touch-ups.
Use your sponge and a light hand to blend edges, layer translucent highlights, and soften harsh lines.
Practice cloud techniques on cardboard first, match tones, and make precise paint touch ups until the sky reads naturally.
Do You Need a Clear Coat for the Ceiling?
Wondering whether you need a clear coat on your painted cloud ceiling? You don’t always, but consider protection, sheen control, and cleaning ease. Weigh clear coat options against ceiling paint considerations before deciding.
- Protection: adds durability and stain resistance.
- Sheen: can change matte clouds to subtle glow.
- Maintenance: eases gentle cleaning without harming sponged effects.
Working With Textured vs. Smooth Ceilings
Before you seal or skip a clear coat, check whether your ceiling is smooth or textured — that choice changes prep, paint application, and the cloud technique you’ll use.
For textured ceilings, use textured techniques: dab lightly, work around high spots, and accept irregular edges.
On smooth surfaces, sponge softly for subtle blends, feather edges, and layer thin washes for realistic, airy clouds without obscuring ceiling detail.
Adapting Technique for Vaulted or Angled Ceilings
On vaulted or angled ceilings you’ll adjust your stroke direction and paint consistency to follow the slope and maintain natural cloud shapes.
You’ll also plan your access points so you can reach each area without stretching—use extension poles when possible.
Secure scaffolding or a sturdy ladder before you start and double-check anchors and footing for every position.
Working With Ceiling Angles
When your ceiling slopes or peaks, you’ll need to adjust brush angles, paint consistency, and your approach to perspective so the clouds read naturally from the floor.
You’ll work with ceiling angles using adapted painting techniques to keep shapes balanced.
- Tilt sponges to match slope.
- Thin washes near ridges.
- Step back often for correct perspective.
Securing Scaffolding And Safety
Sloped and vaulted ceilings change how you set up your workspace, so secure scaffolding and ladders with care before you paint. You’ll check scaffolding stability, follow safety regulations, wear harnesses, and angle platforms for balance. Move slowly, test footing, and keep tools tethered to prevent drops.
| Task | Tool | Check |
|---|---|---|
| Platform | Scaffolding | Stability |
| Fall protection | Harness | Fit |
| Tools | Tether | Secure |
Add Subtle Sunrise or Sunset Color Shifts
If you want your ceiling clouds to feel like dawn or dusk, introduce very thin glazes of warm color along the horizon areas of the composition.
Use a gentle touch so the sunrise palette or sunset gradients barely show through the clouds. Blend edges with a dry sponge.
Try these steps:
- Mix translucent glaze.
- Apply thin horizon wash.
- Soften with sponge.
Lighting Tips to Enhance Your Painted Sky
Because light defines the mood of your painted sky, plan both natural and artificial sources to make the clouds read realistically and comfortably in the room. Use varied lighting techniques—soft diffused fixtures, dimmers, and window placement—to enhance ceiling ambiance and depth.
| Source | Mood | Tip |
|---|---|---|
| Natural | Airy | Use sheer curtains |
| Ambient | Soft | Install dimmers |
| Accent | Dramatic | Angle fixtures |
Painting Neatly Around Fixtures and Vents
Before you start painting clouds, make sure you cover light fixtures and vents with plastic and painter’s tape so paint won’t stain them.
Use a steady hand and an angled brush to cut in neatly where the ceiling meets fixtures, keeping your strokes controlled and minimal.
If possible, remove vent covers and wash them before painting around the opening for a crisp, professional finish.
Protecting Fixtures Properly
Start by turning off the power and removing or loosening light fixtures, switch plates, and vent covers so you can work without masking awkward edges; tape any remaining fixed elements with low-tack painter’s tape and cover them with plastic or paper to keep paint off vents, bulbs, and trim.
Follow fixture safety and fixture protection tips:
- Seal edges with tape.
- Bag bulbs and vents.
- Reinstall carefully.
Cutting In Carefully
1. You’ll use steady cutting techniques and precision tools to paint neatly around fixtures and vents without removing covers. Tape edges, steady your hand, and use a quality angled brush for crisp lines. Work in short strokes, wipe excess paint, and blend sponge clouds up to the taped edge for a seamless finish.
| Step | Tool |
|---|---|
| 1 | Tape |
| 2 | Angled brush |
| 3 | Small brush |
| 4 | Damp cloth |
| 5 | Light sponge |
Vent Cover Preparation
Getting the vent covers ready makes painting around fixtures much easier and cleaner. So, remove any loose dust with a vacuum or brush. Unscrew covers when possible, and label small fasteners so you can reinstall them correctly.
If you can’t take a cover off, mask its edges tightly with painter’s tape and press the tape into seams to keep paint from creeping under.
- Check vent cover types before removing.
- Note vent cover placement for reinstalling.
- Clean, tape, or store covers safely.
Cleaning and Storing Sponges and Leftover Paint
A quick rinse right after you finish prevents paint from drying into the sponge fibers, so work over a sink with warm water and mild dish soap, squeezing until the water runs clear;
then wring and reshape the sponge before letting it air-dry flat to keep it usable for your next touch-up.
Use simple cleaning techniques, label and seal leftover paint in airtight jars, and store sponges dry in a breathable container.
Estimated Time and Cost for the Project
You can expect the whole cloud-painting project to take a few hours to a full day depending on ceiling size and drying times.
Plan for materials like primer, ceiling paint, a couple of colors for clouds, sponges, and drop cloths, which typically run $30–$100 for a small room.
I’ll break down a simple timeframe and a rough cost estimate so you know what to budget.
Estimated Timeframe
Although the exact time will depend on room size and your experience, plan on 4–8 hours for a single small room and 1–2 full days for larger rooms or detailed cloudwork.
Budget extra time for drying between coats and touch-ups so you’re not rushed.
- Break tasks for better time management: prep, paint, touch-ups.
- Schedule drying windows into project planning.
- Allow buffer for unexpected delays.
Approximate Material Cost
Expect to spend roughly $50–$250 on materials for a typical room, depending on paint quality, tools, and whether you need primer or specialty finishes.
Plan budget considerations: basic paint, primer, sponges, rollers, trays, drop cloths, and touch-up brushes.
For savings, compare material sourcing at big-box stores, local suppliers, and online sales.
Factor in small extras for clean-up and disposal.
Fixing Adhesion, Peeling, or Flaking Problems
Peeling paint on a ceiling is usually caused by poor adhesion, moisture, or an incompatible paint layer, and you’ll need to diagnose the cause before repairing it.
Peeling ceiling paint usually signals poor adhesion, moisture issues, or incompatible layers—diagnose the cause before repairing.
- Sand and clean the area, apply a primer with adhesion solutions to bond old paint.
- Replace damaged drywall or fix leaks to stop flaking.
- Repaint with compatible paint; use peeling prevention primers and proper drying time.
Child‑ and Pet‑Safe Paint and Ventilation Tips
Once you’ve fixed adhesion or moisture issues and prepped the surface, think about the paint and airflow you’ll use while painting near kids and pets.
Choose child safe paints and non toxic materials, or pet safe options if animals roam.
Open windows, run fans, and schedule painting when occupants can stay away.
Seal and store leftovers properly to minimize exposure.
Design Ideas: Themed Skies, Stars, Accents
A themed sky can transform a ceiling from plain to magical—pick a concept that suits the room (daytime blue with fluffy clouds for a nursery, a twilight gradient with stars for a bedroom, or a stormy mural for a playroom) and plan accents like metallic star points, glow-in-the-dark paint, or painted birds to reinforce the theme.
- Use themed clouds for depth.
- Add subtle celestial accents.
- Balance color and focal points.
Final Checklist to Finish Your Cloud Ceiling
Before you call the project complete, run through a quick checklist to make sure your cloud ceiling looks polished and holds up: Check edges, blend cloud patterns, seal with matte varnish, and clean droplets. Add final touches like soft highlights.
| Item | Action |
|---|---|
| Edges | Smooth lines |
| Blend | Soften shifts |
| Sealant | Protect finish |
| Detail | Highlight clouds |
Frequently Asked Questions
Can I Paint Clouds Over Popcorn or Heavily Textured Ceilings?
You can, but texture considerations matter: heavy popcorn makes cloud painting techniques harder and yields uneven sponging. You’ll want to prep or skim-coat for smoother results, or embrace texture and adapt your sponging technique accordingly.
Will Ceiling Paint Yellow Over Time From Humidity or Smoking?
About 80% of indoor discoloration comes from pollutants, so yes, ceilings can yellow over time from humidity effects and smoking. You’ll need regular ceiling maintenance, dehumidifiers, and cleaning to slow staining and restore brightness.
How Do I Repair Water-Stained Areas Before Cloud Painting?
You’ll remove loose material, treat water damage with a stain-blocking primer, patch and sand damaged drywall or plaster, then clean and dry the area thoroughly; good ceiling preparation prevents stains from bleeding through your cloud paint.
Can I Use Spray Sealant Instead of Brushing a Clear Coat?
Yes—you can use spray sealant; spray sealant benefits include even coverage and fast drying, and spray sealant application is quicker for delicate textures. Just test first, ventilate well, and apply thin, overlapping coats for best results.
How Long Before I Can Rehang Ceiling Fixtures or Fans?
Like a sunrise waiting to warm the room, you should wait 24–48 hours for drying time; you’ll guarantee fixture safety by confirming paint and sealant are fully cured per manufacturer instructions before rehanging fans or light fixtures.
Conclusion
You’ve now got everything to sponge soft clouds on your ceiling—an easy, affordable way to transform a room. Studies show people spend about 90% of their time indoors, so making ceilings calming really matters for mood and sleep. With the right paint finish, safe ventilation, and simple sponge techniques, you’ll create a dreamy sky that’s kid- and pet-friendly. Try a themed variation, check adhesion, and enjoy the peaceful effect every day.