How to Paint Cracks in a Deck So They Stay Sealed Through Every Season
You can keep deck cracks sealed through every season if you prep, choose flexible products, and finish correctly. Clean and dry the area, remove loose paint and splinters, then use a flexible exterior filler or epoxy for deep gaps and a paintable exterior caulk for narrow splits. Sand and prime where needed, then apply a compatible elastic deck paint or stain. Maintain and reapply as boards move or weather; keep going for full step‑by‑step guidance.
Quick Answer Can You Paint Cracks in a Deck So They Stay Sealed Through Every Season?
Wondering if you can paint cracks in a deck so they stay sealed through every season?
You can improve short-term protection by following how to paint cracks in deck: clean, dry, fill gaps with suitable filler, sand, prime, and apply flexible exterior paint or stain.
Expect maintenance; paint helps water resistance but won’t permanently stop movement or deep structural issues.
Basic Understanding What Causes Deck Cracks and Why Paint Alone Isn’t Enough
You’ll notice deck boards and composites expand, contract, and break down as moisture, UV, temperature swings and freeze-thaw cycles work on the material.
Paint can hide cracks but won’t stop movement or seal deep gaps the way a proper filler or sealant plus the right stain or protective coating can.
Before you paint, you should understand the difference between paint, stain, sealant and filler so you pick products that handle both appearance and structural needs.
How wood and composite materials expand, contract, and degrade
Because wood and composite boards respond differently to moisture, temperature, and sunlight, cracks form for reasons paint can’t fully stop.
You’ll notice wood swells, shrinks, and splits as fibers move and rot over time. Composites resist rotting but can lose structural integrity, delaminate, or become brittle.
You must address material movement and degradation, not just cosmetic paint.
Role of moisture, UV, temperature swings, and freeze-thaw cycles
Although paint can hide surface flaws, it can’t stop the underlying forces that crack a deck: moisture, sunlight, temperature swings, and freeze-thaw cycles all work together to move and weaken boards.
You’ll see swelling, drying, UV breakdown, and seasonal splitting. These forces open seams and pry paint loose, so you’ll need flexible repairs and proper moisture management to keep cracks sealed year-round.
Difference between paint, stain, sealant, and filler
Those environmental forces won’t stop, so you need products that do different jobs: paint covers and colors, stain soaks into wood and highlights grain, sealant flexes to keep moisture out of gaps, and filler rebuilds missing material. You’ll choose based on exposure, movement, and aesthetics—paint for color, stain for grain, sealant for joints, filler for gaps.
| Product | Purpose | Best use |
|---|---|---|
| Paint | Surface color | Low-move boards |
| Stain | Penetrates wood | Show grain |
| Sealant | Flexible barrier | Cracks/joints |
| Filler | Rebuild material | Deep gaps |
Overview of the Best Long-Term Approach
You’ll need to decide when a board can be repaired and when it’s safer to replace it to keep the deck sound.
Plan major work for dry, mild seasons so paint and sealants cure well and last.
Gather the right tools and materials up front—saws, fasteners, filler, sandpaper, primer, and exterior-grade paint—to avoid delays.
When to repair vs. when to replace boards
When deciding whether to patch a cracked deck board or swap it out, focus on cause, extent, and expected lifespan: minor surface splits from weathering can be repaired and sealed, but structural cracks, rot, or repeated failures mean replacement is the smarter long-term choice.
Inspect fasteners, joists, and moisture patterns; repair if damage’s superficial and isolated.
Replace when stability, safety, or longevity are compromised.
Ideal seasonal timing for lasting results
Because paint bonds best to dry, stable wood, plan your crack repairs for a season with moderate temperatures and low humidity so the patch, primer, and topcoat all cure properly.
Aim for late spring or early fall, avoid freeze/thaw cycles and midsummer heat, and check weather forecasts for several dry days.
Curing under steady conditions gives you durable, longer-lasting seals.
Tools and materials you’ll need
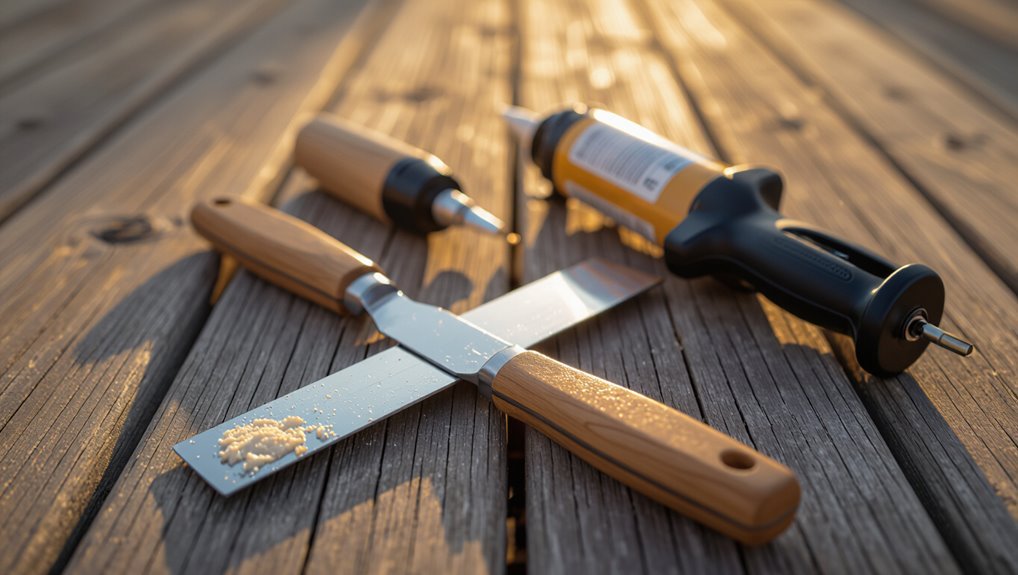
Now that you’ve picked the right season, gather the right tools and materials so your repair lasts.
You’ll need quality supplies and a clear process. Prepare a clean, dry surface before sealing.
- Caulk or flexible wood filler
- Exterior primer and paint
- Sandpaper and a putty knife
- Brush, roller, and painter’s tape
Step-by-Step Guide to Prepare, Repair, and Paint Cracks
Before you start painting, you’ll want to follow a clear prep-and-repair sequence so the finish lasts.
First inspect and map cracks, rot, and any structural issues, then clean the surface thoroughly and remove loose paint or splinters.
Next choose the right repair method—filler, epoxy, caulk, or board replacement—and address damaged fasteners before priming and painting.
Step 1 Inspect the deck thoroughly: mapping cracks, rot, and structural issues
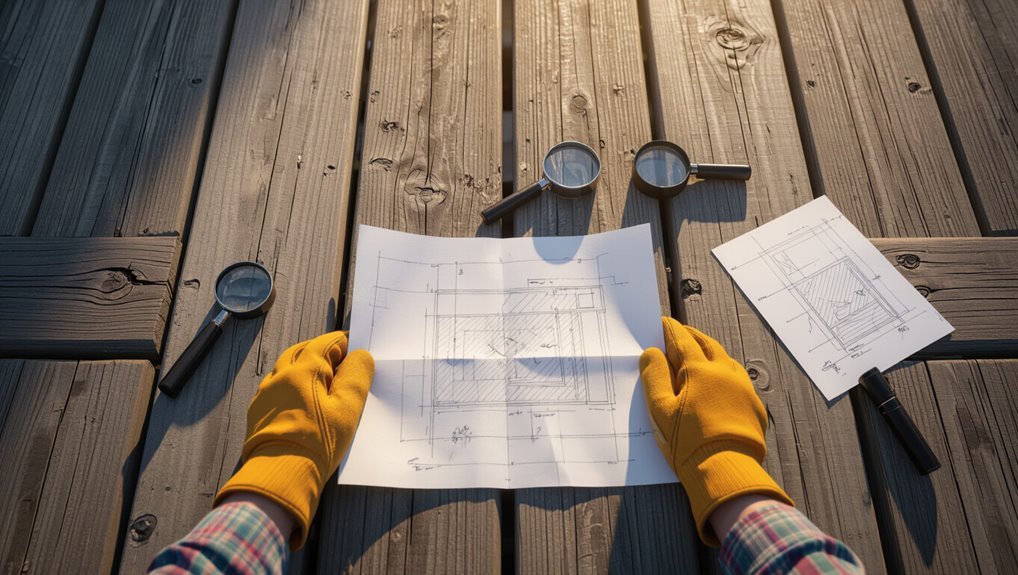
Once you’ve cleared the deck of furniture and debris, walk the entire surface methodically to map every crack, soft spot, and any signs of rot or structural damage.
- Note crack length, width, and location.
- Press boards to find soft or hollow spots.
- Inspect joists and rail posts for movement or decay.
- Photograph and mark areas for repair planning.
Step 2 Clean the surface: washing, mildew removal, and drying times
Step 2 is all about cleaning: wash the deck thoroughly to remove dirt, loose paint, and mildew so repairs and paint will adhere properly.
- Sweep debris, then rinse with a garden hose.
- Use a mildew cleaner or diluted bleach, scrub stubborn spots.
- Rinse thoroughly to avoid residue.
- Let the deck dry 24–48 hours (longer in cool or humid conditions) before repairing or painting.
Step 3 Remove loose paint, splinters, and deteriorated wood (sanding vs. scraping)
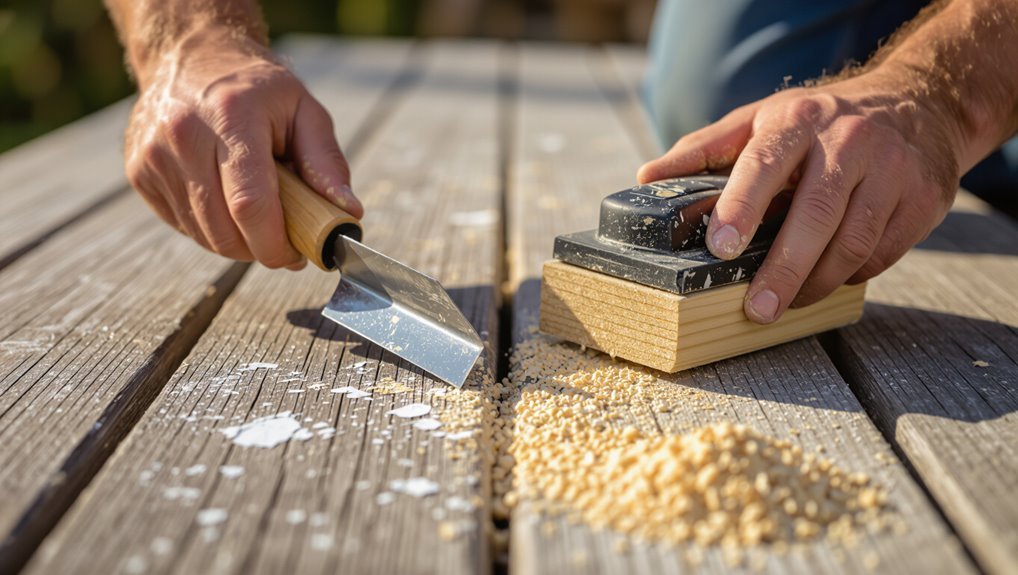
Start by removing all loose paint, splinters, and rotten wood so new fillers and coatings can bond properly; use a stiff scraper for peeling paint and a coarse sanding block or orbital sander to feather edges and smooth splintered areas, taking care not to gouge the timber.
- Scrape peeling paint.
- Sand rough spots.
- Remove loose fibers.
- Vacuum debris and wipe clean.
Step 4 Repairing cracks: choosing between wood filler, epoxy, caulk, and flexible deck fillers
When choosing a repair material, you’ll pick epoxy wood filler for wide, structural gaps and polyurethane caulk for joints or areas that need flexibility.
For deep cracks, you’ll pack epoxy in layers or use a backing material, while hairline cracks are best sealed with thinned caulk or a flexible deck filler applied sparingly.
In the next steps we’ll cover specific application tips and curing times so your repairs hold up under traffic and weather.
When to use epoxy wood filler vs. polyurethane caulk
Although both epoxy wood filler and polyurethane caulk can fix cracks, they serve different jobs and choosing the right one depends on the crack size, wood movement, and whether you’ll be painting.
Use epoxy for wide, structural gaps and areas needing sanding or paint adhesion.
Use polyurethane caulk for narrow, moving joints or where flexibility and weatherproofing matter; it won’t sand smooth.
Application techniques for deep vs. hairline cracks
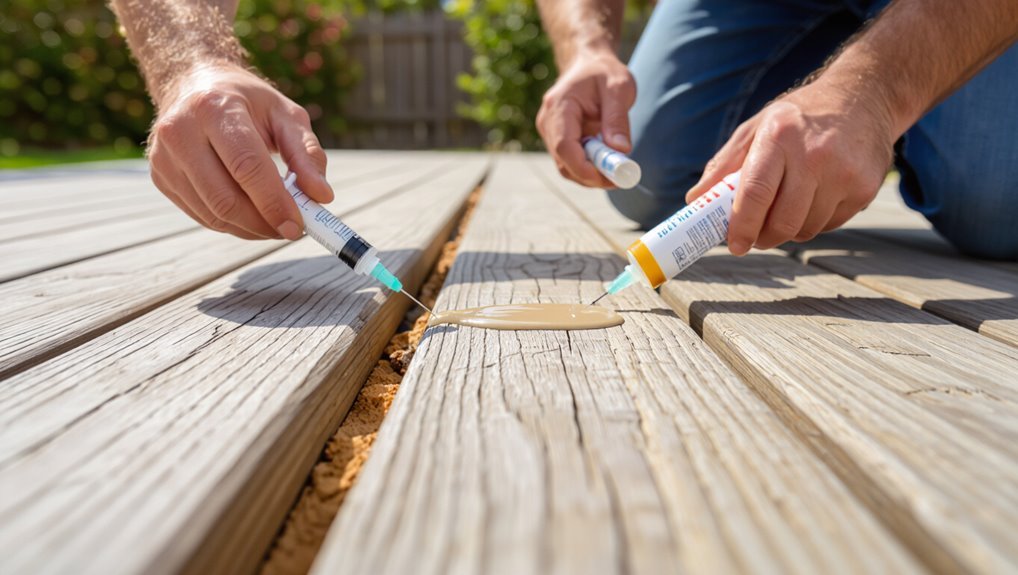
Now that you’ve picked between epoxy for larger, structural gaps and polyurethane for narrow, moving joints, you’ll choose different application methods depending on crack width and depth.
For deep cracks, pack epoxy in layers, curing between passes, then sand flush.
For hairline cracks, run a thin bead of flexible caulk, tool it smooth, and wipe excess.
Prime and paint after curing.
Step 5 Replacing badly damaged boards or fasteners
Inspect the deck closely and remove any boards or fasteners that are cracked, rotten, or loose so your repairs and paint will last.
Replace damaged boards with matching lumber, cut to fit, and fasten with corrosion-resistant screws. Remove rusted nails and swap in deck screws or stainless fasteners.
Confirm joists beneath are sound; sister any weakened joist before reinstalling boards for a stable, lasting surface.
Step 6 Priming: product types and application tips
Step 6 covers priming — the essential bridge between your repairs and a durable finish — and choosing the right product and technique will determine how well paint adheres and resists moisture.
Use a quality exterior primer formulated for wood or composite, apply thin even coats with a brush or roller, sand lightly between coats, and allow full curing time before painting to prevent blistering.
Step 7 Painting/topcoating: choosing weatherproof paints and application methods
Now you’ll pick a weatherproof finish suited to your deck material—100% acrylic or elastomeric paints work well on wood, while low-VOC, oil-modified or specialized composite coatings suit composite boards.
Follow the manufacturer’s recommended number of coats (usually two) and observe the specified drying time and recoat window to guarantee proper adhesion.
If conditions are cool or humid, allow extra cure time before light use to prevent tackiness or peeling.
Recommended paint formulations for wood and composite decks
Although choosing the right paint depends on your deck’s material and exposure, you’ll want formulations that flex with temperature changes, resist moisture, and bond well to either wood or composite surfaces.
For wood, pick high-quality acrylic latex or oil-modified elastomeric coatings with mildew inhibitors.
For composite, use 100% acrylic or specialty composite paints with strong adhesion promoters and UV stabilizers to prevent peeling and fading.
Number of coats, drying time, and recoat windows
When you’re planning the paint stage, decide on the number of coats based on the product type and surface condition: typically two coats for opaque deck paint, one to two for transparent stains.
Allow manufacturer drying times—usually 2–24 hours between coats. Touch only when the previous coat’s tack is gone; full cure can take days to weeks.
Adjust for humidity and temperature.
Step 8 Sealing and finishing: adding clear sealers or protective topcoats
Seal the work to protect your repairs and keep the finish looking fresh—apply a clear sealer or protective topcoat that’s compatible with your paint and the deck material.
Choose a UV-resistant, water-repellent formula, apply thin even coats with a brush or roller, and follow manufacturer drying times.
Inspect for missed spots, sand between coats if needed, and allow full cure before foot traffic.
Materials and Product Comparison for Sealing Cracks
You’ll want a clear comparison of fillers, caulks, primers, paints, and sealers so you can pick the right products for your deck’s cracks.
I’ll outline a simple table of pros and cons for each product type and highlight which options work best in cold, humid, or high-UV conditions.
That way you can match materials to your climate and avoid common failure modes.
Comparison table: fillers, caulks, primers, paints, sealers
Materials matter—so you’ll want a clear comparison of fillers, caulks, primers, paints, and sealers before you start fixing cracks in your deck. Use the table to pick products by function, cure time, and surface prep. Match flexibility and adhesion needs to crack size, then follow manufacturer instructions for best results.
| Product | Key use | Notes |
|---|---|---|
| Filler | Deep fills | Sandable |
| Caulk | Flexible seams | Paintable |
| Primer | Adhesion | Seals wood |
| Paint/Sealer | Finish/protect | UV, water resistance |
Pros and cons for climate-specific choices (cold climates, humid, high-UV)
After you’ve matched product types to crack size and surface prep, consider how climate shifts product performance—what works in one region can fail in another.
In cold climates, pick flexible, low-temp cure sealants to resist freeze-thaw.
In humid areas, choose mildew-resistant, fast-drying formulas.
For high-UV regions, use UV-stable, pigment-rich coatings to prevent chalking and breakdown over time.
Common Mistakes That Cause Repairs to Fail
Don’t expect a lasting repair if you work on dirty or damp boards—sealants and paints won’t bond properly.
Avoid rigid fillers on flexible decking, skip primers, or mix incompatible products, because those choices lead to cracking and peeling.
Also, don’t paint in bad weather or when temperature and humidity are out of range, since curing will fail.
Repairing on dirty or wet surfaces
If you try to fix cracks on a dirty or wet deck, the patch won’t bond properly and the repair will fail quickly.
Clean debris, mildew, and moisture first; dry the surface thoroughly. Use a stiff brush and a suitable cleaner, rinse, and allow full drying time.
Only apply filler and primer to a clean, dry substrate to guarantee adhesion and longevity.
Using rigid fillers on flexible boards
When you use a rigid filler on a deck board that flexes, the patch will crack or pop out as soon as the wood moves.
You should pick a flexible, paintable caulk or elastomeric patch designed for exterior wood.
Prep the crack, follow cure times, and avoid hard epoxies on joist-bending boards.
Flexible products move with the deck and hold paint longer.
Skipping primer or using incompatible products
Although it might seem like an extra step, skipping primer or mixing incompatible products will undermine your repair before it even dries: paint won’t bond properly, patches can peel, and mismatched materials can react or fail under weather and movement.
Use a primer compatible with both wood and your chosen paint or sealant, follow manufacturer compatibility charts, and test a small area before committing.
Painting in poor weather or wrong temperature/humidity
Because paint cures through chemical and physical processes, you’ll get weak bonds and visible failures if you’re working in the wrong weather or during extreme temperature and humidity swings.
Don’t paint when it’s too cold, hot, damp, or when rain’s likely. Read product specs for temperature and humidity ranges, wait for stable conditions, and use rapid-dry formulas only when recommended to guarantee lasting adhesion.
Best Practices and Seasonal Maintenance to Keep Cracks Sealed Year-Round
Keep a simple inspection checklist — quarterly for movement and drainage issues, and a more thorough annual review — so you catch small cracks and paint chips early.
When you spot minor damage, do quick touch-ups with matched paint and flexible filler, and note any repeating trouble spots.
Store tools and leftover products clean, dry, and labeled so you can respond quickly each season.
Annual and quarterly inspection checklist
Inspect your deck at least quarterly and perform a thorough annual review so small cracks never turn into major problems; regular checks let you spot hairline splits, loose boards, and failing sealant early, when repairs are quick and inexpensive.
- Check for new cracks, rot, and loose nails.
- Test rail and stair stability.
- Inspect paint and sealant continuity.
- Clear debris from gaps and drains.
Touch-up strategies for small cracks and paint chips
Small, timely touch-ups will stop hairline cracks and paint chips from becoming bigger repairs, so you should carry a simple kit and follow a seasonal routine.
Keep sandpaper, a putty knife, wood filler, primer, and matching paint ready.
Clean and dry the area, sand edges, fill and cure, prime, then paint thin coats.
Recheck after storms and winter thaw.
How to monitor and manage deck movement and drainage
Because wood expands, contracts, and settles with seasons, you’ll need a simple routine to monitor movement and manage drainage so cracks stay sealed year-round.
Inspect joints, fasteners, and posts quarterly; note gaps or shifted boards. Clear debris from gaps and gutters, direct downspouts away, and add or adjust grading and splash blocks.
Reseal or caulk shrinking joints before heavy rain or freeze.
Storage and care for tools and leftover products
When you’re done sealing cracks, store tools and leftover products so they’re ready and effective next season: clean blades and rollers, empty or tightly cap cans and tubes, and keep solvents and caulk in a cool, dry place away from direct sunlight and freezing temperatures.
Label containers with date and contents, wrap brushes in plastic, dispose of unusable materials per local rules, and inventory supplies before the next project.
Cost, Time, and Effort Estimates
You’ll usually spend much less doing the repairs yourself — expect basic DIY crack patching and painting to run from $20–$200, while hiring a pro can cost several hundred to a few thousand dollars depending on scope.
Plan on minutes to an hour for prep per small crack, 15–30 minutes to fill and sand each repair, and a few hours to paint a whole deck, with larger projects taking a day or two.
If cracks are widespread, the wood is rotting, or the structure feels unsafe, don’t hesitate to hire a professional.
Typical cost ranges for DIY vs. professional repair
Budget matters: deciding whether to tackle deck crack repairs yourself or hire a pro comes down to how much you’ll spend, how long you’ve got, and how confident you’re with the tools.
DIY materials and sealants typically run $30–$150 for a small to medium deck.
Hiring a contractor usually costs $200–$1,200+ depending on extent, labor, and local rates.
Time estimates per step and total project duration
Although the total time depends on deck size and crack severity, a typical small-to-medium repair project takes a few hours to one full day.
Plan for prep, filling, sanding, and finishing as distinct steps so you can schedule breaks and weather windows.
Prep: 30–60 minutes.
Filling: 15–45 minutes plus cure time (up to 24 hours).
Sanding: 20–40 minutes.
Painting/sealing: 30–60 minutes plus dry time.
When to hire a pro: signs you need expert help
If cracks run deep, bridge wide gaps, or the deck flexes underfoot, call a pro—these are signs the problem goes beyond a simple DIY patch.
You should hire an expert when rot, structural damage, or extensive board replacement is present.
Expect pros to assess costs, provide firm timelines, and deliver warranty-backed repairs.
Budget for labor, materials, and inspections to avoid recurring issues.
Case Examples and Scenario-Based Recommendations
You’ll get different advice depending on the situation: for small hairline cracks on a new deck you’ll want the fastest durable fix, while deep cracks and rot on an older deck force a repair-versus-replace decision.
For composite decks with surface fissures, you’ll need product-specific recommendations and compatible fillers or sealants.
We’ll walk through brief case examples and clear next steps for each scenario.
Small hairline cracks on a new deck fastest durable fix
Start by evaluating the cracks’ depth and location so you can pick the fastest, most durable fix for hairline splits on a new deck.
For shallow, stable gaps, sand lightly, clean debris, apply a flexible acrylic or elastomeric filler, then prime and paint.
Work in mild weather, follow cure times, and spot-check annually to touch up before gaps widen or moisture intrudes.
Deep cracks and rot on an older deck repair vs. replace decision
The quick fixes that work for hairline cracks won’t hold up when boards show deep splits or rot, so you’ll need to decide whether to repair or replace based on extent, location, and long-term risk.
If rot is localized, replace affected boards, reinforce joists, then seal and paint.
Widespread decay or structural compromise means full replacement for safety and longevity.
Composite deck with surface fissures product-specific approach
When your composite deck shows surface fissures—hairline splits, shallow checks, or weathered grain—you can usually address them without ripping out boards by choosing products matched to the composite’s material (capped vs. uncapped, PVC vs. wood-plastic blend) and the damage pattern; in many cases a manufacturer-approved filler, compatible sealant, and a light sanding or brushing will restore appearance and slow moisture intrusion while preserving warranty coverage.
Use color-matched fillers, flexible sealants, follow cure times, and test stains on scrap to guarantee adhesion and appearance.
Frequently Asked Questions
You probably have quick questions about lifespan, materials, and safety—like how long a filled crack will last, whether house paint works on a deck, or if caulk’s enough for structural damage.
You’ll also want to know how soon you can walk on the deck after painting and whether paint merely hides cracks or actually slows them.
Below are clear answers to those common concerns.
How long will a painted/filled crack last?
Because conditions and prep vary, a painted or filled crack can last anywhere from a single season to several years; you’ll typically get 1–5 years of service from a well-prepared, properly filled and painted repair on a deck.
Longevity depends on wood movement, moisture, UV, traffic, and quality of filler and paint.
Inspect annually and touch up or re-seal when you see shrinkage or coating failure.
Can I use exterior house paint on a deck?
Can you use exterior house paint on a deck? You can, but it’s not ideal.
House paint lacks the flexible, wear-resistant binders and slip-resistant additives deck paints or stains offer. If you choose house paint, prep thoroughly: clean, sand, prime with a bonded exterior primer, and expect more frequent touch-ups.
For longevity and safety, pick products made for decks.
Is caulk sufficient for structural cracks?
How well will caulk handle structural cracks? You shouldn’t rely on caulk alone for structural issues.
Caulk fills gaps and prevents moisture but lacks strength for load-bearing or moving cracks.
Assess the damage: consult a professional for joist or beam problems, replace or reinforce damaged members, then use appropriate fillers and sealants.
Caulk is a cosmetic, not structural, fix.
How soon after painting can I walk on the deck?
Once you’ve addressed any structural problems and applied the proper fillers or sealants, you’ll want to know when the deck’s surface is safe to walk on.
Wait until the paint’s tack-free time—typically 2–8 hours for fast-dry products, 24 hours for standard latex, and 48–72 hours for oil-based or cool, humid conditions.
Avoid heavy traffic for 7 days for full cure.
Will painting hide cracks or just slow them down?
Wondering whether paint will actually hide deck cracks or just slow their spread?
It won’t permanently hide deep fissures; paint and filler can mask minor surface splits and create a water-resistant barrier that slows deterioration.
You should use proper filler, sand smooth, and apply quality primers and paint.
Expect improved appearance and delayed cracking, not a permanent structural fix.
Visual Guide and Reference Resources
You’ll find photo examples showing each repair stage and the finished results helpful for matching your project to the right technique.
Check manufacturer resources and safety datasheets for product-specific application tips and hazard info.
Don’t forget to confirm local code considerations that might affect materials or methods in your area.
Photo examples of repair stages and finished results
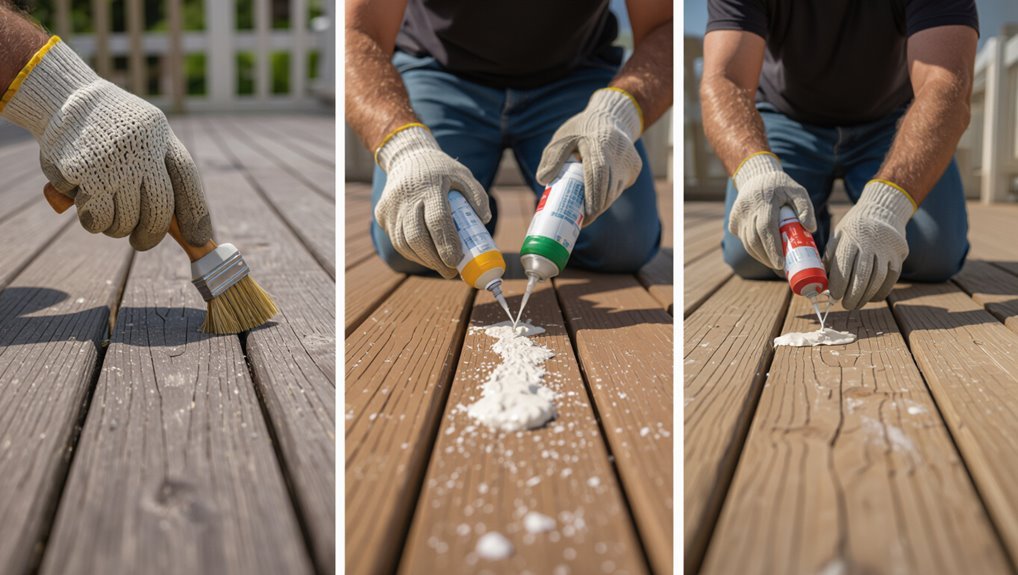
Photos show each repair step and the finished look so you can match your deck’s condition to a clear visual reference.
You’ll see crack assessment, cleaning, filler application, sanding, priming, and final paint in sequence. Use close-ups to compare crack width and filler depth.
Finished shots reveal texture, color match, and seam invisibility so you know when the job’s complete.
Manufacturer resources, safety datasheets, and local code considerations
Before you start, gather the manufacturer’s product guides, safety data sheets (SDS), and any local code references so you’re working from the correct specs and legal requirements.
Review labels, PPE, and ventilation limits. Check curing temps and substrate prep. Follow local permit rules.
- Confirm product compatibility
- Note VOC and disposal rules
- Save SDS for emergencies
- Record permit or inspection needs