
How to Paint Damaged Walls So They Look Flawless Again
Start by inspecting and prioritizing damage—hairline cracks, holes, stains, or moisture—then stop work if dampness exceeds safe levels. Remove loose paint, clean and treat mold or efflorescence, and choose patching or replacement based on material. Tape seams, embed mesh, feather joint compound, sand smooth, and prime stained or porous areas with a compatible primer. Match texture, sheen, and color, apply thin even coats, and check from different angles; keep going for detailed step-by-step guidance.
Make Damaged Walls Look Flawless: Overview
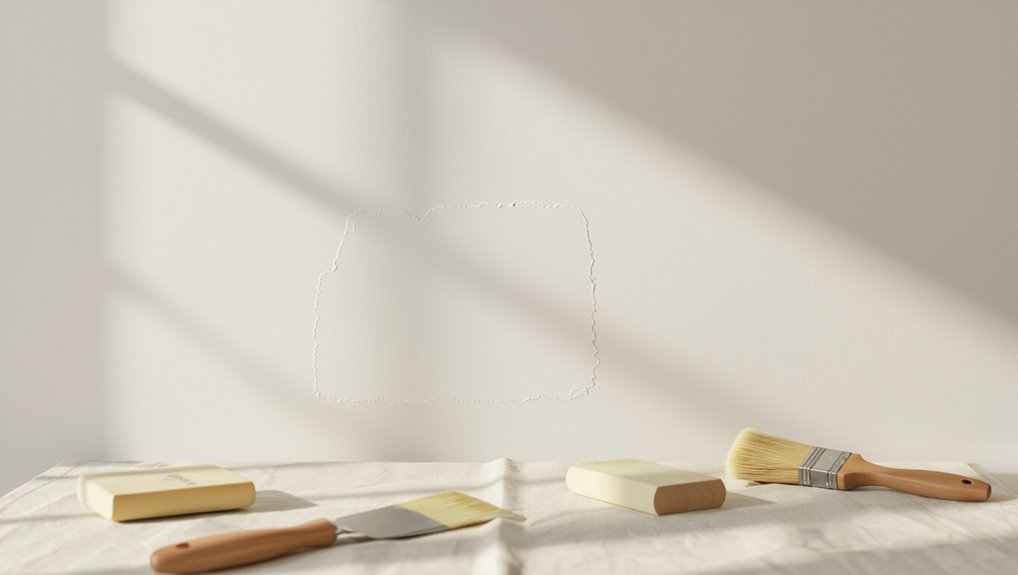
Start by evaluating the damage so you know what you’re up against: hairline cracks, dents, peeling paint, and stains each call for a different fix.
You’ll prioritize fixes that restore wall aesthetics, choose appropriate repair techniques, and plan materials and time.
Triage minor flaws first, then tackle deeper issues methodically so your painting produces a seamless, durable finish.
Inspect Wall Damage Step-By-Step
Start by closely evaluating surface cracks to see how wide and deep they are.
Then check for moisture with your touch or a moisture meter to rule out leaks before you repair.
Finally, identify the existing paint type so you choose compatible primers and topcoats.
Assess Surface Cracks
Before you grab filler or primer, take a close look at the cracks to determine their type and severity: hairline, shrinkage, settlement, or structural.
You’ll perform a quick crack assessment, noting length, width, direction, and nearby paint or plaster loss.
Match repair techniques to the type—simple fill, tape and compound, or professional structural repair—and prioritize safety and containment.
Check For Moisture
Because moisture can ruin repairs and paint, check walls for dampness before you patch or prime. You’ll do moisture detection with a probe or moisture meter, and perform a dampness assessment by visual inspection and touch. If readings are high, stop repairs, find the leak, and dry the area thoroughly.
| Tool | Method | Threshold |
|---|---|---|
| Meter | Probe reading | <15% |
| Touch | Surface feel | Dry |
Identify Paint Type
Once you’ve confirmed the wall is dry, identify the paint type so you choose the right prep and products; oil-based and latex paints require different primers and cleaners, and matching the finish (flat, eggshell, satin, semi-gloss) helps the repair blend in.
Scrape a small spot, use solvent or water to test, then note paint finishes and paint brands to buy compatible primer and touch-up paint.
When to Repair vs Replace Drywall
When the damage is limited to small holes, dents, or surface cracks, you can usually repair the drywall yourself; but if the sheetrock is buckled, saturated, crumbling, or spanning multiple damaged studs, replacement is the safer choice.
Consider drywall lifespan and replacement costs: repair when sound, replace if structural or mold-damaged.
You’ll save time and avoid repeat fixes by choosing replacement when integrity’s compromised.
Identify Wall Material: Drywall, Plaster, Paneling
Before you start repairs, you’ll want to identify whether the wall is drywall, plaster, or paneling by looking at texture, thickness, and seams.
Drywall usually has paper-faced seams and a uniform surface, while plaster feels harder and may have lath or hairline cracks.
Paneling is typically thinner, has visible grooves or sheets, and may be nailed at the edges.
Identifying Drywall Characteristics
Texture can tell you a lot about what’s behind your paint—drywall has smooth, even surfaces with taped seams and screw or nail dimples. Plaster often feels harder and may show hairline cracks or lath impressions. Paneling reveals seams or tongue-and-groove lines with a repeat pattern.
You’ll spot drywall types by uniform wall textures, joint tape, and fastener dimples.
- Check seams
- Feel surface
- Inspect fasteners
Recognizing Plaster And Paneling
Although they can look similar at a glance, plaster and paneling have distinct clues you can spot by touch and sight: plaster often feels dense and may show hairline cracks, rounded edges at moldings, or plaster keys along seams, while paneling reveals repeated seams, tongue-and-groove lines, or visible backing at joints.
Check plaster types for lath or skim coats, and note paneling finishes before prepping.
Essential Tools and Materials Checklist
1 list of tools and materials will keep your repair and painting job efficient: a putty knife and patching compound for holes and cracks, sandpaper (80–220 grit) and a sanding block, primer suited to your wall type, quality paint, brushes and rollers in the right nap and sizes, painter’s tape, drop cloths, a utility knife, a caulk gun with paintable caulk, and a sturdy ladder.
You’ll gather essential tools, Material types, Painting techniques, Surface preparation, Repair methods, Safety equipment, Color selection, Paint application, Texture matching, Finishing touches.
- Gather correct brushes and rollers
- Stock patching and primer
- Choose paint finish and color
Safety Gear and Precautions
Before you start scraping, sanding, or climbing that ladder, make sure you’ve got the right safety gear and know how to use it.
Wear goggles, a dust mask or respirator, gloves, and non-slip shoes.
Wear goggles, a respirator or dust mask, gloves, and sturdy non-slip shoes for safe, comfortable repairs.
Secure the ladder and ventilate the area.
Follow protective equipment instructions and safe practices to prevent inhalation, falls, and skin irritation so repairs go smoothly and safely.
Prep the Room Before Repairs
Once you clear the room and move furniture to the center or out entirely, cover floors and remaining items with drop cloths or plastic sheeting to catch dust, paint, and debris.
Check room layout and plan furniture positioning for after repairs. Tape edges, protect vents and trim, and label removed items.
- Block pathways
- Protect fixtures
- Create a staging area
Remove Loose Paint, Wallpaper, Debris
Start by scraping away any loose paint, peeling wallpaper, and flaking debris so you’re working with a sound surface.
Use a putty knife or scraper, then sand edges smooth.
Remove dust with a vacuum and tack cloth.
If different paint types were used before, note adhesion issues.
Match prep to wall textures to guarantee primer and new paint bond evenly.
Fix Tiny Nail Holes and Pinholes
First, prep the surface by wiping away dust and sanding any rough edges so the patch will adhere.
Then press a tiny amount of spackle or filler into each nail hole or pinhole and smooth it flush with a putty knife.
Once dry, sand lightly and wipe clean so you’re ready to prime and paint.
Prep The Surface
Before you paint, fix tiny nail holes and pinholes so your finish looks smooth and professional.
You’ll do surface cleaning first, then a quick damage assessment to spot spots needing attention. Tidy edges, remove dust, and guarantee paint will adhere.
- Wipe area with a damp cloth
- Inspect under good light
- Lightly sand for adhesion
Fill And Smooth
Now that the surface is clean and lightly sanded, you’ll move on to filling tiny nail holes and pinholes so the paint lays flat.
Use a small putty knife and lightweight repair compounds, pressing firmly and wiping excess. Let dry, then sand with fine-grit for seamless blending.
Employ targeted smoothing techniques to avoid overworking the area, then wipe dust before priming and painting.
Repair Medium Dents With Spackling
Grab a tub of spackling and a putty knife—you’ll use them to fill medium dents that sandpaper and primer can’t fix alone.
Apply thin layers, feather edges, let each cure, then sand smooth. These spackling techniques guarantee seamless dent repair before priming and painting.
- Work in thin coats
- Sand between layers
- Clean dust before priming
Patch Large Holes With Drywall Mesh
If those medium dents needed more than spackling, you’ll handle bigger damage with drywall mesh and joint compound.
Cut ragged edges, press mesh over the hole, then apply compound in thin layers, feathering each.
Trim torn edges, press mesh over the hole, then build thin, feathered compound layers for a smooth finish
Sand lightly between coats, clean dust, and repeat until smooth.
Prime the patched area before painting.
These patching techniques give strong, seamless results that hold up over time.
Repair Cracked or Popping Seams
First, you’ll assess the seam to see if the crack is surface-level or if the joint is separating.
Clean the area of dust and loose compound so new material will bond properly.
Then reinforce the joint with tape and fresh joint compound to prevent future popping.
Assess Seam Damage
When you inspect a wall, check seams closely for hairline cracks, gaps, or areas where the tape is lifting—these signs mean the joint compound or tape has failed and needs repair.
Determine seam types (butt, tapered, butt joints) and plan seam repairs based on damage severity.
- Identify lifting or separation
- Note cracked compound lines
- Mark edges needing full tape replacement
Prep And Clean
1 clear step before you start patching is to clean and prep the seam so repairs bond properly.
Remove loose paint, dust, and debris with a dry brush, then use mild cleaning solutions to eliminate grease or mildew.
Rinse, let dry completely, and scuff glossy areas lightly.
Proper wall preparation guarantees filler adheres and gives a smooth, long-lasting repair ready for finishing.
Reinforce And Tape
Reinforce cracked or popping seams by removing loose joint compound, widening the crack slightly with a utility knife, and embedding fiberglass mesh or paper tape across the gap so the repair won’t reopen.
Then apply joint compound, smoothing over the tape to guarantee full tape application and good adhesive strength before sanding and repainting.
- Press tape firmly for full contact
- Feather compound edges smoothly
- Allow compound to cure completely
Restore Plaster: Floating and Patching
Start by evaluating the damage so you know whether floating or patching is the right fix: floating smooths out shallow cracks and slightly uneven areas, while patching replaces missing or crumbling plaster.
Use plaster restoration techniques: clean loose debris, apply bonding agent, feather successive coats, and sand between layers.
For patches, trim edges, pack compound, cure, then finish smooth before priming and painting.
Treat Water Stains and Mold First
If you see water stains or mold, deal with them before you patch or paint: fix the leak, dry the area thoroughly, and remove any mold with a proper cleaner so stains won’t bleed through new paint or the repair compound.
Use targeted cleaning solutions, proven mold removal steps, surface treatment, drying techniques, and prevention methods.
- Isolate and dry the zone
- Apply cleaner and scrub
- Treat and seal before painting
Remove Efflorescence and Salt Stains
Look for white, powdery salt rings or crusts on masonry and brick—those are efflorescence.
You can brush loose deposits away and wipe remaining stains with a solution of equal parts white vinegar and water.
After the wall’s dry, apply a masonry sealer to prevent salts from returning.
Identify Salt Stains
White, powdery patches on your walls are usually salt stains—also called efflorescence—and they form when moisture pulls soluble salts out of masonry or plaster and evaporates.
You should inspect for damp sources and test if the powder brushes away. Learn salt stain causes to prevent recurrence and choose proper salt stain solutions before painting.
- Check for damp spots
- Rub test
- Trace water source
Clean With Vinegar
Once you’ve confirmed the powder is efflorescence and tracked down the moisture source, you can remove the salt deposits with a vinegar solution.
Mix one part white vinegar with four parts water, test a hidden spot, then scrub gently with a stiff brush.
Rinse thoroughly, let dry, and repeat if needed.
These cleaning tips prevent residue before repainting.
Apply Masonry Sealer
Seal the wall with a masonry sealer to lock out moisture and stop efflorescence from returning.
You’ll prep, test a small area, then follow sealer application instructions, using proper masonry techniques to guarantee even coverage and penetration.
Let it cure fully before painting to prevent salts from reappearing.
- Prep and dry the surface
- Apply sealer evenly
- Inspect after curing
Repair Textured Walls Without Losing Finish
Fixing textured walls without ruining the finish means matching both the texture and the paint so repairs disappear.
You’ll use textured wall techniques to feather patches, sand lightly, and blend edges. Choose the same sheen and tint, prime patched areas, then repaint carefully.
Follow finish preservation tips: test small sections, work in consistent light, and keep tools clean for seamless results.
Match Existing Texture With Simple Tools
After you’ve matched paint and feathered edges, you’ll want to recreate the wall’s texture so the repair vanishes.
Use simple texturing techniques and smart tool recommendations to blend seamlessly. Practice on cardboard, adjust compound thickness, then apply.
Practice on cardboard, tweak compound thickness, then apply simple textures and the right tools for a seamless blend.
- Dab with a sponge for subtle stipple
- Knockdown with a wide knife for flat peaks
- Spray with an aerosol texture for popcorn-like finish
Repair Baseboard and Trim Damage
Tackle baseboard and trim damage next by evaluating dents, gouges, and loose molding so you know what materials and tools you’ll need.
Remove loose sections, glue or nail gaps, and fill gouges with wood filler or spackling.
Match trim materials to original pieces and choose appropriate baseboard styles for replacement sections.
Prime repaired areas before painting for a seamless, durable finish.
Sanding Strategy to Blend Repairs
Start by sanding the repaired areas with a progression of grits—begin with 120–150 to level filler, follow with 180, and finish with 220 for a smooth, paint-ready surface.
You’ll use sanding techniques and blending methods to feather edges and match surrounding texture so repairs vanish.
- Sand lightly across edges
- Clean dust between passes
- Check from different angles
Choose Sandpaper Grit Per Step
Start with a coarse grit to remove bumps and shape the repair quickly.
Then switch to a finer grit to smooth the surface and feather edges for a seamless finish.
You’ll get a professional result by matching grit to each step.
Coarse Grit For Damage
When walls show gouges, deep scratches, or peeling layers, you’ll want coarse-grit sandpaper to remove loose material and level the surface quickly.
You’ll appreciate coarse grit benefits when tackling severe damage; use proper sanding techniques to avoid creating new gouges. Start broad, then inspect and repeat until stable.
- Use 60–80 grit for heavy removal
- Sand with the grain where possible
- Vacuum debris between passes
Fine Grit For Finishing
After you’ve removed rough material with coarse grit, switch to finer sandpaper to smooth scratches and blend repaired areas with the surrounding wall. Use fine grit for final smoothing, testing between 220–320 grit. Employ finishing techniques like circular passes and light pressure until seamless.
| Step | Grit |
|---|---|
| Prep | 120 |
| Smooth | 220 |
| Finish | 320 |
| Touch-up | 400 |
Control Dust and Clean While Sanding
Control dust as you sand by sealing the work area, using the right tools, and cleaning frequently so particles don’t spread through your home.
You’ll prioritize dust control and clean surfaces: vacuum with a HEPA filter, wipe down between passes, and swap to tack cloths for final dust pickup.
- Use a sander with dust collection
- Vacuum often
- Wipe with a damp cloth
When to Use Primer on Repairs
Want to know if that patched area needs primer? You should prime when repairs are porous, unevenly textured, or bare substrate shows—primer benefits include better adhesion and uniform absorption.
Use appropriate primer types for drywall, plaster, or patched compound. If the patch blends smoothly and existing paint is intact, you can often skip priming; otherwise, prime before painting to guarantee a flawless finish.
Choose Primer for Stains and Patches
1 clear rule: prime any area with visible stains or fresh patches before you paint.
You’ll prevent bleed-through and guarantee even sheen. For tough discoloration choose a stain blocking primer; for water or smoke stains pick an oil based primer.
Apply thin, even coats and let dry fully.
- Target stains first
- Seal patched drywall
- Sand between coats
Spot-Prime vs Prime the Whole Wall
Decide whether to spot-prime or prime the whole wall based on how extensive the damage and discoloration are: spot-priming works for isolated patches, but when stains, texture differences, or uneven sheen cover a large area, priming the entire wall gives a uniform base and reduces the chance you’ll see seams or color shifts after painting.
Assess spot prime benefits versus full prime considerations, then act.
Pick Paint Finish to Hide Flaws
Choose a flat or eggshell finish when you want to hide surface flaws, since their low sheen masks imperfections better than shinier options.
You’ll want to avoid high-gloss or semi-gloss finishes because they highlight bumps, scratches, and uneven patches.
Picking the right finish can make a repaired wall look smoother without extra work.
Matte Or Eggshell
Wondering which finish will best hide those dents and scratches? You’ll choose between a matte finish and an eggshell sheen depending on traffic and touch-ups.
Matte hides imperfections best; eggshell adds slight durability with low reflectivity. Pick what suits your room and maintenance needs.
- Matte finish: conceals flaws
- Eggshell sheen: easier to clean
- Match finish to use and light level
Avoid High Gloss
If you want to keep dents and scratches out of sight, skip high-gloss finishes. Choose matte or eggshell as high gloss alternatives; they diffuse light and hide imperfections. For sheen selection, test samples on damaged areas and view at different angles. Match durability needs—eggshell for livable rooms, matte for low-reflective concealment.
| Finish | Look | Best Use |
|---|---|---|
| Matte | Low sheen | Conceal flaws |
| Eggshell | Soft sheen | Everyday rooms |
| Satin | Slight sheen | Cleanable surfaces |
How Sheen Affects Flaw Visibility
While higher-sheen paints give a room a crisper, more washable finish, they also call attention to bumps, drips, and uneven texture—so you’ll see flaws much more readily than with flat or matte finishes.
Understand sheen impact and compare gloss levels to choose wisely.
- Use flat where texture shows.
- Reserve satin for moderate traffic.
- Avoid gloss on imperfect walls.
Choose Color and Sheen to Disguise Repairs
Choose midtone hues that won’t draw attention to patched areas or make them look flat against the rest of the wall.
Use a matte sheen to hide surface irregularities and minimize light reflection.
Make sure the color’s undertones match the existing paint so repairs blend seamlessly.
Pick Midtone Hues
Because midtones sit between highlights and shadows, they mask texture and seams better than extremes do. So pick a hue that blends with surrounding light instead of contrasting it.
You’ll favor muted colors per color theory to hide flaws and keep rooms calm. Choose tones with balanced saturation and warmth to unify patched areas.
- Test swatches on wall
- View at different times
- Match nearby finishes
Opt For Matte Sheen
Once you’ve settled on a midtone, think about sheen—flat, matte finishes hide surface flaws better than anything glossier will.
You’ll want matte benefits: reduced reflection, softer texture, and easier concealment of patches.
Test samples under room lighting to compare sheen effects; choose the dullest finish that cleans acceptably.
That subtle, low-luster option keeps repaired areas visually consistent with the rest of the wall.
Match Existing Undertones
While you’re picking paint, pay attention to undertones—those subtle hints of warm, cool, or neutral that make a color read differently on your wall—and match them to nearby areas so repairs vanish.
Use the color wheel to identify complements, practice undertone matching with small swatches, and pick a sheen that blends.
- Test swatches in different light
- Compare adjacent surfaces
- Adjust tint subtly
Best Brushes and Rollers to Use
Choosing the right brushes and rollers makes the difference between a smooth, professional finish and a frustrating repaint.
You’ll pick brush types based on paint: synthetic for latex, natural for oil.
For walls, choose roller options with nap length matched to surface texture—short for smooth, medium for lightly textured.
Keep quality tools clean to maintain edge control and even coverage.
Cut In Edges Around Patched Spots
When you cut in around patched spots, keep your hand steady and your brush angled to control the line.
Use short, confident strokes and don’t overload the brush so you can feather the paint into the surrounding wall.
That feathering blends the patch edge so repairs disappear once the whole wall’s painted.
Steady Hand Techniques
Usually, you’ll need a steady hand to cut clean edges around patched spots so the paint blends seamlessly with the surrounding wall. You’ll use steady strokes and good wrist control to follow patch outlines, keeping the brush tip angled and paint load light.
- Anchor your elbow for consistency
- Use a sash brush for precision
- Pause to wipe excess paint from the bristles
Feathering Paint Edges
Often you’ll want to feather the paint outward from the patched area so the new coat blends into the old without a hard line. Use a small brush, thin paint, and light feather strokes to soften the perimeter.
Work from center outward, tapping and sweeping to achieve edge blending. Let layers dry and repeat subtly until the patch disappears into the surrounding wall.
Rolling Technique to Avoid Lap Marks
Starting with a properly loaded roller, work in a consistent “W” or “M” pattern to spread paint evenly and keep a wet edge; this prevents lap marks by blending new paint into still-wet areas rather than letting sections dry unevenly.
Start with a loaded roller and use a steady “W” or “M” motion to keep a wet edge.
You should maintain proper roller overlap and follow nap direction for uniform texture.
- Keep a wet edge
- Maintain roller overlap
- Match nap direction
Paint Application Order for Repaired Rooms
Before you start painting, make sure you prime all repaired areas so the patch blends and the finish adheres evenly.
Then plan your topcoat sequence by tackling ceilings first, walls next, and trim last to avoid accidental drips. Following this order will give you a consistent, professional-looking result.
Prime Repaired Areas
Seal repaired spots with a quality primer so your final coat looks uniform and bonds properly. You’ll handle primer selection based on patch type, perform adhesion testing on small areas, and let primer dry fully before painting.
Follow these quick steps:
- Choose primer matched to substrate and finish.
- Test adhesion with tape or light scrape.
- Sand lightly between primer and topcoat.
Paint Topcoat Sequence
Now that repaired areas are primed and dry, plan the paint topcoat sequence so your work looks seamless and efficient. Start with ceilings, then walls, trim last to prevent splatter; use coat sequencing to minimize rework.
Apply full coats, let proper dry times pass, and finish with sheen layering—match finishes at joins so repaired patches disappear and shifts stay consistent.
How Many Coats Repaired Walls Need?
Typically, repaired walls need at least two coats of paint: one to build a uniform base over the repair and a second to match sheen and color, with a third applied when coverage still looks uneven or the wall has heavy texture differences.
You’ll plan coat count, respect drying intervals, and inspect between coats.
- Check coverage after each coat
- Wait full drying intervals
- Add spot touch-ups as needed
Feather New Paint Into Old Walls
Feather the new paint into the old by working thinly from the repair outward, brushing or rolling in overlapping, light strokes so the edge blurs instead of creating a hard line.
Use the feathering technique to taper thickness, blend sheen, and match texture.
Work quickly while edges are wet, inspect from different angles, and repeat thin passes until the paint gradation is invisible and smooth.
Drying Times: Patch → Prime → Paint
After you patch a hole, don’t rush into priming or painting — each layer needs time to dry fully.
Expect different wait times depending on the patching compound, primer type, temperature, and humidity.
I’ll walk you through typical cure times and how to adjust them for your conditions.
Drying Time Between Steps
Because wet compound and fresh primer need time to cure, plan your schedule so each step fully dries before you move on: let patching compound set per the manufacturer’s directions (often 24 hours for standard spackle, faster for lightweight or fast-dry formulas), sand and clean, then wait the recommended time for primer to dry—usually 1–4 hours for water-based primers and longer for oil-based—before applying paint to guarantee proper adhesion and a smooth finish.
- Check ambient humidity before starting.
- Test paint tackiness with a fingertip.
- Allow extra time when in doubt.
Factors Affecting Cure
When you’re planning patch → prime → paint, remember that drying times depend on three main factors: the material you’re using (spackle, joint compound, water- or oil-based primer), the job conditions (temperature, humidity, and airflow), and the layer thickness and number of coats—thicker or multiple layers take longer to cure, high humidity or low temps slow drying, and poor ventilation traps moisture.
You’ll monitor cure chemistry and Temperature dependence, adjust ventilation, and allow full cure before sanding or painting.
Troubleshoot Common Paint Problems After Repair
If you notice peeling, bubbling, or uneven color after repairing a wall, don’t panic—these issues usually have straightforward fixes you can handle yourself.
If your repaired wall peels or bubbles, don’t panic—clean, sand, prime, and repaint once fully cured.
Check surface tension and paint adhesion, clean and sand loose areas, then recoat properly.
Consider humidity and cure time before repainting.
- Sand, clean, prime
- Use compatible primers/paints
- Allow full cure between coats
Fix Visible Seams and Ridgelines
Once you’ve smoothed and primed repaired areas, address any visible seams or ridgelines left from joint compound or patching tape. Lightly sand ridgelines, feather edges, and wipe dust.
Apply thin coats of seam concealers where tape edges show, let dry, then sand again for a seamless shift. Check under natural light and repeat sparingly until the surface reads flat and uniform.
Stop Stains Bleeding Through Paint
First identify what caused the stain—water, smoke, rust, or mold—since that guides your approach.
Then choose a primer designed to block that specific stain type and apply it according to the label.
Once the primer’s dry, seal any remaining damage if needed and repaint for a clean, lasting finish.
Identify Stain Type
Stains come from different sources—water, smoke, rust, grease, or mold—and identifying which one you’re dealing with determines the right treatment to stop bleeding through paint. You should assess stain origins, test with a damp cloth, and use fabric testing for residues before choosing cleaning methods.
- Look for color, odor, texture
- Try a discreet fabric testing spot
- Note location and history
Use Appropriate Primer
After you’ve identified the stain type and cleaned the area, pick a primer designed to block that specific stain so it won’t bleed through your new paint. Choose a product with strong surface bonding, good odor control, and fast drying; perform adhesion testing on a small patch.
| Feature | Benefit |
|---|---|
| Surface bonding | Locks primer to wall |
| Fast drying | Speeds repainting |
Seal And Repaint
Seal the prepped area with a stain-blocking primer designed for the specific bleed type, making sure you cover beyond the damaged spot so edges won’t ghost through;
once the primer’s fully dry, apply two thin coats of your finish paint, letting each coat dry between applications to guarantee complete sealing and even color. You’ll control seal coating and proper repaint timing.
- Check primer compatibility
- Sand lightly between coats
- Inspect under varied light
Reinforce and Repaint High-Traffic Areas
When doorways, hallways, or stairwells see constant foot traffic, you’ll want to reinforce those wall sections before repainting to prevent chips and scuffs from coming back.
Start with traffic reinforcement: apply corner guards or drywall tape, patch dents, sand smooth.
For durable finish, use fabric backed repainting or heavy-duty primer and semi-gloss paint.
Touch up edges and inspect periodically to maintain protection.
Budget Hacks for Repainting Damaged Walls
A few smart shortcuts can stretch your repainting budget without sacrificing durability: prioritize repairs that prevent recurring damage, buy quality primer and a small amount of durable topcoat, and reuse or repurpose materials like leftover trim and hardware.
Stretch your repaint budget wisely: fix recurring damage first, invest in primer and a bit of durable topcoat, and reuse materials.
You can save by sourcing thrift store supplies and trying DIY primer swaps for small areas.
- Buy brushes and rollers used
- Salvage trim and hardware
- Mix paint remnants
When to Call a Pro for Damage
If repairs go beyond simple patching—like widespread mold, structural cracks, or persistent moisture—you should call a pro to assess and fix the root cause rather than patching symptoms.
You’ll want to hire contractor expertise for structural or extensive water damage, document issues clearly, and discuss an insurance claim when needed.
A pro prevents recurring problems and guarantees safe, lasting repairs.
Prevent Future Wall Damage Habits
Because small habits add up, you can prevent a lot of wall damage by being consistent about moisture control, impact avoidance, and maintenance checks. Use habit stacking to tie checks to daily routines and rethink furniture placement to reduce bumps.
Follow simple steps:
- Add a quick moisture check after showers.
- Pad corners and adjust furniture placement.
- Inspect walls monthly and fix scuffs promptly.
Maintenance to Keep Repairs Looking New
Keeping up with small habits makes long-term upkeep easier, but you’ll also need a simple maintenance routine to keep repaired spots looking fresh.
Wipe repairs gently, inspect monthly, and apply preventative sealing where needed to block moisture and stains. Keep a touch up schedule so paint matches stay consistent; note colors, finishes, and dates to make future fixes quick and seamless.
Eco-Friendly Materials and Low-VOC Options
Many eco-friendly paints now deliver great coverage and durability while cutting harmful fumes, so you can repair and refresh walls without compromising indoor air quality.
Choose low-VOC formulas, use sustainable primers to improve adhesion, and pick natural pigments for safer color.
You’ll reduce odors and toxins while getting professional results.
- Low-VOC paints
- Sustainable primers
- Natural pigments
Typical Time Estimates for Repairs
When you’re planning a wall repair project, realistic time estimates help you schedule tasks and avoid surprises. You’ll assess damage, prep surfaces, apply filler, sand, prime, and paint. Use clear task sequencing to set expectations and buffer for drying. Typical timelines depend on size and complexity; track each phase so your finish looks flawless.
| Task | Typical Time |
|---|---|
| Prep | 1–3 hrs |
| Repair | 2–8 hrs |
| Finish | 4–24 hrs |
Common Mistakes That Reveal Repairs
Don’t let sloppy prep or mismatched materials give your repairs away; small errors stand out once paint goes on. You’ll avoid obvious flaws by matching textures and feathering edges so hidden texture blends.
Don’t let sloppy prep betray repairs—match texture, feather edges, and prime so patched areas disappear.
Don’t skimp on sanding or primer—visible patching ruins finishes.
- Match texture, not just color
- Sand and feather edges smoothly
- Prime patched areas before painting
Final Checklist to Inspect Finishes
Before you call the job done, run a final inspection to confirm the repairs disappear into the wall and the finish looks consistent across the room.
Walk the space from different angles, check under varied lighting, feel for texture differences, and spot any missed seams or sheen variations.
Use a concise finish checklist: touch-ups, edge crispness, color match, and cleanup.
Frequently Asked Questions
Can Repaired Areas Accept Decorative Wall Treatments Like Wallpaper or Decals?
Yes — oddly enough, repaired areas can accept wallpaper or decals if you do surface priming and guarantee pattern alignment; you’ll want smooth prep, proper adhesive, and careful matching so flaws don’t betray your clever cover-up.
Will Radiators or Heaters Affect Paint Adhesion on Repaired Sections?
Yes, radiators can affect adhesion: you’ll want to control heat transfer and surface temperature, avoid painting against strong airflow patterns, and let paint curing occur at stable temperatures so repaired sections bond and dry properly.
Can Pets (Scratching) Undo or Damage Fresh Wall Repairs?
Sure — pets can. Right off the bat, pets’ scratching and pet behavior can undo fresh repairs if surfaces aren’t cured or treated; you’ll want scratch resistance primers, durable topcoats, and barriers to keep claws from undoing work.
How Do Humidity Changes Seasonally Affect Patched Plaster Longevity?
Seasonal moisture and temperature cycling can make patched plaster expand, contract, and craze, so you’ll see cracking or delamination over time unless you use flexible fillers, control indoor humidity, and allow full curing between seasons.
Are There Warranties or Guarantees for DIY Repair Work?
Yes—you can get manufacturer warranties on materials, but workmanship guarantees usually don’t cover DIY jobs; imagine a torn warranty ribbon: manufacturers back products, while workmanship guarantees typically require licensed pros and documented installations to apply.
