How to Paint Striped Walls – Easy Step-By-Step Method for Perfect Clean Lines
You can get crisp striped walls by planning layout, priming, and sealing tape edges before you paint. Measure and mark evenly, apply a uniform base coat, then use painter’s tape and press it firmly; seal the tape with the base color to prevent bleed. Cut in edges with an angled brush and roll the stripe color, keeping edges wet for smooth blending. Follow careful removal and touch-ups for perfect lines, and more tips await if you keep going.
Quick 5-Step Stripe Painting Overview
Start by planning your stripe layout and gathering supplies: paint, primer, painter’s tape, a level or laser, a good brush, and a roller.
You’ll prep walls with wall preparation tips, prime, measure and tape precise lines, apply base coat, then use stripe painting techniques to roll or brush the stripes.
Finish by removing tape and touching up crisp edges for a clean result.
Choose Your Stripe Style: Bold, Subtle, or Accent
Decide whether you want wide or narrow stripes, since stripe width dramatically changes the room’s feel.
Pick high-contrast or subtle color pairings to control how bold the pattern reads.
Finally, think about placement—full walls, a feature band, or a single accent stripe—to direct attention where you want it.
Stripe Width Options
Pick a stripe width that matches the room’s scale and the impact you want: wide bands make a bold, modern statement; medium stripes feel balanced and traditional; thin stripes act as a subtle texture or accent.
Choose stripe width options like narrow stripes for subtle stripes or wide stripes for bold stripes; try alternating widths or uniform stripes with careful color coordination.
- Narrow stripes
- Medium bands
- Wide stripes
- Alternating widths
Color Contrast Choices
Having settled on stripe widths, you’ll next choose how much contrast you want between colors—this will define whether your stripes shout, whisper, or simply highlight features.
Use color theory to select complementary colors or subtle seasonal palettes. Consider color schemes, psychological effects, mood setting, accent colors, light reflections and texture contrast.
Plan for possible color fading to keep stripes vibrant over time.
Placement And Accentuation
Three main stripe styles—bold, subtle, and accent—help you control where eyes land and how a room reads, so choose the one that matches your room’s function and furniture.
Use color psychology and visual balance to place stripes where you want focus or calm.
Pick size, direction, contrast, and placement to reinforce architecture and flow.
- Size
- Direction
- Contrast
- Placement
Pick Stripe Direction: Vertical, Horizontal, or Diagonal
Which way will best suit the room: vertical, horizontal, or diagonal? You’ll choose stripe orientation based on visual impact and design principles—vertical for height, horizontal for width, diagonal for energy.
Consider room dynamics, style cohesion, color psychology, and pattern mixing so stripes enhance rather than clash.
Think about space perception and how direction supports function and furniture placement before painting.
Measure Walls and Calculate Stripe Widths
Start by measuring each wall’s width and height with a tape measure, noting doors, windows, and trim so you can calculate uninterrupted stripe runs.
Use measure tools to calculate dimensions and wall area. Consider wall height, stripe spacing, width ratios, and stripe patterns for visual balance and aesthetic appeal.
Apply design considerations to finalize stripe widths before taping.
- Record dimensions
- Map openings
- Test ratios
- Confirm spacing
Mock Up Stripe Layouts (Paper or Software)
Start with paper mockups so you can sketch stripe placement and tape patterns at full scale before committing paint.
If you prefer tech, use digital layout tools or room-design apps to try color combos and adjust widths quickly.
Both approaches save time and help you visualize the final look.
Paper Mockups First
Before you touch a brush, mock up your stripe layout on paper or in simple software so you can see how colors, widths, and spacing play together; this lets you tweak proportions and visual rhythm without wasting paint.
Use different paper types and try varied mockup sizes to test scale and texture.
- Trace wall outline
- Mark measurements
- Test color swatches
- Adjust stripe widths
Digital Layout Tools
1 simple digital mockup can save hours of trial-and-error: use inexpensive apps or basic design software to recreate your wall dimensions, drop in color swatches, and experiment with stripe widths and spacing until the composition feels right.
Use layout software and visualization tools with a color picker, pattern generator, design templates, and a project planner.
Explore online resources for digital design guidance.
Choose the Right Paint Finish for Stripes
Finish choice matters when you’re painting stripes because sheen affects both look and practicality.
You’ll pick paint finish types for durability, touch-up ease, and cleaning. Consider sheen effects: low for hiding wall flaws, satin for mild shine, semi-gloss for trim-like durability, gloss for bold highlights.
- Matte/hide
- Satin/easy clean
- Semi-gloss/durable
- Gloss/accents
Select Colors and Contrast Levels for Stripes
Start by choosing a dominant hue that sets the room’s mood and anchors the stripe scheme.
Decide how much contrast you want—high contrast makes bold stripes, low contrast feels subtle and soothing.
Always test swatch combinations on the wall to see how light and surrounding colors affect the result.
Choose A Dominant Hue
When you pick a dominant hue, think of it as the room’s personality and let the remaining stripes support it rather than compete.
Use color psychology and deliberate hue selection to set mood, then choose accents that complement it.
- Pick a main color with intent.
- Test swatches in different light.
- Limit competing hues.
- Consider finish and saturation.
Balance Contrast Levels
Contrast is what gives striped walls their rhythm, so choose color pairings that match the mood you want—go high-contrast (think navy and white) for crisp, graphic impact, medium-contrast (muted blue and soft gray) for subtle definition, or low-contrast (tonal creams) for a gentle, blended look.
Consider color psychology to set tone, and balance contrast for visual harmony throughout the room.
Test Swatch Combinations
Because paint can look very different on a wall than in a chip, test several swatches on the actual surface and view them at different times of day to judge how your chosen contrasts read in real light.
You should test color combinations, test paint finishes, and test primer types while you test stripe widths and test application techniques.
- Sample colors
- Finish + sheen
- Tape brand trials
- Width mockups
Calculate Paint Quantities for Multiple Colors
Start by measuring the total wall area you’ll paint and break it down by stripe color so you can estimate how much of each paint you’ll need.
Use a paint quantity calculator and apply color ratio guidelines to apportion coverage per hue.
Account for primer, two coats, waste (10–15%), and surface texture.
Round up to nearest can size to avoid shortages.
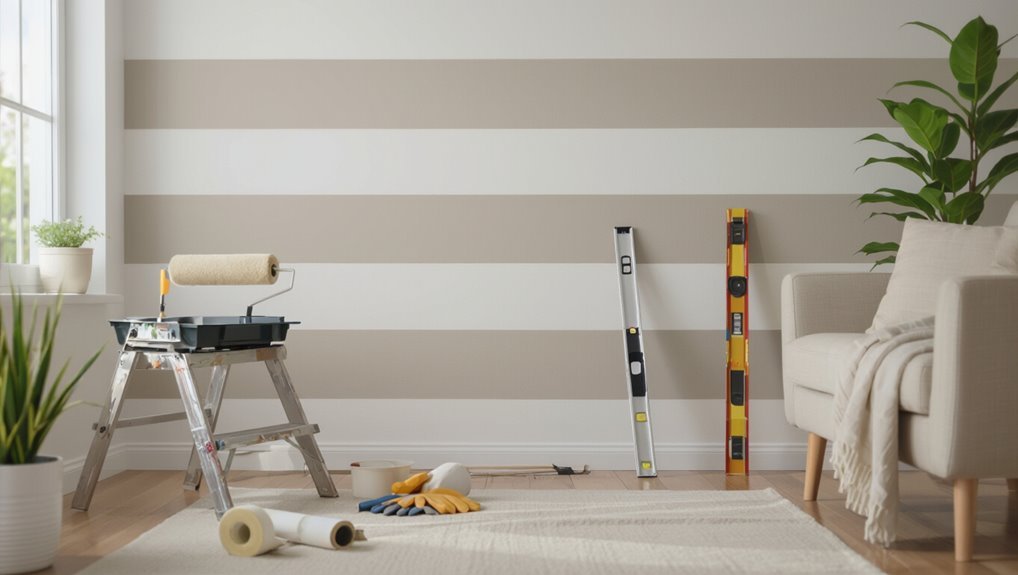
Essential Tools: Tape, Rollers, Brushes, Guides
Painting crisp stripes depends as much on your tools as on your technique. Use proper tape types for edges, focus on roller selection and brush quality, and do wall preparation first.
Plan color combinations, stripe patterns, and layout planning; test with mockup techniques. For cleanup tips, keep rags and thinner handy.
- Tape and guides
- Rollers and covers
- Brushes and angled tools
- Masking aids
Best Painter’s Tapes to Prevent Bleed-Through
When you want razor-sharp stripe edges, choosing the right painter’s tape is essential: look for tapes with clean-removal adhesives, a tight edge seal, and a backing that matches your wall texture and paint type.
You’ll compare painter’s tape types—low-tack for delicate surfaces, medium for general walls, high-adhesion for textured exteriors—and apply proper tape application techniques: press edges firmly and remove at a 45° angle while paint’s slightly tacky.
Why Quality Brushes Matter for Stripe Edges
You’ll notice the brush tip precision makes a huge difference when you’re cutting in stripe edges.
A quality brush lets you control paint flow right up to the tape line so you avoid blobs and feathering.
With the right brush, your edges stay crisp and you spend less time correcting mistakes.
Brush Tip Precision
Choose a high-quality brush and you’ll notice the difference at the stripe edge: a sharp, well-tapered tip lays paint precisely along the tape line, while a cheap, splayed brush leaves fuzz and uneven ridges.
You’ll match brush types to paint types, wall textures, and prep techniques for crisp edge detailing.
- Fine-tapered filament
- Angular sash brush
- Short-stroke technique
- Light loading, watch drying times
Edge Paint Control
If you want razor-sharp stripe edges, invest in a quality brush—its tapered filaments and firm backbone give you control over paint flow and pressure so you can feather right up to the tape without bleeding.
You’ll use edge techniques that rely on steady wrist motion and minimal paint load.
Treat premium brushes as precision tools: maintain, clean, and replace them to keep lines crisp.
Choose Rollers and Nap Length for Stripes
Start by matching your roller nap to the wall texture and stripe width so paint lays down evenly without extra bleed or texture.
Choose roller types and roller materials for desired texture effects and stripe finishes.
Consider nap lengths for paint absorption and roller coverage. Match application techniques to thin or thick nap.
- Smooth walls — short nap
- Light texture — 3/16″
- Medium texture — 1/4″
- Heavy texture — 3/8″
Prep Walls: Clean, Repair, Sand
Prep the walls by cleaning, repairing, and lightly sanding so your stripes go on smooth and the finish lasts.
You’ll tackle wall maintenance and surface preparation with simple DIY techniques: remove dust, fill holes, sand seams.
Consider paint selection and color psychology when choosing hues to support design inspiration, interior trends, room ambiance, visual balance, and subtle texture contrast before you tape and paint.
Prime Walls to Block Stains and Improve Adhesion
Before you tape and stripe, pick the right primer for your surface—stain-blocking formulas for water marks or a universal primer for fresh drywall.
Use a spot primer on any stains or patched areas so they don’t bleed through your stripes. A good primer also improves adhesion, giving cleaner lines and longer-lasting color.
Choose the Right Primer
Primer matters: it seals stains, evens porous surfaces, and helps your paint stripes stick and look true.
You’ll pick between oil-based, latex, or stain-blocking primers based on surface and finish. Learn primer types and application techniques to guarantee uniform coverage, adhesion, and fewer coats.
- Test adhesion
- Choose stain-blocking when needed
- Thin coats, even rolls
- Sand between coats
Spot Block Stains
One quick spot of primer can save you from ugly bleed-through and extra coats later. You’ll spot-treat stains after cleaning techniques, then apply surface priming for stain prevention. This aids paint durability, wall preparation, finish selection, and reduces color fading. Follow maintenance tips to keep stripes crisp and avoid future touch-ups.
| Hope | Relief | Pride |
|---|---|---|
| Calm | Clean | Strong |
| Bright | Secure | Fresh |
| Safe | Steady | Bold |
| Warm | Confident | Clear |
Improve Paint Adhesion
Start by sealing the wall with a quality stain-blocking primer so paint sticks evenly and stains don’t bleed through the stripes.
Use proper surface preparation and adhesion techniques to guarantee long-lasting stripes.
Follow these steps:
- Clean and sand glossy areas.
- Fill holes; smooth imperfections.
- Apply primer evenly; let cure.
- Lightly scuff before topcoat.
When to Paint a Base Coat Under Your Stripes
Wondering if you should lay down a base coat before taping your stripes? You should when the wall needs priming, when your stripe colors are translucent, or when you want base coat benefits like improved coverage and color consistency.
A proper base coat guarantees color harmony between bands, prevents bleed-through, and creates a uniform surface so your taped stripes read crisp and true.
Mark Your Stripe Layout: Tools and Tips
Now that your base coat’s dry and even, it’s time to lay out the stripes so they’ll look straight and balanced.
Now that the base coat is dry and even, plot your stripes carefully for straight, balanced results.
Use stripe layout inspiration and practical marking techniques to plan spacing and focal points. Gather tools, measure, and mark lightly.
- Measure room width and height
- Decide stripe widths and pattern
- Mark vertical reference points
- Check symmetry and adjust
Snap Chalk Lines for Precise Stripes
Once you’ve measured and marked your stripe positions, hook the chalk line and snap crisp guides across the wall.
Check each line against your layout as you go so the stripes stay parallel and evenly spaced. If a line looks off, remeasure and resnap before you start painting.
Measure And Mark
Measure carefully and mark clearly before you touch a brush; accurate chalk lines make the difference between crisp stripes and a messy finish.
Use measuring tools and proven marking techniques to set stripe widths, check level, and note start/end points.
Follow this quick checklist:
- Measure wall height and divide for stripe width.
- Mark top and bottom reference points.
- Verify with a level.
- Recheck spacing before snapping.
Snap Chalk Lines
Grab your chalk line and steady the reel—snapping crisp lines is what turns your measurements into visible guides. Use chalk line tools and proven chalk line techniques: anchor firmly, pull taut, lift, and snap once. Follow each guide, tape edges, and paint confidently along the crisp dust line.
| Reel held | Line taut |
|---|---|
| Anchor | Snap |
| Guide | Paint |
Verify Alignment
Before you snap the final chalk lines, double-check that each guide lines up from corner to corner and reads true at eye level—small misalignments show up as big wobbles across a wall.
Use these stripe alignment techniques and wall measurement tips to confirm accuracy:
- Sight along corners for straightness.
- Measure vertical spacing at multiple heights.
- Snap a test line and reassess.
- Adjust anchors, then snap final lines.
Make Paper/Cardboard Guides for Tricky Edges
When you hit corners, outlets, or trim that tape won’t neatly follow, make simple paper or cardboard guides to protect adjacent stripes and get crisp edges. Use varying paper types and cardboard thickness, balancing edge precision, guide durability, adhesive strength, cut accuracy, template sizes, and application techniques.
| Material | Thickness | Tip |
|---|---|---|
| Cardboard | Medium | Bendable edge |
| Cardstock | Thin | Precise cuts |
| Corrugated | Thick | Durable guard |
Apply Tape Correctly for Vertical Stripes
Once you’ve protected tricky edges with paper or cardboard guides, start laying the tape for your vertical stripes from the ceiling down, pressing firmly along the edge to seal it and prevent bleed-through.
- Measure and mark plumb lines for accurate tape alignment techniques.
- Smooth tape with a plastic card to bond edges.
- Overlap seams slightly where needed.
- Remove tape at a 45° angle after paint’s tacky — follow tape removal tips.
Apply Tape Correctly for Horizontal or Diagonal Stripes
Measure and mark your horizontal or diagonal stripe lines carefully so everything stays even and straight.
Use a quality painter’s tape rated for clean removal to prevent tearing or bleed-through on angled edges.
Once taped, press and seal the tape edges firmly—use a plastic putty knife or your fingernail—to keep paint from seeping under.
Measure And Mark
Start by deciding the stripe width and marking a level reference line across the wall with a pencil and a laser level so you’ve got a consistent guide; this keeps your horizontal or diagonal stripes straight and evenly spaced.
Measure and mark intervals, noting paint types and wall textures to adjust spacing and technique.
- Use a tape measure.
- Mark with pencil.
- Check level.
- Re-measure.
Use Quality Painter’s Tape
With your reference lines in place, pick a high-quality painter’s tape that’s rated for delicate surfaces if the wall’s finish is fresh or textured—it’ll stick without pulling paint.
Choose tape brands known for consistent tape quality and tape adhesion.
Apply straight, smooth tape for precise tape application and plan tape removal timing to protect edges.
Store unused rolls properly for tape longevity; consider tape alternatives only if necessary.
Seal Tape Edges
Before you paint, press the tape edges down firmly so paint can’t bleed under them—use a plastic putty knife or your fingernail and run it along each edge to create a tight seal.
- Check alignment for horizontal or diagonal stripes.
- Smooth edges to improve tape application.
- Wipe dust to boost paint adhesion.
- Seal corners and overlaps before painting.
Seal Tape Edges With Base Paint to Prevent Seepage
Press the painter’s tape firmly along the edges, then brush the base (background) paint over the tape line to seal it so your top color won’t bleed underneath.
After the seal dries, apply your stripe color confidently; the initial coat fills gaps from imperfect tape application, preventing paint seepage.
Remove tape at a 45° angle while paint is tacky for the cleanest edges.
Estimate Paint Per Stripe: Coverage and Coats
Before you start, figure out how much paint each stripe will need by calculating its square footage and checking the paint’s coverage per gallon.
Remember most colors require at least two coats for even color and one coat of primer if you’re covering a darker shade. That quick estimate helps you buy the right amount and avoid mid-project runs to the store.
Stripe Paint Coverage
One stripe’s paint needs will depend on its width, height, and the paint’s coverage per coat, so calculate stripe area first and then match that to the paint’s square-foot coverage to estimate how much you’ll need.
- Measure stripe area precisely.
- Check paint’s square-foot coverage label.
- Consider stripe paint consistency for even stripe paint application.
- Buy slightly extra for touch-ups.
Coats Per Stripe
Decide how many coats each stripe needs by considering color contrast, base coat, and the paint’s opacity: darker or bolder stripes over light primer usually take two coats, while light or semi-opaque colors might need only one plus touch-ups.
Factor paint types, finish options, stripe techniques and pattern variations.
Good wall preparation, layering methods, tool selection, color schemes, design trends and DIY tips guarantee smooth, even coverage.
Cut-In Techniques for Razor-Sharp Stripe Borders
Cutting in is where precision wins: use a steady hand, the right angled brush, and light pressure to paint crisp edges along your stripe lines.
You’ll practice cut in techniques for perfect stripe alignment, steady your elbow, and mask carefully.
Follow these steps:
- Remove excess paint from brush.
- Start from the ceiling edge.
- Use short, controlled strokes.
- Check alignment with a level.
Roll and Brush Sequence for Even Coverage
Start by cutting in along your stripe edges so you’ve got crisp lines to work from.
Roll the main areas next, overlapping the cut-in strokes slightly to blend the paint evenly.
Finish with a brush for any missed spots and feather the joins while the paint’s still wet.
Start With Cut-In
Begin by cutting a crisp edge along the ceiling and trim with a steady brush. Then follow immediately with a mini-roller to blend the brushed area into the field—this roll-and-brush sequence gives you even coverage and prevents lap marks.
Use proper cut in techniques and cut in tools for clean stripes.
- Load brush properly
- Work in small sections
- Feather edges with roller
- Check for drips
Roll In Overlaps
Roll the loaded mini-roller across each stripe so you overlap the brushed edge by a few inches. Then immediately follow with your brush to smooth the shift and remove any excess paint. That roll-and-brush rhythm keeps coverage uniform, hides lap marks, and guarantees the stripe lines stay crisp.
Maintain consistent paint application speed, check edges against your color palette, and work one stripe at a time.
Finish With Touchups
Inspect each stripe carefully and tackle any thin spots or stray marks with the same roll-and-brush rhythm you used earlier: lightly reload the mini-roller, feather onto the area, then immediately follow with a brush to smooth edges and blend texture for even coverage.
- Spot-assess seams for missed coverage.
- Use touch up techniques sparingly.
- Match roller nap for paint blending.
- Feather edges, then lightly roll to unify sheen.
Wait Times: Coats, Drying, and Tape Removal
1 important rule: give each coat the time it needs before you add another or remove tape. You’ll follow waiting periods and coat intervals to guarantee paint adhesion. Use precise tape techniques and removal strategies. Respect drying times between layers to avoid lifting.
| Step | Time |
|---|---|
| Primer | 2–4 hrs |
| Base | 4 hrs |
| Stripe | 2–4 hrs |
| Final | 24 hrs |
Remove Tape Safely Without Peeling Paint
When the paint feels dry to the touch, pull the tape back on itself at a 45-degree angle slowly and steadily to avoid lifting the fresh finish.
Use careful tape removal techniques to protect edges and follow paint preservation tips.
- Score edges with a utility knife.
- Peel slowly, not quickly.
- Warm stubborn tape with a hair dryer.
- Clean edges with a soft cloth.
Fix Bleeding, Jagged Lines, and Gaps
Even with careful taping and slow removal, you may still see paint bleed, jagged edges, or tiny gaps along your stripes — and you can fix them without repainting the whole wall.
Assess edge sealing and stripe alignment, clean edges, and use a fine brush to correct gaps.
Match paint consistency and color saturation, respect drying times, then apply finishing touches and tidy with cleanup techniques.
Touch-Up Methods That Look Hand-Painted
When you need to touch up a stripe, start by blending the new paint into the old so the edge reads seamless.
Match the original brush strokes and direction to keep the texture consistent.
Finish by lightly feathering with a dry brush to soften shifts and disguise any repair marks.
Blend Edges Seamlessly
If you want touch-ups that read as hand-painted, focus on feathering and color-matching so the repaired edge melts into the stripe instead of standing out.
Use subtle color blending techniques and edge softening methods to erase seams. Practice controlled pressure and small-radius blending.
- Thin glaze
- Dry brush fade
- Soft sponge dab
- Micro stippling
Match Brush Strokes
Start by studying the original brushwork so your touch-ups carry the same rhythm and texture as the rest of the wall.
Use the same brush and stroke length, practicing brush stroke techniques on scrap cardboard.
Thin paint to the same viscosity, test matching colors in small swatches, then work outward from the flaw with short, confident strokes so repairs blend invisibly into the stripe.
Feather With Dry Brush
Although you’re not repainting the whole stripe, feathering with a dry brush lets you soften edges and blend small touch-ups so they look hand-painted.
You’ll use a feathering technique with minimal paint on a dry brush, tapping and stroking lightly. Follow these steps:
- Wipe excess paint off brush.
- Lightly stroke along edge.
- Blend inward with short taps.
- Step back and repeat.
Paint Around Windows, Doors, and Trim
Tackle windows, doors, and trim carefully so your stripes look crisp where they meet molding and openings.
Mask window trim and door frames with precise tape application, plan color coordination and accent placement, and use painter’s caulk for tiny gaps.
Take protective measures for hardware and glass, cut in with a steady brush, and inspect edge detailing before removing tape for clean, sharp results.
Work Around Corners and Uneven Walls
When you get to corners and uneven walls, measure and transfer your stripe lines onto each adjacent surface so the pattern aligns visually. Use a level or laser to keep lines continuous and mark reference points on both faces.
- Prep: surface preparation and repair uneven surfaces.
- Tape: use corner techniques for crisp edge finishing.
- Blend: subtle paint blending at corner shifts.
- Check: guarantee visual balance across wall textures.
Match Stripes Across Multiple Walls or Rooms
If you want the stripes to flow from wall to wall or room to room, start by establishing a fixed reference line—usually from a prominent corner or doorway—and transfer that datum to every adjoining surface so all stripe edges line up. Use consistent tape height, measure twice, and check sightlines; striped wall aesthetics and color psychology influence perceived continuity and mood.
| Tool | Purpose |
|---|---|
| Level | Align datum |
| Tape | Mark edges |
| Laser | Verify alignment |
Continue Stripes Over Outlets, Switches, and Obstacles
Start by turning off power and removing outlet and switch covers so you can work with a flat surface; you’ll want the stripe pattern to cross these openings cleanly rather than stop at them.
- Note outlet placements and plan horizontal positioning for continuous lines.
- Use tape precision for crisp edge alignment around switches.
- Make vertical adjustments for obstacle navigation.
- Paint overlaps lightly, reinstall covers for switch coverage.
How to Stripe Textured Walls Without Mess
You’ve already handled outlets and switches, so now focus on how texture changes taping and paint application. Textured walls catch tape and hold excess paint, so you’ll need a slightly different approach.
Use textured wall techniques: press painter’s tape firmly, seal edges with a thin clear base coat, use a dense nap roller, and apply thin multiple coats.
Prioritize stripe prep essentials to prevent bleed and mess.
Use Stencils and Templates for Complex Patterns
When you want crisp, repeatable stripes or intricate motifs, stencils and templates give you control without freehand guesswork.
You’ll explore stencil techniques and template designs for pattern variations, creative applications, and border styles. Use layering methods for color blocking, repeat geometric shapes and intricate patterns, and add accent details for polish.
- Plan
- Align
- Paint
- Repeat
Speed Tips for Painting Large Rooms
Tackle large rooms faster by breaking the job into zones and using tools that cover more ground—think wide rollers, extension poles, and high-capacity paint trays—so you can work steadily without excessive ladder trips.
Plan coats around paint drying times, keep a wet edge to avoid lap marks, choose roller naps suited to wall textures, and prep bundles of taped edges so you move uninterrupted and finish sooner.
Ladder and Tool Safety and Comfort Tips
Ladders and tools should feel like extensions of your body—stable, well-adjusted, and easy to reach—so you can focus on clean stripes instead of awkward stretches or slips.
- Check ladder stability and perform a quick ladder inspection before climbing.
- Set correct ladder placement for safe painting posture.
- Use safety gear and prioritize tool ergonomics.
- Keep workspace organization and guarantee tool accessibility.
Eco-Friendly Paints and Cleanup Tips
When you paint stripes, choose low-VOC or natural paints to keep fumes down and indoor air healthier.
Use washable brushes and collect rinse water so you can filter out solids before disposal.
Properly label and take leftover paint or contaminated rags to a local hazardous-waste or paint-recycling facility instead of tossing them in the trash.
Low-VOC And Natural Paints
Air quality matters as much as color when you’re painting stripes, so choose low-VOC or natural paints to keep fumes—and health risks—down.
- Compare sustainable brands and paint certifications for low VOC benefits.
- Pick eco friendly options with natural pigments to reduce environmental impact.
- Consider health considerations and indoor air quality for living spaces.
- Test samples, read labels, and ventilate while paint cures.
Green Cleanup And Disposal
1 simple habit can make your striped-wall project much greener: clean and dispose of paint materials responsibly.
You can use water-based paints, strain and reuse excess, and dry small amounts for trash.
Take leftover paint to local recycling or hazardous-waste centers for eco-friendly disposal.
Use reusable containers, biodegradable wipes, and follow sustainable cleanup practices so you leave no harmful residues behind.
Caring for and Maintaining Striped Walls
Caring for your striped walls keeps their crisp lines and colors looking fresh for years, and a few simple routines will prevent common wear like scuffs, dirt buildup, and fading.
- Regular wall cleaning prevents dirt buildup and reduces color fading.
- Schedule paint touch ups after inspecting wall textures and wall protection areas.
- Adjust lighting effects and furniture placement to protect stripes.
- Do seasonal maintenance and update wall decor to follow design trends.
Use Stripes to Change Room Proportions
When you want a room to feel taller, wider, or longer, stripes are one of the simplest visual tricks you can use; vertical stripes draw the eye up while horizontal bands widen the space, and varying stripe width or color contrast lets you fine-tune the effect.
Use stripe patterns informed by color psychology and design trends to manipulate visual perception, enhance room height, create space illusion, and maintain visual balance in spatial dynamics.
Mix Widths and Colors for Dynamic Stripe Effects
Mixing stripe widths and colors lets you create movement and focal points without changing the room’s layout.
You’ll use dynamic color combinations and creative stripe patterns to guide the eye. Try contrasts, tonal blends, and varied banding to add depth.
- Vary widths for rhythm
- Pair bold with muted hues
- Repeat an accent color
- Test samples on-site
When to Hire a Pro vs. DIY Striping
After experimenting with widths and color pairings to guide the eye, you’ll need to decide whether to tackle the striping yourself or call in a pro.
Weigh professional experience against your skill level, pattern difficulty, design complexity, and color scheme choices.
Consider wall condition, budget considerations, and project timeline. If precision or speed matters, hire a pro; otherwise, plan carefully and DIY.
Estimated DIY Cost Breakdown for Striping
A simple DIY striping project typically costs between $50 and $300, depending on room size, paint quality, and tools you already own.
You’ll want a clear cost comparison and budget tips to decide paint grade, tape, rollers, and primer. Estimate materials, factor in drop cloths, and reuse tools to save.
- Paint
- Tape
- Tools
- Extras
Troubleshooting: Common Stripe Problems Checklist
Knowing what you’ll spend helps, but even a well-budgeted stripe job can run into problems—bleeding paint, uneven lines, or visible brush marks are common.
Check for stripe mistakes, paint bleeding, tape failures, alignment issues, measurement errors, color clash, uneven application, finish problems, and wall texture impacts.
Use correction techniques: reseal edges, sand, remeasure, touch up, and apply proper primer.
Before-and-After Stripe Project Examples
See how a few strategic stripes can transform a room: these before-and-after examples show common starting conditions, the planning choices made, and the final results so you can spot techniques and pitfalls to borrow or avoid.
- Narrow stripes brighten small rooms — before and after transformations.
- Wide horizontal bands add depth — stripe design inspiration.
- Accent wall with metallic trim.
- Two-tone nursery refresh.
Final Checklist to Finish Your Striped-Wall Project
1 final walkthrough helps you catch smudges, touch-ups, and loose tape before the room’s furniture goes back in.
Inspect all stripes for even edges, press down any lifted tape, and sand tiny drips.
Check stripes for neat edges, press lifted tape, and sand any tiny paint drips before finishing.
Do final touches with a fine brush, clean rollers, and put away cleaning supplies.
Remove protective coverings, reattach hardware, and move furniture back carefully.
Frequently Asked Questions
Will Wallpaper Stripes Be Easier Than Painting for My Wall Design?
Yes — wallpaper stripes will often be easier: you’ll get wallpaper advantages like precise patterns and less prep, and you’ll enjoy design flexibility with many prints, but installation skill and wall prep still matter for a flawless result.
Can I Stripe a Ceiling, and How Do I Avoid Dizzying Patterns?
Yes — you can stripe a ceiling, though don’t release a circus; pick muted ceiling colors, keep pattern balance with wider, subtle bands, align stripes with room axes, and step back often so you won’t get dizzy.
How Do Temperature and Humidity Affect Stripe Paint Drying?
Higher humidity and cooler temps slow drying times and can weaken paint adhesion, so you’ll wait longer and risk tacky stripes; warmer, drier conditions speed curing and improve adhesion, but avoid extreme heat that traps brush marks.
Can I Use Removable Paint for Temporary Striped Looks?
Yes — you can use removable paint for temporary designs; it’s like a scarf for your walls, letting you change looks without commitment. Just test adhesion, follow drying conditions, and expect limited durability on textured surfaces.
How to Stripe Around Built-In Shelves or Irregular Mouldings?
You’ll prep shelves by clearing, sanding, and priming edges, then use precise masking techniques: low-tack tape, painter’s putty for gaps, and flexible caulk; paint stripes in stages, removing tape while paint’s tacky for crisp lines.
Conclusion
You’ve got the plan, tools, and measurements—now bring the room to life. Work methodically, tape carefully, and paint with steady strokes so your stripes stay crisp like the seams of a well-tailored suit. Step back often, fix any edges, and let the paint dry fully between coats. When you remove the tape, enjoy the clean lines and the renewed space you created with your own hands—proud, precise, and unmistakably yours.