How to Patch Ceiling Paint So the Repair Disappears Completely
You can make a ceiling repair vanish by prepping, matching texture, priming, and feathering paint so edges blend. Start by cleaning and removing loose material, fill holes with joint compound, sand smooth and feather edges, then recreate the ceiling texture to match surrounding scale. Use stain-blocking primer on stained or porous spots, then apply paint with the same sheen and method, overlapping lightly from the center outward. Keep going for full guidance on each step.
Quick Answer How to Patch Ceiling Paint So the Repair Disappears Completely
You can usually make a ceiling repair disappear by feathering joint compound, sanding smooth, priming, and matching the original paint finish.
This quick fix works for small cracks, nail pops, or isolated water stains when the texture and color are consistent.
If the damage is extensive, the substrate is compromised, or the texture and sheen don’t match, you’ll need fuller patching and possibly repainting the whole ceiling.
One-sentence solution
Match texture, prime the patched area, then paint with the same finish and feather the new paint into the old so the repair blends seamlessly and becomes invisible.
For how to patch ceiling paint in one sentence: prep the surface, match texture, use stain-blocking primer, apply matching finish, feather edges with thin coats, let each dry fully, and inspect under different light to confirm the repair disappears.
When this quick fix works and when you need more work
If the damage is small—like a hairline crack, a tiny water spot, or a localized scuff—you can usually patch, prime, and paint so the repair disappears;
but for larger problems such as widespread water damage, sagging drywall, textural mismatches across a wide area, or lingering stains, you’ll need more extensive work like replacing drywall, retexturing, or applying multiple coats of primer and paint to truly hide the repair.
You should assess extent, texture, and staining before starting;
if texture or damage is broad, plan for replacement or professional help.
Basic Understanding Why Ceiling Paint Repairs Fail
When a ceiling patch stands out it’s usually because texture, sheen, color, or crisp edges don’t match the surrounding surface.
Ceilings behave differently than walls—materials, texture types, and overhead lighting can exaggerate flaws—so you’ll need to account for those variables.
Before you start, check the right tools and materials (texture sprayers, primers, matching paint and brushes) so your repair has a fighting chance.
Common causes of visible repairs (texture mismatch, sheen, color shift, edges)
Because ceiling repairs involve more than just filling holes, you’ll often see the patch if texture, sheen, color, or edges don’t blend with the surrounding surface.
You need to match texture pattern and paint sheen, feather edges to avoid hard lines, and account for aged or faded paint that shifts color.
Poor prep, uneven sanding, or mismatched materials make repairs obvious.
How ceiling surfaces differ from walls (materials, texture types, lighting effects)
Although ceilings look like just upside-down walls, they use different materials, textures, and lighting interactions that make repairs behave differently.
You’ll encounter thin drywall, plaster, popcorn, knockdown, or smooth finishes that accept paint unevenly. Overhead lighting casts shadows and highlights texture, revealing mismatched patches.
You must match substrate porosity, texture scale, and sheen to hide repairs effectively.
Tools and materials overview
Now that you know how ceiling substrates and textures affect paint appearance, look at the tools and materials you’ll use—mismatches here are the most common reason repairs fail.
You’ll want proper prep and matching supplies to blend repairs seamlessly.
- Quality primer and ceiling paint matched to sheen and tint
- Texture applicator that matches existing finish
- Brushes/rollers sized for ceilings and feathering
Assess the Damage What to Check Before You Start
Before you start patching, check how big and deep the damage is so you know whether you need a skim coat or just spot repair.
Note your ceiling type—flat, popcorn, knockdown, plaster, or drywall—because texture affects patching technique.
Also identify the existing paint (latex or oil, and its sheen) and view the area from different angles and lighting to see how visible the repair will be.
Size and depth of the damaged area
Start by measuring how big and how deep the damage is, because that determines your repair method and materials.
Note whether paint is flaking, a small hairline crack, a shallow gouge, or a hole. Use a ruler and a thin probe to gauge depth.
Record dimensions so you buy the right filler, backing, and sandpaper grit for a seamless patch.
Type of ceiling (flat, popcorn, knockdown, plaster, drywall)
Because ceiling material affects repair technique and paint matching, identify whether you’re working with flat, popcorn, knockdown, plaster, or drywall before you begin.
Flat and drywall are easiest to skim and sand; popcorn needs texture replacement; knockdown requires matching the pattern; plaster may have hairline cracks and needs bonding and setting compound.
Pick tools and patching method to match the surface.
Existing paint type and sheen (latex vs oil, matte vs eggshell)
Once you know the ceiling type, check the existing paint’s base and sheen so your patch and touch-up blend in.
Determine if paint is latex or oil—latex accepts waterborne primers and paints; oil may need a solvent-based primer.
Match sheen (matte, eggshell, satin) because gloss level affects visibility.
Note age and possible yellowing before choosing primer and finish.
Lighting and viewing angles that affect visibility
When you inspect a ceiling patch, check it under the same lighting and from the same angles people will normally see it, because light direction and viewing angle reveal differences in texture, sheen, and color that look invisible head-on.
Move around the room, view from typical spots, and test at different times and with both ambient and directional light to spot mismatches.
Step-by-Step Repair Process
Before you start, clear the area, protect the floor and furniture, and make sure you’ve got safety gear and ventilation.
Remove any loose paint or debris, clean the spot, then fill holes and cracks with the appropriate patching compound or joint compound.
Once it’s dry, sand and feather the edges, match the ceiling texture (flat, sprayed, popcorn, or knockdown), and you’ll be ready to prime and paint.
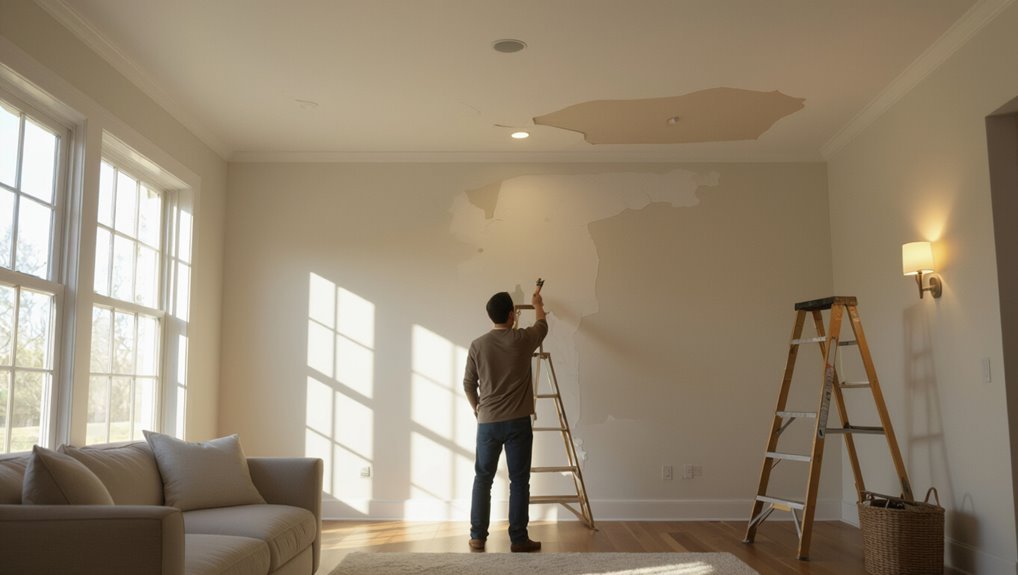
Step 1 Prepare the area (safety, drop cloths, ventilation)
Start by clearing the room and creating a safe workspace: move furniture out or to the center, cover floors and remaining items with drop cloths, and lay a small tarp or plastic sheet directly under the repair area to catch dust and paint drips.
Wear safety goggles and a dust mask, use a ladder safely, and open windows or run a fan for ventilation to reduce fumes and dust.
Step 2 Remove loose material and clean the spot
Scrape away any loose paint, plaster, or debris around the damaged spot using a putty knife or a stiff brush so you’re left with a stable edge to work on.
Wipe the area with a damp cloth to remove dust, then let it dry.
Vacuum nearby dust particles and degrease any stains with a mild cleaner so paint will adhere evenly.
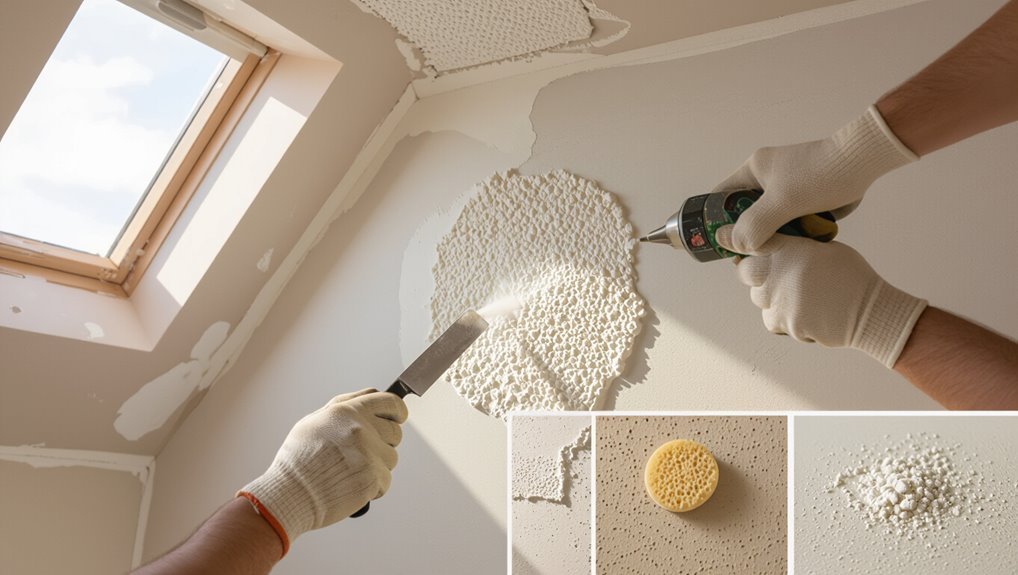
Step 3 Fill holes and cracks (patching compounds, joint compound, plaster)
Choose the right filler and apply it carefully to restore a smooth, even surface.
Use patching compound for small dings, joint compound for larger gaps, and plaster for deep or textured areas.
Press compound into holes, layering as needed, and skim over recessed spots.
Let each layer dry fully, follow manufacturer instructions, and clean edges to prevent ridges before moving to the next step.
Step 4 Sanding and feathering edges for a seamless surface
Grab a sanding block and fine-grit paper and smooth the dried filler so it blends with the surrounding ceiling; you want to remove high spots, feather the edges down to the original surface, and create a uniform plane for primer and paint.
Sand lightly in sweeping motions, check progress from an angle, clean dust with a damp cloth, and make certain that changes are invisible before priming.
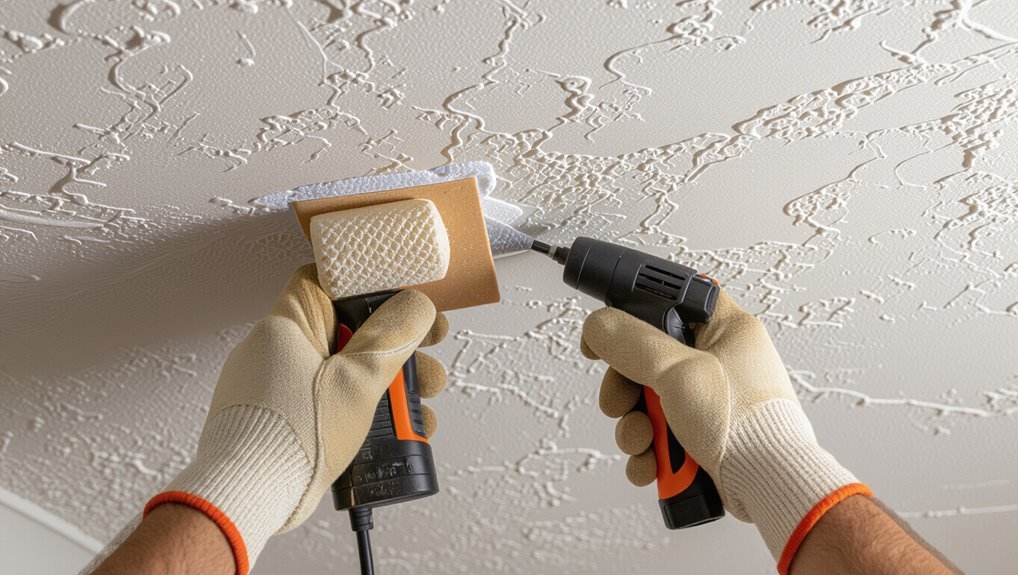
Step 5 Match texture (techniques for flat, sprayed, popcorn, knockdown)
Match the ceiling texture to the surrounding finish before priming so the repair disappears once painted.
Identify the existing texture—flat, sprayed, popcorn, or knockdown.
Use matching tools: brush or roller for flat, stomp or hopper gun for sprayed/popcorn, and joint compound plus knockdown knife for knockdown.
Practice on cardboard, apply thin layers, blend edges, and match pattern scale and direction for an invisible fix.
Step 6 Prime the repaired area (type of primer, stain-blocking)
Once the texture blends with the surrounding ceiling, you’ll prep and prime the repair to seal the patch and guarantee paint adhesion.
Clean dust, sand lightly, and wipe with a damp cloth.
Use a high-quality acrylic latex primer for porous repairs; choose a stain-blocking primer if there’s water, smoke, or tannin bleed.
Let it fully dry before painting.
Step 7 Paint application methods to hide touch-ups (brush, roller, spray; blending techniques)
Now that the patch is primed, pick the paint application that best hides the repair—brush for small touch-ups, a roller to mimic texture, or a spray for the smoothest blend—and use techniques that feather and blend the new paint into the old so the patch disappears.
Lightly overlap surrounding paint, work from the center outward, match nap and direction, and use thin, even coats until seamless.
Step 8 When and how to repaint the entire ceiling for perfect results
If your touch-up still shows, the patched area sits over a large spot, or the ceiling’s finish is uneven, you’ll want to repaint the whole ceiling for a uniform look.
Prep by cleaning, patching, and priming stains. Use the same sheen and quality paint, cut in along edges, then roll in overlapping “W” patterns.
Work quickly, keep wet edges, and apply two coats if needed.
Texture Matching Techniques for Different Ceiling Types
When matching textures you’ll focus on different techniques for each ceiling type, from feathering and sanding smooth ceilings to using spray patterns or DIY tools for stipple and orange-peel.
For popcorn ceilings you’ll decide whether to patch or replace, since matching that bumpy finish is tricky.
Knockdown textures need a specific spray method and a timed knockdown pass to blend new areas with the old.
Smooth/flat ceilings feathering and sanding tips
Match a smooth or flat ceiling’s finish by feathering the patch thinly and sanding carefully so the repaired area blends invisibly with the surrounding surface.
Use thin coats of joint compound, let each dry fully, then sand with a fine-grit sponge or block.
Keep edges feathered beyond the visible repair, wipe dust, prime, and paint with light, even strokes to avoid lap marks.
Stipple and orange-peel spray patterns and DIY texture tools
After you’ve feathered and sanded a flat patch to blend with the ceiling, you’ll often need a textured finish to match stipple or orange-peel surfaces.
Use aerosol texture cans, HVLP spray, or a hopper gun for closest match. Practice on cardboard, adjust distance and nozzle, then apply light, overlapping passes.
For small jobs, try stomp brushes or texture rollers for controlled dabs.
Popcorn ceilings patching vs replacing
Because popcorn ceilings have a pronounced, loose texture, you’ll usually face a simple choice: spot-patch the damaged area and try to recreate the spray-on clumps, or remove and retexture the whole ceiling for a seamless look.
Patch small chips by matching material, spray pattern, and paint; remove when damage is extensive, asbestos is suspected, or you want a modern smooth or knockdown finish for uniformity.
Knockdown texture steps and timing for knockdown finish
One straightforward way to get a knockdown finish is to spray or apply a wet joint compound texture, let it set until the peaks start to crust over, then gently drag a wide drywall knife across the surface to flatten the tips into the signature mottled look.
Work in small sections, timing 10–15 minutes before knocking down; practice pressure and angle to match surrounding texture.
Color and Sheen Matching Strategies
Lighting changes how a color reads, so you should check samples under the same light as the ceiling.
Use swatches, paint chips, sample pots, or color-matching apps to find the right shade, and match the sheen—flat, eggshell, satin—so patched areas won’t catch light differently.
When needed, blend the new paint into the old by feathering edges for a seamless finish.
How lighting affects color perception
When you inspect a patched ceiling under different light sources, you’ll notice paint can look warmer, cooler, lighter, or darker even if it’s the same formula — and that shift can make a perfect color match suddenly visible.
Check the repair under daylight, warm bulbs, and cool bulbs.
Shadows, fixture angle, and bulb CRI change hue and value, so view repairs in the actual room lighting.
Methods to identify exact paint color (samples, swatches, apps, paint chip)
Start by collecting physical references: paint chips from the manufacturer, small swatches painted on card stock, and a sealed sample can if possible, because seeing real paint in the room is the most reliable way to match color and sheen.
Compare swatches under the room’s light, label each, test small patches on the ceiling, and use a color-matching app or store spectrometer for verification.
Matching sheen and finish to avoid shine differences
Because sheen affects how light reflects off your ceiling, matching finish is as important as matching color to avoid obvious patches.
Check your original paint’s sheen—flat, matte, eggshell, satin, or semi-gloss—and buy the same finish.
Test a small, discrete swatch after it dries; light changes and age can alter appearance, so confirm a near-perfect match before repairing the whole area.
When to use paint blending and how to feather paint edges
Once you’ve confirmed the finish matches, decide whether to blend or repaint: blending works best for small repairs where the surrounding paint is still in good condition, while larger or heavily aged areas usually need a full repaint.
If blending, thin the repair coat, feather edges with a soft brush or roller, and work outward in overlapping strokes until the patch visually dissolves into the ceiling.
Tools, Materials, and Cost Estimates
Before you start, gather the essential tools—like a putty knife, sanding block, ladder, texture sprayer or brush, and quality brushes or rollers—so you won’t stop mid-job.
I’ll recommend reliable materials and brands for primer, joint compound, texture, and paint that match ceiling finishes.
Finally, we’ll compare typical cost ranges for DIY patches versus hiring a pro so you can pick the most cost-effective route.
Essential tools list
If you want the patch to blend seamlessly, you’ll need the right tools and materials laid out before you start.
Gather essentials so you work cleanly and efficiently:
- Utility knife, sandpaper, and putty knife for cutting, smoothing, and applying compound.
- Paint roller, brush, and a small tray for even coverage.
- Drop cloth, ladder, and masking tape to protect surroundings.
Recommended materials and brands (primer, compound, texture, paint)
While you’re shopping, pick products that match your ceiling type and the size of the repair: a stain-blocking primer (Zinsser Bulls Eye 1-2-3 or KILZ Original), a lightweight joint compound or premixed spackling (USG Sheetrock All Purpose or DAP Fast ‘n Final), a texture spray that matches your finish (Homax or Rust-Oleum), and a ceiling-grade flat or matte acrylic paint (Behr Marquee or Sherwin-Williams SuperPaint); these choices balance coverage, ease of use, and cost so you won’t need multiple reapplications.
Use a 6-inch putty knife, fine sandpaper, good lighting, and quality brushes or a small roller for seamless results.
Typical cost ranges for DIY vs hiring a pro
Wondering how much you’ll spend fixing a small ceiling patch yourself versus hiring a pro? You can DIY for $15–$75 (compound, primer, paint, tools) and usually finish in an afternoon. Pros charge $150–$600 depending on size, texture, and paint matching. Choose DIY for savings, pro for guaranteed seamless results.
| Option | Typical Cost |
|---|---|
| DIY | $15–$75 |
| Pro | $150–$600 |
Common Mistakes and How to Avoid Them
Don’t skip priming patched areas or you’ll see stains and poor adhesion.
Match the ceiling’s texture and sheen and use the right application method so repairs blend in.
Also sand properly and work in good lighting to avoid visible seams and uneven finish.
Mistake: Not priming patched areas
If you skip priming patched areas, the repair will likely show through the new ceiling paint because joint compound and primer absorb and reflect light differently than the surrounding surface.
You should sand smooth, remove dust, then apply a quality stain-blocking primer to the patch.
That seals porosity, guarantees even sheen and color, and prevents flash or shadowing so the repair blends with the rest of the ceiling.
Mistake: Mismatching texture or sheen
Even if your patched area is perfectly colored, a different texture or sheen will make the repair stick out; your eye notices variations in light reflection and surface profile before it registers color differences.
Match the ceiling’s finish—flat, eggshell, or satin—and replicate texture with the same tools and technique.
Test a small area, let it dry, then adjust until the repaired spot disappears.
Mistake: Using wrong paint application method
When you pick the wrong tool or technique—rolling where you should brush, or spraying without masking—you’ll end up with drips, visible strokes, or uneven coverage that draws the eye right to the repair.
Choose the proper applicator for the paint and texture, match stroke direction to surrounding ceiling, use thin even coats, and feather edges so the patch blends seamlessly.
Mistake: Repairing under poor lighting or without proper sanding
Rolling or brushing correctly won’t save you if you can’t see what you’re fixing or skip sanding first.
Work under bright, even light so you catch texture, stains, or feathered edges.
Sand patched areas smooth, remove dust, and wipe with a damp cloth before priming.
Skipping these steps leaves visible seams and poor adhesion—take the time for proper prep.
Prevention and Long-Term Maintenance Tips
To keep patches from coming back, you’ll want to control moisture with proper ventilation and fix any leaks promptly.
Make a habit of inspecting your ceiling seasonally and doing small touch-ups before problems spread.
Store leftover paint in airtight containers, label them with the color and date, and note the formula so you can match it later.
How to prevent recurring ceiling damage (ventilation, leak prevention)
Because recurring ceiling damage usually traces back to moisture and poor airflow, you should focus first on eliminating leaks and improving ventilation to stop problems before they start.
Check roof, flashing, and plumbing for drips, fix seals promptly, and route gutters away from the foundation.
Install or upgrade exhaust fans in kitchens and baths, use attic ventilation, and keep humidity below 50% to prevent deterioration.
Routine inspection and touch-up strategy
When you schedule quick inspections every few months, you’ll catch small cracks, stains, and peeling before they become big repairs.
Make a simple checklist for drywall seams, paint discoloration, and fixtures so you can note changes and act swiftly.
Tackle minor flaws with matching touch-up paint, feather edges, and smooth brush strokes.
Record dates and actions so maintenance stays consistent and efficient.
Best practices for storing leftover paint and documenting colors
Keep leftover paint organized so future touch-ups match and you don’t waste product.
Label cans with room, date, paint line, finish, and mixing ratio. Seal lids tightly, store cans upside down on a shelf away from heat and freezing.
Photograph labels and swatch large enough for color matching. Keep a small, labeled sample jar for quick repairs and note batch numbers.
When to Call a Professional
If the damage involves structural issues, extensive water stains, or suspected asbestos in popcorn texture, you should call a pro instead of tackling it yourself.
Expect a contractor to assess the problem, give written quotes with timelines, and explain any required permits or safety measures.
Ask about guarantees and what the warranty covers before they start.
Signs the repair is beyond DIY (structural damage, large water damage, asbestos in popcorn)
Although small chips and stains you can usually fix yourself, some ceiling problems mean you should call a professional right away.
Call if you see sagging, cracks through plaster or drywall, or exposed joists—signs of structural damage.
Also call for large, recurring water stains or active leaks, and if your popcorn ceiling might contain asbestos; don’t disturb it.
Professionals assess safety and scope.
What to expect from a contractor (quotes, timelines, guarantees)
When you call a contractor, expect a clear breakdown of work, costs, and timing so you can compare bids and plan, not just a rough estimate thrown together on the spot.
Ask for a written quote, start-to-finish timeline, materials list, and warranty terms.
Confirm insurance and licensing, payment schedule, and cleanup.
Get everything signed before work begins.
FAQ
You’ll find quick answers here to common questions like whether you can paint over a water stain without priming and how long to wait between patching, priming, and painting.
We’ll also cover whether touch-ups can ever be invisible, how to match ceiling texture without special tools, and when to spray versus use a roller.
If you’re unsure about any step, these FAQs will help you make the right call.
Can I patch a water stain and paint over it without priming?
Can you paint over a water stain without priming? You can, but you shouldn’t.
Water stains often bleed tannins and moisture, causing discoloration to reappear. Prime first with a stain-blocking primer to seal the spot and guarantee adhesion.
Skipping primer risks patch visibility and wasted paint. After priming, finish with matching ceiling paint for an invisible repair.
How long should I wait between patching, priming, and painting?
Although the exact timing depends on materials and room conditions, plan on waiting at least 30 minutes to an hour after a patch dries before priming, then another 1–4 hours (or until the primer’s dry-to-recoat time) before painting.
Check product labels and room humidity; longer waits help adhesion and prevent lap marks. If in doubt, allow overnight between steps for best results.
Will touch-up paint ever be invisible on a ceiling?
Once your patch, primer, and paint have fully cured, you’ll still sometimes see a difference between the touch-up and the surrounding ceiling.
It can be nearly invisible if you matched color, sheen, and applied thin, even coats. Light angle, age, and underlying stains can reveal edges.
If it’s noticeable, feather additional thin coats and let them cure before deciding on full-area repainting.
How do I match texture without special tools?
If you don’t have specialty tools, you can still mimic common ceiling textures using household items and careful layering: dab joint compound with a sponge for orange peel, flick a brush for knockdown, or press crumpled plastic to create popcorn-like bumps.
Work small, let each layer dry, then sand lightly and feather edges.
Prime before painting to guarantee an even finish.
Is it better to spray the ceiling or use a roller for touch-ups?
After you’ve matched texture and primed the patch, choose your application method based on the size and finish of the repair: spraying gives the fastest, most uniform coverage over large areas and textured surfaces, while a roller offers more control for small touch-ups and minimizes overspray.
Use a small foam roller for smooth ceilings, and spray for broad or stippled areas; feather edges and blend wet into wet.