
How to Prep Stained Cabinets for Paint So the Finish Actually Lasts
You can make stained cabinets hold paint for years by doing proper prep: remove doors and hardware, clean grease and silicone, then sand or use a liquid deglosser so paint can bite. Repair gouges, re-glue veneer, and fill gaps before priming with a stain-blocking or bonding primer. Apply thin, even coats, sand between layers, and use a durable topcoat, allowing full cure. Keep going to get step-by-step tips, product choices, and time estimates.
How to Prep Stained Cabinets for Paint So the Finish Actually Lasts
You’ll get a quick answer up front, a short actionable checklist you can follow right away, and a clear outline of what this guide covers and who it’s for.
I’ll show the exact prep steps that make the paint stick and last, plus the tools and supplies you’ll need.
Quick Answer The Short, Actionable Checklist
1 clear, actionable checklist will get your stained cabinets ready for paint and make the finish last: remove doors and hardware, clean thoroughly, sand or degloss, fill imperfections, prime with a bonding primer, and recoat with quality paint.
Follow this quick how to prep stained cabinets for paint checklist and you’ll avoid peeling or uneven coverage:
- Remove doors, labels, and hardware
- Degrease and rinse well
- Sand or use liquid deglosser
- Prime with bonding primer and repaint
What This Guide Covers and Who It’s For
This guide walks you step-by-step through prepping stained cabinets so the paint bonds and lasts—covering tools, surface-prep methods (sanding vs. deglosser), primer choices, common fixes, and when to call a pro.
You’ll get clear, practical instructions for DIYers with basic tools, plus tips for pros tackling tricky finishes. Use it to decide whether you can handle the job or should hire help.
Why Proper Prep Matters Benefits and Risks of Skipping Steps
If you skip proper prep, the paint won’t bond well and won’t last, leaving you with chipping, peeling, or sticky spots.
You’ll see those common failures show up where grease, old finish, or rough surfaces weren’t removed.
Taking the time to sand, clean, and prime prevents those issues and saves you rework later.
How prep affects adhesion and longevity
Because paint bonds to a clean, keyed surface, proper prep determines how well your finish will stick and how long it will last.
You remove contaminants, sand or degloss to create mechanical bite, and prime to seal tannins. That prevents peeling, chipping, and discoloration.
Skipping steps shortens lifespan and forces early repairs, so follow each prep stage carefully for durable results.
Common failures when prep is inadequate
You’ve seen how proper prep creates the grip and seal paint needs; skip or shortcut those steps and you’ll start seeing predictable failures.
You’ll face problems that ruin the look and durability of your cabinets:
- Peeling or flaking within months
- Visible brush marks and orange peel texture
- Stain bleed-through and discoloration
- Uneven wear at edges and high-touch areas
Basic Understanding Materials and Tools You’ll Need
Before you start, identify your cabinet material—solid wood, plywood, MDF, laminate, or veneer—because each needs different prep.
Gather essential supplies like cleaners, a deglosser, multiple sandpaper grits, suitable primers, brushes and rollers, and a respirator.
Finally, pick a paint and primer system formulated for stained surfaces to guarantee adhesion and durability.
Types of cabinet materials (solid wood, plywood, MDF, laminate, veneer)
Cabinet materials vary in how they accept paint and how much prep they need, so it helps to know what you’re working with: solid wood is durable and sands well; plywood is stable and holds screws; MDF is smooth but swells if it gets wet; laminate resists adhesion and needs special primers; and veneer looks like real wood but can peel if not sealed.
| Material | Traits | Prep focus |
|---|---|---|
| Solid wood | Sandable, durable | Fill, sand |
| Plywood | Stable | Secure, sand edges |
| MDF | Smooth | Seal edges |
| Laminate | Nonporous | Degloss, prime |
Essential tools and supplies (cleaners, deglosser, sandpaper grades, primers, brushes, rollers, respirator)
Getting the right tools makes the job faster and gives you a smooth, long-lasting finish. You’ll need cleaners, a deglosser, varied sandpaper, and a quality respirator.
Prep tools include:
- TSP or trisodium cleaner and microfiber cloths
- Deglosser and 120–220 grit sandpaper
- High-adhesion primer and foam roller
- Synthetic-bristle brush and respirator rated N95 or better
Choosing the right paint and primer for stained cabinets
While stain hides under the surface, the right primer and paint are what make your cabinets look professional and hold up over time.
Choose a high-adhesion, staining-blocking primer labeled for glossy or stained wood. For topcoat, use a durable, water-based acrylic or alkyd-modified enamel in satin or semi-gloss for wear resistance.
Match product compatibility and follow manufacturer’s dry times.
Step-by-Step Prep Process
Start by removing doors, drawers, and hardware carefully so you can work efficiently and avoid damage.
Next you’ll deep-clean to eliminate grease, grime, and any silicone residue, then assess the existing finish—glossy stain, varnish, or sealed surface—to decide whether to strip or degloss.
Finally, consider chemical strippers and safety precautions if stripping is needed, or learn when and how to use a liquid deglosser for a simpler prep.
Step 1 Remove doors, drawers, and hardware safely
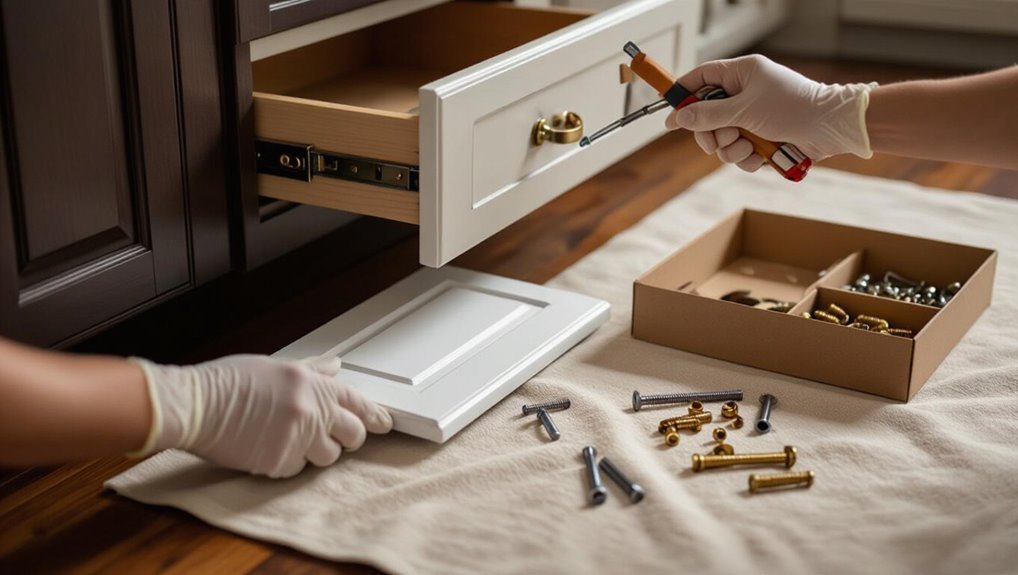
- You’ll make painting easier and protect pieces by removing doors, drawers, and hardware safely. Label parts, work systematically, and keep fasteners together.
- Number doors and matching frames with a pencil
- Store screws in labeled bags
- Place hinges and knobs in a shallow tray
- Lay doors flat on padded sawhorses
Handle panels gently to avoid chipping edges.
Step 2 Deep clean to remove grease, grime, and silicone buildup
Scrub away the buildup: before you even sand or prime, thoroughly clean stained cabinets to remove grease, grime, and any silicone or caulk residue that will prevent paint from adhering.
Use a degreasing cleaner or TSP substitute, wipe with microfiber, and tackle silicone with a razor or adhesive remover.
Rinse, dry fully, and inspect corners and hinges so paint bonds evenly.
Step 3 Assess finish: glossy stain, varnish, or sealed surface when to strip vs. degloss
Once you’ve removed grease and silicone, inspect the surface to determine whether you’re dealing with a glossy stain, hardened varnish, or a factory-sealed finish.
This choice dictates whether you’ll strip the coating or simply degloss it for paint adhesion. Test adhesion with sandpaper in an inconspicuous spot; glossy or varnished surfaces often need stripping, while sealed finishes may only require scuffing and a high-adhesion primer.
Step 4 Chemical stripping options and safety precautions
If the finish needs more than scuffing, you’ll choose a chemical stripper and follow strict safety steps: pick a solvent- or caustic-based stripper suited to your finish, test in an inconspicuous spot, and work in a ventilated area.
Wear gloves, eye protection, and a respirator, protect nearby surfaces, and dispose of waste per local rules.
Neutralize residue before sanding.
Step 5 Deglossing: when and how to use liquid deglosser
Step 5 is deglossing: use a liquid deglosser when the existing finish is intact but too glossy for paint to adhere reliably.
Wipe small sections with a solvent-based deglosser on a clean rag, following product directions and ventilating the area. Let surfaces dry completely, then inspect for dull, even tooth.
Deglossing avoids heavy stripping but won’t replace sanding where bonding requires mechanical abrasion.
Step 6 Sanding strategy by substrate and finish (grit progression and tips)
After deglossing and confirming the surface has good tooth, you’ll move on to sanding tailored to the substrate and existing finish.
Choose grits and pressure to avoid sanding through veneer or stain. Follow this guide:
- Solid wood: 120→180 for flattening, finish with 220
- Veneer: 180→220 gently
- MDF: 120→180, feather edges
- Previously lacquered: 220→320 light pass
Step 7 Repairing damage: filling gouges, loose veneer, and joint fixes
Begin by evaluating all damage so you know what to fix and in what order: inspect gouges, loose veneer, gaps, and wobbly joints.
Repair steps:
- Clean debris from gouges, then use wood filler or epoxy.
- Re-glue and clamp veneer; trim excess after drying.
- Fill gaps with colored filler to match grain.
- Reinforce or re-screw loose joints, checking alignment before finishing.
Step 8 Final clean, tack cloth, and dust control before priming
With repairs sanded smooth and joints tightened, you’re ready for a final cleaning that keeps dust from ruining your primer.
Wipe surfaces with a damp microfiber, vacuum crevices, then use a tack cloth for a last pass. Control dust in the room and let everything dry.
- Microfiber wipe
- HEPA vacuum crevice
- Stubborn dust: tack cloth
- Airflow off, settle 10–15 minutes
Step 9 Selecting and applying the correct primer (oil vs. shellac vs. bonding primers)
When you’re ready to prime, choosing the right primer—oil-based, shellac, or a modern bonding formula—makes the difference between a lasting finish and peeling or bleed-through; each type has specific strengths depending on bare wood, tannin-rich stains, or slick lacquered surfaces.
- Use oil for stain blocking and adhesion on raw wood.
- Choose shellac for severe bleed or odor blocking.
- Bonding primers stick to glossy finishes.
- Thin coats, sand between layers.
Step 10 Painting technique for durable finish (brush vs. spray, wet edges, coats, drying times)
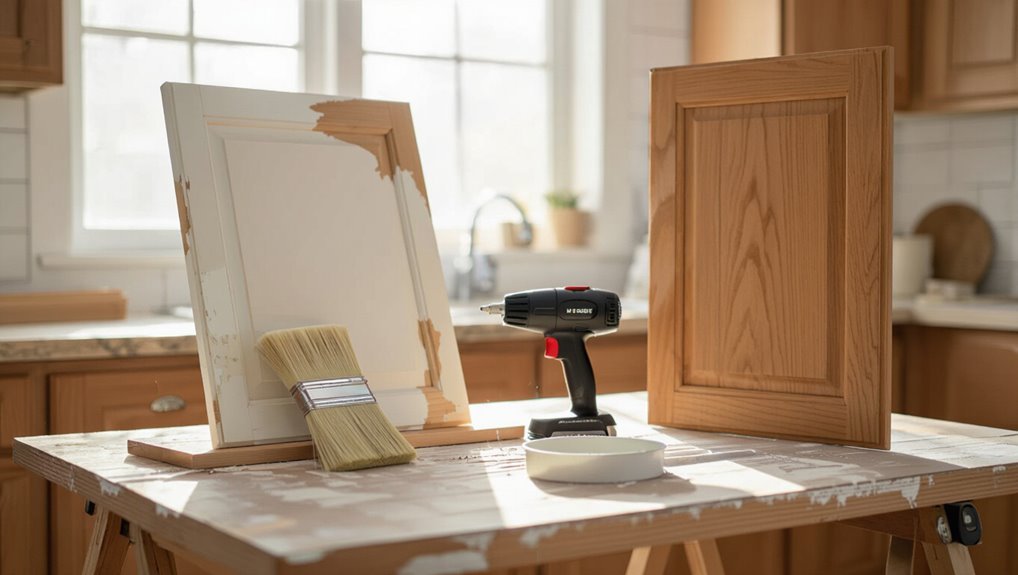
Although the primer’s job is mostly done, how you apply the paint determines durability and appearance.
So choose your method—brush, roller, or spray—based on the cabinet profile, finish type, and your skill level.
Use thin, even coats, keep a wet edge to avoid lap marks, sand lightly between coats, and follow manufacturer recoat windows.
Multiple light coats beat one heavy one for resilience.
Step 11 Topcoats and curing: polyurethane, water-based varnish, or lacquer and recommended dry times
After you’ve built up smooth, fully cured paint coats, it’s time to protect them with a topcoat—choose polyurethane for toughness, a water-based varnish for clarity and low odor, or lacquer for fast drying and a hard, factory-like finish.
Each cures differently and affects sheen, durability, and recoat timing, so pick the product that matches your use and schedule.
Apply thin, even coats, sand lightly between coats, follow manufacturer dry and cure times, and allow full cure before heavy use to avoid tackiness or damage.
Comparison Prep Approaches by Cabinet Type and Condition
Your prep will change based on what your cabinets are made of and how they’re holding up.
For stained solid wood, you’ll usually strip or sand to expose raw wood and use a stain-blocking primer;
veneered or plywood cabinets often need light sanding, spot-repair, and a high-build primer.
For laminate and thermofoil, you’ll focus on cleaning, scuffing with an abrasive, and using a bonding primer or primer-sealer designed for slick surfaces.
Best method for refinishing stained solid wood cabinets
Refinishing stained solid wood cabinets means choosing the right prep based on wood species, construction, and wear—pine and oak respond differently than maple or birch, and dovetail drawers or glued frames change what you can disassemble. You’ll strip or scuff, sand selectively, fill gaps, prime with an adhesion primer, and use thin topcoats for stability.
| Step | Action |
|---|---|
| 1 | Clean |
| 2 | Strip/scuff |
| 3 | Sand |
| 4 | Prime |
| 5 | Topcoat |
Best method for veneered and plywood cabinets
1 key difference with veneered and plywood cabinets is that the surface is a thin layer over a substrate, so you’ll treat them more gently than solid wood: sand lightly, use a deglosser, and avoid deep sanding or water saturation. Seal edges and repair veneer lifts with wood glue.
| Issue | Recommended action |
|---|---|
| Delamination | Glue, clamp, seal |
| Thin surface | Light sand, degloss |
| Exposed plywood | Primer coat |
| Fragile edges | Edge sealing |
Best method for laminate and thermofoil cabinets
Because laminate and thermofoil are nonporous factory finishes, you’ll need to focus on adhesion rather than heavy sanding: clean thoroughly, scuff with a fine abrasive or liquid deglosser, repair any lifted edges or seams, and use a high-adhesion primer designed for slick surfaces before painting.
| Step | Action |
|---|---|
| 1 | Clean and degloss |
| 2 | Repair seams |
| 3 | Prime with adhesion primer |
Common Mistakes and How to Avoid Them
Don’t skip degreasing or grab the wrong cleaner — greasy surfaces wreck adhesion.
Make sure you sand enough to roughen the finish but not so much that you remove detail or thin veneer.
Pick the right primer, apply enough of it, and paint only when temperature, humidity, and dust levels are within recommended ranges.
Skipping degreasing or using the wrong cleaner
Skipping degreasing or grabbing the wrong cleaner will leave oils and grime that prevent paint from adhering properly, so you’ll want to remove every trace of grease before priming.
Use a dedicated degreaser or trisodium phosphate substitute, follow directions, and rinse thoroughly.
Test a small area first. Don’t rely on dish soap alone—it’s not strong enough for kitchen residues.
Inadequate sanding or over-sanding
When you sand stained cabinets, aim for even, controlled abrasion—too little leaves old finish that blocks primer, while too much can gouge the wood or strip veneers.
Use a fine-grit sanding block, follow the grain, and keep light pressure. Check progress often, stop when the sheen dulls, and feather edges.
Replace damaged veneer panels rather than sanding aggressively.
Wrong primer choice or insufficient priming
If you pick the wrong primer or skimp on priming, paint won’t adhere properly and stains or tannins can bleed through, ruining your finish.
Choose a high-quality stain-blocking or bonding primer made for wood. Apply recommended coats, let each dry fully, and sand lightly between layers.
Don’t assume one thin coat will suffice—proper priming prevents peeling, blotches, and costly rework.
Painting in poor conditions (temperature, humidity, dust)
Primer won’t save a flawless finish if you paint in bad conditions—temperature, humidity, and dust all affect how paint adheres and cures.
You should wait for ideal conditions or control them. Plan, monitor, and protect your workspace:
- Paint between 50–85°F (10–29°C)
- Keep humidity below 60%
- Use tack cloths and air filters
- Pause during windy or dusty days
Tips and Best Practices to Make the Finish Last
Set up a clean, well-ventilated workspace with dust control and a staging area so parts stay pristine while you work.
Choose a paint system rated for kitchens and bathrooms—look for durability and easy-clean finishes that resist moisture and grease.
Once painted, preserve the finish with gentle cleaning, prompt touch-ups, and routine care to keep cabinets looking fresh.
Workshop setup: ventilation, dust control, and staging parts
Because a clean, controlled workspace prevents dust and fumes from wrecking your finish, plan your ventilation, dust control, and staging before you sand or paint.
You’ll work safer and get smoother results. Set up a layout for parts, filtered airflow, and cleanup.
- Open windows and run cross-ventilation with a box fan
- Use a HEPA shop vac while sanding
- Hang plastic to contain dust
- Stage doors on sawhorses with soft supports
Optimal paint systems for kitchens and bathrooms (durability, cleanability)
When you’re choosing paint for kitchens and bathrooms, pick systems that resist moisture, scrub off stains, and hold up to frequent use.
Use a high-quality acrylic latex or alkyd hybrid primer, then a durable waterborne enamel or satin polyurethane topcoat.
Opt for mildew-resistant formulas, low-VOC options, and products rated for cabinetry.
Test adhesion on a scrap before full application.
Maintenance tips to preserve painted cabinets (cleaning methods, touch-up techniques)
Although painted cabinets can look fresh for years, they’ll last longest if you follow a simple routine of gentle cleaning, quick touch-ups, and preventive care.
Wipe spills immediately with a soft cloth and mild detergent, avoid abrasive pads, and dry surfaces.
Keep a small jar of mixed paint for fast repairs, sand lightly before touching up, and use felt pads to prevent chips.
Cost, Time, and Effort Estimates
You’ll want a clear sense of time and money before you start: a small kitchen can take a weekend, a medium job a few days, and a large kitchen up to a week or more.
Expect DIY material costs to run low to mid hundreds while hiring pros typically adds labor that can push totals into the thousands.
Keep those ranges in mind as you weigh doing the work yourself versus hiring someone.
Typical time breakdown for a kitchen cabinet project (small, medium, large)
A typical kitchen cabinet repaint breaks down into discrete phases—prep, priming, painting, and reassembly—each demanding different amounts of time, cost, and effort depending on kitchen size.
Expect a small job to take a long weekend, a medium kitchen 3–5 days, and a large project up to two weeks if you’re working mostly evenings and weekends.
Plan per-phase timing: prep 30–50%, priming 10–15%, painting 20–30%, reassembly 10–20%.
Estimated materials and labor costs (DIY vs. professional)
When weighing DIY against hiring pros, think regarding fixed material expenses and variable labor costs—materials for a typical kitchen (primer, paint, sandpaper, brushes/rollers, masking tape, and hardware) usually run $150–$500 for DIY, while professional projects add markup and specialized supplies that can push materials to $300–$800. You’ll save labor but invest time; pros charge $40–$100+/hr.
| Item | DIY Cost | Pro Cost |
|---|---|---|
| Materials | $150–$500 | $300–$800 |
| Labor estimate | 0 (your time) | $40–$100+/hr |
| Total range | $150–$500 | $500–$4000+ |
FAQ Quick Answers to Common Questions
You’ll find quick answers to the most common cabinet-prep questions to help you decide whether sanding, stripping, or a special primer is needed.
I’ll cover which primers bond to glossy stain, how many paint and topcoat layers are typical, and how long you should wait before reinstalling hardware and using the cabinets.
These brief FAQs will let you move forward with confidence.
Can I paint over stained cabinets without sanding?
Curious if you can skip sanding and still get good results? You can in limited cases: clean thoroughly, degrease, and use a high-bond primer designed for slick or stained surfaces.
Expect weaker adhesion and shorter durability than with sanding. For heavily worn, glossy, or oily finishes, sanding or scuffing is still the safer route to achieve a long-lasting paint job.
Is stripping always necessary before painting stained cabinets?
If you skipped sanding and used a high-bond primer, you’ve already reduced how much finish removal you need — but stripping isn’t always optional.
You should strip when finish is flaking, sticky, heavily glazed, or when multiple coats or solvent finishes sit on top.
Otherwise, light sanding, deglosser, and proper primer usually suffice to guarantee adhesion and a durable painted surface.
What primer bonds best to glossy stained surfaces?
Looking for the best primer for glossy stained surfaces? Use a high-bonding, adhesion-promoting primer—either an oil-based shellac primer (Zinsser BIN) or a high-quality bonding latex/urethane primer formulated for slick surfaces.
Scuff sand first, clean thoroughly, then apply thin, even coats. These primers penetrate or chemically bond to glossy stain, ensuring paint adheres and resists peeling.
How many coats of paint and topcoat are required for kitchen cabinets?
How many coats will your kitchen cabinets need depends on the paint, the cabinet material, and the finish you want—generally plan on two thin coats of paint plus one protective topcoat, with a third paint coat sometimes needed for full, even coverage on dark or heavily stained wood.
Use thin, even layers, sand lightly between coats if recommended, and choose a durable topcoat like water-based polyurethane.
How long before I can reinstall hardware and use cabinets?
Wondering when you can put the hardware back and start using your cabinets?
Wait at least 24 hours for paint to cure to the touch, but 48–72 hours before rehanging hardware and gentle use.
For heavy use or oil-based/topcoats, wait 7 days for full cure.
Always follow manufacturer cure times; test a hidden spot before reinstalling to avoid smudges or scratches.
Final Checklist Before Painting
Before you grab your brush, run through a quick pre-paint readiness checklist to make sure your work lasts.
Confirm surfaces are clean, sanded, and free of dust; hardware is removed or masked; and you’ve applied the right primer.
If anything’s off, fix it now to avoid problems after the paint goes on.
Pre-paint readiness checklist to ensure lasting results
Once you’ve finished stripping, sanding, and cleaning, run through this final pre-paint checklist to catch any issues that could shorten the finish’s life:
- Inspect for remaining gloss; scuff or sand slick spots.
- Fill cracks, gaps, and nail holes; sand smooth.
- Wipe with tack cloth and let fully dry.
- Mask hardware, hinges, and adjacent surfaces; secure dust control.
