How to Prep Textured Walls for Wallpaper Application
You can wallpaper textured walls, but you’ll need to prep them well: identify the texture (orange peel, knockdown, popcorn), repair holes and open seams with appropriate filler, sand and feather edges smooth, then clean and prime with a high-build or bonding primer. For deep textures consider skimcoating or choosing a heavy-duty adhesive and thicker wallpaper to mask imperfections. Follow proper layout and seam techniques to avoid bubbles and telegraphing—keep going and you’ll find detailed steps, tools, and product tips.
Can You Wallpaper Over Textured Walls? Quick Rules
Can you wallpaper over textured walls? You can, but you’ll assess texture compatibility first: light orange peel or knockdown often works if you choose heavyweight wallpaper that masks imperfections.
Smooth, stable surfaces boost wallpaper durability. You’ll prep by filling deep crevices or skimming for extreme textures.
When in doubt, test a small patch to confirm adhesion and final appearance before committing.
What Texture Problems Do Wallpapers Face
Although textured walls can add character, they create specific challenges for wallpaper installation. You’ll face uneven surfaces, gaps, and extra seams that test wallpaper adhesion and cause bubbling or peeling. You must assess, skimcoat, and choose adhesive wisely to counter texture challenges and get smooth results.
| Emotion | Problem | Feeling |
|---|---|---|
| Frustration | Bubbling | Defeated |
| Hope | Repairable | Relieved |
| Anxiety | Peeling | Urgent |
| Confidence | Solvable | Encouraged |
Identify Your Wall Texture: Orange Peel, Knockdown, Popcorn
First, look closely to spot orange peel: it has a fine, bumpy finish like the fruit’s skin.
Next, you’ll recognize knockdown by its flattened, patchy texture where peaks were smoothed down.
Popcorn is the coarse, popcorn-like spray often used on ceilings, and each texture will affect how you prep for wallpaper.
Spotting Orange Peel
Often you’ll spot orange peel by touch as much as by sight — it feels slightly bumpy and dimpled, like the skin of an orange, with a fine, consistent texture rather than large peaks or flat patches.
You’ll notice uniform, tiny pits across the surface. For wallpaper, identify these texture types early so your wall preparation—sanding, priming, or skim coating—matches the surface before hanging.
Recognizing Knockdown & Popcorn
If the orange‑peel texture feels like fine, uniform dimples, knockdown and popcorn present much bolder profiles you’ll want to spot next.
You’ll recognize knockdown texture by flattened peaks and irregular, mottled patterns after spraying and troweling.
Popcorn texture looks like clustered, raised nodules used on ceilings.
Identify each so you can choose proper sanding, skim coat, or removal before wallpapering.
Decide: When You Can Wallpaper vs. When to Smooth
Wondering whether to hang wallpaper directly or smooth the wall first? You’ll assess wall texture, choose wallpaper types, and test adhesion. If texture’s mild and paper forgiving, you can hang. For heavy knockdown or popcorn, smooth first to avoid visible bumps and poor seams. Use this quick guide:
| Condition | Action | Result |
|---|---|---|
| Mild texture | Hang | Good finish |
| Heavy texture | Smooth | Seamless finish |
| Popcorn | Smooth | Durable bond |
Tools and Materials You’ll Need
You’ll want a compact kit of essential prep tools—drop cloths, sandpaper, a scraper, putty knife, and a good vacuum—to start the job right.
Keep surface repair supplies on hand for filling holes and smoothing high spots, plus primers for tricky textures.
Finally, choose the right adhesives and accessories like wallpaper paste, a smoothing tool, seam roller, and a sharp utility knife.
Essential Prep Tools
Before you start stripping, skim-coating, or sanding, gather the right tools so the job goes faster and cleaner.
For textured walls, essential tools include a sturdy ladder, drop cloths, utility knife, sanding block or pole sander, vacuum with brush, masking tape, wide putty knife, mixing bucket, and quality brushes/rollers.
These prep techniques speed workflow and reduce dust and errors.
Surface Repair Supplies
Materials matter when repairing textured walls—gather patching compound, joint compound or spackle (depending on hole size), a quality all-purpose primer, and drywall tape for larger cracks. You’ll choose repair material options based on damage and follow surface preparation techniques before priming.
| Item | Purpose |
|---|---|
| Patching compound | Fill holes |
| Drywall tape | Stabilize cracks |
| Primer | Seal repairs |
Adhesives And Accessories
With patching and priming done, turn your attention to the adhesives and accessories that’ll make wallpaper stick and look right.
Choose adhesive types for your wallpaper—pre-mixed paste for nonwoven, paste-the-paper for heavy vinyl, or clear adhesive for delicate prints.
Gather wallpaper accessories: a seam roller, smoothing brush, pasting table, sharp utility knife, sponge, level, and clean rags for tidy installation.
3 Tests to Check Paint Adhesion and Wall Stability
You’ll run three simple tests to make sure paint is sticking and the wall won’t betray your new wallpaper: a visual inspection, a tape (or adhesion) test, and a moisture check.
First, scan for peeling, bubbles, or irregular texture.
Next, perform adhesion tests with strong tape on several spots.
Finally, use a moisture meter to confirm wall stability before priming and papering.
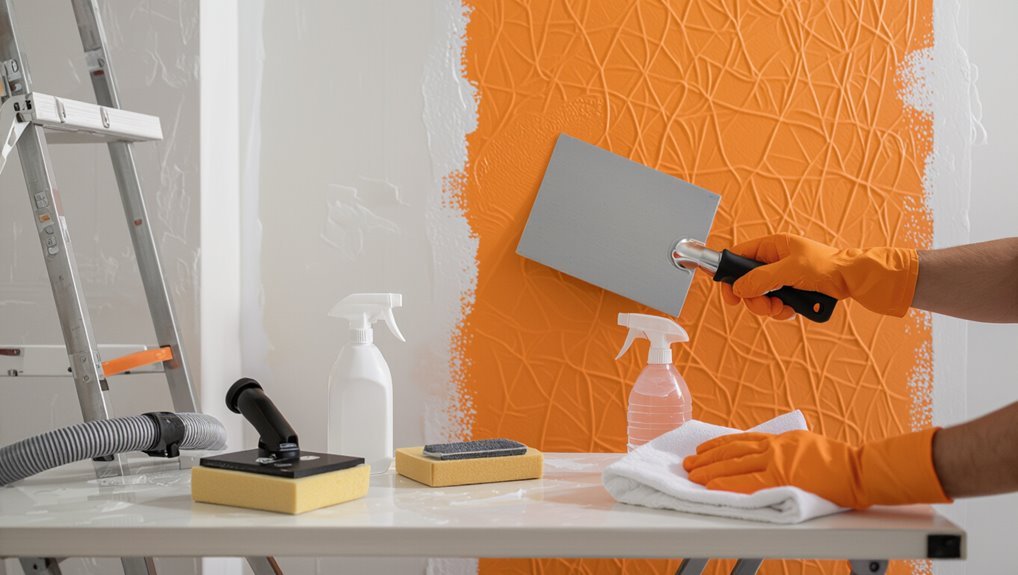
Remove Loose Paint, Flaking Texture, and Dust
Start by scraping away any loose paint and flaking texture—work systematically from top to bottom so you don’t miss spots—and collect dust as you go. After scraping, vacuum and wipe down for proper surface cleaning to improve paint adhesion. Patch gaps, remove debris, and let it dry completely before priming.
| Task | Tool |
|---|---|
| Scrape | Putty knife |
| Vacuum | Brush attachment |
| Wipe | Damp cloth |
| Patch | Spackle |
Sanding Orange Peel Before Wallpapering (Safe Method)
Before you start sanding orange peel, make sure you’ve got the right tools and safety gear—sandpaper or a sanding block, a pole sander for reach, a dust mask, goggles, and drop cloths.
Use gentle, even strokes with fine-grit sandpaper and keep the pressure light to avoid gouging the drywall. Work in small sections, wipe away dust frequently, and stop if the texture starts to look uneven so you can reassess.
Tools And Safety Gear
For sanding orange peel texture safely, gather the right tools and personal protective equipment so you can work efficiently and avoid hazards.
Prioritize safety precautions: respirator, goggles, gloves, and disposable coveralls.
For tool selection, choose a dustless sander or hand sanding block, fine-grit sandpaper, and a vacuum with HEPA filter.
Keep a dust sheet and first-aid kit nearby.
Sanding Technique Tips
Begin by evaluating the orange peel texture to determine how much sanding it needs: you want to knock down the high points without removing the texture entirely so the wallpaper will lie flat.
Use gentle sanding techniques aimed at smooth finishes.
- Start with 120–150 grit
- Sand with a pole sander, light pressure
- Vacuum dust frequently
- Spot-skim fill as needed
How to Knock Down Heavy Texture Safely
Because heavy texture can trap adhesive and create an uneven surface, you’ll need to remove or greatly reduce it before wallpapering.
Use controlled knockdown techniques: mist the wall, score large peaks, and skim with a wide knife.
Wear eye, lung, and skin protection and shut off power to nearby outlets.
Follow safety precautions, work in small sections, and clean debris thoroughly.
Removing Popcorn or Cottage-Cheese Texture (Safe Steps)
Start by testing for lead and asbestos before you touch the ceiling—these older textures can contain hazardous materials, and if present you’ll need a professional abatement plan.
For safe texture removal, work wet, protect floors, and ventilate. Prioritize wall safety and avoid sanding dry.
- Mist surface lightly
- Use a wide putty knife
- Wear HEPA respirator
- Contain and bag debris
Patch Holes, Seams, and Deep Texture Hollows
Walk the wall and assess each damaged area so you know which holes, seams, or deep texture hollows need attention.
Choose the right filler—spackling for small holes, joint compound for seams, and a heavier patching product for deep voids—and apply it smoothly.
Once dry, sand and feather the edges so the repaired spots blend seamlessly with the surrounding texture.
Assess Damage Areas
Before you hang a single strip, inspect the wall for holes, open seams, and deep texture hollows that will telegraph through the wallpaper. You’ll want to mark each flaw so you can patch it systematically.
Perform a damage assessment during your wall inspection to prioritize repairs and note stubborn areas.
- Mark holes and pits
- Highlight open seams
- Note deep texture hollows
- Photograph problem spots
Use Appropriate Fillers
Once you’ve mapped every blemish, patch holes, seams, and deep texture hollows with the right filler so the wallpaper lays flat and the pattern won’t show imperfections.
Choose filler types—spackling for small holes, joint compound for seams, and patching plaster for deep hollows.
Follow proper application techniques: press, fill, and smooth in layers, letting each cure before proceeding to avoid sagging or shrinkage.
Sand And Feather Edges
Smooth the repaired spots by sanding and feathering the edges so the filler blends seamlessly into the surrounding wall texture.
You’ll use gentle sanding techniques and focus on edge smoothing to avoid gouges. Work progressively with finer grit until shifts vanish, then wipe dust before priming.
- Use flexible sanding block
- Sand toward the center
- Blend seams lightly
- Check under angled light
Skim-Coat Textured Walls: Step-by-Step
Skim-coating textured walls gives you a flat, uniform surface that’ll make wallpaper stick and look its best; you’ll be spreading thin layers of joint compound, sanding between coats, and feathering edges until the texture disappears.
Start by cleaning, taping trim, and mixing compound.
Use proper skim coat techniques with a wide trowel, apply even thin passes, let dry fully, then repeat as needed to eliminate wall texture.
Feather and Sand a Skim Coat for a Smooth Finish
Before you start sanding, make sure the skim coat is fully dry and any loose debris or dust is removed so the surface is ready to work.
Use a feathering technique with a wide trowel or joint knife to taper the edges of the skim coat into the existing wall so there are no ridges.
Finish by sanding with a fine-grit block or pole sander, checking with your hand and a light to catch imperfections.
Prepare Surface Properly
Start by applying a thin, even layer of joint compound over the textured surface and feather the edges so the new coat blends seamlessly into the surrounding wall; this gives you a flat, continuous base that wallpaper will adhere to.
You’ll do surface cleaning and basic wall preparation first, then follow these steps:
- Remove dust and grease
- Repair cracks and holes
- Prime the skim-coated area
- Check for level and consistency
Feather And Sand
Once your skim coat is dry and primed, you’ll want to feather and sand the surface so the wall reads perfectly flat under wallpaper. Use proper feathering techniques to blend edges, then employ progressive sanding methods from 120 to 220 grit. Check for imperfections, touch up, and re-sand until smooth.
| Step | Tool | Grit |
|---|---|---|
| Blend edges | Trowel | — |
| Initial sand | Block | 120 |
| Smooth sand | Pole sander | 150 |
| Finish sand | Sponge | 220 |
| Inspect | Light | — |
Best Primers for Previously Textured Surfaces
When you’re covering textured walls, picking the right primer makes the difference between a smooth finish and visible imperfections; choose one formulated to level and seal without filling every crevice.
- Use high-build primers for leveling; note primer types and surface compatibility.
- Shellac-based for stain blocking.
- Acrylic for flexibility.
- Bonding primers for slick or glossy textures.
Choosing Wallpaper Adhesive for Textured Walls
Priming sets the stage, but the right adhesive makes the wallpaper actually stick to textured walls — pick one that compensates for uneven surfaces and bonds well to your primer.
You’ll choose between heavy-duty pastes, premixed adhesives, or clear acrylics based on texture depth and material.
Consider adhesive types and follow recommended application techniques for consistent contact without over-saturation or gaps.
Apply Primer and Adhesive for an Even Bond
Start by applying your chosen primer in smooth, overlapping strokes so it seals the texture and creates a uniform surface for adhesion.
Begin with smooth, overlapping primer strokes to seal texture and create a uniform surface for strong adhesion.
You’ll choose primer and adhesive based on texture, then spread adhesive evenly for a strong bond. Primer benefits and adhesive types matter for durability.
- Pick the right primer
- Match adhesive types to wallpaper
- Apply adhesive uniformly
- Let primer dry fully
How to Hang Wallpaper Over Lightly Textured Walls
Smoothly hang wallpaper over lightly textured walls by planning each strip and working steadily from a plumb line; you’ll align patterns, butt edges (or slightly overlap if using seams designed for that), and smooth out adhesive with a brush or seam roller to bridge minor texture without flattening it completely.
Use gentle hanging techniques, press seams, trim excess, and keep a clean, even surface for reliable pattern alignment.
Handling Seams, Pattern Matching, and Imperfect Edges
When you’re hanging wallpaper over imperfect surfaces, pay close attention to seams, pattern repeats, and uneven edges so the joins look intentional rather than obvious; align patterns at their repeat points, trim edges squarely, and use a seam roller and brush to press adhesive into low spots while slightly lifting high ridges to reduce shadowing without crushing texture.
- Prioritize seam handling at pattern breaks
- Match pattern alignment before cutting
- Tidy imperfect edges with straight cuts
- Work texture variations into overlaps
Troubleshooting: Bubbling, Lifting, and Telegraphing
If bubbles, lifting edges, or pattern telegraphing show up after you’ve hung a strip, don’t panic—you can usually fix them without stripping the whole wall.
For bubbling issues, smooth out with a pinhole release and roller.
Address lifting solutions by reactivating adhesive or adding paste under edges.
Identify telegraphing causes—deep texture or poor wallpaper adhesion—and perform localized texture repair before rehanging.
Call a Pro: Structural, Moisture, or Asbestos Red Flags
Fixing small wallpaper problems yourself is fine, but certain signs mean you should call a professional.
Fix minor wallpaper issues yourself, but call a pro if you spot serious signs or hazards.
If you spot structural cracks, persistent moisture stains, or suspect old materials, don’t proceed—these can hide serious problems like mold or asbestos.
Arrange an asbestos inspection and address moisture issues before wallpapering.
- Large foundation or wall cracks
- Recurrent damp or mold
- Historic plaster or insulation
- Musty odors
Best Products, Time, Cost, and Cleanup Checklist
Start by gathering the right products so you don’t get halfway through the job and have to run to the store: high-quality wallpaper paste or pre-mixed adhesive suited to your wall type, a reliable smoothing brush or plastic seam roller, a sharp snap-off utility knife with extra blades, a paste brush or roller, a level and plumb line, and a drop cloth plus painter’s tape for protection.
Follow best practices: allow prep and lining time, expect 1–3 days total.
Include a cost breakdown for materials, tool rental, and disposal; plan a simple cleanup routine: scrape, vacuum, wipe, and dispose responsibly.
Frequently Asked Questions
Can Wallpaper Be Removed Without Damaging Skim-Coated Walls?
Yes — you can remove wallpaper without damaging skim-coated walls if you use gentle removal techniques and proper wall preparation tips. You’ll soften adhesive, peel carefully, clean residues, and repair minor imperfections to protect the skim coat.
How Long Should Newly Skim-Coated Walls Cure Before Wallpapering?
Think of your wall as a loaf that needs rising: you should wait 7–14 days for proper curing time, using careful skim coating techniques and controlled humidity; don’t rush, or the wallpaper won’t adhere properly.
Can Wallpaper Be Applied Over Painted Wallpaper Remnants?
You can, but you’ll need paint removal and thorough surface preparation first; strip loose paper, sand or dissolve remaining paint, fill and smooth imperfections, then prime so the new wallpaper adheres evenly and doesn’t bubble or peel.
Will Textured Walls Affect Heated Towel Rails or Wall Fixtures?
Yes — textured walls can affect wall fixture compatibility and towel rail installation: you’ll need sturdier anchors, possibly flat mounting plates, and careful leveling; don’t expect effortless fitting, so reinforce studs or use heavy-duty fixings for a secure install.
Are Steam-Hang Wallpaper Methods Safe on Older Plaster?
Yes — you can use steam-hang methods on older plaster, but you’ll need caution: steam damage can weaken plaster integrity, so you’ll inspect, repair loose sections, and test a small area before proceeding to avoid further harm.
Conclusion
You can absolutely wallpaper textured walls, but don’t expect magic—some textures telegraph through thin papers. If you’re worried it’ll look bumpy, imagine a smooth linen finish hiding behind pattern; use a heavy-duty lining paper or skim-coat to get that look. Take your time prepping, match patterns carefully, and patch seams as you go. With the right prep and materials, your room will read like a fresh, intentional design, not a rushed DIY.