
How to Remove Fabric Paint From Walls Safely and Effectively
First identify whether the fabric paint is water-based, acrylic, or solvent-based by testing a hidden spot with water and rubbing alcohol. Work in a ventilated area, protect floors, and wear gloves. For fresh spills, blot and rinse with mild soap and water; for dried spots, gently lift with a plastic scraper, rehydrate with rubbing alcohol or a mild remover, and test before wider use. Patch any damage, prime, and match paint color — keep going to learn specific methods and safety tips.
Who This Guide Is For and What to Expect
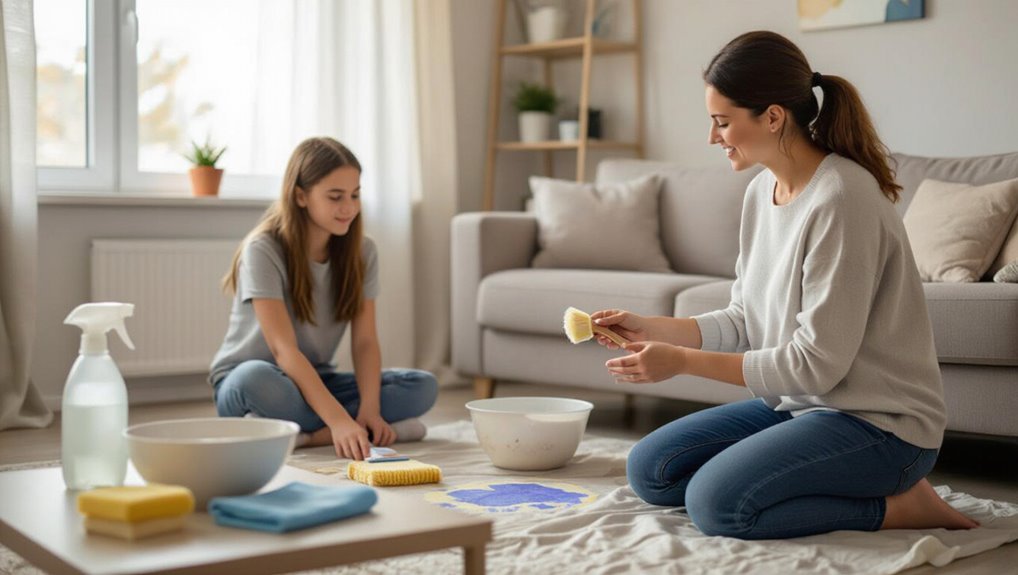
If you’ve got fabric paint on your walls—whether from a craft project gone wrong, kids experimenting, or an accidental spill—this guide is for you.
You’ll get clear advice tailored to homeowners, renters, and caregivers who want safe, effective paint care. Expect practical options, tools to use, and cleaning safety tips that help you decide whether to tackle removal yourself or call a pro.
Quick Fix: Remove Fabric Paint From Walls Safely (Step-by-Step)
First, identify whether the fabric paint is water- or solvent-based so you pick the right cleaner.
Then pick an inconspicuous spot and test your chosen method to make sure it won’t damage the wall finish.
If the test goes well, you can proceed with the full removal using the step-by-step steps below.
Assess Paint Type
Before you start scrubbing, identify what kind of fabric paint you’re dealing with so you can choose the safest removal method.
Check labels or texture to distinguish water-based, acrylic, or solvent-based fabric paint types.
Also note wall surface compatibility—porous drywall, painted plaster, or sealed surfaces react differently.
That determines solvents, dilution, and pressure you should use to avoid damage.
Test Cleaning Spot
While you may be enthusiastic to tackle the whole stain at once, always test your chosen cleaner on an inconspicuous spot first to confirm it won’t damage the wall finish or spread the paint.
You’ll test cleaning solutions and test fabric types nearby, observe for 10–15 minutes, then proceed only if safe.
- small hidden corner
- dab with cotton swab
- wait 15 minutes
- check for color loss
- note reaction
Identify the Type of Fabric Paint on Your Wall
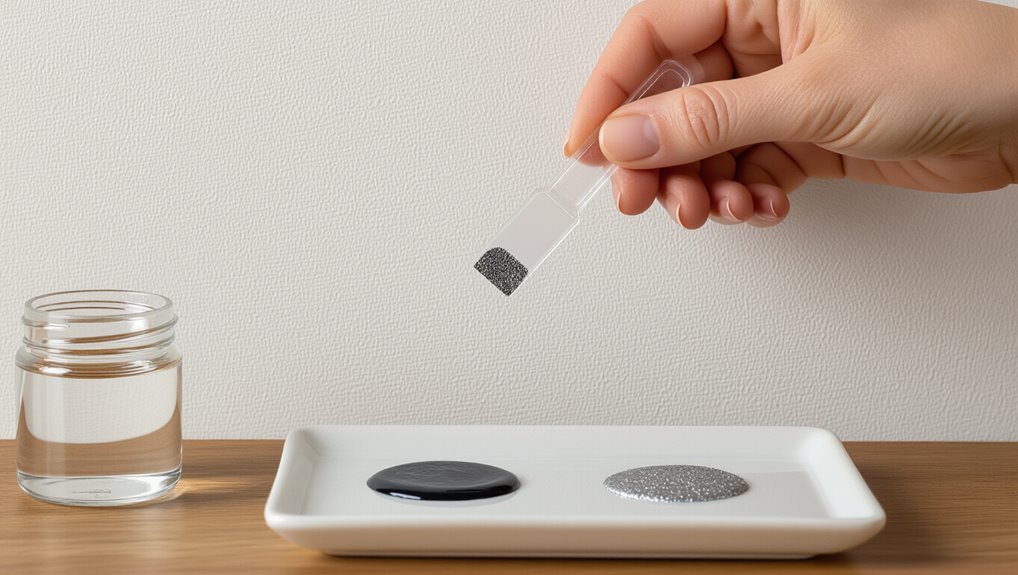
First, check the paint’s texture—is it raised, chalky, or smooth—which gives clues about its composition.
Note how long it took to dry; quick-drying paints often behave differently from slow-setting formulas.
Finally, do a small solubility test (water, then rubbing alcohol) to see whether it’s water-based or solvent-based before choosing a removal method.
Check Paint Texture
Because different fabric paints dry with distinct feels and sheens, start by running your hand lightly over the marked area and looking closely at how the paint sits on the wall: is it soft and flexible like textile inks, slightly raised and rubbery like fabric paint with a gel binder, or hard and glossy like acrylic-based fabric paints?
Use fabric paint characteristics and wall texture types to decide:
- soft, matte film
- slightly raised, rubbery feel
- hard, glossy shell
- flaky or cracked edges
- blends into textured wall paint
Note Drying Time
If you can, note how long ago the stain happened and whether the paint still feels tacky or is fully set, since drying time helps pinpoint the formula: textile inks and water-based fabric paints often dry within minutes to an hour and remain flexible, gel- or rubber-based paints can take several hours to cure and may feel slightly sticky longer, and acrylic or solvent-heavy fabric paints usually form a hard, glossy shell after a day or more.
| Type | Drying duration | Clues |
|---|---|---|
| Water-based | Minutes–1 hr | Flexible, soft |
| Gel/rubber | Hours | Slightly tacky |
| Acrylic/solvent | Day+ | Hard, glossy |
Note drying techniques and drying duration to identify treatment steps.
Test Solubility Type
Want to know what’ll actually lift the stain? You test a hidden spot to determine solubility and match fabric paint types to proper removal techniques.
Use small swabs and note reactions; water-based wipes away, solvent-based resists. If unsure, proceed cautiously.
- water-based (acrylic)
- solvent-based (oil)
- dye-based
- mixed media
- unknown/aged paint
How Wall Finish Affects Paint-Removal Choices
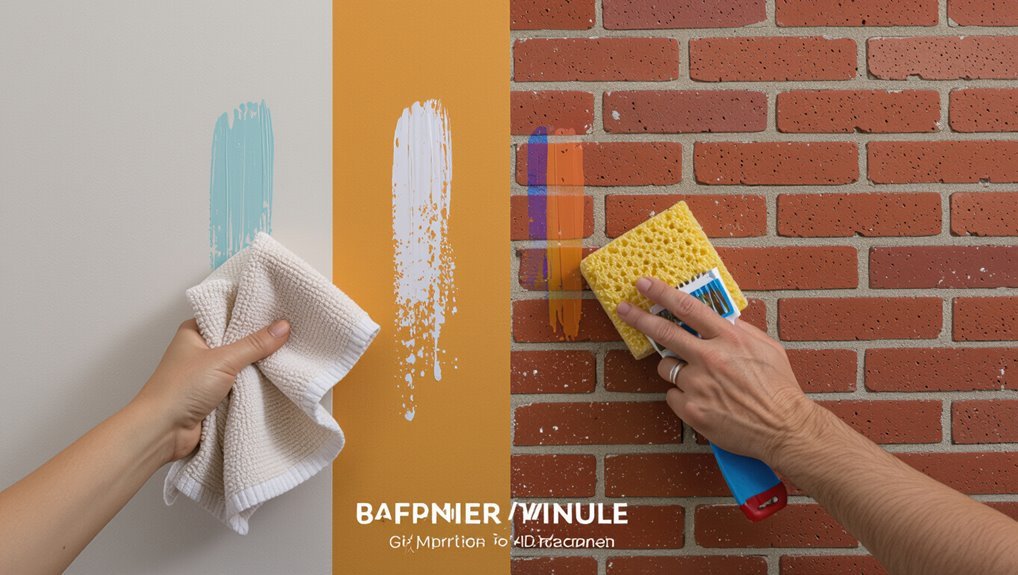
While choosing a removal method, consider your wall’s finish—smooth painted drywall, textured plaster, or wallpapered surfaces all react differently to solvents, scrubbing, and scraping.
You’ll assess wall finish and paint compatibility first: porous or matte surfaces absorb solvents, textured plaster resists heavy scraping, and wallpaper may delaminate.
Match gentler, solvent-free approaches to delicate finishes to avoid further damage.
Gather Tools and Supplies Before You Start
Before you start, assemble the essentials so you won’t interrupt the job to hunt for tools: gloves, safety goggles, drop cloths, a putty knife or plastic scraper, soft cloths and sponges, mild detergent, rubbing alcohol or a recommended solvent, and sandpaper or a sanding sponge for stubborn spots.
Gather supplies, plan cleaning techniques, and note safety precautions before you begin.
Gather supplies, plan cleaning techniques, and review safety precautions before starting any project.
- Plastic scraper
- Microfiber cloths
- Mild detergent
- Rubbing alcohol
- Sanding sponge
Use Safety Gear and Ventilation to Protect Yourself and the Room
Now that you’ve gathered your tools, put on appropriate safety gear and open windows to ventilate the room.
Wear gloves, goggles, and a respirator if using solvents; safety equipment keeps you safe from fumes and splashes.
Use ventilation tips like cross‑venting with fans and keeping doors open.
Work methodically, take breaks outside, and dispose of contaminated materials safely.
Protect Adjacent Surfaces and Furniture
Before you start removing paint, cover nearby floors with drop cloths or plastic sheeting to catch drips and debris.
Move or shield surrounding furniture with old sheets or painter’s tape and cardboard to prevent accidental staining.
Take a moment to secure edges so coverings won’t slip while you work.
Cover Nearby Floors
Cover the floor around your work area with drop cloths or heavy-duty plastic sheeting to catch drips and overspray; tape seams and edges to baseboards so nothing slips under.
Keep floor protection secured, place cleaning supplies nearby, and follow safety precautions like gloves and ventilation.
- Weighted drop cloths
- Plastic sheeting taped down
- Cardboard for high-traffic paths
- Paper towels and rags
- Small spill tray
Shield Surrounding Furniture
1 simple step you can take is to move smaller pieces out of the room and drape larger furniture with breathable cloths or plastic sheeting so paint splatter and fumes can’t settle on upholstery or wood.
Then secure coverings, tape seams, and create clear pathways to prevent accidents.
Prioritize furniture protection and workspace organization so cleanup’s faster and damage risk is minimized.
Test a Small Area for Finish-Safe Cleaning
Since wall finishes vary, you should always try any cleaner on an inconspicuous spot first to confirm it won’t damage paint or texture.
Test gentle cleaning solutions for fabric paint residue, wait to see effects, then proceed.
Check for discoloration, sheen change, or texture loss before wider use.
- small corner behind furniture
- around switch plates
- baseboard edge
- inside closet wall
- under trim molding
Act Fast: Removing Still-Wet Fabric Paint
Act quickly when fabric paint is still wet — the sooner you act, the easier it is to lift the stain without harming the wall. You’ll need gentle removal techniques: blot excess paint, use mild soap and water, then rinse. Avoid aggressive scrubbing and harsh drying methods. Monitor the spot; repeat as needed until the paint lightens.
| Step | Action |
|---|---|
| 1 | Blot excess |
| 2 | Soap rinse |
| 3 | Air dry |
Blot and Lift Fresh Fabric Paint With Household Items
Grab a clean white cloth or paper towels and gently blot the fresh paint to lift as much as you can—don’t rub, which pushes pigment deeper.
Use gentle blotting techniques and simple lifting methods with household items to prevent spreading.
- Damp white cloth
- Paper towels
- Mild dish soap
- Distilled water
- Cotton swabs
Remove Partially Dried Fabric Paint Gently
If the paint’s still tacky, you’ll want to gauge how thick the layer is before you touch it.
Test a small, hidden spot with the mildest cleaning method first so you don’t damage the wall.
If that works, move to gentle solvents like rubbing alcohol or a commercial fabric-paint remover, using light pressure and a soft cloth.
Assess Paint Thickness
When you inspect the stained area, look closely to determine how thick the fabric paint layer is and whether it’s still tacky or has started to set; that tells you how gently you need to proceed and which removal method will work best.
Use paint thickness assessment to evaluate removal techniques and choose tools and solvents accordingly.
- thin smear, barely raised
- tacky but flexible
- thin crust with soft center
- firm film, partially set
- thick, raised bead
Test Cleaning Method
Start by choosing the gentlest test method and work on a small, inconspicuous spot about the size of a coin to see how the paint responds.
Gently blot with a damp cloth and a mild cleaner, and always test cleaning products first.
Observe for color lift, paint softening, or wall damage to confirm test surface compatibility before proceeding to remove more of the partially dried fabric paint.
Use Gentle Solvents
Choose a solvent that’s mild enough for your wall finish—rubbing alcohol, a diluted dish soap solution, or a commercial adhesive remover labeled safe for painted surfaces—and apply it sparingly to a microfiber cloth rather than directly onto the wall.
Gently blot the fabric paint, test first, and rinse with water.
- small circular motions
- fresh cotton swabs
- minimal pressure
- quick blotting
- repeat tests
Soften and Lift Fully Dried Fabric Paint
Soften stubborn, fully dried fabric paint by gently rehydrating it before you try to lift any pigment—this loosens the binder and makes the paint peel or wipe away without damaging the wall.
Test a small area, apply minimal solvent or damp cloth, and let it sit.
Match fabric paint types to appropriate removal techniques, then gently scrape or blot lifted paint, repeating as needed until the stain’s gone.
Use Soap and Warm Water for Water-Based Fabric Paint Removal
If the fabric paint was water-based, grab mild dish soap and warm water—this simple mix will often dissolve the pigment and binder without harming painted walls.
You’ll gently blot and rinse, repeating until the stain fades. Use soft cloths and patience; water based solutions are a safe starting point among paint removal techniques.
- Soft cloth
- Warm water
- Mild dish soap
- Blotting motion
- Rinse and repeat
How Isopropyl Alcohol Works on Acrylic Fabric Paint and When to Use It
Isopropyl alcohol breaks down the acrylic binder in fabric paint, loosening pigment particles so you can lift them from the wall without sanding. Use it when water and soap don’t budge a dried acrylic stain or when the paint feels tacky to the touch.
You’ll test Isopropyl effectiveness on an inconspicuous spot, blot gently, and note Acrylic paint interaction before proceeding to avoid finish damage.
Use Vinegar Solutions Safely on Painted Walls
Because vinegar is acidic, you should dilute it and test it first before applying it to painted walls; it can lift acrylic residues but may dull or etch some finishes.
Dilute vinegar and spot-test painted walls first—its acidity can remove residues or dull delicate finishes.
You’ll adjust vinegar concentration based on wall compatibility and finish. Test a hidden spot, use soft cloths, rinse thoroughly, and avoid prolonged soaking.
- small diluted mix
- hidden patch test
- soft circular motion
- quick water rinse
- gentle pressure only
Use Baking Soda Paste to Lift Stubborn Fabric Paint Spots
Scrub gently with a baking soda paste to lift stubborn fabric paint spots without damaging the finish: mix baking soda and water into a spreadable paste, apply it to the stain, and work in small circular motions with a soft cloth or sponge until the paint loosens. Rinse, repeat if needed, and blot dry for safe paint removal.
| Step | Tip |
|---|---|
| 1 | Mix paste |
| 2 | Test area |
| 3 | Apply gently |
| 4 | Rinse well |
| 5 | Blot dry |
Use a Plastic Scraper on Fabric Paint Without Gouging Drywall or Plaster
Pick a soft plastic scraper with a thin, flexible edge so you can lift paint without cutting into drywall or plaster.
Test it on an inconspicuous spot and wear a piece of painter’s tape or a thin pad under the blade to protect the finish as you work.
Work slowly at a low angle, rechecking the wall often to avoid gouges.
Choose The Right Scraper
Start with a plastic scraper rather than metal to lift dried fabric paint without gouging drywall or plaster.
You’ll choose scraper materials and consider scraper types for edges, flexibility, and reach so you remove paint cleanly.
Pick a soft plastic blade, a firm angled tool, or an extendable handle for safety.
- soft plastic blade
- flexible putty knife
- angled scraper
- extendable handle
- replaceable tips
Protect The Wall Surface
One simple way to protect drywall or plaster is to use a soft plastic scraper so you lift fabric paint without gouging the surface. You’ll work gently at a low angle, testing pressure on an inconspicuous spot and adjusting if the tool digs in.
For wall protection, pair this with mild solvent and careful surface preparation: clean, dry, and mask surrounding areas before scraping.
Use a Melamine Sponge Safely on Wall Paint
Before you scrub, test a melamine sponge on an inconspicuous spot to make sure it won’t dull or remove the wall paint—these sponges act like very fine sandpaper and can take off finish as well as stains.
You’ll check melamine sponge benefits and wall paint compatibility, use light pressure, keep the area wet, and stop if paint thins.
- small circular motions
- damp, not soaked
- check progress frequently
- avoid gloss finishes
- rinse sponge often
Remove Fabric Paint With Commercial Paint Removers Safely
When you opt for a commercial paint remover, pick one labeled safe for your wall finish and fabric paint type.
Read and follow the product’s instructions, use gloves and eye protection, and guarantee good ventilation.
Test a small hidden spot first to confirm it won’t damage the wall.
Choose Appropriate Remover
Because commercial paint removers vary widely in strength and chemical makeup, you’ll want to pick a product that’s effective on fabric paint but safe for your wall’s finish.
Choose removal products labeled for latex or acrylic-based fabric paint, test a hidden spot, and match remover type to wall coating.
- water-based remover
- solvent-based remover
- gel/paste remover
- citrus/soy remover
- paint stripper variant
Follow Safety Precautions
Now that you’ve picked a remover that’s compatible with your wall finish, take a moment to protect yourself and your space before applying any chemicals.
Wear recommended safety equipment — gloves, goggles, and a respirator if label suggests. Open windows and run fans to guarantee ventilation importance.
Test a small area, follow manufacturer instructions, and dispose of rags and residues responsibly.
Choose the Right Paint Stripper for Interior Walls
A metal scraper in hand won’t do the job alone—you’ll need the right stripper for interior walls to remove fabric paint without damaging drywall or trim.
Consider products that balance paint interactions and removal effectiveness while being low-odor and low-VOC.
- gel formula for vertical control
- water-based for gentle action
- solvent for stubborn spots
- citrus for milder smells
- fast-acting for small areas
Read Product Labels and Test Commercial Removers Safely
Once you’ve chosen the type of stripper, read product labels carefully and test removers on a hidden patch before tackling visible areas. You’ll confirm product safety, get label understanding, and avoid damage. Wear gloves, ventilate, and follow dwell times. If the test fails, stop and try another remover.
| Step | Action | Result |
|---|---|---|
| 1 | Read label | Know hazards |
| 2 | Patch test | Check finish |
Use Heat (Hair Dryer) to Soften Fabric Paint Carefully
Before you use a hair dryer, test it on a hidden spot to make sure the heat won’t damage the paint or wall finish.
Use low, even heat and keep the dryer moving to soften the fabric paint without scorching.
Once the paint softens, gently scrape or blot it away with a plastic scraper or cloth.
Test Heat On Hidden Area
If the paint’s been on the wall for a while, you’ll want to test heat on a hidden spot before using a hair dryer on the visible area.
You’ll check heat sensitivity and watch for bubbling, discoloration, or texture change in hidden areas to avoid damage.
- corner behind furniture
- inside a closet edge
- behind a picture frame
- under a molding
- behind a switch plate
Use Low, Even Heat
Warm the paint gently with a hair dryer set to low, keeping the nozzle about 6–8 inches from the wall and moving it steadily to avoid concentrating heat in one spot.
You’ll use low, even heat to soften paint, easing removal with a plastic scraper or cloth.
Test heat settings first, avoid high temperatures, and prefer safe heat tools to prevent bubbling or damaging the wall.
When to Avoid Heat: Wallpaper, Vinyl, and Delicate Finishes
Because heat can loosen adhesives and melt plastics, you should never use a hair dryer, iron, or steam cleaner on wallpaper, vinyl, or delicate finishes — doing so can warp the surface, lift seams, or set paint stains.
Consider wall type considerations and finish compatibility before proceeding.
- patterned wallpaper
- vinyl-coated panels
- textured plaster
- thin painted paper
- faux wood veneer
Repair Minor Wall Damage After Paint Removal
Inspect the wall closely for gouges, scratches, or thin spots left from scrubbing and scraping; you’ll want to address these before priming and repainting so the finish looks even.
Use lightweight spackling for small holes, apply with a putty knife, and follow patching techniques that match nearby wall textures.
Feather edges, let dry fully, and inspect for levelness before priming.
Sand and Smooth a Wall Patch Without Over-Sanding
Once the spackle’s dry and level with the surrounding surface, you’ll move on to sanding—aiming to smooth the patch without removing too much material.
Use light pressure, circular motions, and progressively finer grit for effective sanding techniques and wall smoothing. Keep edges feathered.
- Start with 120–150 grit
- Switch to 220 grit
- Use a sanding block
- Check from multiple angles
- Clean dust before evaluating
Prime and Repaint Areas After Fabric Paint Removal
Once the patch is smooth and dust-free, inspect the surface for stains, texture differences, or uneven absorption so you know if a stain-blocking primer is needed.
Pick a primer suited to the wall material and the type of paint you’ll use, then let it fully dry.
Finally, repaint with matching finish and blend feathered edges for an invisible repair.
Surface Inspection And Prep
Surface inspection and prep are critical steps before you prime and repaint—check the wall for residual stains, texture changes, or damage left by the fabric paint removal process so you can address problems now rather than after painting.
Use surface preparation and wall inspection to guide repairs, then clean and sand.
- Clean residue
- Sand rough spots
- Fill gouges
- Prime patched areas
- Recheck texture
Choose Primer And Paint
After you’ve cleaned, sanded, and patched, pick a primer and paint that’ll hide stains and blend with the surrounding finish.
For primer selection, choose a stain-blocking product suited to your wall material. Check paint compatibility with the primer and consider finish types for durability.
Do proper surface preparation before priming, then use careful color matching to blend new paint seamlessly with the existing wall.
Color-Matching Tips for Touch-Up Paint That Blends Invisibly
When matching touch-up paint, start by comparing colors in natural light so you can see true undertones. Then test small swatches on an inconspicuous area to confirm the blend; don’t rely on a single sample or indoor lighting alone.
Compare colors in natural light and test tiny swatches out of sight—never trust one sample or indoor lighting alone.
Use your color palette and blending techniques carefully to match sheen and texture.
- Observe at different times
- Use tiny brushes
- Feather edges gently
- Compare both wet/dry
- Adjust tint slowly
Remove Stains Left Behind by Paint Solvents
After removing the paint, check the wall for solvent residue by looking for discoloration, sticky spots, or a lingering odor.
If you find chemical stains, neutralize them right away with a mild solution like diluted vinegar or a baking soda paste, testing a small area first.
Rinse the treated spot, let it dry, and inspect before repainting or touching up.
Assess Solvent Residue
Because paint solvents can leave a faint haze or discoloration even after the top stain is gone, you’ll want to inspect the area closely for any lingering residue before proceeding.
Check for solvent safety cues and note residue effects. Look under varied light, smell for chemical odor, feel for tackiness, test a small spot, and document size and color to plan next steps.
- sheen shifts
- color halo
- sticky surface
- faint odor
- texture change
Neutralize Chemical Stains
Start by neutralizing the solvent stain to halt any ongoing chemical reaction and prevent further discoloration or tackiness.
Blot excess solvent, then apply a diluted baking soda or vinegar solution to restore chemical neutrality. Test a hidden spot first.
Gently dab—don’t rub—until the stain removal progresses, rinsing with clean water and drying.
Repeat cautiously to avoid paint or wall damage.
Remove Multi-Layer Spots From Repeated Fabric Paint Splatters
When fabric paint has built up from repeated splatters, you’ll need to work through each layer methodically to avoid smearing or damaging the wall finish.
When fabric paint builds up, remove each layer slowly and carefully to avoid smearing or damaging the wall finish.
You’ll assess fabric paint techniques used, test solvents, and plan for common removal challenges. Proceed gently, layer by layer, and stop if the finish softens.
- scrape softened paint gently
- blot with solvent
- rinse area
- repeat cautiously
- touch up paint
Remove Fabric Paint From Textured Walls and Stucco
Textured walls and stucco need a careful assessment before you start—identify the depth and type of texture so you know how aggressive you can be.
You’ll use gentler removal methods like soft-bristled brushes, mild solvents, or poultices to avoid damaging peaks and crevices.
Work in small areas and test your technique on an inconspicuous spot first to guarantee the finish stays intact.
Assess Wall Texture
Before you choose a removal method, inspect the wall’s texture closely—stucco and heavy orange-peel finishes trap paint in crevices, while light knockdown has shallower pockets that clean more easily.
You’ll do a quick wall texture analysis and note fabric paint characteristics to plan approach.
- Deep stucco pockets
- Shallow knockdown valleys
- Raised orange-peel bumps
- Smooth plaster sections
- Painted ridges and edges
Gentle Removal Techniques
Although stucco and orange-peel finishes hold paint in nooks, you can remove fabric paint gently by working slowly and using soft tools that won’t damage the texture.
Start with a microfiber cloth and warm soapy water, blotting rather than scrubbing. For stubborn spots, try a soft-bristled brush or diluted rubbing alcohol.
These gentle techniques follow safe practices to protect finish and prevent spreading.
Adjust Technique for Plaster, Drywall, and Wood Paneling
When you’re choosing a removal method, match your approach to the surface—plaster, drywall, and wood paneling each react differently to solvents, scrubbing, and moisture.
Use plaster techniques gently to avoid gouging, prefer drywall methods that limit saturation, and test cleaners on wood paneling finish first.
Handle plaster gently to prevent gouging, limit drywall saturation, and always test cleaners on wood finishes first.
- Soft cloths for plaster
- Light scraping for drywall
- Solvent spot tests
- Minimal water on wood
- Sand/blend sparingly
Handle Fabric Paint on High or Hard-to-Reach Walls
If the paint is up high, first assess how tall the area is and whether you need a ladder, scaffolding, or an extension pole.
Pick stable, rated equipment and have a spotter so you’re steady while you work.
Use gentle application techniques—soft brushes, minimal solvent, and light pressure—to avoid drips and surface damage.
Assess Height And Access
Start by measuring how high the paint stain sits and mapping the surrounding access points so you know what equipment you’ll need; ladders, step stools, or an extension pole can change both your technique and safety precautions.
Perform a clear height assessment and access evaluation, noting obstacles and surface fragility.
- Ceiling height
- Wall obstructions
- Flooring stability
- Nearby furniture
- Electrical fixtures
Choose Stable Equipment
Now that you’ve mapped height and access, pick sturdy equipment that’ll keep you safe while reaching high or awkward spots. Use stable tools like an A-frame ladder or extension pole, secure footing, and a spotter. Prioritize equipment safety: check locks, wear non-slip shoes, and avoid overreaching.
| Tool | Tip |
|---|---|
| A-frame ladder | Lock spreaders |
| Extension pole | Secure head |
Use Gentle Application Techniques
When you’re tackling fabric paint on high or awkward walls, work with slow, controlled motions to prevent drips and over-scrubbing that can spread stain or damage paint underneath.
Use a step ladder, extendable tools, gentle scrubbing with soft cloths, and light cleaners.
Focus on small sections, blotting rather than rubbing, and pause often to check progress.
- step ladder
- extendable scrubber
- soft cloths
- mild cleaner
- blot don’t rub
Protect Children and Pets During Cleanup
Keep kids and pets out of the cleanup area and secure the room with a closed door, baby gate, or temporary barrier so they can’t wander in while you work.
For child safety and pet protection, store solvents, rags, and tools out of reach.
Wear gloves and ventilate the space.
Follow cleanup precautions, label waste, and restore a safe environment before letting family return.
How Long Different Methods Typically Take
Although the exact time depends on the paint type, age, and the wall surface, you can expect most removal methods to take anywhere from a few minutes to several hours per spot.
Although times vary with paint type, age, and surface, most removal methods take minutes to a few hours per spot.
You’ll use Time estimates and Method comparisons to choose.
Typical durations:
- Damp cloth: 5–30 minutes
- Soap + water: 10–60 minutes
- Rubbing alcohol: 5–45 minutes
- Commercial remover: 10–120 minutes
- Sanding/repair: 60–240 minutes
Cost Comparison: DIY Household Methods vs. Commercial Products
You’ll want to compare the upfront and per-use costs of DIY options like soap, vinegar, rubbing alcohol, and baking soda so you know what you’re really spending.
Check commercial removers for their price per ounce and any extra supplies they require to see if they justify the higher sticker price.
That cost view will help you decide whether to try a household fix first or buy a professional product.
DIY Methods Cost Breakdown
Comparing costs for DIY household methods versus commercial products helps you pick the most efficient route for removing fabric paint from walls.
You’ll use DIY options to save, but do a careful cost evaluation of time, supplies, and risk.
Consider these typical expenses:
- Vinegar + water mix: low cost
- Baking soda paste: very cheap
- Rubbing alcohol: moderate
- Dish soap solution: minimal
- Scraper/tool: one-time buy
Commercial Product Pricing
After weighing DIY options, look at commercial removers to see where your time and effort buy convenience.
You’ll compare commercial cleaner options like solvent-based sprays, gel strippers, and eco-friendly formulas.
Check pricing comparisons per ounce, coverage, and required safety gear.
Higher upfront cost often saves labor and risk, but calculate total expense versus DIY supplies and potential wall touch-ups before deciding.
When to Call a Professional Wall Restoration Specialist
If the paint stain covers a large area, has soaked into drywall or plaster, or the surface crumbles when you touch it, call a professional wall restoration specialist—it’s something you shouldn’t try to fix on your own.
You’ll get a professional assessment and tailored restoration solutions.
Consider scenarios like:
- Extensive staining across a wall
- Sagging or soft drywall
- Mold or odor after paint
- Structural cracking
- Historic or delicate finishes
How Professionals Remove Set-In Fabric Paint (Methods Pros Use)
When stains have set into drywall or plaster, professionals rely on a mix of mechanical, chemical, and thermal techniques to lift fabric paint without causing more damage.
You’ll see them evaluate the surface, test small areas, and choose methods that balance effectiveness with preservation.
You’ll watch pros use gentle sanding, targeted solvent gels, heat application, and controlled scraping—professional techniques for careful fabric paint removal that protect finishes.
Signs That Paint Removal Attempts Are Causing More Harm Than Good
Professionals try to minimize damage, but your own removal attempts can still cause problems if you push too hard or use the wrong methods.
Watch for signs you’re making things worse: visible paint damage, softened drywall, or spreading stains. Stop if you notice worsening texture, excessive scraping, or strong chemical odors—these often signal removal mistakes and escalating harm.
- bubbling paint
- torn drywall paper
- discoloration beyond spot
- sticky residue spreading
- persistent chemical smell
Prevent Fabric Paint From Reappearing During Future Projects
Because prevention is easier than cleanup, plan ahead to keep fabric paint from showing up where it shouldn’t during future projects.
Use fabric paint prevention tips: store paints tightly, label lids, clean brushes immediately, and dedicate work zones.
Adopt future project strategies like wearing disposable clothing, using trays, and keeping children and pets away to minimize accidental splatters and transfers.
Best Practices for Laying Drop Cloths and Masking Walls for Painting
Start by spreading clean, sturdy drop cloths so they fully cover floors and furniture. Then smooth seams and secure edges with low-tack painter’s tape to prevent trips and paint seepage.
You’ll use drop cloths placement and wall masking techniques to protect surfaces; follow painter’s tape usage, surface protection methods, paint prevention tips, and cleanup strategies.
- Overlap cloths
- Tape flush to baseboards
- Mask trim edges
- Protect vents
- Keep tools organized
Dispose of Paint Waste and Used Solvents Responsibly
Once the job’s done and drop cloths are folded away, don’t just toss used rags, leftover paint, or solvents in the trash or down the drain; they can harm the environment and violate local rules.
Seal containers, label hazardous waste, and take them to a community hazardous waste facility or collection event.
Follow paint solvent safety guidelines and choose eco friendly disposal options to reduce risk and fines.
Document Damage for Insurance or Landlord Claims
Photograph the damage from several angles and distances, capturing close-up detail and the wider wall context so you can prove how extensive the paint stain or peel is.
You should timestamp images, note locations, and record steps taken for damage assessment and claim documentation.
Keep originals, make backups, and contact your insurer or landlord promptly.
- timestamps
- multiple angles
- scale reference
- written notes
- backup files
Frequently Asked Troubleshooting Scenarios and Quick Fixes
Troubleshooting tricky fabric-paint issues? You’ll find clear troubleshooting tips: test solvents on a hidden spot, use mild detergent for fresh stains, apply rubbing alcohol for small spots, and gently sand dried blobs before repainting.
If paint won’t budge, try a commercial stain remover sparingly. These effective solutions minimize damage; document results and stop if the wall surface degrades.
Time-Saving Tips for Tackling Multiple Spots at Once
If you’re facing multiple fabric-paint spots, group them by treatment type and work in small zones so you can move efficiently without re-mixing solutions or switching tools repeatedly.
Use practical fabric paint techniques and multiple spot strategies to save time:
- Triage by stain age and color
- Pre-test remover on scrap
- Batch similar spots together
- Use multi-head tools
- Track progress with checklist
Eco-Friendly Alternatives for Removing Fabric Paint From Walls
When you’re working through batches of spots, you can also choose methods that are gentler on your home and the planet. Use eco friendly cleaners like diluted vinegar, baking soda paste, or plant-based sprays. Test natural solvents on a hidden area, work gently with a soft cloth, and ventilate.
| Method | Ingredient | Use |
|---|---|---|
| Cleaner | Vinegar | Dab |
| Paste | Baking soda | Scrub |
| Solvent | Citrus | Spot-test |
| Spray | Plant oil | Wipe |
Common Mistakes to Avoid When Removing Fabric Paint
Although you want the paint gone fast, rushing or using the wrong products can make stains worse or damage your wall finish.
Don’t rush—using the wrong products or methods can worsen stains and damage your wall finish.
You should test cleaning solutions, follow safe removal techniques, and avoid common errors that strip paint or spread fabric paint.
Don’t scrub harshly or mix solvents.
- Using abrasive tools
- Skipping a spot test
- Mixing chemicals
- Overwetting drywall
- Rushing the process
Quick Checklist to Follow Before You Start Paint Removal
Before you start, gather supplies, protect the area, and confirm the wall type so you can remove fabric paint safely and efficiently.
Check fabric paint types and age, test a hidden spot, and verify proper ventilation.
Lay drop cloths, tape trim, and remove furniture.
Have mild cleaner, solvents, soft cloths, and a plastic scraper ready.
Know paint disposal rules.
Decision Flow: Choosing the Right Removal Method for Your Situation
If you’re ready to tackle the stain, follow a simple decision flow that matches the paint type, wall surface, and how long the paint has been there so you pick the least aggressive, most effective method first.
Use removal techniques suited to fresh vs. cured fabric paint, testing in an inconspicuous spot.
- Identify paint age
- Check wall finish
- Try gentle solvent
- Escalate to mechanical methods
- Consider professional help
Frequently Asked Questions
Can Fabric Paint Transfer to Adjacent Rooms Through Ventilation?
Yes — you can expect some paint transfer through ventilation systems if paint’s still wet or aerosolized; you’ll want to seal vents, run fans to exhaust outward, and isolate the room so particles won’t migrate into adjacent spaces.
Will Fabric Paint Damage Electrical Outlets or Light Switches?
Think of a paint spill like a skillet sizzling near outlets: you shouldn’t let fabric paint touch switches. You’ll avoid damage by identifying paint types, turning power off, wearing gloves, and using gentle cleaners as safety precautions.
Can Laundry Prewash Stain Removers Work on Wall Paint?
Yes — you can try laundry prewash stain removers on wall paint, but they’re hit-or-miss; test first. Use gentle stain removal techniques, avoid harsh scrubbing, and consider fabric paint alternatives like rubbing alcohol or repainting.
How to Remove Fabric Paint From Baseboards or Trim Differently?
You’ll treat baseboards like delicate jewelry, not a wall — use gentle solvent on cotton swabs for spot cleaning, sand stubborn spots lightly, then repaint if needed; prioritize trim protection with tape and drop cloths beforehand.
Are There Warranty or Rental Lease Implications for Paint Removal?
Yes — you’ll need to check lease agreements and warranty coverage: leases may require landlord approval and repainting, while warranties rarely cover tenant damage; get written permission, document repairs, and save receipts to protect your deposit and claims.
