How to Remove Paint Stains From Metal Without Scratching the Surface
You can remove paint stains from metal without scratching by softening the paint first with warm soapy water, steam, or a commercial softener, then using gentle solvents like rubbing alcohol or citrus removers on a hidden spot. Lift softened paint with a plastic scraper or nylon brush and wipe with a microfiber cloth, rinsing often to avoid residue. Wear gloves and work ventilated. Follow up with touch-up and regular inspections, and keep going to learn specific methods for different finishes.
How to Remove Paint Stains from Metal Without Scratching the Surface
If you want a quick answer: use gentle, nonabrasive options like chemical paint removers formulated for metal, citrus-based solvents, or a plastic scraper with warm soapy water to lift paint without scratching.
Below you’ll get a glance at safe, scratch-free methods and the tools to use for each.
Use these techniques depending on the metal (aluminum, stainless steel, painted/coated surfaces) and the paint type or how long it’s been on.
Quick Answer Safe, Scratch-Free Methods at a Glance
Start with the gentlest approach and work up: you’ll protect the metal by using soft tools and mild solvents first, reserving stronger chemicals or abrasives only if needed.
For quick, scratch-free results on how to remove paint stains from metal, try warm soapy water, microfiber cloths, plastic scrapers, rubbing alcohol, and commercial citrus removers.
Test hidden spots and rinse thoroughly after cleaning.
When to Use These Methods (Types of metal and paint scenarios)
Now that you’ve got the gentle options in mind, decide which method suits the metal and paint you’re dealing with.
For aluminum or stainless, try mild solvents or plastic scrapers.
For painted or powder-coated surfaces, start with soap, water, and heat.
For rusted or thick enamel, use chemical strippers formulated for metal, testing a hidden spot first to avoid finish damage.
Understanding Paint on Metal
To remove paint effectively, you’ll need to understand how and why paint bonds to metal at a basic chemical level.
Know the common types you’ll encounter—latex, enamel, spray paint and rust-preventive coatings—and how their chemistry changes removal options.
Also remember that finishes like powder-coating, anodizing, bare metal and primed surfaces all respond differently to solvents and mechanical methods.
Why Paint Adheres to Metal (basic chemistry and bonding)
Because metal surfaces offer a mix of physical texture and chemical sites, paint sticks by combining mechanical interlocking, adsorption, and chemical bonding.
You’ll find that surface roughness traps pigment and binder, while polar metal atoms attract polar paint molecules.
Oxide layers and surface treatments create reactive groups that form coordination or covalent links with binders, increasing adhesion and resistance to simple removal.
Common Types of Paints on Metal (latex, enamel, spray paint, rust-preventive)
Understanding how paint bonds to metal helps you pick the right removal method, but it also helps to recognize the different kinds of coatings you’re likely to encounter.
You’ll find water-based latex that’s flexible and lifts with soap and heat; oil-based enamel that’s tougher and may need solvents; spray paints that dry thin and often respond to light abrasion; and rust-preventive primers requiring specific removers.
How Different Metal Finishes Affect Removal (powder-coated, anodized, bare metal, painted primer)
When you’re removing paint, the metal’s finish determines which methods will work and which will damage the substrate, so you need to match technique to surface:
Powder-coated surfaces resist solvents but scratch easily, so use mild cleaners and plastic scrapers.
Anodized aluminum tolerates gentle chemical strippers.
Bare metal allows mechanical removal but rusts if exposed.
Painted primer needs care to avoid lifting the underlying coat.
Safety and Preparation
Before you start, put on gloves, eye protection, and a mask, and work where fumes can’t build up.
Gather a checklist of cleaners, scrapers, rags, and a test patch tool so you won’t stop halfway through.
Always try your chosen method on an inconspicuous spot to make sure it won’t damage the metal.
Safety Gear and Ventilation
One good rule: always suit up and ventilate the work area before you start removing paint from metal.
Wear gloves, eye protection, and a respirator rated for fumes; avoid cotton that soaks solvents.
Open windows, use a fan to direct air outward, and work outdoors if possible.
Keep a fire extinguisher nearby and don’t smoke around solvents or heat sources.
Tools and Materials Checklist
Now that you’ve suited up and set up ventilation, gather the right tools and materials so you can work efficiently and safely.
You’ll need items that clean without abrasion, protect surrounding areas, and help remove residue.
- Soft microfiber cloths, plastic scrapers, nitrile gloves
- Gentle solvent (paint remover for metal), isopropyl alcohol
- Masking tape, drop cloth, small nylon brushes
How to Test a Method Safely on an Inconspicuous Spot
Pick a small, hidden area—like the underside or inside edge—and apply your chosen cleaner there first to check for discoloration, damage, or finish loss.
Wait the full recommended dwell time, wipe gently with a soft cloth, and inspect under good light.
If no harm appears, proceed using the same technique.
If you see damage, stop and try a milder product or a different method.
Step-by-Step Scratch-Free Removal Methods
You’ll start by softening stubborn paint with heat, steam, or a commercial softener.
Then move to gentle chemical removers that are safe for metal.
Use non‑abrasive tools like plastic scrapers, nylon brushes, and dental picks before finishing with microfiber cloths and targeted wiping solutions.
For small parts, consider ultrasonic or steam cleaning to lift residues without scratching.
Step 1: Softening the Paint First (heat, steam, commercial softeners)
Soften the paint before you try to lift it—making removal quicker and reducing the risk of scratches or gouges.
Use controlled heat (heat gun on low or a hair dryer) or steam to loosen edges, or apply a commercial softener per instructions.
Test a small area, protect surrounding finishes, work patiently with a plastic scraper, and reheat as needed until paint peels away gently.
Step 2: Gentle Chemical Removers (paint strippers and solvents safe for metal)
For most metal surfaces you’ll choose between mild solvents like rubbing alcohol or acetone, and stronger paint strippers for tougher coatings.
You’ll pick alcohol or mineral spirits for light splatters and use a low-odor, metal-safe stripper when the paint’s thick or baked on.
Always test a small area first and follow safety instructions to protect the metal and yourself.
Solvent Options and When to Use Each
1 key to removing paint from metal without scratching is choosing the right solvent for the job; different removers—citrus-based solvents, acetone, alcohols, lacquer thinner, and commercial paint strippers—work best depending on the paint type, metal finish, and how long the paint’s been cured. Match solvent to paint, test a hidden spot, protect finishes, ventilate, and use gentle tools.
| Solvent | Best Use |
|---|---|
| Citrus | Fresh latex, safe on finishes |
| Acetone | Epoxy, cured spots |
| Alcohol | Shellac, light coatings |
| Lacquer thinner | Lacquer, stubborn film |
| Commercial stripper | Thick/coated layers |
Step 3: Mechanical, Non-Abrasive Techniques (plastic scrapers, nylon brushes, dental picks)
When chemical removers aren’t ideal or you want to avoid solvents, use gentle mechanical tools—plastic scrapers, nylon brushes, and dental picks—to lift paint without scratching metal.
Work slowly at shallow angles, testing a hidden spot first. Scrape softened edges, brush residue into flakes, and use dental picks for tight seams.
Clean debris frequently and stop if you see scratches.
Step 4: Microfiber and Cloth-Based Removal (wiping techniques and solutions)
Now that you’ve loosened and lifted paint with plastic scrapers and nylon brushes, switch to microfiber and soft cloths to remove remaining residue without scratching the metal.
Dampen cloth with a mild solvent or soapy water, wring it well, and wipe along the grain. Use fresh cloth sections to avoid re-depositing paint.
Finish dry with a clean microfiber to prevent streaks.
Step 5: Ultrasonic and Steam Cleaning for Small Parts
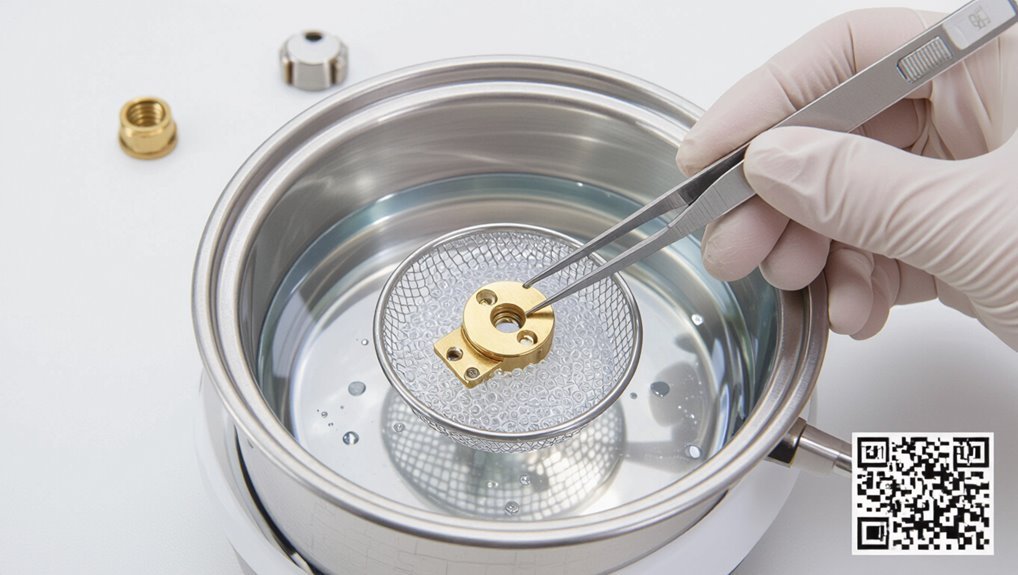
Ultrasonic and steam cleaning offer fast, scratch-free ways to strip paint from small metal parts you can’t safely scrape; you’ll get deep-cleaning action without abrasive contact by using cavitation or controlled steam softening.
Use an ultrasonic bath with appropriate solvent or a steam cleaner at safe pressure, secure parts, monitor cycle times, and rinse thoroughly—both methods loosen coatings without scouring or deforming delicate surfaces.
Step 6: Final Cleaning and Neutralizing Chemicals
Before you finish, neutralize any remaining chemicals and give the part a final clean so residues won’t cause corrosion or interfere with coatings.
Rinse thoroughly with water, then apply a mild neutralizer (baking soda solution or manufacturer-recommended neutralizer) if solvents were used.
Dry completely with lint-free cloth or compressed air.
Inspect for residue, repeat rinsing if necessary, then protect with corrosion inhibitor or appropriate primer.
Comparative Guide Best Method by Situation
You’ll choose different techniques depending on the job: for small precision areas like chips, hinges, and hardware you’ll want tools that offer control, such as cotton swabs, scrapers, or a fine brush with solvent.
For large surfaces such as doors, fences, or machinery, plan for bulk methods like pressure washing, chemical strippers, or sanding to save time.
If you’re working with delicate finishes like anodized aluminum, chrome, or patina, use the gentlest, non-abrasive options and test a spot first.
Small Precision Areas (chips, hinges, hardware)
When dealing with chips, hinges, and small hardware, pick a method that matches the material, finish, and tight tolerances so you remove paint without damaging the metal or mechanisms. Use gentle solvents, cotton swabs, nylon picks, and micro-abrasives sparingly; protect moving parts and re-lubricate after cleaning.
| Situation | Tool | Precaution |
|---|---|---|
| Chip | Swab | Test first |
| Hinge | Brush | Shield spring |
| Hardware | Pick | Avoid torque |
Large Surfaces (doors, fences, machinery)
Scope matters: large surfaces like doors, fences, and machinery need methods that balance speed, finish quality, and substrate safety, so pick the approach that fits the paint type, metal, and accessibility. You’ll favor pressure washing, chemical strippers, or mechanical sanding based on scale. Compare options below to choose fast, gentle, or cost-effective solutions.
| Method | Speed | Finish |
|---|---|---|
| Pressure wash | Fast | Moderate |
| Chemical strip | Moderate | Good |
| Mechanical sand | Slow | Excellent |
Delicate Finishes (anodized, chrome, patina)
Because delicate finishes like anodized aluminum, chrome, and patina can be easily damaged, you need methods that remove paint without stripping the underlying finish or altering color and texture. Use gentle solvents, soft cloths, and plastic scrapers; test an inconspicuous spot first. Compare options below.
| Finish | Best Tool | Caution |
|---|---|---|
| Anodized | Isopropyl + cloth | No abrasives |
| Chrome | Mineral spirits | Avoid acid |
| Patina | Dry cleaning solvent | Preserve patina |
Tools and Products Recommended (Safe for Metal)
You’ll want the right non‑abrasive scrapers and soft‑bristled brushes to lift paint without scratching the metal.
Use metal‑safe solvents and strippers (with dilution and contact‑time notes) for tougher spots, and follow label precautions.
After removal, apply a recommended protective coating—like clear lacquer, rust inhibitor, or wax—to seal and protect the surface.
Best Non-Abrasive Scrapers and Brushes
When removing paint from metal, pick scrapers and brushes that clear residue without scratching the surface.
You’ll want tools that flex, resist marring, and fit tight spots.
Try safe options like:
- Plastic or nylon scrapers for old paint chips
- Soft-bristle nylon brushes for grooves and seams
- Brass-bristle brushes for stubborn flakes (light pressure)
Use steady strokes and test an inconspicuous area first.
Best Solvents and Strippers for Metal (and dilution/use notes)
Before applying any chemical, pick a solvent or stripper that’s formulated for metal and matches the paint type you’re removing—acetone or methyl ethyl ketone (MEK) works well for lacquers, denatured alcohol for shellac, and commercial paint removers or caustic gel strippers handle multiple layers.
For delicate finishes, consider soy- or citrus-based biodegradable strippers that are gentler on substrates.
- Test solvent on an inconspicuous spot first.
- Dilute strong solvents per label; use gloves and ventilation.
- Neutralize and rinse metal after use to prevent corrosion.
Recommended Protective Coatings After Removal
Although stripping leaves metal clean, it also strips protective layers, so you’ll want to apply a coating that matches the metal type and purpose to prevent corrosion and surface damage.
For ferrous metal use rust-inhibiting primers and enamel or polyurethane topcoats. For aluminum or stainless, choose clear anodizing sealers, corrosion inhibitors, or acrylic lacquers.
Use thin, even coats and follow manufacturer cure times for durable protection.
Common Mistakes and How to Avoid Them
Don’t reach for abrasive pads or heavy sandpaper unless you want scratches or ruined finishes.
Always test solvents on a hidden spot before applying harsh chemicals to the whole area.
And don’t overheat metal or use high-heat methods that can warp or damage it.
Mistake: Using Abrasive Pads and Sandpaper
Reaching for abrasive pads or sandpaper might seem like a quick fix, but you’ll often do more harm than good: these materials can scratch protective coatings, gouge soft metals, and create surface irregularities that make repainting harder.
Instead, try gentle, non-abrasive methods—soft cloths, plastic scrapers, solvent-soaked pads—and test a small area first to preserve finish and avoid permanent damage.
Mistake: Applying Harsh Chemicals Without Testing
If you skip testing harsh chemicals first, you can easily strip protective coatings, discolor the metal, or cause corrosion that’s costly to fix.
Always spot-test in an inconspicuous area, wait for full reaction, and rinse thoroughly.
Use milder removers, follow manufacturer instructions, and wear gloves.
If damage appears, stop immediately and try a gentler method or consult a professional.
Mistake: Overheating Metal or Using High Heat Methods
While heat can loosen stubborn paint, applying too much or using open flames can warp, discolor, weaken metal, and you’ll often end up with more damage than you started with.
Don’t use blowtorches or high-temp guns on delicate pieces. Use controlled heat like a hairdryer for small spots, test an inconspicuous area, and combine with gentle scrapers and solvents to avoid warping.
Preventing Future Paint Stains and Damage
Before you paint, make sure the metal is clean, dry, and properly primed to give the finish better adhesion and fewer drips.
Use protective films or covers during work and wipe fresh splatters immediately with a damp cloth or solvent recommended for your paint.
For touch-ups, keep the right tools and matching paint on hand and work in small, controlled strokes to prevent new stains.
Surface Preparation Before Painting
Preparation sets the stage for a clean, durable finish, so you’ll want to strip dirt, rust, and old flaking paint from metal surfaces before you ever touch a brush.
Sand lightly with fine-grit paper, degrease with a solvent, and remove dust.
Apply a rust converter where needed and use primer suited to the metal type.
Let each coat cure fully before painting.
Protective Films, Covers, and Quick-Clean Practices
1 simple habit can save you hours of cleanup: cover and protect anything near your metal project, and clean spills immediately.
Use low-tack protective films, drop cloths, and magnetic covers for edges. Keep a damp microfiber cloth and solvent-safe wipes nearby so you can blot drips before they cure.
Label tools and mask adjacent surfaces to prevent accidental splatters.
Best Practices for Safe Touch-Ups
When you do touch-ups, work in short sessions and use the right tools so you don’t make the problem worse: choose a fine brush or foam applicator for small spots, thin your paint slightly for a smoother feathered edge, and keep solvent and clean cloths handy to remove any stray marks before they cure.
Test on an inconspicuous area, mask surrounding metal, feather edges, and let coats dry fully.
Maintenance and Long-Term Care After Paint Removal
Once the stain’s gone, you’ll want to recoat or prime the metal and apply rust protection to keep it sealed and durable.
Set a simple inspection schedule—check outdoor metal at least twice a year and after severe weather so you catch chips or rust early.
Prompt touch-ups and cleaning will extend the life of your finish and prevent future repairs.
Recoating, Priming, and Rust Protection
After you’ve removed old paint and treated any corrosion, plan your recoating to stop new rust and guarantee a long-lasting finish; proper priming and rust protection are the next critical steps that seal the metal and promote adhesion for topcoats.
Choose a corrosion-inhibiting primer compatible with your topcoat, apply thin even coats, allow full cure, then use a durable topcoat or clear sealer for added protection.
Regular Inspection Schedule for Outdoor Metal
If you want your freshly prepped and recoated outdoor metal to stay rust-free, inspect it on a predictable schedule so small issues don’t become big repairs.
Check monthly for flaking paint, rust spots, or moisture traps; recoat or touch up within weeks if needed.
Do a thorough quarterly review, documenting location and treatment, so corrosion never gains a foothold.
FAQ
Got questions about tricky spots like chrome, powder-coating, plated or anodized finishes, or rusted metal?
We’ll cover whether gentle household options like vinegar or baking soda work and how to remove spray paint or stubborn stains without causing scratches or making rust worse.
Read on for clear, safe answers and quick precautions.
Can I remove paint from chrome without scratching it?
Wondering whether you can remove paint from chrome without scratching it? Yes — you can, if you act carefully.
Use soft, nonabrasive tools (microfiber, nylon brush), gentle solvents designed for chrome, and test in an inconspicuous spot.
Work slowly, dissolve rather than scrape, and rinse frequently.
If unsure, consult a professional to avoid damaging plating or clearcoat.
Is vinegar or baking soda effective for paint removal on metal?
Although vinegar and baking soda are handy for many household tasks, they’re only mildly effective at removing paint from metal and work mainly on fresh, water-based spots; they won’t reliably strip latex or oil-based paint or cured finishes.
You can use them to soften tiny drips, scrub gently with a soft brush, then rinse and dry.
For stubborn paint, choose a targeted remover.
How do I remove spray paint without damaging powder-coating?
How can you remove spray paint from powder-coated metal without harming the finish?
Use gentle methods: start with warm soapy water and a soft cloth.
Then try isopropyl alcohol or a citrus-based remover on a hidden spot.
Rub lightly, rinse often, and avoid abrasives or harsh solvents.
If paint resists, consult the coating maker or a professional to prevent damage.
Will paint stripper harm plated or anodized surfaces?
If the spray paint won’t come off with gentle cleaners, you’ll want to be careful before reaching for a commercial paint stripper—many formulations can attack plated or anodized finishes.
Test a small, hidden area first. Use a stripper labeled safe for plated or anodized metal or choose mechanical options like plastic scrapers and soft-bristle brushes.
Rinse thoroughly and neutralize per product instructions.
How to remove paint from rusted metal without making rust worse?
When you’re dealing with paint on rusted metal, work gently to remove the coating without worsening the corrosion: start by softening paint with a mild, gel stripper or warm soapy water.
Then use a plastic scraper and nylon brush. Rinse thoroughly, dry immediately, and treat rusted areas with a rust converter or light sanding only where necessary.
Prime and repaint to protect the metal.