How to Stencil a Textured Wall Without a Blurry Mess
You can get crisp stenciled patterns on a textured wall if you prep, pick the right supplies, and apply paint lightly. Clean and sand high spots, prime if needed, and choose a durable mylar or adhesive stencil. Use a firm stencil brush, mini roller, or foam pouncer with thin, well-dried paint and stipple or pounce in short taps, offloading between passes to avoid bleed. Secure the stencil, lift straight up, and touch up tiny flaws, and more tips follow below.
Quick Answer Can You Stencil a Textured Wall Without a Blurry Mess?
Yes—you can get crisp results on mildly textured walls by using a stiff-bristled brush or foam pouncer, a snugly taped stencil, and thin, well-dry paint applied in light, stippling taps.
Expect some texture to show through the pattern, so perfect sharpness is realistic only on low to medium textures.
If the wall is heavily textured or rough, skip stenciling or consider a smoothing skim coat first.
Short summary of the method and expected results
You can stencil a textured wall without ending up with a blurry mess by using the right prep, tools, and technique: clean and prime the surface, use a stencil made for texture or a flexible adhesive-backed stencil, apply paint sparingly with a dense foam pouncer or stiff-bristle brush held almost perpendicular, and lock the stencil in place with low-tack spray or clamps so you only get crisp edges where the paint meets the high points of the texture.
You’ll work in thin layers, overlap minimally, and expect sharp motifs that follow the wall’s contours; minor touch-ups can refine edges without losing the textured effect.
When stenciling on textured walls is or isn’t recommended
Although textured walls can take stencil work beautifully when you use the right prep and tools, they’re not always the best choice for every design or texture type.
You should stencil if texture is subtle, pattern has bold shapes, and you can press stencil flat.
Avoid stenciling on deep, spongey, or highly irregular textures; they blur edges and frustrate precise motifs.
Understanding the Challenge Why Texture Causes Blurry Stencils
When you stencil over bumps and ridges, paint can’t transfer evenly, so crisp edges get blurred.
Different textures — from light orange peel to heavy knockdown or popcorn — each trap and spread paint differently, causing smudges or thin patches.
Most bleeding and uneven coverage come from too much paint, stencil lift, or trying to force a flat stencil against an irregular surface.
How wall texture affects paint transfer and edges
Because textured surfaces break up the stencil’s contact with the wall, paint tends to pool on high points and skip over low ones, which blurs edges and softens details.
You’ll get uneven coverage where paint bridges across bumps, creating halos and ragged lines.
Control transfer by using minimal paint, dabbing motion, and firm, consistent pressure so edges stay crisp despite irregular surfaces.
Types of textured surfaces and how each impacts results
Surfaces range from smooth to heavily stippled, and each texture changes how paint transfers through a stencil and how crisp your edges will look.
You’ll adjust technique based on surface type to get predictable results.
- Smooth drywall: sharpest edges, minimal dabbing
- Light orange peel: minor texture, slight softening
- Knockdown: uneven shadows, careful pressure needed
- Stippled/stipple: pronounced bumps, edge loss
- Heavy popcorn: poor detail retention, avoid fine motifs
Common causes of bleeding, smudging, and uneven coverage
Although texture can add character, it also creates tiny gaps and high points that let paint creep under the stencil, causing bleeding, smudging, and uneven coverage.
You’ll also wrestle with too-wet brushes or rollers, loose stencils, uneven pressure, and inconsistent paint thickness.
Dust, peeling texture, and complex patterns amplify errors.
Control moisture, secure the stencil, use light dabs, and build thin layers.
Prep Work Assessing and Preparing Your Wall
Before you start stenciling, gather a simple tools-and-materials checklist so you won’t stop mid-job.
Check your wall’s texture to decide if a soft-bristled brush, foam roller, or a sturdier stencil is best, then clean, prime, and smooth any small imperfections.
If the texture is too heavy or the surface uneven, consider skim-coating or patching those areas before you stencil.
Tools and materials checklist
Grab a clipboard and checklist—you’ll want the right tools and materials on hand before you touch the wall.
Gather quality stencil, painter’s tape, foam roller and pads, low-nap brush, and contractor’s level. Have drop cloths, mild cleaner, sanding block, primer, and compatible paint ready. Confirm spare stencil paper and gloves.
- Stencil
- Painter’s tape
- Foam roller
- Primer
- Drop cloths
How to evaluate wall texture and choose the right stencil
Texture matters—run your hand across the wall and look closely to determine whether it’s smooth, lightly orange-peeled, knockdown, or heavily stippled, because that will dictate which stencil type and application method will work best.
For smooth or light textures use thin mylar stencils and minimal paint.
For knockdown, choose thicker stencils, heavier-bodied paint, and pouncing techniques; avoid delicate detail on heavy stipple.
Surface preparation steps: cleaning, priming, and smoothing small imperfections
Now that you know how texture affects stencil choice, get the wall ready so your pattern lays cleanly and lasts.
Wash surface with mild detergent, rinse and let dry. Lightly sand rough spots and remove dust.
Prime with a stain-blocking, adhesion-promoting primer suited for textured surfaces. Fill tiny nicks with lightweight spackle, sand smooth when dry, and wipe clean before stenciling.
When to consider skim-coating or patching before stenciling
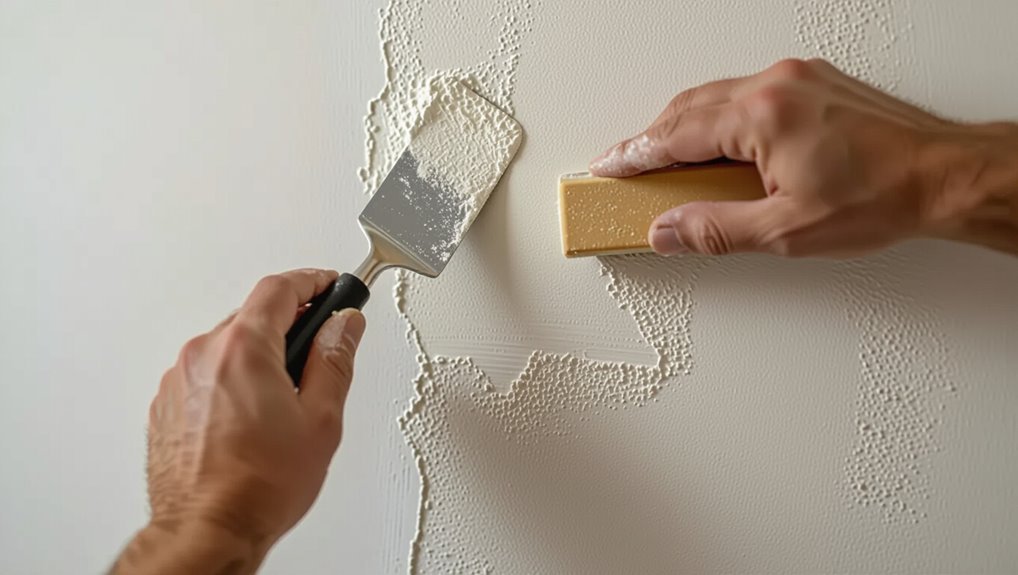
If your wall has deep gouges, pronounced orange peel, or uneven patches that will show through the stencil, consider skim-coating or patching first; doing so creates a smooth, consistent surface that helps crisp stencil edges and prevents paint pooling.
You should skim-coat when texture varies across the area, patches exceed a few inches, or repeated test stencils blur; otherwise, spot-fill and sand.
Choosing the Right Stencil and Paint
You’ll want to pick a stencil material that matches your wall and technique—mylar for durability, adhesive for textured grips, or paper-backed for one-offs—each has trade-offs.
Choose paint with a thicker, slightly open-bodied formula that skips pooling in crevices and keep it at the right consistency to avoid bleed.
Use stiff stenciling brushes, short-nap rollers, or foam pouncers to get crisp edges on uneven surfaces.
Stencil material options (mylar, adhesive, paper-backed) and pros/cons
Picking the right stencil material can make or break your textured-wall project, so let’s compare the common choices—mylar, adhesive, and paper-backed—and how they perform with different paints and textures. You’ll choose based on durability, surface contact, and cleanup.
| Material | Strength | Best for |
|---|---|---|
| Mylar | Durable | Reusable, light texture |
| Adhesive | High contact | Deep texture, crisp edges |
| Paper-backed | Cheap | Single-use, smooth walls |
Paint types and consistencies best for textured surfaces
Choosing the right paint and consistency is essential when stenciling textured walls because proper flow and adhesion determine how crisp your pattern will read against bumps and grooves.
Use thicker acrylic or latex paints slightly thinned with water or a flow improver so they bridge texture without running.
Test mixes on scrap, aim for body that won’t puddle yet fills surface peaks for solid coverage.
Recommended brushes, rollers, and applicators for crisp edges
For crisp stencil edges on textured walls, use tools that deliver controlled, thin layers of paint: firm stencil brushes or short-nap foam rollers for even pressure, mini foam pouncers for recessed texture, and artist-grade small foam or bristle brushes for touch-ups and tight corners.
You’ll dab, not swipe, and load sparingly to prevent bleed.
- Firm stencil brush
- Short-nap foam roller
- Mini foam pouncer
- Small bristle brush
- Artist foam detail brush
Step-by-Step Stenciling Process for Textured Walls
Start by securing and aligning the stencil so your pattern stays straight as you work.
Load the right amount of paint, offload onto a rag and test, then apply with stippling, pouncing, or controlled rolling to suit the texture.
Lift carefully to avoid smudges, move into the next repeat, and touch up edges as needed.
Step 1 Secure and align the stencil
Begin by holding the stencil against the wall where you want the pattern to sit and make sure it’s level and square to surrounding features; you’ll secure it once alignment feels right.
Tape one edge, check with a small level, then fasten opposite corners with low-tack painter’s tape or repositionable spray adhesive.
Confirm placement visually and with a light touch before painting.
Step 2 Use the correct amount of paint: load, offload, test
With the stencil secured, it’s time to load your applicator correctly so the pattern stays crisp on the textured surface.
Dip lightly, then offload excess onto a paper towel or tray until the applicator’s almost dry.
Test on scrap drywall or a hidden area, adjust paint consistency if needed, and repeat until you get even, non-bleeding coverage before stenciling.
Step 3 Application techniques: stippling, pouncing, and controlled rolling

Move your applicator deliberately and you’ll get the cleanest results on textured walls.
Stipple by tapping lightly to deposit pigment on highs without bridging crevices.
Pounce with a dauber for small, controlled dots where texture varies.
Use a short-nap roller lightly—roll in one direction, offload between passes, and build thin layers to avoid bleed and maintain crisp edges.
Step 4 Lifting the stencil and moving to the next repeat without smudge
Lift the stencil straight up and steady to prevent any smudging—don’t slide or twist it across the freshly painted surface.
Hold it briefly to let paint settle, then move to your next position using registration marks or alignment tabs.
Reposition carefully, clamp or tape if needed, and repeat your controlled application.
Check spacing visually before pressing down to start the next imprint.
Step 5 Touch-ups and refining edges
Inspect your work closely and grab a small brush or a cotton swab to fix any paint bleeds, uneven edges, or missed spots.
Blend corrections by feathering outward, matching texture with light stippling. Clean stencil residue before repositioning.
Step back often to check alignment and overall rhythm.
Seal once dry with a clear, breathable topcoat to protect your crisp edges and guarantee durability.
Alternative Methods to Get Crisp Designs on Texture
If the stencil’s edges blur on your textured wall, try adhesive or repositionable stencils to hold the design tight.
You can also use outlines or subtle shadowing to hide soft edges, or embrace faux effects that look intentionally distressed.
For a crisper or more permanent finish, consider vinyl decals, wallpaper panels, or hiring a pro for hand-painting.
Adhesive or repositionable stencil application
Stick the stencil down and you’ll immediately see how much cleaner your edges can get on textured walls.
Use low-tack repositionable adhesive or spray adhesive in light, even coats so the stencil hugs bumps without tearing paint.
Press edges with a soft roller or cloth, paint with a dry brush or stippling brush, then peel slowly for sharp, consistent motifs.
Using outlines or shadowing to disguise soft edges
When texture softens your stencil edges, add a thin outline or subtle shadow to sharpen the design and trick the eye into seeing crisp lines.
After stenciling, use a fine brush or foam-tip applicator to trace a darker or lighter edge around motifs. Keep outlines narrow, follow contours, and blend slightly so shadows read as depth rather than obvious correction.
Practice on scraps first.
Faux effects: intentionally distressed or softened stenciling
Although you can aim for razor-sharp stencils on textured walls, deliberately softening or distressing your design creates a stylish, lived-in look that works with—not against—the surface.
You can dry-brush, sand edges lightly, or apply a thin glaze to mute contrasts. Test techniques on scrap, vary pressure for consistency, and embrace imperfections to make patterns appear intentional and cohesive with texture.
Professional options: vinyl decals, wallpaper, or hand-painting
If you want a crisper, more permanent look than softened stenciling offers, consider professional alternatives like vinyl decals, wallpaper, or hiring a hand-painter.
Vinyl adheres over texture for sharp edges and easy removal; pre-pasted or custom wallpaper can mask irregularities; a skilled painter replicates complex motifs with precision.
Choose based on budget, permanence, and pattern scale for the cleanest result.
Common Mistakes and How to Fix Them
You’ll run into a few predictable issues—overloading your brush or roller, stencil shifting, and paint seeping into the texture—and you’ll need simple fixes for each.
Start by diagnosing whether excess paint, movement, or the wall’s texture caused the problem, then use techniques like blotting excess, re-taping or using registration guides, and carefully scraping or touching up seepage.
I’ll also tell you how to decide when a quick fix will do and when it’s worth stopping and redoing the section.
Overloading the brush or roller diagnosis and remedy
One common culprit behind blotchy stencils on a textured wall is overloading your brush or roller, which drips paint into crevices and smears the pattern.
Diagnose by spotting puddles or raised edges.
Remedy: load minimally, offload excess on a tray or paper towel, use a dry stippling motion, and rebuild thin layers.
Let each layer dry before reapplying.
Stencil movement during painting prevention and correction
Stencil shifting is a frequent cause of blurry or doubled patterns, but you can prevent it by anchoring the stencil and working deliberately.
Tape edges securely, use low-tack repositionable adhesive or magnets on metal, and hold a steady hand with short, controlled dabs.
If movement occurs, stop, realign using registration marks, and redo the affected motif before paint dries to avoid muddiness.
Paint seepage into texture touch-up strategies
Catch seepage early and you can often fix it without redoing the whole wall.
Blot excess paint with a damp sponge, then let dry.
Gently scrape raised blobs with a razor or fine brush.
Feather edges by stippling base color, then reapply stencil pigment sparingly.
Seal with a clear matte coat to blend texture and prevent future bleed.
When to stop and redo vs. when to live with the result
If you’ve managed seepage and touch-ups but still see noticeable flaws, decide whether to live with them or start over based on visibility, effort, and your tolerance for imperfection.
If flaws sit in eye-level focal areas or bother you, redo the stencil: strip loose paint, re-prime, and re-stencil carefully.
If flaws hide in low-visibility spots, touch-up and accept—they often add character.
Best Practices and Pro Tips for Consistently Sharp Results
Before you start, make a template for test swatches and do practice runs so you can tweak paint load and technique on a scrap piece.
Pay attention to timing, ventilation, and drying between coats, and plan for sealing and simple maintenance to keep edges crisp long-term.
Use cost-saving tricks like buying sample paints or renting tools, but know when a pro’s skill is worth the investment.
Template for test-swatches and practice runs
Start with one small, dedicated test board and run several full practice swatches before you touch the wall.
Mark each swatch with paint type, roller/fabric, pressure, and stencil orientation.
Note drying behavior, edge crispness, and texture fill.
Adjust technique—less paint, lighter tamping, different nap—until you consistently get sharp edges.
Use your best swatch as the on-wall reference.
Timing, ventilation, and drying considerations
Because paint on textured surfaces needs predictable drying to hold crisp edges, time your stenciling to allow thin, even passes and quick tack-drying between layers so you don’t drag wet paint across peaks.
Work in moderate temperatures, use fans for gentle airflow (not direct blasts), maintain low humidity, and test small areas to confirm drying pace before committing to large sections.
Maintenance and sealing for longevity
While stencils look great fresh off the wall, proper maintenance and sealing are what keep those edges crisp for years, so you’ll want to protect the design right after the paint fully cures.
- Clean gently with a soft, damp cloth—no abrasives.
- Apply a clear, water-based matte sealer for subtle protection.
- Test sealer on a scrap first.
- Recoat every few years or after heavy wear.
- Touch up edges promptly if chips appear.
Cost-saving tips and when to hire a pro
Keeping your stencil looking sharp with regular sealing also saves money over time, but there are other smart ways to cut costs and know when to call in a pro.
Buy reusable stencils, work in batches, and use quality brushes to avoid redo expenses.
Hire a professional if walls have deep texture, large areas, or you lack time—it’s cheaper than repeated fixes.
Supplies and Material Comparison Cheat Sheet
Grab a quick reference table that compares stencil types, applicators, and paint choices so you can pick the right combo for your textured wall.
You’ll see which stencils work best on bumps, which applicators give the cleanest edges, and which paints stick without clogging the design.
Use it to match your surface and skill level before you start.
Quick reference table: stencil types, applicators, and paint choices
Here’s a compact cheat sheet to help you match stencil types with the best applicators and paints so you can pick the right combo fast; use it to decide whether a soft foam roller or a stiff brush will give the cleanest edges on your textured wall and which paint finish will hide or highlight the texture.
| Stencil type | Best combo |
|---|---|
| Thin plastic | Stiff brush + satin |
| Thick mylar | Foam roller + matte |
| Paper | Pouncing pad + eggshell |
| Flexible | Small roller + semi-gloss |
Project Scenarios and Case Examples
You’ll see clear step sequences for a light orange peel texture so you can follow each stage without guessing.
For heavy knockdown or popcorn finishes, I’ll recommend the right prep and alternative approaches to avoid common pitfalls.
Then we’ll review before-and-after troubleshooting mini-cases to show fixes for issues you might run into.
Scenario A Light orange peel texture: step sequence
For a light orange peel texture, follow a clear step sequence that preps the surface, aligns your stencil, and applies paint in controlled passes so the pattern reads cleanly without filling the texture’s recesses.
Clean and prime, secure the stencil with low-tack tape, pounce paint sparingly with a foam pouncer, lift frequently to check edges, and touch up small gaps with a fine brush for crisp repeats.
Scenario B Heavy knockdown or popcorn: recommended approach
Heavy knockdown or popcorn texture needs a different strategy than light orange peel because its deep peaks and crevices will quickly trap paint and obscure stencil detail.
You’ll need to flatten or fill high relief, use thin, stippling layers, and choose a heavy-duty stencil with a firm backing.
Test on a scrap, sand or skim where needed, and apply multiple light coats for crisp edges.
Before-and-after troubleshooting mini-cases
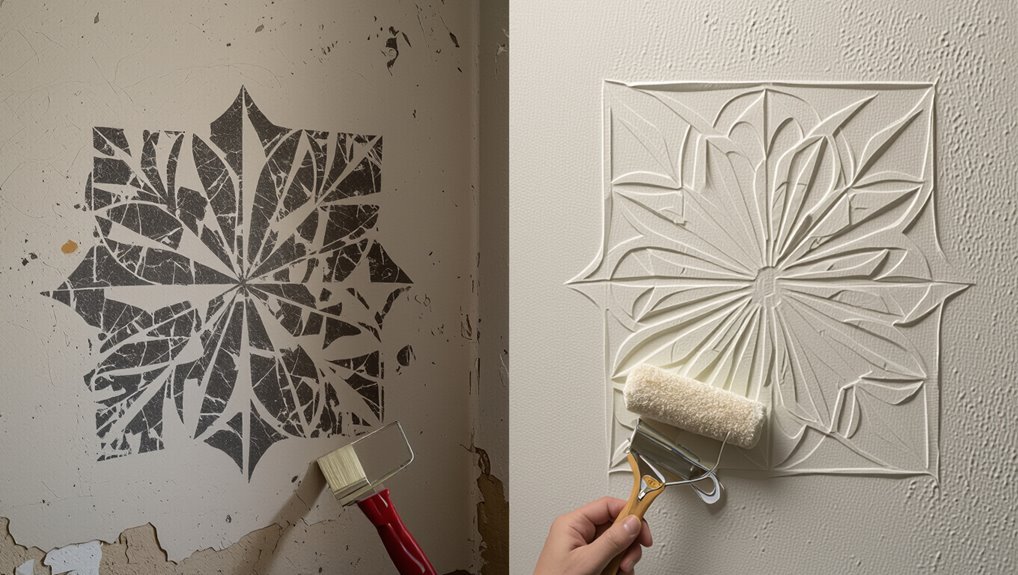
When troubleshooting stencil problems on textured walls, walk through short before-and-after mini-cases that show exactly what went wrong, why it happened, and the simple fix you can use next time.
Describe one failed pass (blurry edges from overloading), explain cause (too much paint, heavy brush), then show the fix (use a dry stipple brush, thin paint, test on scrap) and result.
FAQ Common Questions About Stenciling Textured Walls
You’ll probably have a few practical questions as you start — like whether sanding textured walls always helps, if spray paint works with stencils, and how to keep pattern repeats aligned on uneven surfaces.
You’ll also wonder about cleaning reusable stencils and how many coats or touch-ups are typical for textured jobs.
Below are clear answers and tips to help you get consistent results.
Will sanding or smoothing the wall always improve stenciling?
Could smoothing the wall make stenciling easier? Sometimes.
Light sanding or skim-coating reduces peaks that catch paint and blur edges, so your stencil will sit flatter and give crisper lines.
But aggressive smoothing can damage texture you want to keep and requires prep, drying, and priming.
Weigh effort against desired look; test a small area first before committing.
Can I use spray paint with stencils on textured walls?
Wondering if spray paint will work over a textured wall? You can, but it’s tricky.
Spray covers uneven peaks quickly and risks bleed or haloing. Use light, controlled passes, hold the can farther back, and test on a sample.
Secure the stencil tightly, consider spray sealers, and accept softer edges versus crisp brush-applied or roller stenciling for best results.
How do I match repeats and keep pattern alignment on uneven surfaces?
Spray painting can leave softer edges, which makes keeping repeats aligned even more important on textured walls.
Use registration marks on the wall and stencil, align by feel over bumps, and press the stencil firmly at anchors.
Work in small sections, checking alignment visually and with a straightedge.
Allow paint to dry between repeats to avoid smudging and shifting your pattern.
What’s the best way to clean reusable stencils after use?
Most stencils clean up easily if you act quickly: rinse off excess paint with warm water and a soft brush or sponge while the paint’s still wet.
Then lift stubborn bits with a toothbrush or a soft plastic scraper. Pat dry with a lint-free cloth, lay flat to air-dry, and store between sheets of wax paper.
For dried paint, soak briefly in warm soapy water before gently scrubbing.
How many coats or touch-ups are typical for a textured wall stencil?
Because textured surfaces catch paint differently, you’ll usually apply one solid base coat and then one to two stencil coats, with small touch-ups as needed.
Start light with thin layers to avoid pooling. Inspect in different light angles and press less paint into deep texture.
Expect to retouch edges and gaps with a fine brush; total touch-ups often equal a coat or two.
Closing Checklist Ready-to-Stencil Quick Reference
Before you start stenciling, run through a quick day-of checklist so you’ve got the right tools, a clear plan, and any touch-up supplies on hand.
Follow the step-by-step sequence—surface prep, stencil alignment, paint application, and drying times—to keep the process smooth.
Finish with a final inspection for missed spots, bleeding, or uneven coverage so you can correct issues before the paint fully sets.
Day-of checklist: tools, steps, and final inspection
When you’re ready to start stenciling, gather and check your tools so you don’t interrupt the process: stencil, painter’s tape, level, quality roller or stencil brush, paint tray, drop cloths, ladder, mild cleaner, sandpaper, and a damp rag.
Inspect surface, test paint, align stencil, use light pressure, clean edges.
- Tape and level
- Test swatch
- Light dabbing
- Wipe spills
- Final touch-up