
How to Stop Paint Chipping on Wood for Good
You can stop paint from chipping on wood for good by diagnosing causes, stripping loose paint, and prepping the surface thoroughly. Remove flaky paint, clean and degloss the wood, repair rot or gaps, then sand smooth. Use the right primer for your wood and environment, apply thin even coats of quality acrylic or durable enamel, and allow proper dry and cure times. Maintain caulking and ventilation to prevent moisture—keep going and you’ll learn the full step-by-step fixes.
Quick Answer How to Stop Paint Chipping on Wood for Good
Fix chipping paint by scraping loose flakes, sanding smooth, priming, and using quality exterior paint for lasting adhesion.
You can tackle small spots and prep work yourself with basic tools, but call a pro if the wood is rotten, the surface is large, or the job needs structural repair.
If you’re unsure, get a pro estimate to compare costs and scope before you start.
One-sentence solution summary
Prepare the surface, use the right primer and paint, and seal with a durable finish so you eliminate moisture and adhesion problems that cause paint to chip.
To stop paint chipping on wood, you’ll clean, sand, repair and prime properly, choose exterior-grade or wood-specific paint, apply thin even coats, and finish with a weatherproof sealer to lock in adhesion and prevent future flaking.
When to call a pro vs DIY
If the peeling is limited to small areas and you’re comfortable with sanding and repainting, you can handle most repairs yourself; hire a pro when damage is widespread, the wood is rotten or structural, or you lack the tools or time for proper prep and priming.
You should call a pro for hidden moisture issues, extensive rot, lead paint concerns, or when guarantees and professional finishes matter.
Understanding Paint Chipping on Wood
Paint chipping is when paint loses adhesion and flakes away from the wood surface.
You’ll usually see it from moisture, poor surface prep, temperature changes, or using the wrong paint for the job.
The wood’s species and age also matter—soft, porous, or weathered wood holds paint less well than dense, new lumber.
What is paint chipping?
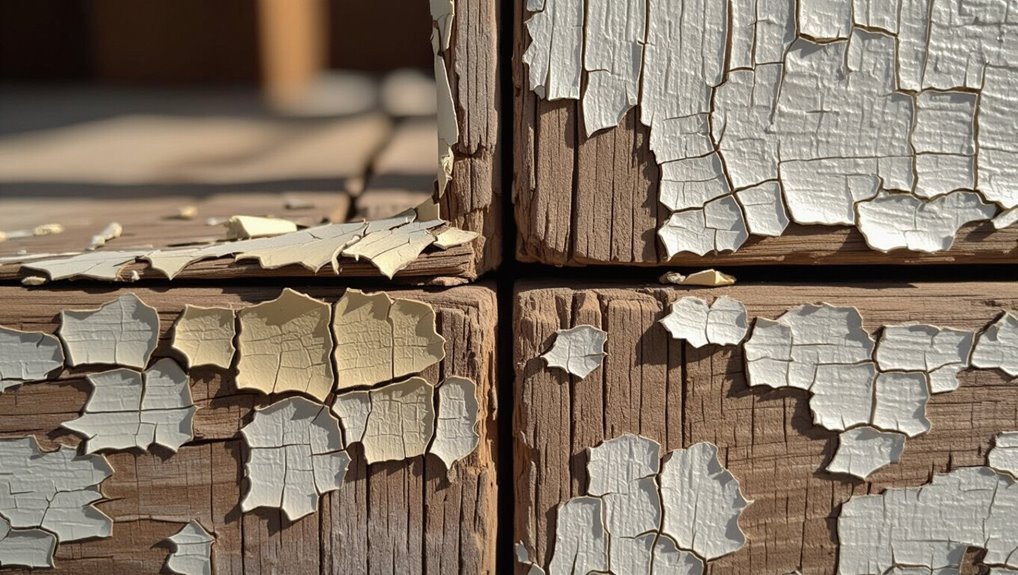
Chipping is what happens when a painted surface loses small pieces of its coating, leaving exposed wood and jagged edges.
You’ll notice flakes, curls, or thin scales lifting away, altering texture and appearance. It reduces protection, lets moisture and dirt reach the substrate, and creates rough areas that catch on clothing or tools.
You can spot it early and address it.
Why paint chips on wood common causes
Now that you can recognize chipping and its effects, let’s look at why it happens so you can prevent it.
Paint peels when adhesion fails: dirt, oil, or moisture on the surface, poor prep, incompatible primers or paints, and rapid temperature changes all undermine the bond.
Mechanical wear, impact, and trapped water behind paint also cause flakes.
Proper prep and correct products stop most chipping.
How wood type and age affect chipping
Because different woods absorb, move, and hold finishes differently, the species and age of your wood play a big role in whether paint will stick and stay put.
Young, resinous softwoods may bleed or peel; old, dried hardwoods can be brittle and flaky.
You’ll prepare and prime differently: sand, seal knots, use appropriate primers, and allow for seasonal moisture movement to prevent chipping.
Assessment Inspecting the Damage
Start by looking closely at the chipped areas to judge how deep and widespread the damage is, noting whether it’s just flaking paint or exposed, rotten wood.
Grab a scraper, putty knife, stiff brush, and a moisture meter or screwdriver to probe soft spots while you inspect.
If chips are superficial and the substrate is sound, surface prep and spot-priming will usually do; if paint is lifting across large areas or the wood is soft, plan for a full strip and repaint.
How to evaluate the extent of chipping
Wondering how bad the chipping is? You should walk the surface, note areas where paint flakes, and press gently to see if it lifts.
Measure affected square inches and categorize chips: isolated, clustered, or full-panel failure.
Check edges, corners, and seams for deep wood exposure or rot.
Record severity to plan repair scope and primer/finish needs.
Tools and materials for inspection
Now that you’ve mapped where paint is failing and noted severity, grab the right tools to inspect those areas closely.
Use them to test adhesion, find rot, and spot rusted nails.
- Scraper, putty knife, wire brush for probing loose paint.
- Moisture meter and screwdriver for checking damp or soft wood.
- Safety gear: gloves, eye protection, dust mask.
When surface prep is enough vs full strip-and-repaint
Before you decide whether to patch and prime or strip everything back, inspect how deep and widespread the failure is: probe edges, scrape loose flakes, and note blistering, rot, or multiple paint layers.
If damage is surface-level and wood is sound, sand, spot-prime, and repaint.
If wood is soft, flaking runs deep, or old coatings refuse to adhere, strip and redo for lasting results.
Step-by-Step Repair and Prevention
Now you’ll follow a clear step-by-step process to stop future chipping and fix existing damage.
Start by removing loose paint safely, clean and degrease the surface, repair any wood defects and gaps, then sand with the proper grit progression.
Finish by choosing the right primer—it’s essential for adhesion and long-lasting results.
Step 1 Safe removal of loose and flaking paint
Start by removing all loose, peeling, or flaking paint so the new finish will adhere to a solid surface.
Wear a dust mask, gloves, and eye protection.
Use a putty knife, paint scraper, or heat gun on low to lift failing paint, working gently to avoid gouging wood.
Collect debris, dispose safely, and inspect for remaining loose edges before proceeding.
Step 2 Proper surface cleaning and degreasing
1. You’ll clean and degrease the wood so new paint bonds reliably. Use a mild detergent or trisodium phosphate substitute, scrub with a stiff brush, then rinse thoroughly.
Dry completely before priming.
- Dish soap solution
- TSP substitute (follow instructions)
- Rinse with clean water and air-dry
Step 3 Repairing wood defects and filling gaps
Patch and fill any cracks, holes, or gouges so paint has a smooth, stable surface to adhere to.
Use exterior-grade wood filler or epoxy for structural gaps, pressing firmly and overfilling slightly.
For seams and trim joints, apply paintable exterior caulk.
Let compounds cure fully, then check for adhesion and repeating fills if needed before priming and painting.
Step 4 Sanding techniques and recommended grit progression
Begin by smoothing the repaired areas and blending them with the surrounding wood so paint will lay down evenly; use a progression of grits—from a coarser 80–120 grit to remove high spots and excess filler, then move to 150–180 grit to refine the surface, and finish with 220 grit for a paint-ready, lightly scuffed profile—sanding with the grain and applying even pressure to avoid gouges.
- Sand coarse to fine.
- Keep strokes with the grain.
- Clean dust between grits.
Step 5 Choosing the right primer and why it matters
Because paint won’t stick or hide imperfections on its own, choosing the right primer is an essential step: it seals bare wood and fillers, promotes adhesion, blocks stains and tannins, and creates a uniform surface so your topcoat goes on smoothly and lasts. Pick a primer based on wood type, exposure, and stain-blocking needs.
| Primer Type | Best For | Key Benefit |
|---|---|---|
| Oil-based | Exterior, tannins | Stain blocking |
| Latex | Interior, quick dry | Flexibility |
| Shellac | Severe stains | Fast sealant |
Step 6 Selecting paint types and finishes for durability
Now that you’ve sealed and primed the wood, pick a paint type and finish that will stand up to the conditions the surface will face.
For exterior or high-moisture areas, choose 100% acrylic latex for flexibility and UV resistance.
For interior high-traffic surfaces, use a durable enamel or hybrid alkyd.
Opt for satin or semi-gloss for easier cleaning and better wear resistance.
Step 7 Correct application methods (brush, roller, spray)
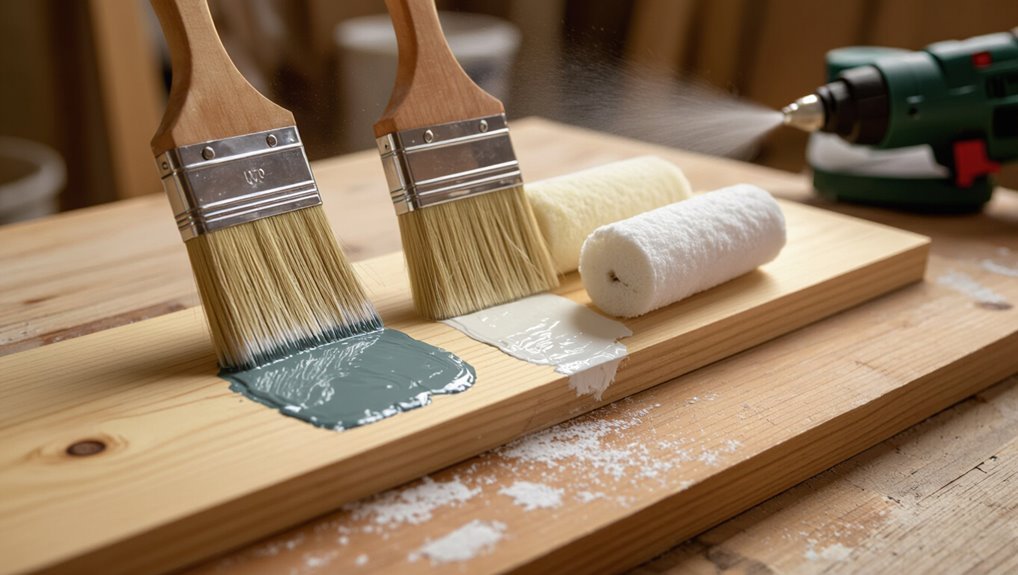
Tools matter: choosing between a brush, roller, or sprayer and using each correctly makes the difference between a smooth, long-lasting finish and premature chipping.
Use a quality brush for edges and detail, a short-nap roller for flat panels, and a sprayer for even coverage on complex pieces.
Maintain wet edges, apply thin, even coats, and avoid overworking the paint to prevent lifting.
Step 8 Drying, curing times, and recoating intervals
Dry time and cure time aren’t the same thing, and knowing both — plus the correct recoating interval — keeps your repair from failing before it’s finished.
Check manufacturer specs for surface dry versus full cure. Temperature, humidity, and coat thickness change times.
Wait recommended minimums before sanding or recoat; when in doubt, extend drying. Rushing causes adhesion failure and chipping.
Step 9 Final protective topcoats and sealants
1 final protective layer can make the difference between a temporary fix and a long-lasting repair, so choose a topcoat or sealant that matches your project’s exposure and finish.
Apply appropriate exterior polyurethane or spar varnish for outdoor wood; use water-based polyurethane or lacquer indoors.
Follow manufacturer drying and recoat times, apply thin even coats, lightly sand between coats, and cure fully before heavy use.
Best Practices and Long-term Prevention
To keep paint from chipping over time, you’ll want to guard wood against seasonal and environmental stress like moisture, sun, and temperature swings.
Set a regular maintenance schedule for inspections and quick-touch repairs, and control indoor humidity and ventilation to protect interior wood.
For exterior wood, pay attention to caulking, flashing, and drainage so water never has a chance to undermine your finish.
Seasonal and environmental precautions (moisture, sun, temperature)
Because wood and paint react constantly to the seasons, you’ll need to plan for moisture, sun exposure, and temperature swings if you want coatings to last.
Store and apply paint in recommended temperature ranges, use breathable primers and finishes outdoors, seal end grain and joints, add UV-resistant topcoats, and guarantee proper drainage and ventilation to prevent trapped moisture and thermal stress that lead to cracking and peeling.
Maintenance schedule and quick-touch repair tips
When you keep a simple, seasonal maintenance routine—inspect every spring and fall, clean off dirt and mildew, and address small chips within days—you’ll prevent most paint failures and extend the life of your finish.
- Sand feathered edges, prime, and spot-paint within 48 hours.
- Keep touch-up kits (matching paint, brush, sandpaper) handy.
- Recoat high-wear areas every 3–5 years; monitor and act promptly.
Ventilation and indoor humidity control for interior wood
Small indoor humidity swings and poor airflow can wreck even a perfectly repaired finish, so keep controlling moisture and ventilation as part of your upkeep routine.
Use exhaust fans in kitchens and baths, run dehumidifiers or HVAC humidistats seasonally, and guarantee attic and crawlspace vents aren’t blocked.
Monitor with a hygrometer, keep relative humidity between 35–55%, and dry spills immediately to prevent peeling.
Exterior wood care: caulking, flashing, and drainage
If you want exterior paint and wood trim to last, prioritize proper caulking, flashing, and drainage so water never sits against the wood long enough to rot or lift the finish.
Seal gaps with high-quality paintable caulk, install metal or PVC flashing at joints and rooflines, and maintain gutters and slopes to direct water away.
Regularly inspect and repair to prevent paint failure.
Tools, Materials, and Product Recommendations
Now you’ll get a clear checklist of the essential tools you’ll need and the right primers, paints, and sealers for different projects.
I’ll also recommend safety gear and proper disposal steps so you protect yourself and the environment.
Follow these picks and procedures to make your paint job last.
Essential tools checklist
Before you begin, gather the right tools and supplies so you can prep, repair, and repaint wood without running back to the store.
You’ll need quality basics to remove old paint, fix damage, and apply new coats cleanly.
- Sandpaper (80–220 grit), sanding block, and wire brush.
- Putty knife, wood filler, and scraper.
- Brushes, foam rollers, drop cloth, tack cloth, and painter’s tape.
Recommended primers, paints, and sealers by use-case
Choose products that match the wood type, exposure, and desired finish so your prep work actually holds up; primers, paints, and sealers each play a specific role in adhesion, durability, and moisture resistance. Pick oil-based primer for exterior, latex for interior. Use enamel for trim, acrylic for siding, and spar urethane for marine exposure.
| Use-case | Primer | Topcoat |
|---|---|---|
| Interior furniture | Latex bonding | Acrylic enamel |
| Exterior siding | Oil-based | 100% acrylic |
| High-moisture | Shellac block | Spar urethane |
Safety gear and disposal guidelines
Because handling paints, solvents, and sanding dust can create real hazards, you’ll want the right safety gear and a clear plan for disposing of waste before you start work.
Wear NIOSH-rated respirators, chemical-resistant gloves, eye protection, and coveralls.
Bag and label contaminated rags. Never pour solvents down drains; follow local hazardous-waste protocols.
Ventilate, keep a fire extinguisher handy, and store leftovers in sealed, labeled containers.
Common Mistakes That Cause Rechipping
You’ll see paint start to chip when you skip primer or use the wrong one, paint over dust, oil, or damp wood, or don’t sand and prep surfaces properly.
Incompatible paint layers or rushing between coats also prevent proper adhesion.
Addressing these common mistakes first will stop most rechipping problems.
Skipping primer or using wrong primer
If you skip primer or use the wrong one, the paint won’t bond properly and it’ll start chipping sooner than you’d expect.
Always choose a primer matched to the wood and topcoat—oil-based for tannin-rich woods, latex for most interior projects, or a stain-blocking primer when needed.
Apply evenly, let it cure, and you’ll improve adhesion and long-term durability.
Painting over contaminants or wet wood
When you paint over dirty, oily, or damp wood, the finish won’t stick and will start flaking or peeling soon after.
Always clean surfaces with a mild detergent or TSP substitute, remove grease, and dry thoroughly.
If moisture or contaminants remain, paint won’t bond.
Test a small area first and only paint when wood is completely clean and bone-dry to prevent early rechipping.
Poor sanding or insufficient adhesion prep
Skimping on sanding or skipping adhesion prep sabotages paint performance right from the start.
You need to remove old loose paint, smooth rough edges, and degloss surfaces so primer and paint bite. Light sanding, proper cleaning, and using a bonding primer where needed create mechanical and chemical grip.
Do this consistently and chips won’t travel beyond the initial nick.
Using incompatible paint systems
Mixing paints that aren’t chemically compatible is a fast route to chips and peeling — oil-based primers, for example, don’t always bond to modern water‑based topcoats, and different resin types can repel one another or cure unevenly.
You should match primer and topcoat types, follow manufacturer compatibility charts, and test a small area.
When in doubt, use recommended multi‑system primers or fully convert to one paint family.
Comparison DIY vs Professional Repair
You’ll weigh cost, time, and durability when deciding between DIY and a pro for fixing chipped wood paint.
Small touch-ups and nonstructural trim are often DIY-friendly, but larger prep work, extensive rot repair, or guarantees usually mean you should hire a pro.
If you go pro, ask about prep methods, warranty, insurance, timeline, and references before signing a contract.
Cost, time, and durability comparison
While tackling paint chipping yourself can cut upfront costs, comparing DIY vs. professional repair means weighing not just price but time and how long the fix will last; you’ll balance savings, labor, and longevity when deciding.
| Option | Time | Durability |
|---|---|---|
| DIY | Shorter | Moderate |
| Pro | Longer | Higher |
Projects suitable for DIY vs when to hire a pro
Because some jobs are straightforward and others hide tricky prep or finish work, you should match the project to your skills and tools: tackle small tasks—touch-ups, sanding, priming, and repainting trim or furniture—if you have basic tools and patience.
Hire a pro for extensive rot repair, large exterior surfaces, lead paint concerns, or jobs needing perfect feathering and long-lasting warranties.
How to vet a professional painter (questions to ask)
Want to know if a painter will do the job right and stand behind their work?
Ask for licensing, insurance, and written estimates. Request references and recent photos of similar jobs.
Confirm prep methods, brand-quality primers and paints, and warranty terms.
Ask who’ll supervise and timelines.
Get everything in a clear contract so expectations and remedies are documented.
Troubleshooting Specific Scenarios
If paint’s peeling only at edges or joints, you’ll want to check for movement or poor adhesion at seams and fix the caulking and primer.
For bubbling or blistering, look for moisture or heat issues under the finish and address the source before repainting.
When dealing with furniture vs siding or historical finishes (including possible lead paint), you’ll need different prep methods and safety precautions, so match your repair steps to the situation.
Peeling only at edges or joints
When paint peels only along edges or joints, it usually points to movement, moisture, or inadequate surface prep at those stress points.
So you’ll want to target those causes first. Remove loose paint, sand smooth, clean residues, and apply flexible caulk to gaps.
Prime with a bonding primer, use paint rated for exterior movement, and allow proper curing to prevent re-peeling.
Bubbling or blistering paint
Because bubbling or blistering paint signals trapped moisture or poor adhesion, you’ll need to pinpoint the source before repainting.
Inspect for leaks, damp wood, or failing primer. Strip loose blisters, sand to sound substrate, let wood dry thoroughly, then apply appropriate primer and paint.
Use breathable coatings outdoors and fix ventilation or flashing issues so blisters don’t return.
Chipping on painted furniture vs siding
Although both furniture and siding can show similar flakes and chips, the causes and fixes often differ, so you’ll want to assess each by use, exposure, and substrate.
For furniture, focus on adhesion, movement at joints, and gentle prep with deglossing.
For siding, address weathering, moisture barriers, and flexible exterior coatings. Choose primers and topcoats made for the specific environment.
Historical finishes and lead-paint considerations
Older paint layers and historic finishes need careful handling, especially since many contain lead and fragile binders. You should test for lead before sanding or scraping; use encapsulation or qualified abatement if positive.
Preserve original character when possible: stabilize flaking with conservation adhesives, thin-compatible primers, and reversible consolidants. Avoid aggressive stripping and DIY disposal—hire certified professionals for hazardous material removal and long-term durability.
FAQ Frequently Asked Questions
You probably have a few quick questions after troubleshooting, so let’s answer the common ones about longevity, spot repairs, primers for knotty wood, safe lead paint removal, and weatherproofing.
I’ll explain how long properly prepped paint should last and whether you can paint over chips without sanding. You’ll also get guidance on the best primers for resinous wood, safe lead-removal steps, and realistic expectations for weatherproofing.
How long should properly prepped paint last on wood?
How long should properly prepped paint last on wood?
With correct sanding, primer, quality paint, and suitable conditions, expect 7–15 years on exterior wood and 10–25+ years indoors.
High-traffic areas wear faster.
Regular inspection, touch-ups, and keeping moisture out extend life.
Use proper finish for the location and address underlying issues to get the longest, most reliable protection.
Can I just paint over chipped areas without sanding?
Can you just paint over chipped areas without sanding? You can in a pinch, but paint won’t adhere well to loose flakes or glossy edges.
Remove loose paint, clean the surface, and feather rough edges with light sanding or a scraper.
Use a quality primer on bare spots before repainting. Skipping prep risks quick re-chipping and uneven finish.
What primer works best for knotty or resinous wood?
If you’ve removed loose paint and prepped the surface, the next challenge is sealing knotty or resinous wood so new paint sticks and won’t bleed tannins or sap.
Use a high‑quality shellac-based or oil‑based stain‑blocking primer; shellac blocks best for heavy bleeding, oil is more forgiving and easier outdoors.
Apply two thin coats, sand lightly between, then topcoat for lasting adhesion and color stability.
How do I remove old lead paint safely?
Wondering whether you can tackle old lead paint yourself? You can, but only with strict precautions:
wet-sand or use a HEPA-equipped sander, contain and seal the area, wear a respirator rated for lead, disposable coveralls, and gloves.
Never dry-scrape or use heat above 1100°F.
Test chips first; if extensive, hire a certified lead abatement pro to protect health and comply with regulations.
Will weatherproofing products prevent chipping completely?
How well do weatherproofing products stop paint from chipping? They help a lot but won’t eliminate chipping completely.
You’ll extend paint life by sealing wood, shedding moisture, and blocking UV, yet mechanical damage, poor prep, and old paint failure still cause chips.
Use weatherproofing with proper surface prep, quality primers and paints, and regular maintenance to minimize but not guarantee zero chipping.
