
How to Stop Stains Coming Through Paint Once and for All
You can stop stains coming through paint by first identifying and fixing the source—moisture, tannins, rust, smoke or oil—then thoroughly cleaning and drying the surface. Sand and repair damaged areas, treat mold or rust, and use a proper stain-blocking primer (shellac or oil-based for heavy stains; quality water-based for light ones). Apply recommended topcoats and allow full cure. Follow maintenance and moisture controls, and keep going to learn targeted fixes and product picks.
How to Stop Stains Coming Through Paint Once and for All
Want a quick, no-nonsense fix for stains coming through paint? Use a stain-blocking primer designed for the specific stain type, then repaint with a quality topcoat — that combination stops most stains permanently.
I’ll explain the best products and the proper steps so you can apply the solution confidently.
Quick Answer The Most Effective Solution Summarized
If you need a fast, permanent fix for stains bleeding through paint, prime the surface with a stain-blocking primer made for the specific stain type (oil, water, or tannin).
Then topcoat with quality paint—this two-step approach stops most stains once and for all.
To learn how to stop stains coming through paint, clean, dry, spot-prime, and apply two finish coats for lasting protection.
Understanding Paint Stain Bleed-Through
You’ll first want to know what causes stains to push back through paint so you can stop them at the source.
Common culprits include watermarks, smoke and nicotine, tannins from wood, rust, mold, oil and grease.
Identifying the type of stain lets you choose the right primer and prep before repainting.
What Causes Stains to Come Through Paint
When stains come through paint, it’s usually because something beneath the surface is still active—moisture, tannins, rust, nicotine, or oil can migrate up and show through even well-applied finishes.
You need to identify the source, stop its activity, and remove or seal affected materials.
Otherwise the stain’s chemicals keep moving, breaking down coatings and reappearing despite repainting.
Common Types of Stains (watermarks, smoke, nicotine, tannin, rust, mold, oil, grease)
Knowing the source is only half the job; next you’ll want to recognize the common stain types so you can choose the right fix.
Watermarks, smoke and nicotine discolor surfaces; tannin from wood or tea seeps through; rust leaves orange-brown stains; mold darkens and smells; oil and grease repel water and foul finishes.
Each needs specific cleaners and sealing primers before repainting.
##
You’ll see different results depending on whether you use latex, oil-based paint, or a stain-blocking primer, so pick products that match the problem. Below is a quick comparison to help you decide which combo works best for common stains. Review it and you’ll know what to test first.
| Paint Type | Strengths | When to Use |
|---|---|---|
| Latex | Fast-drying, flexible | Fresh stains, interior walls |
| Oil-based | Tough, seals well | Severe stains, gloss finishes |
| Primer (stain-blocking) | Blocks tannins, adhesion | Over knots, water marks |
How Different Paint Types React to Stains (latex vs oil-based vs primer-finish interactions)
Although stains can look the same on the surface, different paint chemistries react very differently to them, and that affects how you’ll stop bleed-through.
Latex paints resist waterborne stains but let tannins seep through unless sealed with a stain-blocking primer.
Oil-based paints hide tannins better but yellow over time.
Always match primer type to topcoat and use shellac or specialty blockers for stubborn stains.
Materials and Tools You’ll Need
You’ll want the right primers and sealers, compatible paint types, and the proper brushes, rollers, and protective gear to stop stains from bleeding through.
Don’t forget stain-specific cleaning and prep supplies so surfaces are clean and ready for coating.
I’ll list the recommended products and when to use each.
Recommended Primers and Sealers
When tackling stains that bleed through paint, pick a primer-sealer designed for stain-blocking—these products bond to the surface and lock in tannins, oils, and water marks so your topcoat stays clean and true.
Choose based on substrate and stain type, follow dry times, and apply evenly.
- Oil-based stain-blocking primer
- Shellac-based sealer for heavy tannins
- Water-based primer for light stains
Paint Types, Brushes, Rollers and Protectives
Before you pick up a brush, decide on the paint type and the tools that match the job: latex (water-based) for ease and low odor, oil for durable, glossy finishes, and specialty formulations (acrylic, alkyd, or stain-blocking topcoats) for specific substrates or problem areas; pair them with quality brushes—synthetic for water-based, natural-bristle for oil—and the right rollers, trays, and protective gear (drop cloths, gloves, goggles, and masks) to get a clean, efficient result.
- Brushes: choose quality widths and bristle types
- Rollers: match nap to surface texture
- Protective gear: cover floors, ventilation, PPE
Stain-Specific Cleaning and Prep Supplies
Having chosen the right paint and tools, next focus on gathering stain-specific cleaning and prep supplies so you can neutralize and block stains rather than trap them under fresh paint.
You’ll need the right cleaners, primers, and application tools for each stain type:
- Oil/grease: trisodium phosphate, degreaser, oil-blocking primer
- Water/mold: bleach cleaner, mold inhibitor, shellac-based primer
- Nicotine: TSP substitute, deglosser, stain-sealing primer
Step-by-Step Guide to Stop Stains Bleeding Through
Start by evaluating the surface and identifying the stain so you know what you’re dealing with.
Then clean and dry the area properly, make any necessary repairs like patching or sanding (and address mold if present), and pick a stain-blocking primer suited to the problem.
Finish by applying the right topcoat—correct sheen and number of coats—to prevent bleed-through.
Step 1 Assess the Surface and Identify the Stain
When you inspect the stained area closely, note the stain’s color, texture, size, and whether it’s damp or dry so you can choose the right treatment.
Check surrounding surfaces for spread, smell for solvents or mildew, and test a hidden spot to gauge adhesion and paint type.
Photograph the stain, record observations, and decide if professional assessment is needed before proceeding.
Step 2 Proper Cleaning and Drying Techniques by Stain Type
Tackle cleaning and drying systematically so stains won’t reappear through new paint: identify the stain type (water, smoke, grease, tannin, mold, or rust), choose the appropriate cleaner and safety gear, and work from the outer edges inward to avoid spreading the stain.
Use targeted cleaners (degreaser, bleach solution, rust remover), blot don’t rub, rinse thoroughly, and dry completely with fans and dehumidifiers before priming.
Step 3 Surface Repairs (patching, sanding, mold remediation)
Repair the surface carefully so stains won’t bleed through the new paint: patch holes and gouges, sand glossy or uneven areas for proper adhesion, and fully remediate any mold before sealing.
Use appropriate filler, feather edges, and sand to a smooth, consistent profile. Remove mold with proper cleaners and dry thoroughly.
Inspect repairs for contamination before moving on.
Step 4 Choosing and Applying the Right Stain-Blocking Primer
Step 4 is where you stop stains for good by choosing and applying a stain-blocking primer designed for the specific contaminant—watermarks, smoke, ink, tannin, or nicotine—and the substrate you’re painting;
pick a high-quality oil- or shellac-based primer for severe stains and a water-based or hybrid stain-blocker for milder issues.
Read product labels for VOC limits and compatibility with your topcoat, and apply it per manufacturer directions to fully seal the repair before painting.
Use a brush or roller suited to primer type, allow full dry/curing time, and sand light flaws before topcoating.
Step 5 Applying Topcoat Paint Correctly (number of coats, sheen choice)
Once the primer’s fully cured, apply your topcoat correctly to lock out stains and achieve an even finish—use the right number of coats based on coverage, choose a sheen that hides imperfections and matches the room’s function, and follow consistent application techniques so each layer bonds and seals the primer beneath.
Apply thin, even coats; wait full dry times; typically two coats suffice, three for heavy stains.
Step 6 Post-Paint Inspection and Touch-Ups
Now that your topcoat’s dry, do a careful inspection and touch up any trouble spots so stains don’t reappear or show through.
Walk walls under varied light, note thin coverage, shadowed stains, and drips.
Sand tiny imperfections, spot-prime stained areas, and recoat sparingly.
Let cures fully, then reassess.
Address missed spots promptly to guarantee a uniform, stain-free finish.
Strategies for Specific Stain Types
You’ll tackle each common stain differently: water and mold need drying and anti-fungal treatment. Tannin from wood calls for blocking primers and sealers, and smoke or nicotine may require deep cleaning or odor-sealing primers.
For rust and metal stains, use inhibitors and barrier coats, while oil and grease demand thorough degreasing followed by stain-blocking primer.
I’ll walk you through the best product choices and step-by-step methods for each type.
Water Stains and Mold Prevention and Treatment
When water soaks through paint, it often carries minerals and organic matter that leave visible stains and encourage mold growth.
You should address both moisture sources and contaminated surfaces to stop recurrence. Fix leaks, improve ventilation, and dry areas thoroughly.
Clean stains with a mildew cleaner or diluted bleach, rinse, prime with a stain-blocking primer, then repaint with mold-resistant paint.
Tannin Stains from Wood Blocking and Sealing Methods
Besides water-borne stains and mold, wood can cause its own problems: tannins leach from certain woods and bleed through paint as yellow-brown or rust-colored stains.
You should block tannins by applying a shellac-based or stain-blocking primer to bare wood, let it cure fully, then topcoat with quality paint.
For stubborn bleed-through, repeat blocking before repainting.
Smoke and Nicotine Stains Deep Cleaning vs Primer Solutions
If smoke or nicotine has stained your walls, you can often choose between deep-cleaning the surface or sealing the residue with a stain-blocking primer—each approach has pros and limits.
You can degrease and oxidize residues with trisodium phosphate or specialized cleaners, but heavy staining may need repeated cleaning.
Primers like shellac or shellac-based stain blockers lock stains in and simplify repainting.
Rust and Metal Stains Inhibitors and Barrier Coats
Although rust and metal stains can penetrate paint and leave reddish-brown halos, you can stop them with the right inhibitors and barrier coats before repainting.
Scrape loose rust, treat metal with a rust converter or metal-specific inhibitor, then apply a corrosion-blocking primer or epoxy barrier coat.
Seal fasteners and penetrations, let coatings cure fully, and use compatible topcoats to prevent bleed-through.
Oil and Grease Degreasing and Primer Recommendations
Oil and grease penetrate paint differently than rust, so you’ll need to remove them thoroughly before priming to prevent bleed-through and adhesion failure.
Use a strong degreaser or trisodium phosphate, scrub, rinse, and let dry.
For primers, pick a solvent-based or stain-blocking oil primer, or a high-performance shellac primer for persistent oils.
Recoat with compatible topcoat.
Common Mistakes That Cause Stain Bleed-Through
Don’t skip cleaning and drying surfaces—you’ll trap oils and residues that let stains push through paint.
Using the wrong primer or applying it too thin lets tannins and watermarks bleed back to the finish.
Also, painting over active moisture, mold, or unresolved structural and plumbing problems only masks the issue temporarily.
Skipping Proper Cleaning or Drying
If you skip thoroughly cleaning or fully drying a wall before priming and painting, contaminants like grease, smoke residue, or dampness can keep stains leaching through even the best paint job.
You should remove grime, mold, and loose particles, let surfaces dry completely, and use appropriate cleaners.
Otherwise, trapped oils or moisture will react with coatings and cause persistent bleed-through.
Using the Wrong Primer or Thin Application
When you pick the wrong primer—or slap on too thin a coat—you leave stain-blocking to chance and let tannins, grease, or smoke creep back through your finish.
Choose a high-quality, stain-blocking primer formulated for the specific stain (oil-based for water stains, shellac or shellac-based alternatives for severe tannin/smoke).
Apply full coverage in recommended thickness and dry times to guarantee a reliable barrier.
Painting Over Active Moisture or Mold
Even the best primer won’t stop stains that come from active moisture or live mold, because you’re covering a continuing source rather than a surface issue.
You must dry and eliminate the moisture, remove mold with proper cleaners or professional remediation, and only repaint when completely dry and treated.
Painting over active problems just traps moisture and guarantees stains and recurrence.
Ignoring Underlying Structural or Plumbing Issues
Because hidden leaks and structural defects keep sending moisture into your walls, paint and primer only mask symptoms while stains keep coming back.
You need to locate and fix plumbing, roof, flashing, or foundation problems before repainting. Inspect, repair, and let materials fully dry.
Otherwise stains will recur, wasting time and money. Call a pro if you can’t find the source.
Prevention, Maintenance, and Long-Term Best Practices
To keep stains from returning, you should regularly inspect painted surfaces and catch issues while they’re small.
Choose durable paint systems for kitchens, bathrooms, and exterior walls, factor in humidity and temperature when scheduling work, and follow simple seasonal maintenance.
Know when a stubborn stain needs a pro’s equipment and when a DIY spot-repair is enough.
Routine Inspection and Early Detection Tips
When you inspect painted surfaces regularly, you catch small issues—like hairline cracks, bubbling, or faint discoloration—before they become stains that soak through the paint.
Check monthly and after storms, document spots, and act fast.
- Scan ceilings and exterior eaves for damp patches.
- Test suspicious areas with a moisture meter.
- Note recurring spots and trace their source.
Choosing Durable Paint Systems for High-Risk Areas
If you work in moisture-prone or high-traffic areas, choose paint systems designed to resist stains, mildew, and abrasion so problems never penetrate the finish.
Select high-quality primers, stain-blocking primers for tannins and water marks, and premium epoxy or acrylic topcoats for durability.
Follow manufacturer instructions for surface prep and curing, and schedule targeted touch-ups to maintain protection and prevent breakthrough.
Seasonal and Environmental Considerations (humidity, temperature)
Because temperature and humidity directly affect how paint cures and how stains behave, you should plan painting and maintenance around seasonal conditions to prevent failures.
Paint in recommended temperature ranges, avoid high-humidity days that trap moisture, and wait for dry spells after heavy rain.
Store stain-blocking primers in stable conditions, monitor indoor humidity with dehumidifiers, and schedule inspections during moderate seasons.
When to Call a Professional vs DIY
Wondering whether to tackle stain prevention and repairs yourself or call a pro? You can handle small stains, routine sealing, and spot priming with the right products and careful prep.
Call a professional for persistent discoloration, suspected mold, structural leaks, or if staining spans large areas. Pros diagnose hidden causes, verify proper substrates, and guarantee long-term solutions you mightn’t achieve DIY.
Comparison of Top Stain-Blocking Primers and Sealers
When you’re choosing a stain-blocking primer or sealer, you’ll want to compare oil-based, shellac, and acrylic formulas for their adhesion, odor, and stain-blocking power.
Consider cost versus performance so you know when a premium product is worth the extra money for tough stains or high-traffic areas.
I’ll outline the strengths and best uses of each type to help you pick the right one.
Oil-Based vs Shellac vs Acrylic/Stain-Blocking Primers
Pick the right primer and you’ll stop stains before they ever show through paint: oil-based, shellac, and acrylic stain-blocking primers each have clear strengths and trade-offs, so knowing how they differ helps you choose the best one for the job.
| Type | Strength | Best Use |
|---|---|---|
| Oil | Durable | Tannin stains |
| Shellac | Fast seal | Smoke, water |
| Acrylic | Low odor | Mild stains, walls |
Cost vs Performance: When to Invest in Premium Products
Although a higher price tag doesn’t always guarantee better results, investing in a premium stain-blocking primer or sealer often saves you time and rework—especially on severe tannin, smoke, or water stains—because top-tier formulas offer stronger adhesion, faster sealing, and greater longevity than budget options.
Choose premium for high-risk surfaces or visible areas; use mid-range for mild stains and low-traffic rooms.
Quick Reference Checklist Before Painting
Before you lift a brush, run through a short checklist to prevent stains from bleeding through your new paint:
- Clean surfaces thoroughly and let them dry.
- Apply a suitable stain-blocking primer where needed.
- Repair and sand damaged areas for a smooth base.
Follow these steps, and you’ll reduce bleed-through risk and get a reliable, long-lasting finish.
FAQ
You probably have specific questions like whether a regular primer will stop nicotine or smoke stains and if you can paint over water stains without fixing the leak.
We’ll also cover how many coats of primer and paint you need, whether eco-friendly stain-blocking options work, and how long to wait after remediation before painting.
Read on for clear, practical answers.
Will a regular primer stop nicotine or smoke stains?
Curious whether a regular primer will block nicotine or smoke stains?
No — standard primers usually won’t fully seal heavy nicotine or tar. You’ll need a stain-blocking or shellac-based primer designed to trap odors and pigments.
Clean surfaces thoroughly first; otherwise stains can bleed through.
Finish with quality topcoat for durability and better appearance.
Can I paint over water stains without fixing the leak?
Can you paint over a water stain without fixing the leak? You can temporarily cover the mark, but the stain will likely return if moisture continues.
Fix the leak first, dry and clean the area, then use a stain-blocking primer before repainting.
Painting alone only masks symptoms; treating the source prevents recurring stains and potential structural or mold damage.
How many coats of primer/paint are needed to fully block stains?
After you’ve fixed the leak and prepped the surface, decide how many coats you’ll need based on the stain’s severity and the products you pick.
For light stains, one primer coat plus one finish coat often suffices.
For stubborn tannin or smoke stains, apply a high-quality stain-blocking primer, let it cure, then add two finish coats.
Check coverage and touch up as needed.
Are there eco-friendly stain-blocking options that actually work?
Wondering if green stain-blocking options actually work? Yes—low-VOC shellacs and water-based primers with sustainable certifications can block many stains without harsh solvents.
You should choose products labeled “stain-blocking” or “odorless shellac” and follow surface prep.
For severe tannin or smoke stains, eco options sometimes need a sealing layer designed for heavy-duty stains before topcoating to guarantee lasting coverage.
How long should I wait after remediation before painting?
If you’ve used a low-VOC or odorless shellac to seal stains, give the sealed surface time to cure before painting so the primer and topcoat adhere properly.
Generally wait 24–48 hours for shellac, 48–72 hours for oil-based primers, and up to 7 days for heavy remediation or moisture issues.
Confirm dryness, odor absence, and manufacturer cure times before applying paint.
Visual Aids and Troubleshooting Gallery
You’ll find before-and-after examples that show how effective stain-blocking primers and techniques can be.
Use the visual guide to help you identify stain types and judge severity so you know which products and prep steps to use.
If a result doesn’t match the examples, the troubleshooting gallery will point you to likely causes and fixes.
Before-and-After Examples of Stain Blocking
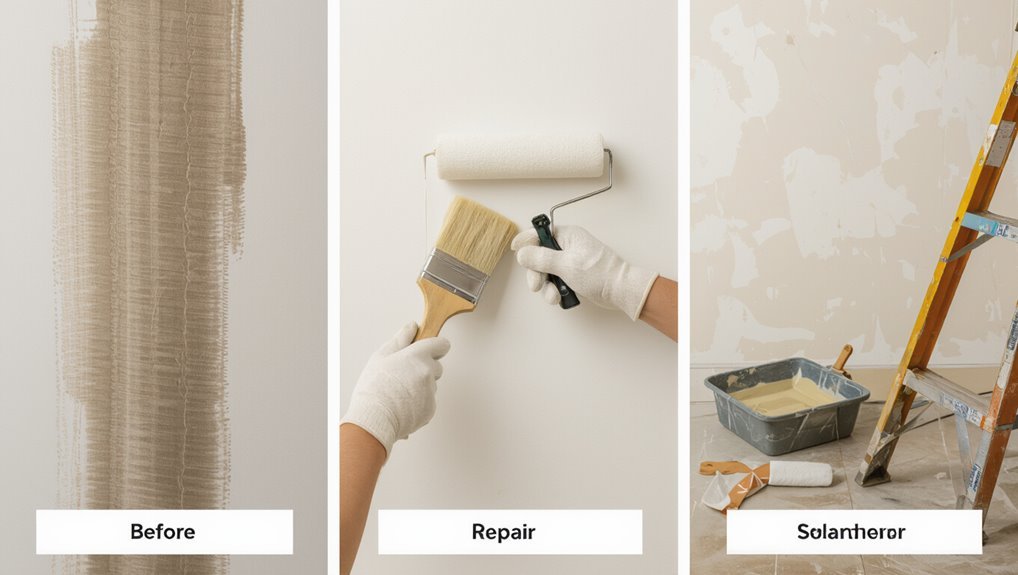
1 clear photo can say more than a page of instructions: this gallery shows real before-and-after shots of common stains—water rings, nicotine, smoke, ink, and tannin bleed—and how using the right stain-blocking primer transformed each surface.
You’ll see prep steps, primer choice, and final gloss level. Use these examples to match stain type, verify coverage, and avoid repeat bleed-through.
Visual Guide to Identifying Stain Types and Severity

Wondering which stain you’re looking at and how bad it is? Use clear photos and labeled examples to compare:
- water rings (faint, brownish rings)
- smoke/yellowing (spread and amber hue)
- mold/mildew (dark, fuzzy spots)
- tannin/wood bleed (rusty streaks)
- oil/grease (dark, translucent).
Include severity markers—surface, penetrating, structural—and brief treatment icons so you act correctly and quickly.
